Growing a plant in a pot is genuinely one of the most rewarding things you can do as a beginner gardener, and it is a lot more forgiving than people assume. Pick the right pot, use a decent potting mix, put it somewhere with enough light, water it when the soil actually needs it, and feed it every couple of weeks once it is established. That is the whole system. Everything else is just filling in the details, and that is what this guide does.
How to Grow a Pot Plant in Containers Step by Step
Marcus Whitley
24 Mar 2026
What growing a pot plant actually means
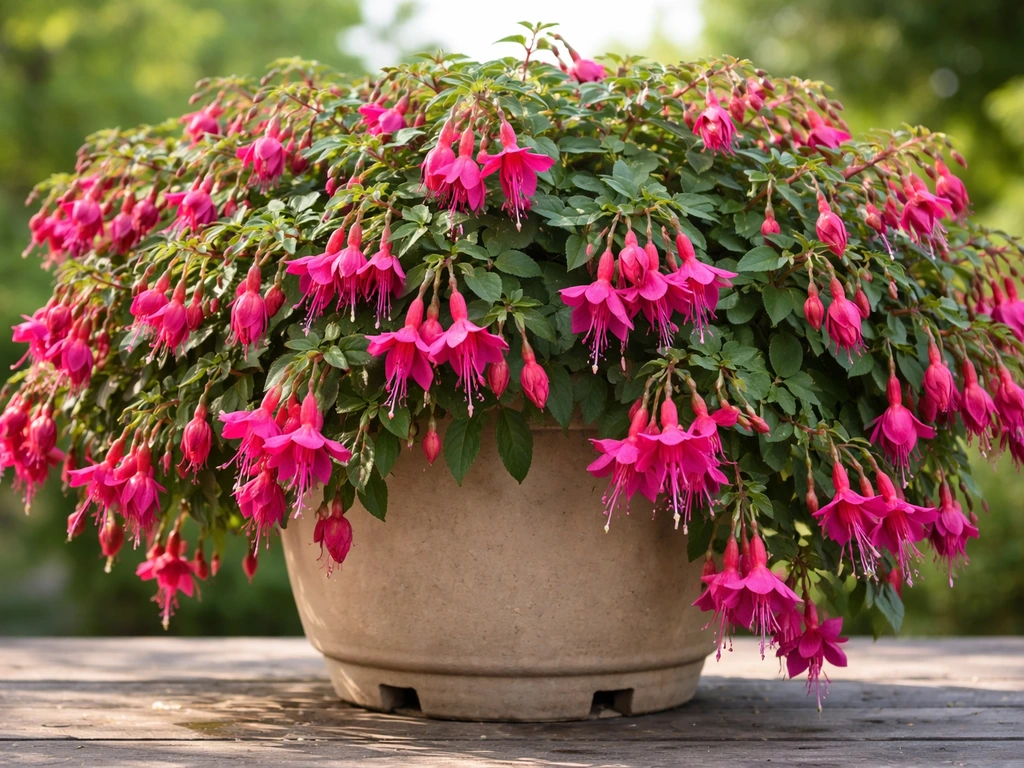
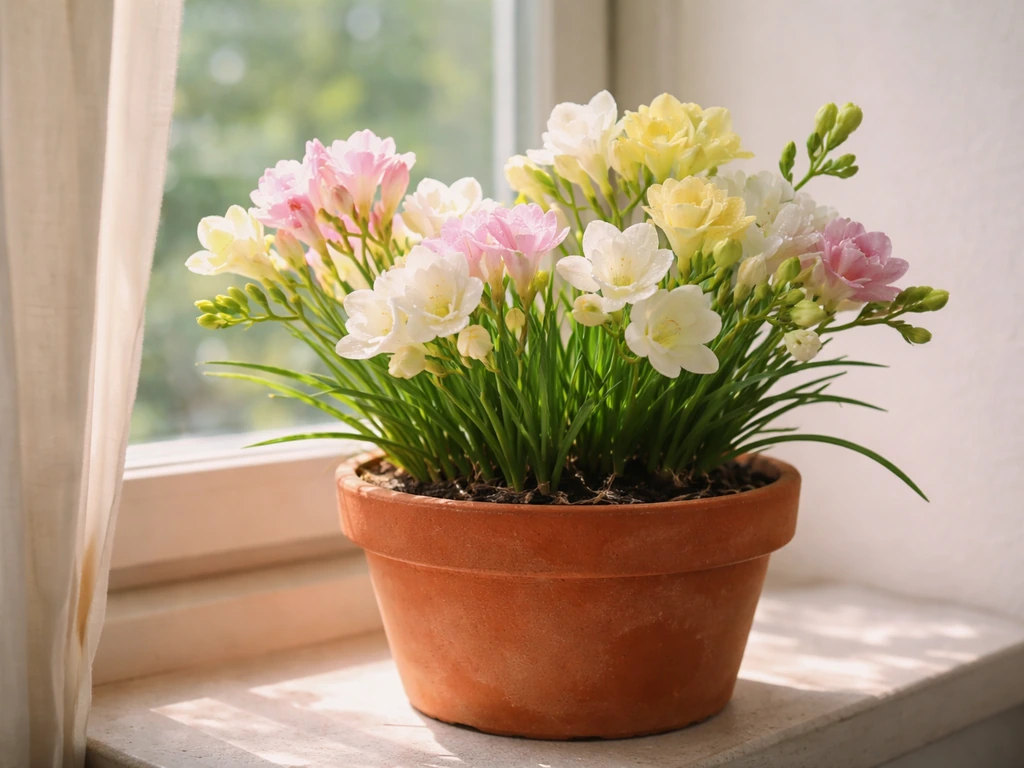
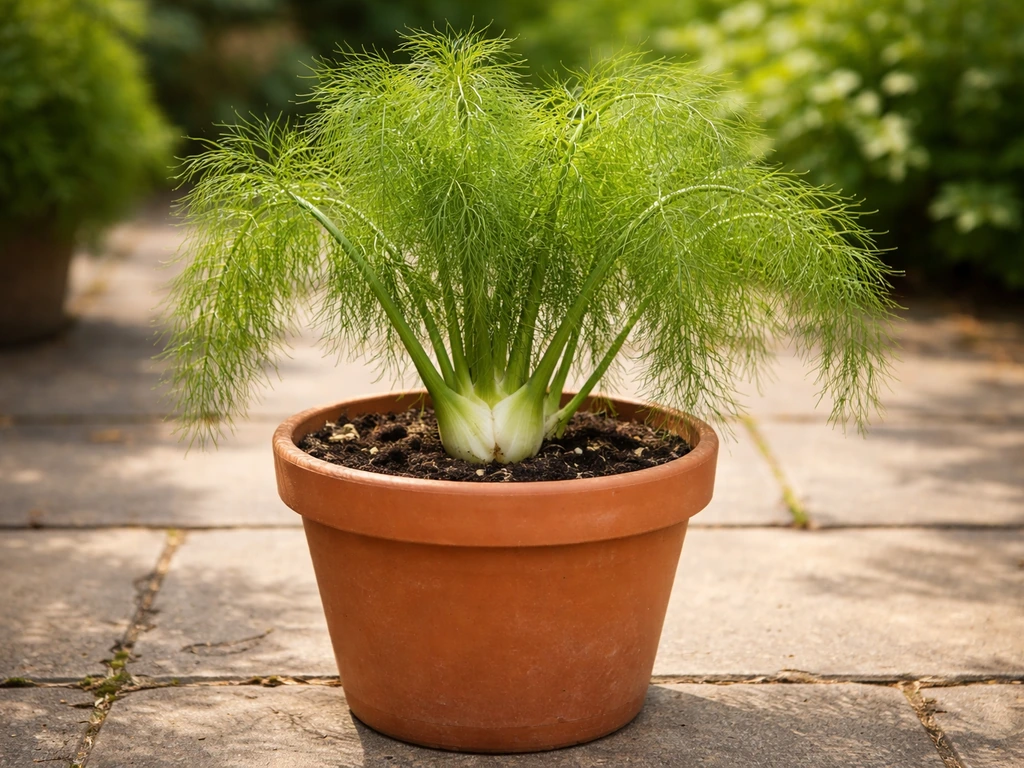
When we talk about growing a pot plant here, we mean any plant grown in a container rather than directly in the ground. That covers an enormous range: herbs on a kitchen windowsill, tomatoes on a balcony, flowering plants on a doorstep, shrubs in large planters, and even small trees in half-barrel containers. The container can be terracotta, plastic, fabric, ceramic, wood, or anything else that holds soil. The principle is the same across all of them.
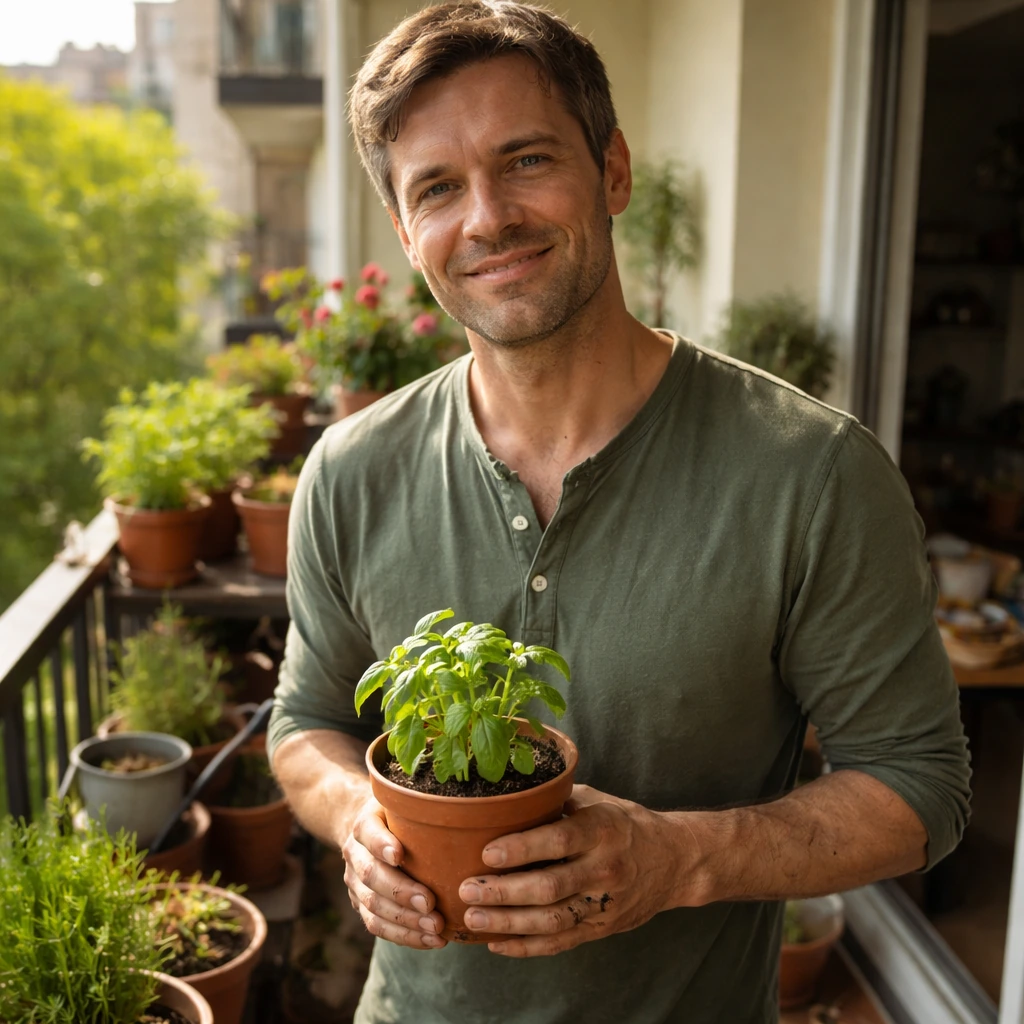
Container gardening is the ideal starting point if you have limited outdoor space, no garden bed, or just want more control over where your plants live. A pot can move. It can sit on a balcony, a windowsill, a patio, or a fire escape. You can grow almost anything this way, which is why the question of how to do it well is worth answering properly rather than just saying 'put some soil in a pot and water it.'
The one thing containers cannot do is pretend to be the ground. A pot has a fixed, limited volume of soil. That means it dries out faster, nutrients get used up faster, and roots eventually run out of room. Once you understand that, you can work with it. Everything in this guide is really about compensating for those three limitations in the simplest possible way.
Choosing the right pot, drainage, and where to put it
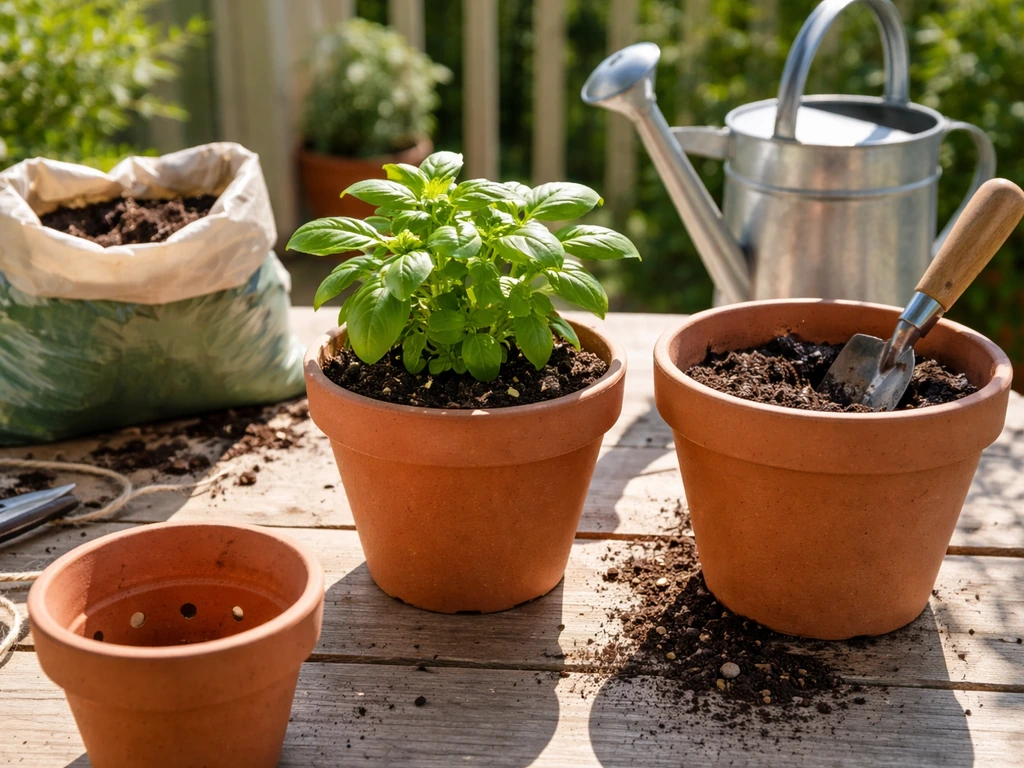
Pot size matters more than pot material
The single most common mistake beginners make is choosing a pot that is too small. Small pots dry out within hours in summer, give roots nowhere to go, and generally create more work for you. As a starting point, a 10-to-12 inch diameter pot works well for herbs, smaller flowers, and most houseplants. For vegetables like tomatoes, peppers, cucumbers, or beans, go bigger: at least a 5-gallon container, which is roughly the size of a standard bucket. Larger containers hold more soil, which means more moisture, more nutrients, and a more stable environment for roots.
On material: terracotta looks great and is breathable, but it dries out quickly and needs more frequent watering. Plastic and glazed ceramic retain moisture longer and are lighter to move. Fabric grow bags drain very well and prevent roots from circling, which makes them a favourite for vegetables. Any of these work fine as long as you match your watering habits to the material.
Drainage is non-negotiable
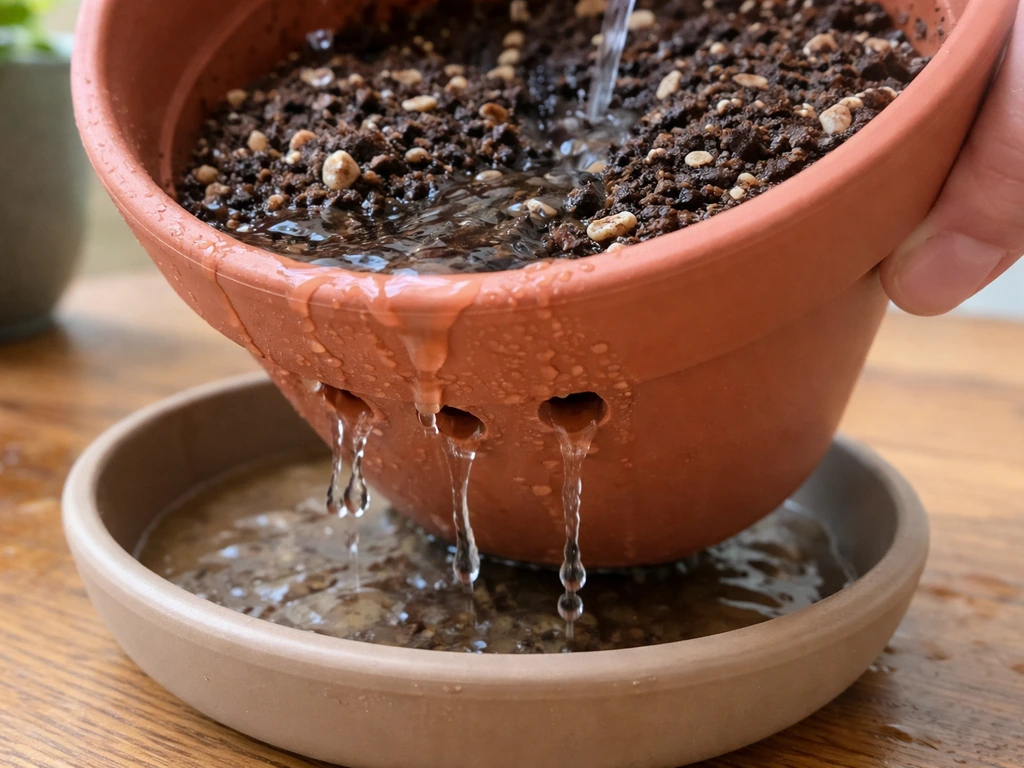
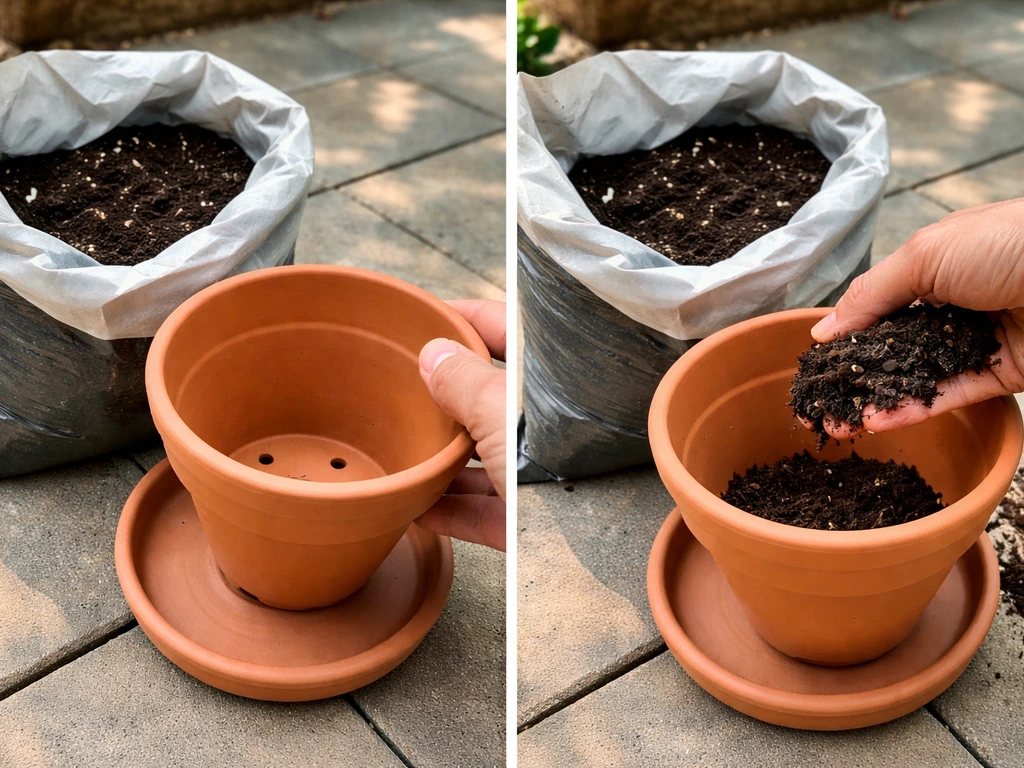
Your pot must have drainage holes. This is not optional. Plants need oxygen at their roots, and when the potting mix stays waterlogged, oxygen gets pushed out, roots suffocate, and rot sets in quickly. If you have a decorative outer pot or a foil wrapper covering a nursery pot, either remove it for watering or pierce the bottom so water can escape freely. The same goes for saucers: tip them out after watering rather than leaving the pot sitting in a pool of water.
If your pot does not have drainage holes and you cannot drill them, your plant will eventually struggle. A thin layer of gravel at the bottom does not fix this the way gardening folklore suggests. The only real fix is proper holes. If a pot you love has no holes, use it as an outer sleeve and keep the plant in a plain nursery pot with drainage inside it.
Placement: sun, wind, and access
Put your pot where the plant's light needs will actually be met, not where it looks nice. Most fruiting vegetables and flowering plants need six or more hours of direct sun per day. Herbs like basil and rosemary are the same. Leafy greens, ferns, and many houseplants manage with bright indirect light or partial shade. If you are not sure, check the seed packet or plant label. Wind is also worth thinking about, especially on balconies: wind dries out pots dramatically faster and can knock over tall plants. A sheltered spot near a wall or railing is usually better than the open middle of a rooftop.
Getting the soil right from the start
Do not use garden soil in a pot. I will say it once clearly: garden soil compacts badly in containers, drains poorly, and can carry pests or diseases. Always use a potting mix specifically made for containers.
A quality potting mix is usually soilless and built from a few key ingredients: something to hold moisture (like peat moss or coconut coir), something to keep it airy and well-draining (perlite or vermiculite), and usually some composted organic material for nutrients. Perlite is the white chunky stuff that looks like tiny polystyrene balls. Its job is to stop the mix compacting and to keep air channels open around roots. Vermiculite does a similar job but also holds onto water and nutrients a little more. Most commercial potting mixes already contain a reasonable balance of these.
If you want to tweak a basic bag of potting mix, adding about 20 to 30 percent extra perlite by volume improves drainage noticeably for most plants. For cacti and succulents, go even heavier on the perlite or buy a specific cactus mix. For moisture-loving tropical plants or vegetables, a mix with more coir and compost works better.
Fill your pot to within about an inch of the rim. An underfilled pot holds less water and dries unevenly. Make sure the pot is sitting level too: a tilted container loses water from one side and stays dry on the other.
Planting: seeds vs transplants, depth, spacing, and timing
Seeds or transplants?
Transplants (small plants you buy from a nursery) are the easier starting point for beginners. You skip the germination stage, get a faster result, and reduce the chance of early failure. For vegetables like tomatoes, peppers, and aubergines, transplants also make sense because their growing season is long and starting from seed adds weeks you might not have depending on your climate and the current date.
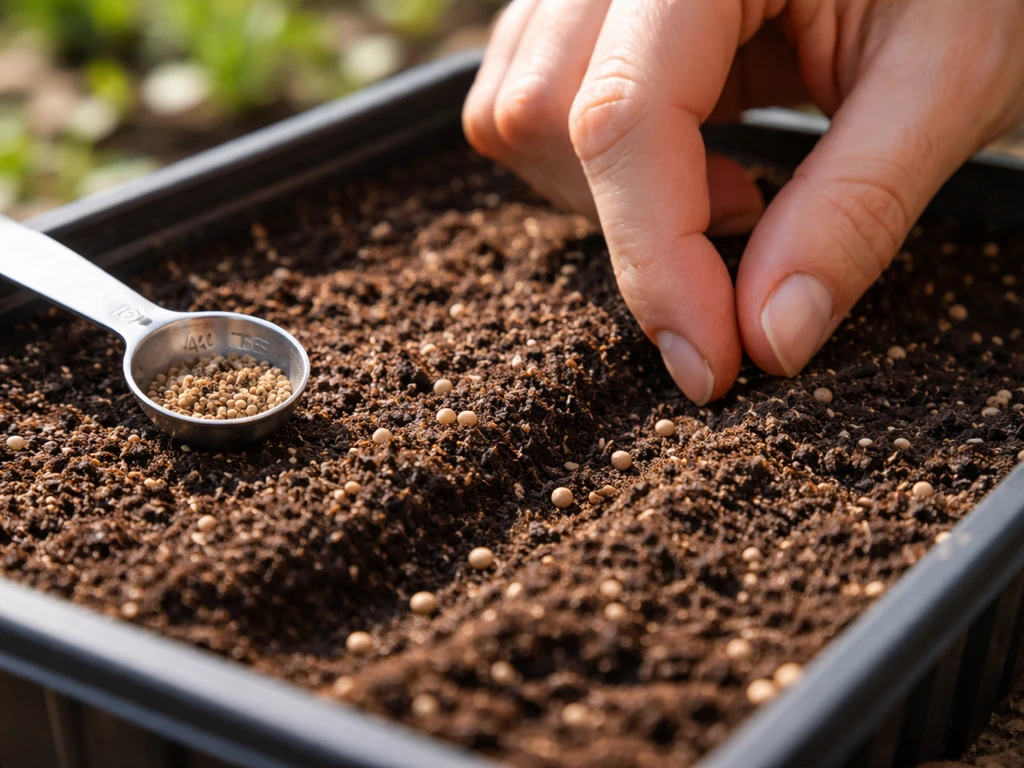
Seeds work brilliantly for herbs (basil, coriander, dill), fast-growing salad leaves, radishes, and flowers like marigolds and nasturtiums. They are cheaper and satisfying to watch. The rule with seeds is not to overthink depth: a good general guide is to plant a seed roughly twice as deep as it is wide. Very fine seeds like basil are just pressed onto the surface and barely covered.
How to transplant without stressing your plant
Water the transplant thoroughly before you remove it from its nursery pot. This one step reduces transplant shock significantly because the root ball holds together better and the roots are hydrated going in. Make a hole in your potting mix that is wide enough to accommodate the root ball without squeezing it, set the plant in so the soil level matches what it was in the nursery pot (for most plants), firm the mix gently around it, and water again. For tomatoes specifically, you can plant them deeper than they came, burying part of the stem, because they form roots along buried stems and end up with a stronger root system for it.
Spacing and timing
In containers, resist the urge to cram in more plants than the space allows. Overcrowding means competition for water, nutrients, and light, and it increases humidity around foliage which encourages disease. A 12-inch pot comfortably holds one medium herb plant or three to four small herbs. A 5-gallon container suits one tomato or pepper plant. Check the seed packet or plant label for spacing recommendations and take them seriously.
Timing depends on your climate and frost dates. Cool-season crops like lettuce, spinach, kale, and pansies go in during early spring or autumn. Warm-season plants like tomatoes, basil, and peppers need to wait until temperatures stay reliably above 10 degrees Celsius at night. Because pots are movable, you do have some flexibility: if a cold snap is forecast, you can bring a pot indoors or under cover for a few nights.
Watering and feeding: getting the routine right
How often to water
Container plants dry out faster than plants in the ground because there is less soil volume to hold moisture, and heat from the sun warms pot walls which accelerates drying. In summer, a small terracotta pot in full sun might need watering every day or even twice a day in a heatwave. A large plastic pot in partial shade might go three or four days between waterings.
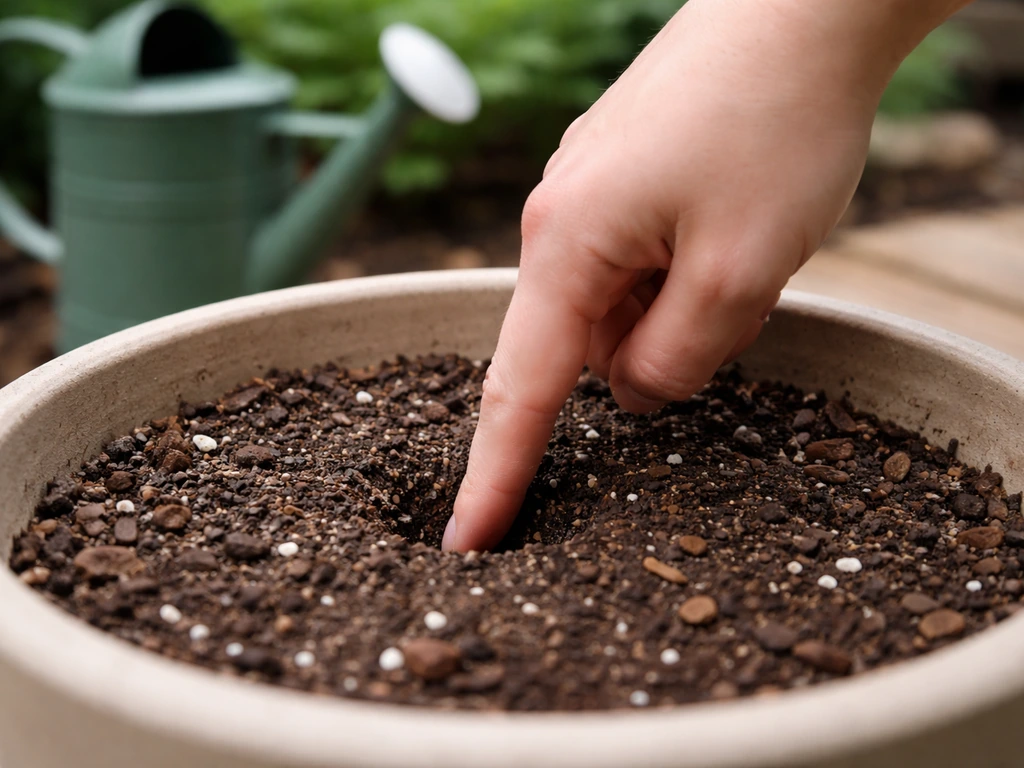
The best guide is not a fixed schedule but a quick check: stick your finger one to three inches into the potting mix. If it feels dry at that depth, water. If it still feels moist, wait. This takes 10 seconds and is more reliable than any calendar approach because it adjusts automatically for weather, pot size, and plant type.
When you do water, water slowly and thoroughly until you see water running freely out of the drainage holes. This does two things: it makes sure moisture reaches the entire root zone rather than just wetting the surface, and it flushes excess mineral salts out of the mix. Quick, shallow watering from the top is one of the most common mistakes in container gardening and leads to dry pockets at the root level even when the surface looks wet.
Feeding your potted plants
Potting mix usually contains some nutrients when you buy it, but those get used up and washed out with regular watering fairly quickly. A good rule of thumb is to start a regular feeding routine two to six weeks after planting, depending on how fast the plant is growing and how heavily you are watering. Fast-growing vegetables and flowering plants are hungry and benefit from weekly or fortnightly feeding during the growing season. Slower-growing houseplants might only need feeding once a month.
A balanced liquid fertiliser (something with roughly equal nitrogen, phosphorus, and potassium, often labelled as NPK 10-10-10 or similar) works for most plants. For fruiting and flowering plants, switch to a higher-potassium formula once they are establishing flower buds. Slow-release granules mixed into the potting mix at planting are a lower-maintenance option that feeds gently over several months.
One thing to watch: over-fertilising is a real problem in containers. Because the soil volume is limited, excess fertiliser salts have nowhere to go and they build up in the mix over time. Signs include white crusty deposits on the soil surface or pot rim, leaf tip burn, and wilting even when moisture is adequate. The fix is to water very thoroughly, letting large amounts of water flush through the pot, which leaches the excess salts out through the drainage holes.
Light, temperature, and looking after your plants through the seasons
Light is probably the most underestimated factor in container gardening, especially for people growing plants indoors. Insufficient light is the number one reason indoor pot plants grow slowly, produce pale or yellowing leaves, and generally look weak and leggy. A plant stretching toward a window, with long thin stems and widely spaced leaves, is telling you it needs more light. Moving it closer to the brightest window in the room is the first fix to try.
If natural light genuinely is not enough, a grow light helps a lot. For home use, keeping supplemental lights on for between 10 and 16 hours per day is the recommended range. Less than 10 hours and you are not really making up the deficit. More than 16 hours and you can interfere with the plant's rest cycle, which most plants need.
Outdoors, seasonal changes affect container plants more than in-ground plants because pots heat up and cool down faster than soil does. In spring, start hardening off indoor-started plants by putting them outside for increasing amounts of time each day over a week or two before leaving them out permanently. In autumn, bring tender plants in before the first frost rather than waiting and hoping. Most tropical houseplants dislike temperatures below about 10 to 12 degrees Celsius.
During summer, pot plants on paved surfaces like concrete or paving slabs can overheat from heat radiating off the ground. Raising pots on feet or a wooden surface makes a real difference. In winter, cold can damage roots in pots because there is no surrounding soil mass to buffer temperature swings. Wrapping pots in bubble wrap or hessian, or moving them to a sheltered spot against a wall, protects roots during cold snaps.
Fixing common problems and knowing when to repot
The most common issues and how to fix them
| Problem | Likely Cause | Fix |
|---|---|---|
| Wilting despite moist soil | Root rot from overwatering or poor drainage | Check roots (brown and mushy = rot), repot into fresh dry mix, ensure drainage holes are clear |
| Wilting with dry soil | Underwatering or very hot/windy conditions | Water thoroughly until it runs from the bottom; consider moving to a less exposed spot |
| Yellowing leaves (lower first) | Overwatering, poor drainage, or nutrient deficiency | Check soil moisture and drainage first; start a balanced feed if drainage is fine |
| Pale, leggy, stretched growth | Insufficient light | Move to a brighter spot or add a grow light |
| Leaf tip burn or white crust on soil | Salt build-up from over-fertilising | Flush pot thoroughly with plenty of water; reduce feeding frequency |
| Tiny flies around the soil surface | Fungus gnats from overly moist potting mix | Let the top layer dry out more between waterings; use yellow sticky traps; consider BTI (a biological treatment) |
| Slow or no growth | Wrong season, insufficient light, or root-bound | Check light, temperature, and whether roots are circling the bottom of the pot |
When to repot and how to refresh soil
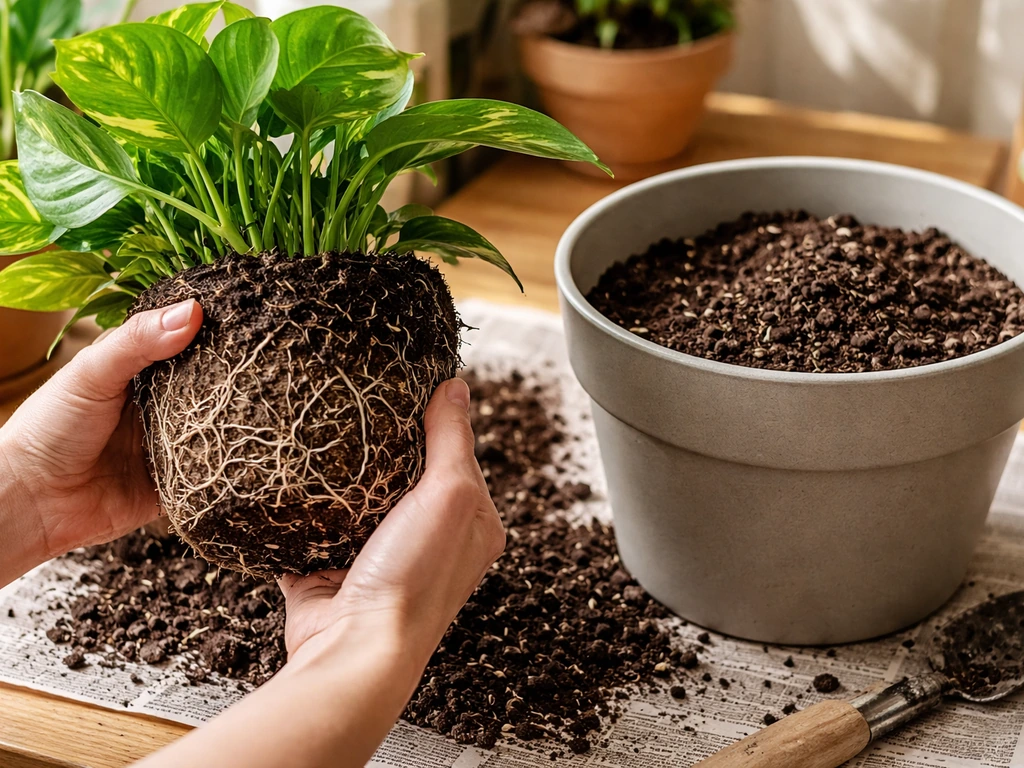
A plant needs repotting when roots start poking out of the drainage holes, when the plant dries out within a day of watering even when you are watering correctly, or when growth stalls for no other obvious reason. These are all signs the root system has filled the pot and there is simply no room left. Repot into a container that is one size up (roughly two inches wider in diameter), not dramatically bigger, because overly large pots hold excess moisture that roots have not yet grown into, which can lead to rot.
Even if a plant does not need a bigger pot, refreshing the potting mix every one to two years is a good habit. Old mix breaks down over time, loses its airy structure, and gets depleted of nutrients. You do not necessarily need to go up a pot size: you can take the plant out, shake off the old mix, trim any dead or circling roots, and replant it into the same pot with fresh mix. Doing this in early spring before the main growing season is ideal.
Fungus gnats are worth a specific mention because they are so common and so annoying. The larvae live in the moist upper layer of potting mix and feed on organic matter and young roots. The fix is to let the top inch or two of soil dry out between waterings, which makes the environment much less hospitable to them. Yellow sticky traps placed flat on the soil surface catch adults and help you monitor how bad the infestation is. For a persistent problem, a biological treatment using BTI (Bacillus thuringiensis israelensis, sold as mosquito dunks or similar) watered into the mix kills larvae without harming the plant.
Your starter setup and what to do today
If you want to get started right now, here is the simplest possible setup that works reliably for a beginner growing almost any plant in a pot. If you want a specific target like how to grow money plant in pot, follow the same container rules here for pot size, drainage, and light get started right now.
- Choose a pot with drainage holes: at least 10 to 12 inches for herbs or houseplants, 5 gallons or larger for vegetables.
- Buy a quality all-purpose potting mix (not garden soil). Add a handful of extra perlite per pot if you have it.
- Fill the pot to about an inch from the rim and make sure it is sitting level.
- Plant a transplant (easiest) or sow seeds at the correct depth. Water the transplant well before planting.
- Place the pot in the best light spot available for that plant type.
- Check soil moisture every day by pushing a finger one to three inches in. Water thoroughly when it feels dry at that depth.
- Start feeding with a balanced liquid fertiliser two to four weeks after planting, every one to two weeks during the growing season.
- Watch for the warning signs in the troubleshooting table above and address them early.
That is genuinely all you need to get a healthy plant growing in a pot. how to grow <a data-article-id="CEC4CCE8-C48B-46EF-BF08-5CB842477624">the best pot plants</a>. how to grow <a data-article-id="CEC4CCE8-C48B-46EF-BF08-5CB842477624"><a data-article-id="CEC4CCE8-C48B-46EF-BF08-5CB842477624">the best pot plants</a></a> The details matter, but they are learnable over time. Your first pot might not be perfect, and that is fine. Most of the best container gardeners I know learned by making small mistakes and adjusting. The system above keeps those mistakes recoverable.
Once you have the basics working, there is a lot of interesting territory to explore from here: growing specific vegetables in containers, trying organic potting methods, setting up a full potted garden across multiple containers, Once you have the basics working, there is a lot of interesting territory to explore from here: growing specific vegetables in containers, trying <a data-article-id="BBDE554-D7C2-4220-93CF-55A824BA7375">organic potted plants</a>, setting up a full potted garden across multiple containers, or even experimenting with hydroponic setups. But none of that matters until you have one pot, one plant, and a reliable daily habit of checking whether it needs water. how to grow organic potted plants Start there.
FAQ
How can I tell if I’m overwatering versus just watering at the wrong time?
If your potting mix stays wet for days, even when it feels like you watered correctly, the most likely causes are poor drainage (no true holes or water trapped in a saucer), an oversized container, or a mix that is too fine and compacts. Use the “fingertip depth” check (1 to 3 inches) rather than the surface, and confirm water runs freely out the bottom each time.
Can I move my indoor pot plant outside in the summer, or will it shock it?
Yes, but you need the right conditions. Many common houseplants tolerate summer outdoors only gradually, and direct sun on balconies can scorch leaves. Move the pot into morning sun or bright shade for a week, then reassess, and bring it back indoors if nights drop toward 10 to 12°C.
What should I do if my plant is root-bound but it looks unhealthy during repotting?
Trim the absolute minimum and recheck the light before you remove anything. Root-bound plants often lose vigor when they are disturbed, but a gentle approach helps: loosen circling roots at the edges, remove only dead or clearly rotten roots, and repot promptly into fresh mix in the same or one size up container.
My container plant wilts but the soil surface looks damp, what’s the usual fix?
Start by checking the potting mix moisture at 1 to 2 inches and then correct the watering method. Quick top watering can leave dry pockets, so when you do water, do it slowly until runoff comes from the drainage holes. If fertilizer salts are suspected (crusting on rim), flush with a deeper soak and ensure the excess drains out.
How do I prevent fungus gnats and other common container pests from coming back?
For pests, the fastest early win is consistency, not strength. In containers, fungus gnats improve when you let the top inch dry between waterings and use yellow sticky traps. For bigger outbreaks like aphids or whiteflies, inspect leaf undersides weekly and treat early, since containers can build up problems quickly because plants are confined in one microclimate.
Can I start fertilizing immediately after planting, or should I wait?
Usually yes, if you match nutrition to growth and you don’t overdo it. A general approach is to feed lightly once growth is clearly established, then increase frequency for fast fruiting plants. Avoid switching to a higher dose immediately after transplanting, because tender new roots can be sensitive to concentrated fertilizer.
My plant stopped growing in its container, how do I know whether it needs a bigger pot?
Do a quick root-space check. If roots are not filling the pot and growth has stalled, the cause is more likely light, temperature, or watering imbalance than “needing more space.” If roots are circling or drying happens within a day, then repot one size up and refresh the mix as needed.
Will using a self-watering planter change how often I should water and feed?
Yes, but it changes your whole routine. Self-watering containers hold moisture more consistently, so plants typically need less frequent watering, and the mix can stay wetter longer. Use the fingertip depth method anyway, and avoid fertilizing too aggressively, since nutrients also get flushed less predictably.
Is wrapping pots in bubble wrap or hessian really safe, and how should I do it without causing rot?
When using bubble wrap, ensure drainage remains unobstructed and avoid sealing pots in a way that traps moisture and reduces airflow. Wrap for cold snaps or overnight protection rather than permanently, and periodically check the mix so it does not stay saturated in cool weather.
Why do my potted plants dry out too fast in hot weather, and what changes help most?
If you have extreme sun, combine strategies instead of relying on one. Use a larger pot for more stable moisture, raise it off hot paving to reduce root overheating, and consider a container color that does not absorb as much heat. Then keep to the 1 to 3 inch moisture check, because “every day” watering is not universal in summer.