Yes, you can absolutely grow chokos in pots, and it works better than most people expect. The key things you need are a big container (at least 40–50 litres), a sturdy trellis, full sun, and warmth. Plant a whole sprouting choko fruit directly into your pot, give it something to climb, feed it regularly, and you can realistically harvest fruit around blank" rel="noopener noreferrer">120 to 150 days after planting, once the vine gets going in earnest.
How to Grow Chokos in Pots: Beginner Container Guide

Marcus Whitley
20 May 2026
Why grow chokos in a pot (and what to expect)
Chokos (Sechium edule, also called chayote) are vigorous climbing vines that produce pale green, pear-shaped fruit beloved in Asian, Latin American, and Pacific Island cooking. They're surprisingly well-suited to container life if you give them enough room and the right conditions. For urban and balcony gardeners, a pot means you can move the plant into warmer spots, control the soil, and grow something genuinely productive in a small footprint.
That said, be honest with yourself about expectations. Chokos are big plants. Without pruning, a choko vine can easily stretch beyond 10 metres long. In a pot, you're managing that energy into a contained space, which takes a bit of regular attention. You won't get the same yield as an in-ground plant sprawling over a fence, but you can still get a solid harvest from a single vine. I've seen people get two to three dozen fruits from a well-fed container plant in a warm season.
One thing that catches beginners off guard: chokos are short-day plants, meaning they only start flowering once day length drops below about 12 hours. So you plant in spring, grow the vine through summer, and then flowers appear in autumn as days shorten. Fruit then matures roughly 30 to 35 days after pollination. That's why the total time from planting to harvest sits around 120 to 150 frost-free days. If your growing season is short, start as early as possible and prioritise warmth.
Choosing the right pot, soil mix, and site conditions
Pot size and material
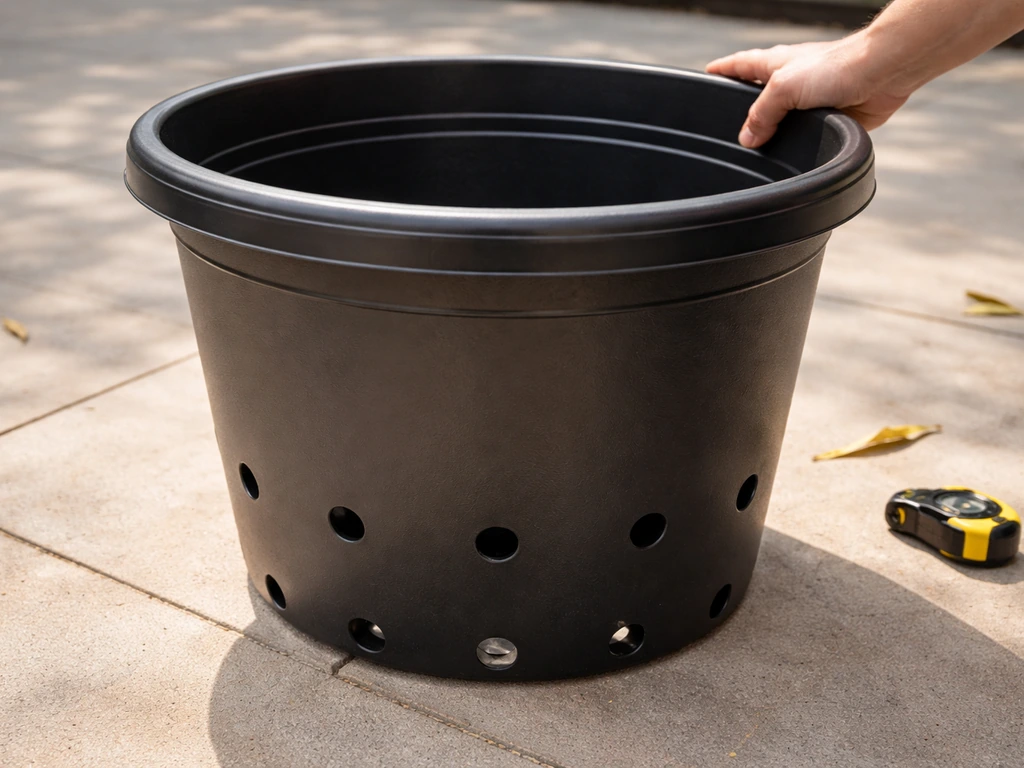
Go as large as you can manage. A minimum of 40 litres is workable, but a 60 to 80 litre container gives the roots the room they need and reduces how often you need to water. Half wine barrels, large nursery pots, or deep tubs all work well. Depth matters just as much as width, aim for at least 40 cm deep. Avoid shallow decorative pots; the root system on a choko is substantial and it needs room to anchor the vine. Make sure whatever you choose has multiple drainage holes. Chokos hate sitting in water.
The right potting mix
Never use straight garden soil in a pot. It compacts, drains poorly, and leads to root rot, which is one of the most common ways people lose a choko plant in a container. [For a drainage-focused “peat-lite” style mix](https://www. ncat.
org/publication/potting-mixes-for-certified-organic-production/), NCAT’s example recipe uses about 50% peat moss plus 50% perlite or vermiculite to improve porosity and help prevent root rot. Instead, use a quality potting mix as your base and improve it with around 20 to 30 percent perlite or coarse vermiculite to boost drainage and aeration. A good starting formula is roughly 50 percent premium potting mix, 30 percent compost, and 20 percent perlite.
This gives you nutrient-rich, well-drained, loose soil that a choko vine will genuinely thrive in. Refresh or top-dress with compost every season.
Sun and warmth requirements
Chokos need full sun, at least 6 hours of direct sunlight daily. They can tolerate partial shade but your yield will drop noticeably. One of the biggest advantages of a pot is that you can wheel or carry it to the sunniest spot on your balcony or patio, which is worth doing. Temperature is equally important: chokos are frost-sensitive and cannot tolerate temperatures below about 12°C without fruit development being affected. They'll die back completely in a frost. Choose the warmest, most sheltered position you have, especially in cooler climates, and be ready to move the pot indoors or under cover if temperatures drop sharply in autumn.
Planting chokos in containers
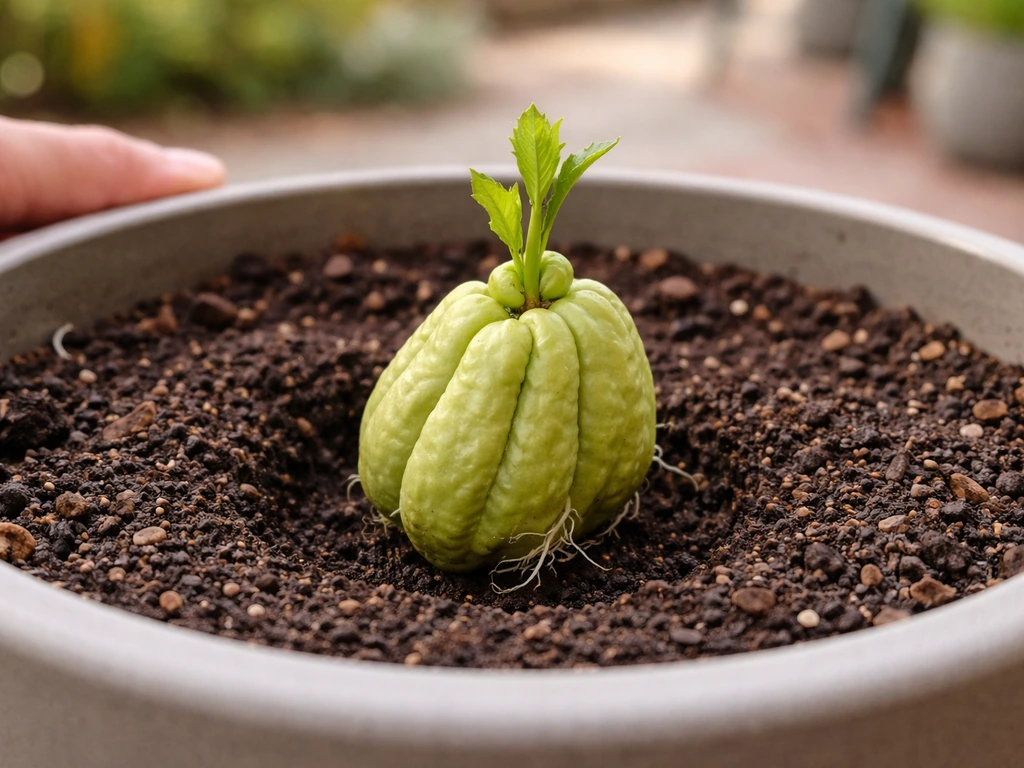
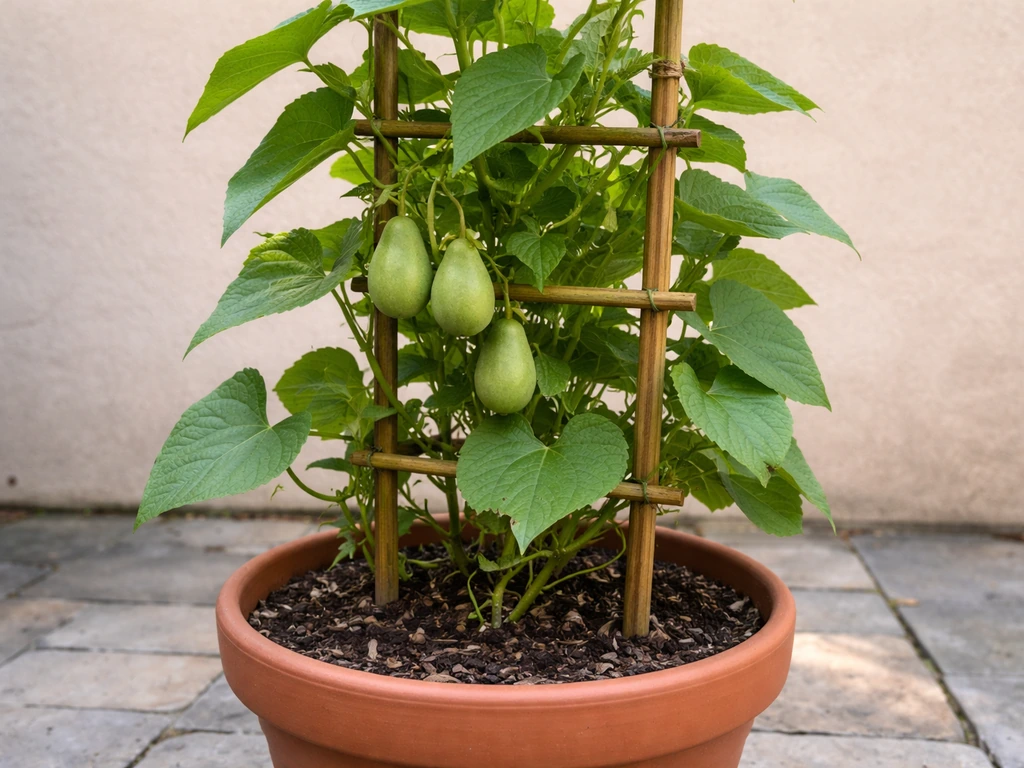
The easiest way to start a choko is to plant a whole fruit. You don't need to extract seeds or do any special preparation. Just buy a choko from the supermarket or fruit market, let it sit at room temperature for a week or two until you can see a green sprout emerging from the narrow end, and then plant it. The entire fruit acts as the seed and nutrient reserve for the young plant.
- Fill your pot to about two-thirds with your prepared potting mix.
- Place the sprouting choko at an angle of about 45 degrees, with the sprout end pointing upward and just peeking out of the soil. The broader base of the fruit should be buried.
- Cover lightly, leaving the tip of the sprout exposed or just at soil level.
- Water in gently and place in a warm, sunny spot.
- Expect the first real shoots to emerge and grow rapidly within 2 to 4 weeks, especially if temperatures are consistently above 18°C.
Timing matters. In Australia and the Southern Hemisphere, plant in spring, from September to November depending on your location. In the Northern Hemisphere, aim for late April to May once frost risk has passed. Starting too late means the vine won't have enough growth time before autumn flowering kicks in, which limits your harvest window. If you're in a cooler climate, starting your choko on a warm windowsill indoors and then transplanting outside once the weather stabilises is a smart move.
Support and training for container vines
This is the part most beginners underestimate. A choko vine grows fast, and without something to climb, it will sprawl across your balcony floor and become unmanageable within weeks. You need a support structure in place before or as soon as you plant.
For pots, a tall obelisk or bamboo teepee works well if you're training one main stem upward. Alternatively, fix a trellis panel or netting behind the pot against a wall or fence and train the vine up and then sideways along the horizontal space. A good system used for mirliton (another name for choko) is to let the main stem climb straight up vertically, then allow lateral branches to spread outward along horizontal supports. This keeps the plant tidy and makes it much easier to spot and harvest fruit.
As the vine grows, loosely tie the main stem to the support every 20 to 30 cm using soft garden ties or strips of old pantyhose. Don't tie too tightly as stems thicken as they grow. Chokos have tendrils that will grip netting or wire on their own once they find it, so getting them started in the right direction is the main job.
Pruning is essential in a container. Once the main vine has reached the top of your support, pinch out the growing tip to encourage side shoots. This keeps the plant at a manageable size and actually promotes more fruiting laterals. If any shoots are heading away from the support or growing downward, remove them cleanly. Aim to keep three to five productive lateral stems rather than letting the vine run rampant.
Watering and feeding schedule for container chokos
How often to water
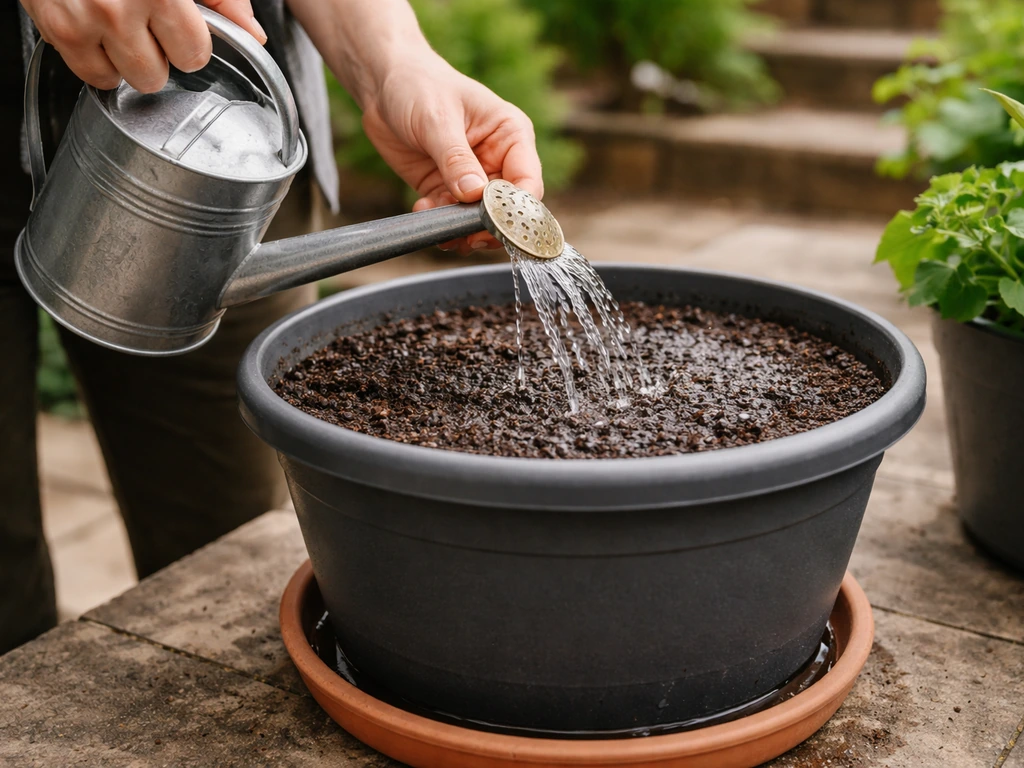
Containers dry out faster than garden beds, and chokos are thirsty plants during the growing season. In warm weather, you'll likely need to water every one to two days. The simplest check: push your finger about 5 cm into the soil. If it feels dry at that depth, water thoroughly until it drains freely from the bottom. If it's still moist, hold off. Never let the pot sit in a saucer of standing water, that's how root rot starts. In cooler or overcast weather, pull back significantly. The soil should be consistently moist but never waterlogged.
Feeding the vine
Chokos are heavy feeders, especially when they're growing fast and producing fruit. Start with a balanced liquid fertiliser (something like a 5-5-5 or similar NPK ratio) applied every two weeks at half strength from when shoots are about 10 cm tall. As the plant begins to flower and set fruit in autumn, switch to a potassium-rich liquid fertiliser (like a tomato food or potash-based product) to support fruit development. Every four to six weeks through the growing season, top-dress the pot with a handful of compost or slow-release granular fertiliser and scratch it lightly into the surface. Consistent feeding is probably the single biggest factor in getting a decent yield from a container plant.
| Growth Stage | Fertiliser Type | Frequency |
|---|---|---|
| Shoots emerging (first 4–6 weeks) | Balanced liquid (half strength) | Every 2 weeks |
| Vigorous vine growth | Balanced liquid + compost top-dress | Liquid every 2 weeks, compost monthly |
| Flowering and fruiting (autumn) | High-potassium liquid (tomato food) | Every 1–2 weeks |
| Post-harvest | Light compost top-dress only | Once, then rest the plant |
Pest, disease, and common problems in pots
Pests to watch for
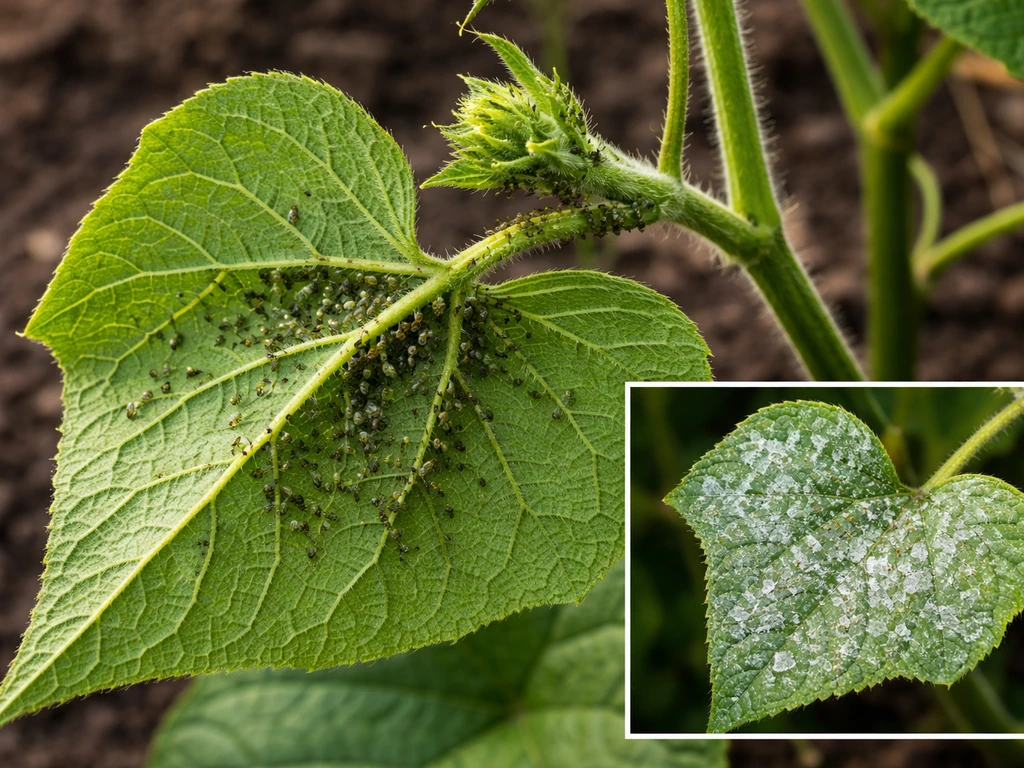
The most common insect pests on chokos are aphids, whiteflies, and spider mites. Aphids and whiteflies tend to cluster on new growth and the undersides of leaves. Blast them off with a firm jet of water from a hose, or apply an insecticidal soap spray. Spider mites usually show up in hot, dry conditions and look like fine webbing on the leaves. Increasing humidity around the plant and keeping it well-watered reduces spider mite pressure. In a container, catching these early is easy because the plant is right in front of you.
Disease and fungal issues
Powdery mildew (a white powdery coating on leaves) and downy mildew (yellowing with a greyish underside) can both affect chokos, particularly in humid conditions with poor airflow. Keep the vine well-spaced on its trellis, avoid wetting leaves when you water, and ensure the plant gets good air circulation. If you spot powdery mildew early, a spray of diluted neem oil or a baking soda solution (1 teaspoon per litre of water) can help manage it.
Root rot and nutrient deficiency
Root rot from waterlogging is probably the most common reason container chokos fail. The fix is almost always the same: better drainage. Make sure your potting mix contains enough perlite, your pot drains freely, and you're not overwatering. If the plant suddenly wilts despite moist soil, that's a classic root rot sign. Pull back on watering immediately and let the mix dry out somewhat before resuming. Yellowing leaves across the whole vine (not just lower older leaves) usually signals a nutrient deficiency, most commonly nitrogen. A dose of balanced liquid fertiliser should green things up within a week or two.
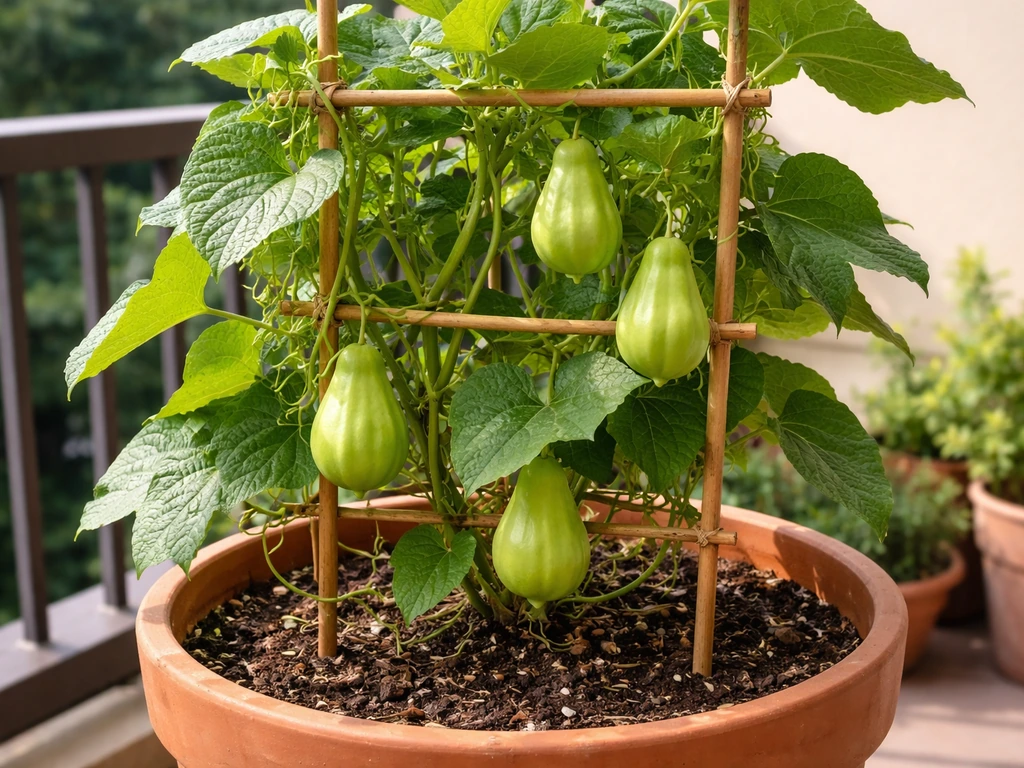
When and how to harvest (and what to do after)
Chokos are ready to harvest when the fruit is tender, about 10 to 15 cm (4 to 6 inches) long, and still firm with smooth, unwrinkled skin. At this size they're at their best for eating: mild, crisp, and versatile. If you leave them too long they become tough and starchy, and the seed inside becomes fibrous and hard. Once pollinated, fruit typically reaches harvest size within 30 to 35 days. The whole fruiting season from planting usually takes 120 to 150 frost-free days.
To harvest, use a sharp knife or secateurs and cut the stem a centimetre or two above the fruit. Don't pull or twist, the vine can be damaged more easily than it looks and the tendrils may be holding other fruit-bearing stems nearby. Harvest regularly as fruit matures, picking promptly encourages the plant to keep producing rather than putting energy into ripening a few large fruits.
After your main harvest flush in autumn, the vine will start to die back as temperatures drop and day length shortens further. In frost-free climates, you can cut the vine back hard (to about 30 to 40 cm from the base), refresh the potting mix with compost, and allow the plant to reshoot in spring from the root system. In cooler climates where frost is possible, bring the whole pot under cover or into a sheltered spot. The tuber at the base can survive mild cold if protected. Some gardeners save a sprouting fruit from the harvest and use that to replant fresh in spring, which is completely valid and gives you a vigorous new start.
Quick troubleshooting guide
| Problem | Likely Cause | Quick Fix |
|---|---|---|
| No flowers appearing | Days still too long (short-day plant), or insufficient warmth | Be patient into autumn; ensure plant gets full sun and warm conditions |
| Vine growing but no fruit setting | Pollination issue or lack of both male and female flowers | Hand-pollinate using a small brush between male and female flowers |
| Yellowing leaves across whole vine | Nitrogen deficiency | Apply balanced liquid fertiliser at recommended strength |
| Wilting despite moist soil | Root rot from waterlogging | Improve drainage, reduce watering, check pot drainage holes are clear |
| White powder on leaves | Powdery mildew | Improve airflow, spray with diluted neem oil or baking soda solution |
| Vine getting out of control | Insufficient pruning | Pinch back growing tips and remove stems heading away from support |
| Fruit developing but dropping early | Temperature stress or inconsistent watering | Maintain steady moisture, protect from cold snaps |
Your next steps starting today
If it's currently spring or early summer in your region, this is the ideal time to get moving. Here's exactly what to do in the next few days and weeks.
- This week: Buy a choko from the supermarket and set it on a warm windowsill to sprout. Source a large pot (60 litres or more), perlite, compost, and quality potting mix.
- In the next few days: Mix your potting medium (50% potting mix, 30% compost, 20% perlite) and fill the pot. Set up your trellis or support structure before planting.
- Once the choko has a visible sprout (1 to 2 weeks): Plant it as described, angled at 45 degrees with the sprout tip at or just above soil level. Place the pot in the sunniest, warmest spot you have.
- Weeks 2 to 6: Water regularly (check daily in warm weather), begin liquid feeding when shoots are 10 cm tall, and start training the main stem up the support.
- Ongoing through summer: Prune lateral stems to keep the plant manageable, feed every two weeks, and watch for pests. Switch to potassium-rich fertiliser when flower buds appear in autumn.
- Autumn: Begin harvesting fruit when it reaches 10 to 15 cm. Keep picking regularly to encourage continued production until the vine dies back or frost threatens.
Chokos are genuinely one of the more rewarding vines you can grow in a pot once you get the setup right. For a practical step-by-step guide, see our full article on how to grow chayote in pots.
If you enjoy growing climbing vegetables in containers, you might also find it worth exploring how chayote (the very same plant, just known by a different name in other regions) is cultivated in pots, along with other fast-growing edible vines like thotakura and chukkakura that thrive in container gardens with similar warm, sunny conditions. For a close match in needs and routine, check our guide on how to grow thotakura in pots.
If you specifically want chukkakura, you can follow the same pot setup, warm sun, and regular feeding approach described for other vigorous container vines like chokos how to grow chukkakura in pots.
FAQ
Why is my potted choko vine growing lots of leaves but not flowering?
If your choko vine isn’t flowering, the usual causes are too much cold (below about 12°C affecting fruiting), not enough day length drop (flowers are triggered once days get shorter, roughly under 12 hours), or excessive nitrogen late in the season. Move the pot to the warmest spot you have, then switch from balanced feed to a potassium-rich fertiliser as soon as flowering is expected, and avoid heavy late nitrogen dressings.
Can I start a choko indoors and transplant it outside into the pot?
Yes, but be careful with timing. In a container, a cold snap can set the plant back or cause complete dieback, so do not transplant outside until nights are reliably above roughly 12°C. Hardening off for 7 to 10 days (gradually increasing sun and outdoor exposure) helps prevent leaf scorch, and you should keep feeding at half strength until the vine resumes strong growth.
How small can I harvest chokos in pots, and does it affect yield?
You can harvest earlier than the typical window, but only for “tender” eating size. Pick fruit when it’s about 10 to 15 cm long and still firm, smooth, and unwrinkled. If you wait until the fruit becomes seedy and starchy, it will taste tough, and the plant may also slow down because it is putting energy into ripening and seed development.
What’s the best way to keep a potted choko alive through winter?
Overwintering is easiest when frost is possible. Move the pot under cover or into an area protected from freezing rain and wind, then cut back to about 30 to 40 cm. Keep the mix slightly moist but not wet, since growth pauses in cool weather. In spring, refresh with compost and resume regular feeding once new shoots appear.
My choko looks wilted even though I watered, what could be wrong?
Dead, wrinkled, or collapsing leaves usually point to water stress, root damage, or cold shock. First check drainage (ensure multiple holes and no saucer standing water), then use the finger test 5 cm down before watering again. If the soil is wet and the plant wilts, root rot is likely, so pull back on watering immediately and improve aeration (extra perlite is best done in a repot, not as an emergency fix).
How do I prevent root rot in a container choko?
Chokos are tricky to save once root rot is advanced, so prevention is key. Make sure your potting mix is airy (potting mix plus perlite) and water only when the top few centimeters are drying, not by a fixed schedule. Also, water deeply until it drains from the bottom, then empty any runoff right away, this reduces the “wet feet” cycle that causes rot.
Is it okay to twist or pull chokos off the vine?
Rough handling can cause stem breaks and can also disrupt nearby fruiting laterals because the plant is actively supported and tied to a trellis. Use secateurs or a sharp knife, cut a small section of stem above the fruit, and avoid twisting. If you see a cluster of developing fruits, harvest the smallest tender ones first so you don’t stress the stem while it’s supporting multiple loads.
How much should I prune a potted choko, and will pruning reduce my harvest?
Container chokos often do better when you train for one main leader and fewer laterals. Aim to keep about 3 to 5 productive side stems after pinching the top once it reaches the trellis. Removing shoots that flop downward improves airflow and makes fruit easier to spot, and keeping stems tied loosely prevents strangling as the vine thickens.
What can I do if pests keep coming back on my container chokos?
If aphids or whiteflies keep returning, try a combination approach. Start with a firm water blast to knock them off, then follow with insecticidal soap in the early morning or late afternoon, repeat every 5 to 7 days for at least a couple of cycles. For spider mites, cool the plant slightly by consistent watering, and check the undersides of leaves frequently during hot, dry stretches.