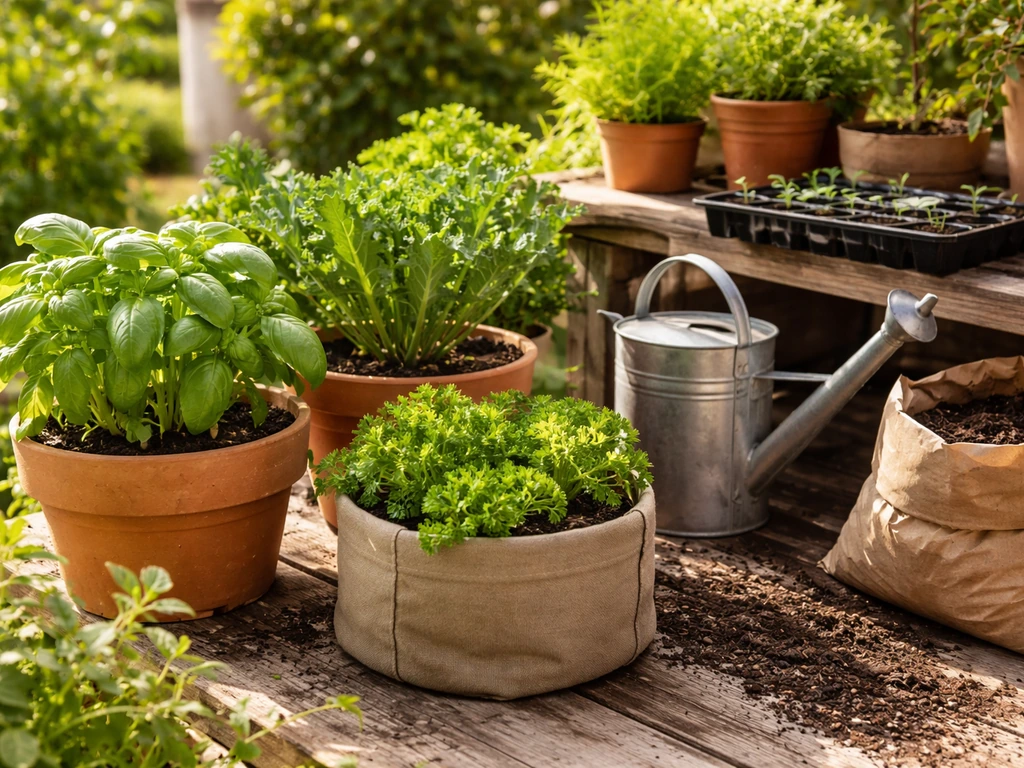
Growing organic potted plants is completely doable, even if you have nothing more than a balcony, a windowsill, or a small patio. The short answer: go organic in a container garden by using natural soil inputs, skipping synthetic fertilizers and pesticides, and relying on healthy soil biology to keep your plants fed and your problems manageable. This guide walks you through every step, from picking the right pot to harvesting without a drop of synthetic chemical in sight. If you're specifically looking for a cannabis option, see also how to grow a pot plant for plant-specific light, feeding, and growth-stage timing. If you want top results, use these same container basics to learn how to grow the best pot plants. To get started with confidence, follow a simple routine for how to grow potted plants step by step.
How to Grow Organic Potted Plants: Step-by-Step Guide
What 'organic' actually means for container gardeners
When people say 'organic gardening,' they usually mean avoiding synthetic fertilizers, synthetic pesticides, and manufactured soil amendments. The USDA's National Organic Program (NOP) formalizes this for commercial growers: under 7 CFR § 205.105, the general rule is that synthetic substances are prohibited in organic production unless they are specifically listed as allowed on the NOP's National List. Non-synthetic (natural) substances are generally allowed unless specifically prohibited. Sewage sludge, for example, is explicitly banned.
For a home container gardener, you don't need a USDA certification, but the same logic applies. You're aiming to feed your soil with natural inputs (compost, worm castings, kelp, fish emulsion) and manage pests without synthetic chemistry. The easiest shopping shortcut: look for the OMRI Listed seal on bags of soil, fertilizer, or pest products. OMRI (the Organic Materials Review Institute) independently reviews products against USDA NOP standards, so an OMRI Listed label is a reliable signal that a product is approved for organic use.
In practical terms, here's what 'organic' looks like in a potted garden:
- Soil and amendments: compost, worm castings, coco coir, perlite, aged bark, kelp meal, bone meal, blood meal, rock phosphate
- Fertilizers: fish emulsion, liquid seaweed, compost tea, slow-release organic granules (look for OMRI Listed)
- Pest control: physical barriers, beneficial insects, neem oil, insecticidal soap, diatomaceous earth, copper fungicide (all used at label rates)
- What to avoid: synthetic NPK fertilizers (like 10-10-10 soluble salts), systemic insecticides (imidacloprid, etc.), synthetic fungicides, and any product listing sewage sludge or biosolids
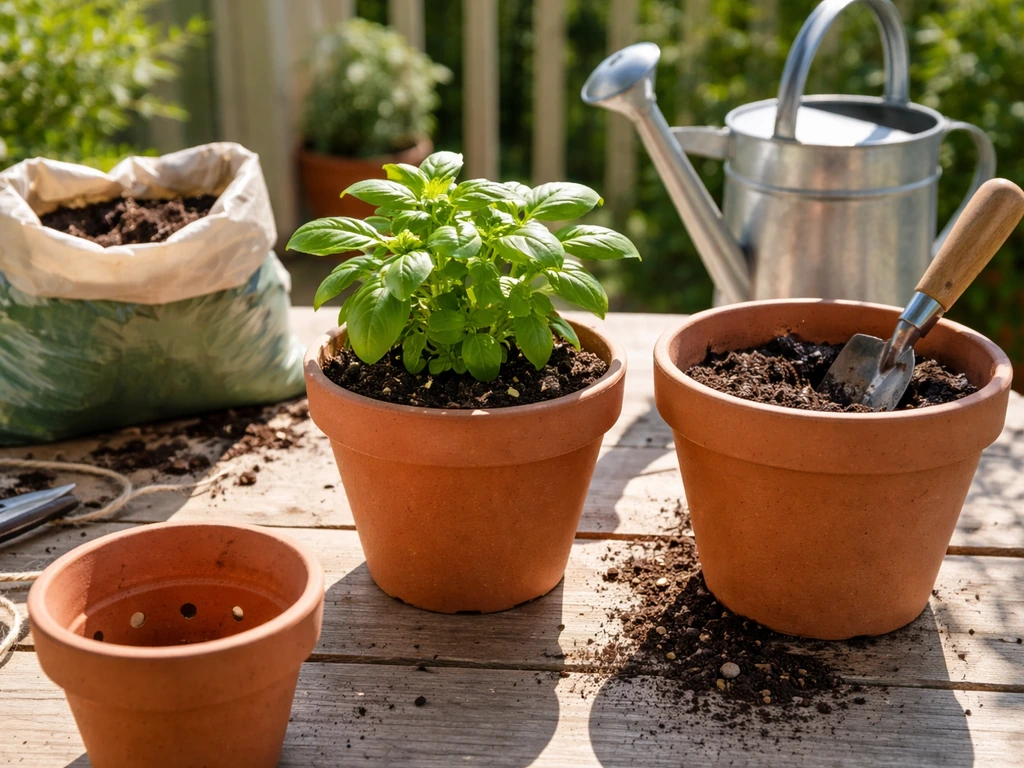
Picking the right container and getting drainage right
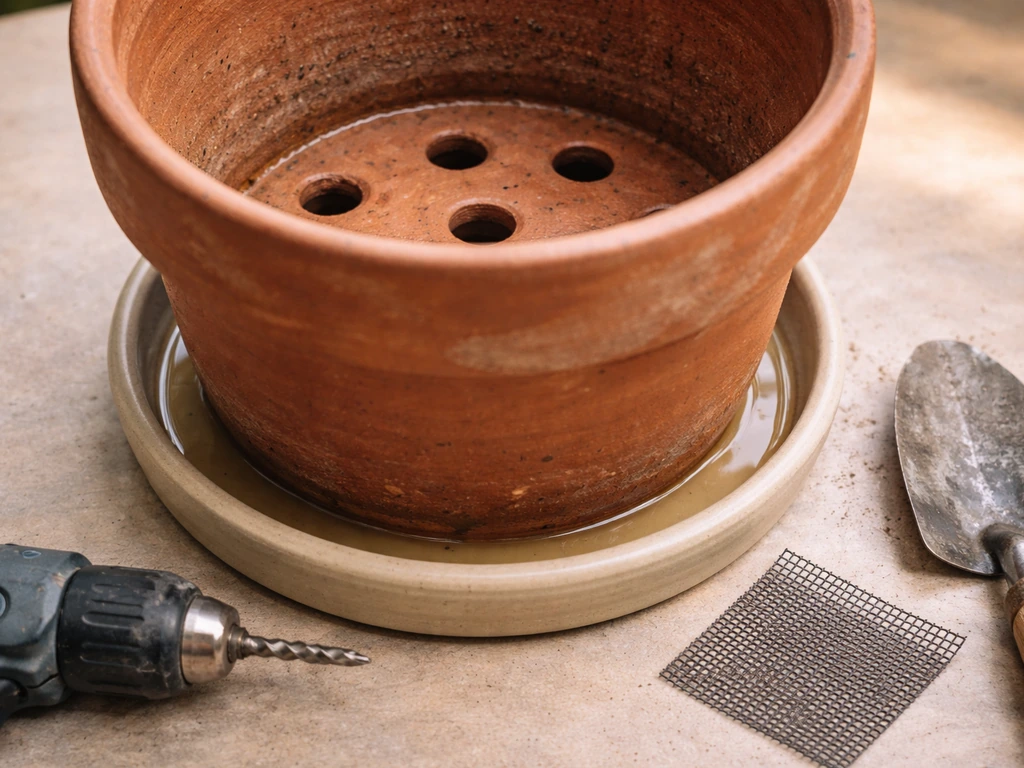
The container choice matters more than most beginners expect. Drainage is the number one factor. A pot with no drainage holes will drown roots in a few weeks, no matter how carefully you water. Every pot you use needs at least one hole at the bottom, and for pots wider than 10 inches, two or three holes is better. If you fall in love with a decorative container that has no hole, use it as a sleeve and drop a plain plastic nursery pot inside it.
Pot size is the next big decision. Container-grown plants are limited to the root space you give them, so undersizing is a common and frustrating mistake. Here's a practical size guide based on what I've found works:
| Plant Type | Minimum Pot Size | Notes |
|---|---|---|
| Herbs (basil, parsley, cilantro) | 6–8 inch diameter | Can share a 12-inch pot as a mixed herb planter |
| Lettuce and leafy greens | 8–12 inch diameter, 6 inches deep | Shallow-rooted; a window box works great |
| Peppers | 12–14 inch diameter | One plant per pot |
| Bush tomatoes (determinate) | 5-gallon (12-inch diameter) | Minimum; 7–10 gallon preferred |
| Vining tomatoes (indeterminate) | 10–15 gallon | Needs stake or cage |
| Strawberries | 8-inch diameter per plant | Hanging baskets or strawberry towers work well |
| Dwarf citrus or shrubs | 15–25 gallon | Terracotta or wood planters for stability |
For materials, terracotta breathes well and helps prevent overwatering, but it dries out fast in summer heat. Plastic and glazed ceramic hold moisture longer, which helps if you tend to forget to water. Fabric grow bags (made of breathable felt) are excellent for tomatoes and peppers because they air-prune roots naturally, which promotes a healthier root system. I've used 7-gallon fabric bags for peppers for several seasons and rarely deal with root-bound problems.
Skip the layer of gravel at the bottom of pots. Research has shown it actually raises the water table inside the pot rather than improving drainage. A well-draining organic mix and good drainage holes are all you need.
Organic potting mix and amendments: what to buy and what to skip
Regular garden soil from your yard is a poor choice for containers. It compacts, drains poorly, and can carry pathogens. You want a purpose-made potting mix, ideally one labeled OMRI Listed or certified for organic use. Look for mixes that list compost, perlite, coco coir, and aged bark as main ingredients. Avoid anything that lists 'time-release fertilizer' or 'synthetic wetting agents' if you want to stay fully organic.
Here are the amendments worth adding to a base organic potting mix:
| Amendment | What It Does | How Much to Add |
|---|---|---|
| Worm castings (vermicompost) | Slow-release nutrients, beneficial microbes, improves structure | 10–20% of total mix volume |
| Compost (finished) | Nutrients, microbial life, moisture retention | 20–30% of total mix volume |
| Perlite | Improves drainage and aeration, prevents compaction | 15–20% of total mix volume |
| Coco coir | Water retention, lightweight structure | Included in most commercial mixes; add more for dry climates |
| Kelp meal | Trace minerals, growth hormones, slow release | 1 tbsp per gallon of mix at planting |
| Bone meal | Phosphorus for root and flower development | 1 tbsp per gallon at planting |
| Biochar (activated) | Improves microbial habitat, water retention | Up to 10% of mix volume |
A simple DIY mix that works well: 40% quality compost, 30% coco coir, 20% perlite, and 10% worm castings. Mix in a tablespoon each of kelp meal and bone meal per gallon of final mix. This gives you a nutrient-rich, well-draining, biologically active growing medium without spending money on premixed specialty soils.
What to avoid: any potting mix or fertilizer containing synthetic NPK salts, urea, ammonium nitrate, or anything labeled as 'enhanced with extended-release fertilizer' (that coating is usually synthetic). Also skip peat moss if you can. It's not renewable; coco coir is the sustainable alternative and performs just as well.
Setting up your plants: seeds vs. seedlings, spacing, and transplanting
Starting from seed is cheaper and gives you more variety options, but it takes longer and requires a bit more attention early on. Starting from seedlings (buying young plants at a nursery) gets you to harvest faster and is the better choice if you're a first-timer or if you're planting late in the season. There's no wrong answer, and I regularly do both depending on the plant.
Starting seeds in containers
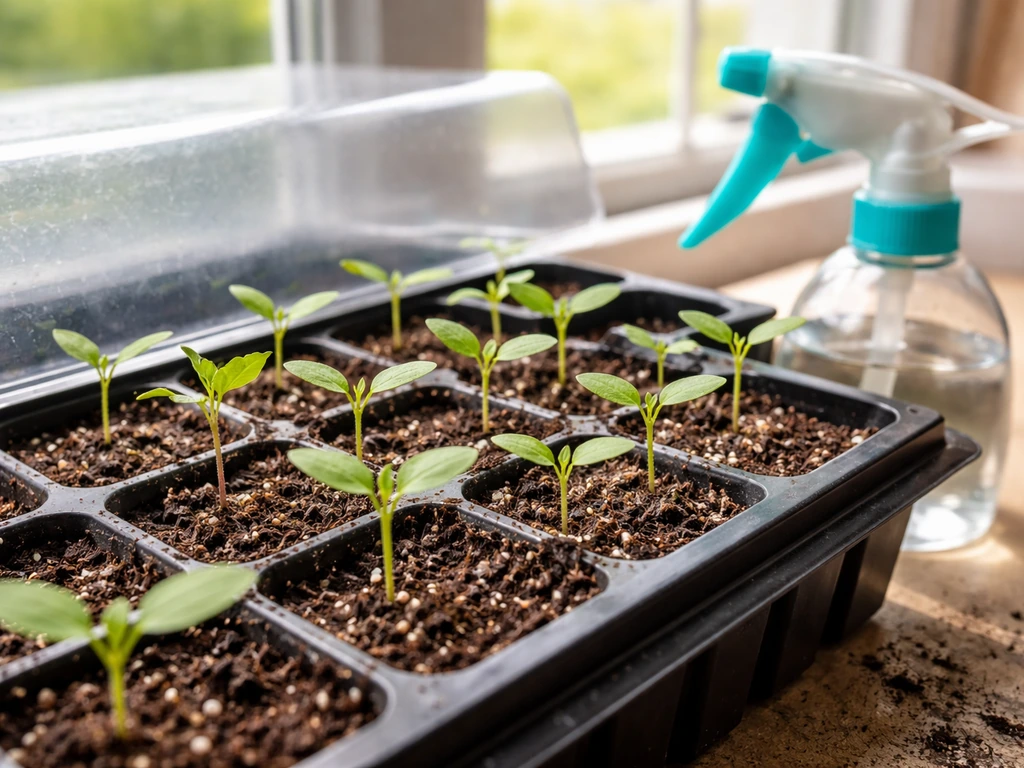
Use a dedicated seed-starting mix rather than your main potting mix. Seed-starting mix is finer and lower in nutrients, which is exactly what tiny seedlings need. Sow seeds at twice their diameter in depth (a rough rule that works for most vegetables and herbs). Keep the mix consistently moist but not soggy. Most seeds germinate best between 65–75°F (18–24°C). A seedling heat mat speeds up germination noticeably for warm-season crops like tomatoes and peppers.
Once seedlings have two sets of true leaves (not just the initial seed leaves), they're ready to move into their final container or to be thinned. Thinning is hard for beginners to do, but it matters: crowded seedlings compete for light and nutrients and usually produce less overall. Snip the weaker ones at the base rather than pulling them, which disturbs roots.
Transplanting nursery seedlings
When transplanting a nursery-bought plant into a larger pot, water it thoroughly an hour before you start. Fill your pot with damp (not soaking) potting mix to about 2/3 full. Pop the plant out of its nursery pot, gently loosen any circling roots with your fingers, and set it in the new pot so the top of the root ball sits about an inch below the pot rim. Fill in around it, firm gently, and water well. Tomatoes are an exception: you can bury them deeper, right up to the bottom set of leaves, and they'll grow extra roots along the buried stem.
Give transplants a few days in a shaded, sheltered spot before moving them to full sun. This 'hardening off' period reduces transplant shock and the wilting and leaf scorch that can follow.
Spacing in containers
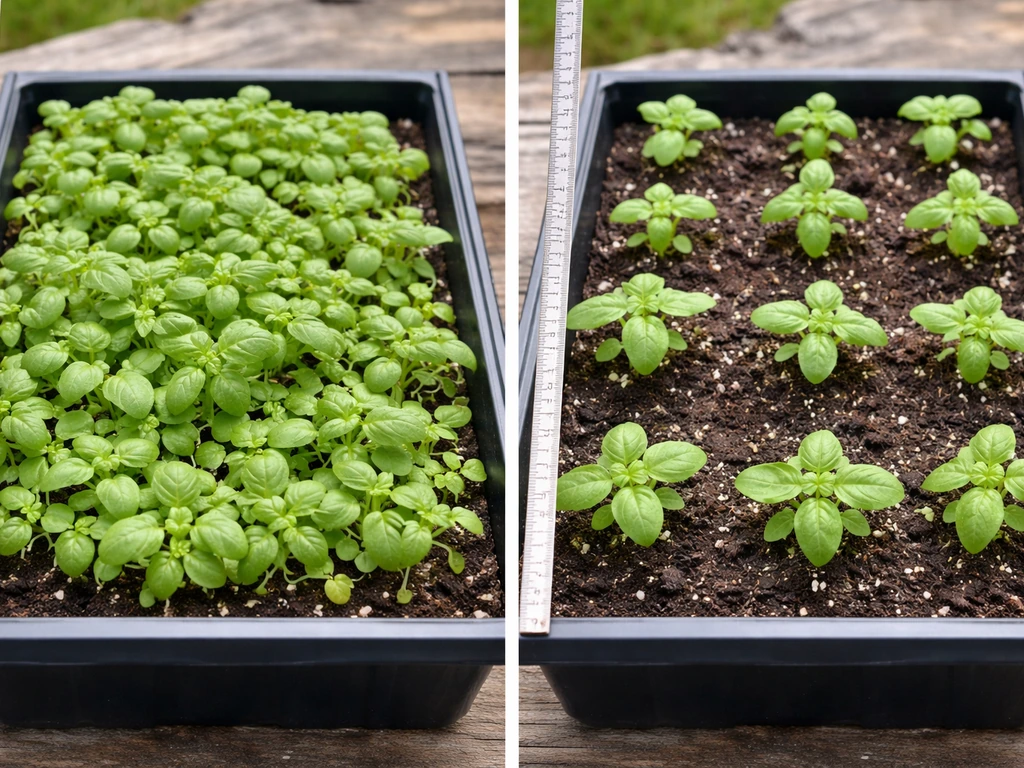
Overcrowding is the most common beginner mistake. One tomato plant per 5-gallon pot. One pepper per 12-inch pot. Three to four basil plants per 8-inch pot. One zucchini per 15-gallon container (and even then, it will need consistent feeding). Tight spacing feels wasteful early in the season but becomes a chaotic, pest-prone mess by midsummer.
Watering and light: the two things that make or break container plants
Containers dry out far faster than garden beds because the soil volume is small and pots are exposed on all sides. In summer, a small terracotta pot in full sun may need watering every day. A large fabric grow bag every two days. The only reliable way to know if a plant needs water is to check the soil: push your finger about an inch into the mix. If it feels dry at that depth, water. If it's still moist, wait. Don't go by schedule alone; go by feel.
When you water, water thoroughly. That means pouring until water runs freely from the drainage holes, not just moistening the surface. Shallow watering trains roots to stay near the top, which makes plants more vulnerable to drying out. Deep watering encourages roots to grow down through the whole pot, which produces stronger, more resilient plants.
A thin layer of organic mulch on the surface of your pots (straw, shredded leaves, coco coir) cuts evaporation significantly and is one of the best things you can do for a container garden in summer. Even 1/2 inch makes a difference. It also suppresses the surface algae and minor weeds that appear in outdoor pots.
For light, most fruiting plants (tomatoes, peppers, cucumbers, eggplant) need 6–8 hours of direct sun daily. Herbs generally need 4–6 hours. Leafy greens (lettuce, spinach, kale) can get by on 3–4 hours and actually do better in partial shade during hot months. If you're growing indoors, a south-facing window is your best bet, but most vegetables and herbs need a grow light to do well without direct outdoor sun. Full-spectrum LED grow lights positioned 6–12 inches above seedlings work well and run cheap on electricity.
Feeding your plants organically through the season
Organic feeding is slower and more forgiving than synthetic fertilizing. The goal isn't to force rapid growth with a hit of soluble salts; it's to build soil life that steadily releases nutrients to your plants. That said, containers are a closed system. The mix you start with will be largely depleted within 4–6 weeks, especially for heavy feeders like tomatoes and peppers. You need to replace those nutrients through the season.
A practical organic feeding schedule
- At planting: work in slow-release organic granules (kelp meal, bone meal, or a balanced organic granular blend like an OMRI Listed 4-4-4 or 5-5-5) into the mix.
- Weeks 2–4: start liquid feeding every 7–10 days with fish emulsion or liquid seaweed diluted to label rates. These give a quick, mild nutrient boost and support microbial life.
- Once plants are actively growing and flowering: switch to a slightly higher-phosphorus liquid feed (liquid bone meal, bloom-booster organics) to support flowering and fruiting. Every 10–14 days is enough.
- Mid-season top-dress: every 4–6 weeks, scrape aside the top inch of soil and add a 1/2-inch layer of worm castings or compost, then water in. This replenishes microbial life and slow-release nutrients.
- Late season: taper off feeding 4–6 weeks before your expected first frost (for outdoor containers) to let plants harden and finish naturally.
A word on compost tea: brewing aerated compost tea and applying it as a drench or foliar spray is a great organic practice for container plants. It inoculates the soil with beneficial bacteria and fungi. You don't need fancy equipment. A simple bucket, an aquarium air pump, a tablespoon of molasses (as a microbial food source), and a handful of finished compost brewed for 24–36 hours produces a good active batch. Apply within a few hours of finishing.
Watch your plants for signs of nutrient deficiency. Yellowing of older (lower) leaves usually means nitrogen is running low. Purple tinges on leaves often signal phosphorus deficiency. Yellowing between leaf veins on younger leaves can indicate iron or magnesium issues. These are fixable: a feeding of fish emulsion addresses nitrogen quickly, and a dilute solution of Epsom salt (magnesium sulfate, which is allowed in organic production) handles magnesium deficiency.
Keeping pests and diseases in check without chemicals
Prevention is easier than treatment in container gardening. Most pest and disease problems come from stressed plants, overcrowding, poor air circulation, or inconsistent watering. A plant growing in good organic soil, with enough light and water, is naturally more resistant. That said, problems still happen, and here's how to handle them organically.
Prevention habits that matter
- Inspect plants every few days, especially the undersides of leaves where pests hide and lay eggs
- Remove dead leaves and debris promptly; they harbor fungal spores and pests
- Space pots so air can circulate around them; crowded containers encourage fungal disease
- Water at the base, not overhead, to keep foliage dry and reduce fungal problems
- Rotate which crops you grow in the same containers each season to prevent disease buildup
Common pests and organic fixes
| Pest or Problem | Signs | Organic Solution |
|---|---|---|
| Aphids | Clusters of tiny soft insects on new growth, sticky residue | Strong spray of water to knock off; insecticidal soap spray; introduce ladybugs |
| Fungus gnats | Tiny flies around soil; larvae damage roots | Let soil dry more between waterings; yellow sticky traps; beneficial nematodes (Steinernema feltiae) as a soil drench |
| Spider mites | Fine webbing, stippled pale leaves | Insecticidal soap or neem oil spray; increase humidity; remove heavily infested leaves |
| Scale and mealybugs | Waxy bumps or white cottony masses on stems | Dab with isopropyl alcohol on a cotton swab; neem oil spray |
| Powdery mildew | White powdery coating on leaves | Improve air circulation; baking soda spray (1 tsp per quart of water with a drop of dish soap); remove affected leaves |
| Root rot | Wilting despite moist soil, brown mushy roots | Reduce watering immediately; repot into fresh dry mix; trim affected roots; improve drainage |
| Slugs and snails | Irregular holes in leaves, slime trails | Copper tape around pot rims as a barrier; diatomaceous earth on soil surface; evening trapping with a board |
Neem oil is one of the most useful organic tools in container gardening. It acts as a repellent, an insecticide for soft-bodied pests, and a mild fungicide all in one. Mix 1–2 teaspoons of cold-pressed neem oil with 1/2 teaspoon of liquid dish soap per quart of water and spray every 7–10 days as a preventive, or every 3–4 days when actively treating a problem. Apply in early morning or evening, never in direct midday sun, to avoid leaf scorch.
For beneficial insects, you don't need to release purchased bugs if you make your container area attractive to them naturally. Grow a few flowering herbs nearby: dill, fennel, marigolds, and sweet alyssum attract predatory wasps, lacewings, and hoverflies that eat pest insects. Even one pot of flowering herbs on a balcony helps. This is the integrated pest management (IPM) approach, and it's genuinely effective over a season.
Your starter plan: what to do this week and easy plants to begin with
If you're starting from scratch right now in late March 2026, you're in a great position for a spring planting. Here's a practical roadmap for your first week:
- Decide on your space: count how many pots you can fit and how much direct sunlight that spot gets daily. Be honest about this. Even 3–4 hours a day supports leafy greens and herbs.
- Buy or gather containers: a mix of 6-inch pots for herbs, one or two 5-gallon containers or fabric grow bags for peppers or bush tomatoes, and a window box for greens. Make sure every pot has drainage holes.
- Get your organic mix: buy a quality OMRI Listed potting mix, a small bag of worm castings, and a bag of perlite. Mix them 70/20/10 (mix/castings/perlite) as your base.
- Pick your plants: for March/early spring indoors, start basil, lettuce, and kale seeds now. For outdoor pots (once frost risk passes), plan for tomato seedlings, peppers, and herbs at your local nursery in 4–6 weeks.
- Get one organic liquid fertilizer: a bottle of fish emulsion or liquid seaweed covers you for the first full season. Start applying two weeks after planting.
- Set a watering reminder: check your pots every morning. Stick your finger in. Water when the top inch is dry. Adjust from there.
Best plants for your first organic container garden
Some plants just perform reliably in pots with organic management, especially for beginners. These are my top picks based on ease, reward, and how forgiving they are of imperfect conditions:
- Herbs: basil, mint (always in its own pot, it spreads aggressively), parsley, chives, and thyme are nearly foolproof in 6–8 inch pots with 4+ hours of sun
- Leafy greens: lettuce, spinach, and arugula thrive in shallow window boxes and tolerate partial shade; sow seeds directly and harvest outer leaves continuously
- Bush cherry tomatoes: varieties like Tumbling Tom or Tumbler are bred for containers and produce heavily in 5-gallon pots; very rewarding for beginners
- Peppers (sweet or hot): patient growers are rewarded; they're compact, manageable in 12-inch pots, and very responsive to organic feeding
- Strawberries: everbearing varieties in 8-inch pots or hanging baskets are productive, beautiful, and naturally pest-resistant
- Marigolds and nasturtiums: grow these alongside vegetables; they attract beneficial insects, repel some pests, and are edible too
What to monitor in your first month: look at the leaves every few days. Healthy organic container plants have deep green, firm leaves (adjusting for the plant type) and steady visible growth. Yellowing, spots, or stunted new growth are early signals that something is off, and the earlier you catch a problem, the easier it is to fix. Keep notes on what you planted, when you watered, and when you fed. It feels unnecessary but after one season it makes you a noticeably better container gardener for the next.
Growing organically in containers The soil biology you build up over a season creates a living growing system that gets easier, not harder, over time. If you already have some experience learning <a data-article-id="DC947453-2F58-4CC9-A6C8-71F2ADF0858B">how to grow money plant in pot</a> generally, adding the organic layer is mostly about swapping products and building a few new habits. Start small, get comfortable with the basics, and expand from there. One successful pot of basil or a tray of lettuce is all it takes to make this feel real.
FAQ
Can I use any “organic” potting mix and skip reading the label?
Yes, but check the ingredient list carefully. Even if the bag says “organic,” some mixes include synthetic wetting agents or extended-release nutrients. If you want full organic compliance, use a mix labeled OMRI Listed or certified for organic use and avoid anything mentioning time-release, enhanced, or synthetic NPK sources.
Should organic potted plants sit in a tray or saucer of water?
Use a saucer or tray only if you also control drainage. Empty standing water within 15 to 30 minutes after watering (especially in glazed pots) to prevent root stress and fungal issues. If your decorative pot has a sleeve, ensure the sleeve drains into the saucer, and that the sleeve itself is not sitting in pooled water.
What should I do if my container soil stays wet too long?
If the soil is staying wet beyond 2 to 3 days, your mix may be too dense or your pot may have insufficient drainage, regardless of the organic products. Replace the top layer, improve drainage holes, and consider switching to a lighter blend (more perlite or coco coir). Persistent sogginess often leads to root rot, which organic feeding cannot fix.
How do I know when to move a potted plant into a bigger container?
Start with the smallest realistic pot for that crop, then step up only when roots fill it. Signs it is time to repot include roots circling the inside edges, roots emerging from drainage holes, and faster-than-usual drying even with consistent watering. When you upsize, keep the root ball intact and avoid burying the crown of plants unless they are known to tolerate deep planting (tomatoes are an exception).
How often should I water organic potted plants if containers dry out fast?
Aim for “fully saturated, then drained,” but temperature and pot material change the timing. In hot weather, you may need to water more often, however you should still check the soil at about 1 inch deep each time. A better target than a schedule is soil moisture plus the plant’s posture, leaves should not wilt between waterings.
Can I mulch the pot surface, and will mulch cause problems?
Mulch helps, but do not bury the plant stem or cover the top of the root ball deeply. Keep mulch a small gap away from crowns to reduce stem rot risk and to keep airflow around the base. Also, if you see persistent algae, gently scrape the top inch and refresh mulch rather than adding more on top.
Is compost tea enough to keep container plants growing all season?
Yes, but treat compost tea as a soil inoculant, not a replacement for nutrient replenishment. Containers still need periodic feeding because the mix is a closed system. If you brew tea, apply it shortly after finishing and avoid using it as a daily foliar routine, which can encourage unwanted growth on leaves in humid conditions.
How do I use Epsom salt without overdoing it?
Epsom salt can help specific deficiencies, but it can also build up in containers if overused. If you suspect magnesium, use a dilute solution and reassess in 7 to 10 days. If you do not see improvement, the issue may be iron, pH-related nutrient lockout, or inconsistent watering, and repeating the treatment can waste product.
When should I prune or pinch herbs in a container garden?
For organic potted plants, pruning should focus on removing damaged leaves and managing airflow, rather than heavy “shape pruning” during heat waves. Once plants are established, basil and similar herbs often respond well to pinching tips, but avoid cutting back too drastically when the plant is stressed from underwatering or low light.
Do organic fertilizers cause salt buildup in containers, and how can I prevent it?
Because pots limit root expansion, salt buildup can happen even with organic nutrients if you use multiple concentrated products. If leaves look overly dark or growth stalls, flush the container occasionally by running clean water through until it drains freely, then let it drain fully. This reduces excess salts that can interfere with organic nutrient uptake.
Why are my indoor organic potted vegetables not producing well?
Indoor plants often need more consistent light than people expect. If you see tall, stretched growth or pale leaves, increase light intensity or duration before changing fertilizer. For fruiting crops, insufficient light is a common reason for weak flowering, even when soil nutrients are adequate.
What is the best organic approach when pests show up early?
Organic pest control works best when you act early. If you notice the first clusters or leaf stippling, start neem oil promptly and repeat on the schedule needed for your severity level. Also check undersides of leaves and new growth, because many pests hide there even when the top looks fine.
Can I keep organic potted plants through winter indoors, or should I start over?
Yes for many herbs and some vegetables, but complete winter harvest is less predictable because light levels drop. Consider moving containers closer to windows, using grow lights for at least 10 to 14 hours daily, and reducing watering frequency based on slower growth. For tender crops, cold drafts can cause damage even if the soil feels warm.