You can absolutely grow caladiums in pots, and they actually do really well in containers as long as you nail three things: warm soil, decent drainage, and the right amount of light. Plant the tubers about 2 inches deep with the knobby, eye-covered side facing up, use a well-draining potting mix, keep the soil consistently moist but never soggy, and give them bright indirect light or gentle morning sun. Do those things and you'll have those dramatic, colorful leaves all summer long.
How to Grow Caladiums in Pots: Step-by-Step Guide

Marcus Whitley
6 May 2026
Best pot type and container setup
Caladiums are surprisingly forgiving about pot material, but they are not forgiving about sitting in water. That one thing will kill your tubers faster than almost anything else. So before you pick a pretty container, make sure it has drainage holes in the bottom. That's non-negotiable.
For size, a single caladium tuber does fine in a pot that's at least 8 to 10 inches wide. If you want to plant multiple tubers together for a fuller look, go with a 12 to 14-inch pot and space the tubers 8 to 12 inches apart. Wider is always better than deeper for caladiums since most of their root activity happens in the top several inches of soil.
Terracotta pots are a great choice because they allow moisture to evaporate through the walls, which reduces the chance of staying too wet. Plastic pots retain moisture longer, which can work if you're in a hot, dry climate but can cause rot problems in cooler or humid conditions. Whatever you use, if you're going with a decorative outer pot (sometimes called a cache pot or liner system), never let water pool in that outer container. If you water and see water collecting in the bottom of the outer pot, pull the inner pot out and dump that water. Roots sitting in pooled water even for a day or two can start rotting.
One common mistake people make: adding a layer of gravel at the bottom of the pot thinking it improves drainage. It doesn't. Research from University of Illinois Extension is clear that a gravel layer doesn't create better drainage and can actually make things worse by raising the water table inside the pot. Just use a pot with holes and a good mix, and you're set.
Soil mix and drainage for caladium tubers in pots
Caladiums need a mix that holds some moisture without staying soggy. A standard all-purpose potting mix is a fine starting point, but I always cut it with perlite to improve drainage. A ratio of about 70% potting mix to 30% perlite works well. If your climate is very dry or you're keeping the pot on a hot sunny balcony, you can dial back the perlite a little to retain more moisture.
Avoid garden soil straight from the ground. Illinois Extension advises against using garden soil in houseplant containers and recommends sterile potting mixes with good drainage Avoid garden soil straight from the ground.. It compacts in containers, drains poorly, and can introduce pests or disease. Also skip heavy, peat-dominant mixes without amendment, since those can stay wet for too long after watering and create exactly the cold, wet environment that rots tubers.
If you want a slightly richer setup, adding a small amount of compost to your mix is fine, but keep drainage as the priority. The goal is a mix that feels evenly moist after watering but not muddy, and that drains freely out the bottom within a minute or two of watering.
Bulb selection and planting depth: when and how to plant
Choosing healthy tubers
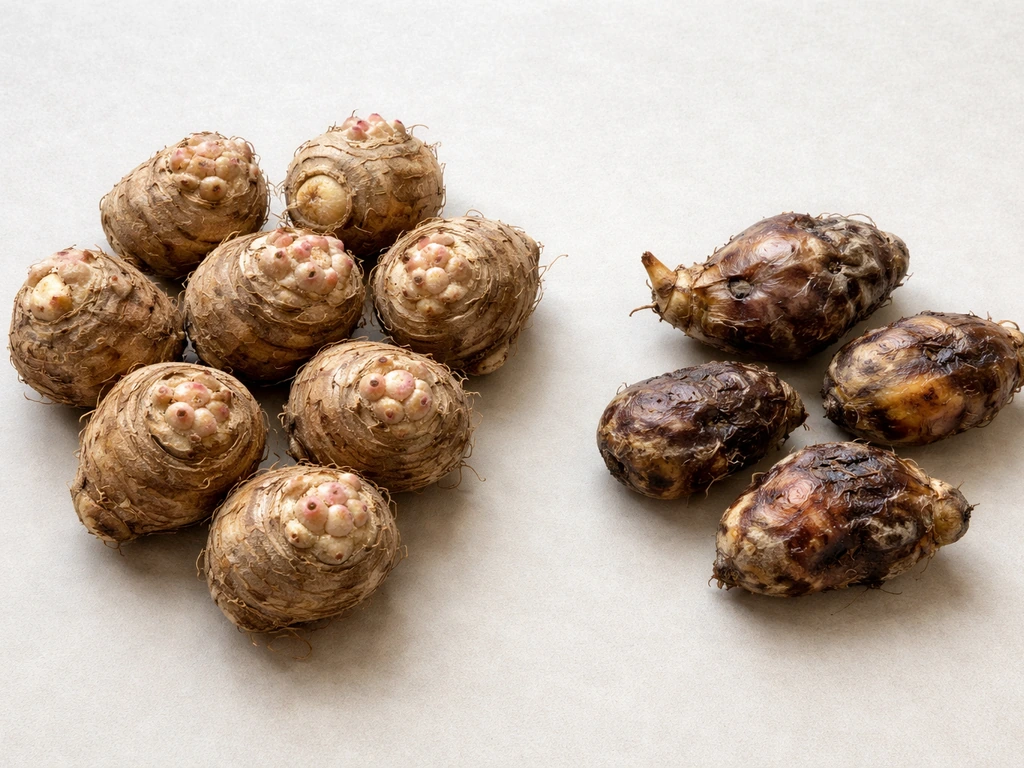
When buying caladium tubers, look for ones that feel firm and have visible bumpy growth points (called eyes) on the top surface. Soft, mushy, or shriveled tubers are already compromised. Bigger tubers generally mean more eyes and a fuller, leafier plant. If you're buying online or at a garden center in early spring, this is exactly the right time to be doing it since May is prime planting season in most of the US.
Timing: soil temperature matters more than the calendar
The single most important timing rule for caladiums is soil temperature. Don't plant until your potting mix is blank" rel="noopener noreferrer">at least 70°F. Cold soil is the number-one reason tubers sit there doing nothing for weeks and then rot. If you're starting indoors in a cooler room, the mix might be well below that even in spring. A cheap soil thermometer (a few dollars at any garden center) is worth having. If you're in the Midwest or a region with cold springs, start tubers indoors 4 to 6 weeks before your last frost date so they can get going in warmth before moving outside.
How to plant the tubers
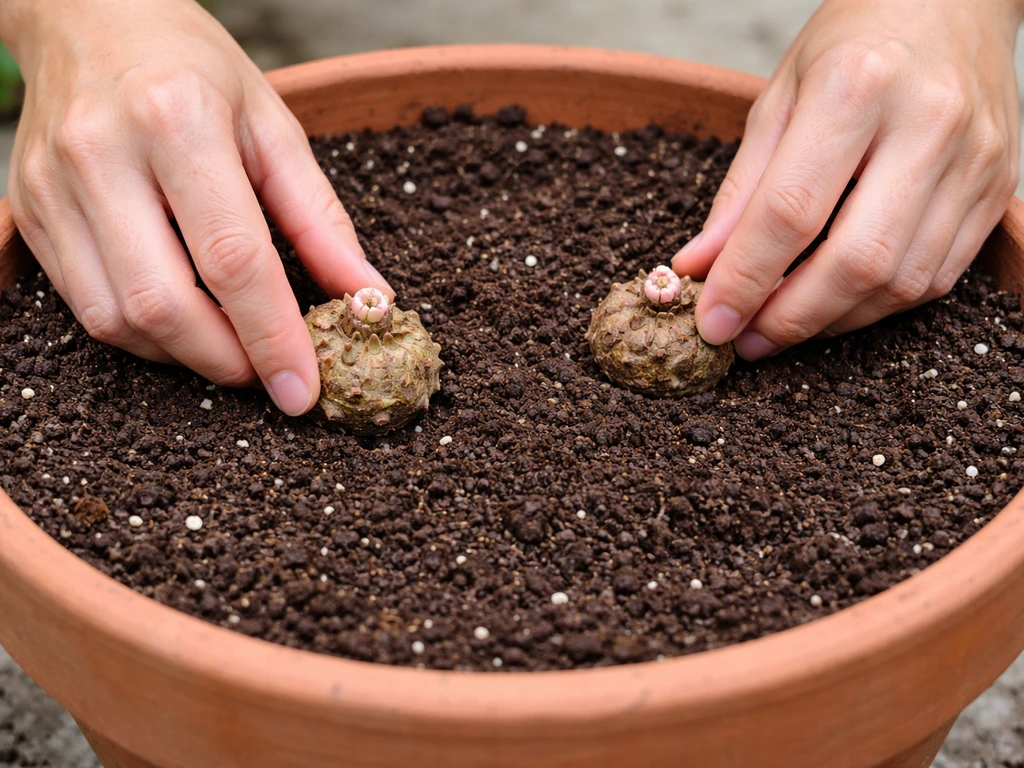
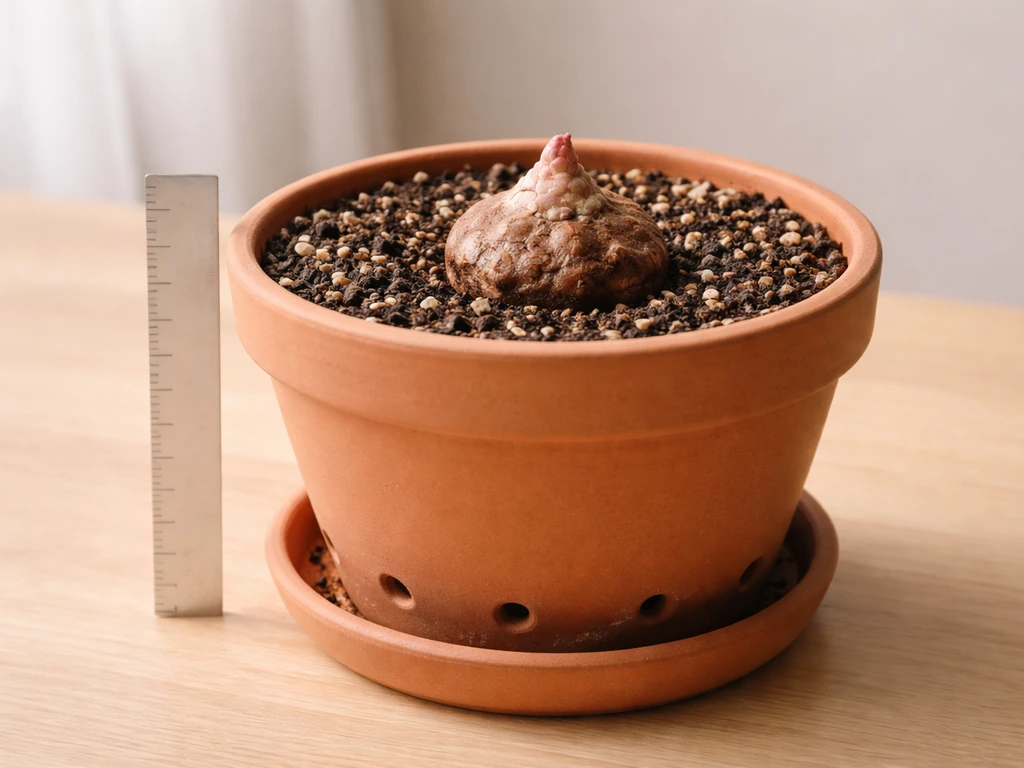
- Fill your pot about two-thirds full with your prepared potting mix.
- Place the tuber knobby/eye side facing up. If you can't tell which side is which, the slightly flatter or smoother side usually goes down.
- Cover the tuber with about 1 to 2 inches of potting mix. When starting indoors to avoid cold, wet media, you can go shallower — barely covering the tuber — and add more mix as it sprouts.
- Water gently so the soil is moist but not soaking wet.
- Place the pot somewhere warm (ideally 70°F or above) and be patient. Sprouting can take 2 to 4 weeks depending on temperature.
If you're planting multiple tubers in one pot, space them 8 to 12 inches apart from center to center. It feels like a lot of space when the pot looks empty, but caladiums need room to spread their leaves without crowding.
Light, temperature, and humidity for vivid leaves
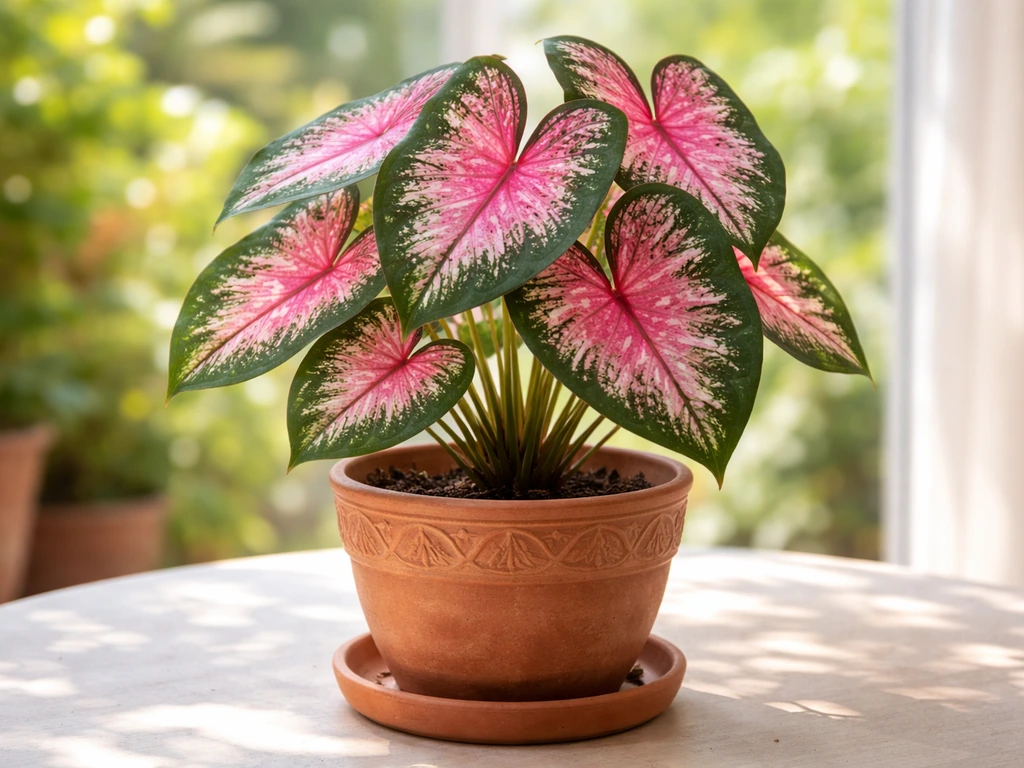
Caladiums are grown for their leaves, and getting the light right is what makes those leaves pop. Too much direct sun and the leaves bleach out, scorch, or develop brown crispy edges. Too little light and they get leggy and the colors look dull and washed out. The sweet spot is bright indirect light or 2 to 4 hours of gentle morning sun followed by afternoon shade. A north or east-facing balcony or porch is ideal. South or west-facing spots often get too intense in summer, especially afternoon sun.
Indoors, a spot near a bright window (but not in a beam of direct sun) works well. Some newer sun-tolerant caladium varieties can handle more direct light, but classic varieties like 'Candidum' or 'Red Flash' really prefer shade protection in the afternoon. If your leaves are developing brown edges or look bleached, move the pot to a shadier spot right away.
Temperature is just as important. Caladiums are tropical plants that want warmth. Keep them above 60°F at all times, and ideally above 65°F. Anything below 50°F will stress the plant and can damage or kill the tuber. If you're keeping your pot outdoors, bring it in before nighttime temperatures drop into the low 60s in fall.
High humidity helps caladiums look their best. If you're growing them indoors, especially in air-conditioned rooms, the air can get very dry. Grouping plants together, placing the pot on a tray of pebbles with water (just make sure the pot bottom isn't sitting IN the water), or running a small humidifier nearby all help. You can also keep soil temperature from climbing too high in outdoor containers by sitting the pot in a shaded spot during the hottest part of the day. Research suggests keeping soil below 85°F to protect leaf color, so mulching the top of the pot with a thin layer of bark mulch can help moderate temperature swings.
Watering and fertilizing throughout the growth cycle
Watering
During active growth (roughly late spring through early fall), keep the soil evenly moist. If you want the best results when growing callaloo in pots, focus on warm conditions, consistent moisture, and containers with excellent drainage. Stick your finger about an inch into the soil, if it feels dry at that depth, water thoroughly until water runs freely from the drainage holes. If you’re also exploring other easy container plants, learn how to grow portulaca in pots for another heat-loving option. In hot weather, a pot can dry out every couple of days. In cooler or cloudier conditions, once a week might be enough. The goal is to avoid two extremes: bone-dry soil (which stresses the plant and causes leaf wilt and browning) and constantly soggy soil (which rots the tuber). Calibrachoa is also a great container plant, and learning its pot watering and sun needs will help you avoid common bloom and wilt problems how to grow calibrachoa in pots.
One practical habit that helps: water in the morning so the soil surface can dry out a little by evening. Caladiums aren't fans of consistently wet crowns (the top of the tuber) overnight, especially in cooler weather.
Fertilizing
Caladiums are moderate feeders. There are two easy approaches: mix a balanced slow-release granular fertilizer into your potting mix at planting time, or apply a diluted balanced liquid fertilizer (something like 10-10-10 or 20-20-20) once a month during active growth. If you're using a slow-release fertilizer at planting, you can top it up with a liquid feed once a month starting around 4 to 6 weeks after planting, especially if the plant is in a pot that gets watered frequently (since nutrients flush out faster in containers than in the ground). Don't overfeed, too much nitrogen can push leafy growth at the expense of color intensity.
One more thing worth doing mid-season: if your plant develops flower spikes (they look like small, plain greenish spathes, similar to a tiny peace lily), pinch or cut them off. Flower development pulls energy away from the foliage, and the leaves are the whole point with caladiums.
Dormancy care: what to do when leaves die back
As days shorten and temperatures cool in late summer and fall, caladium leaves will naturally start to yellow and die back. This is completely normal and not a sign that you've done something wrong. The plant is going dormant, pulling energy back into the tuber to survive the winter.
When leaves start yellowing and flopping, reduce watering significantly. Once most of the foliage has died back, you have two options: lift and store the tubers, or leave them in the pot and store the whole pot in a warm, dry spot.
Lifting and storing tubers
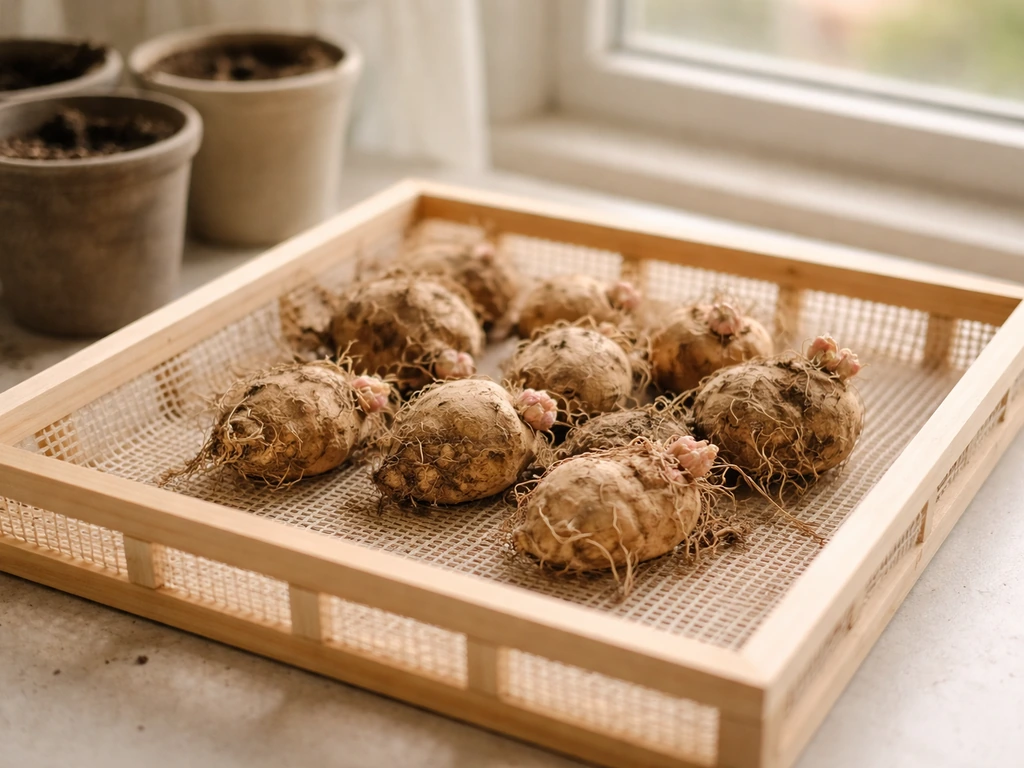
- Gently dig or tip the tubers out of the pot after foliage has died back.
- Brush off most of the soil (don't wash them — moisture encourages rot).
- Let the tubers air dry in a warm, shady spot for about a week.
- Store them in dry sphagnum moss, perlite, or vermiculite in a breathable container like a paper bag or mesh bag.
- Keep them somewhere that stays between 55°F and 60°F — a cool room, basement shelf, or garage (as long as it doesn't freeze) works well.
- Check on them every few weeks and discard any that feel mushy or smell bad.
Stored this way, tubers can last up to 5 months. In spring, when soil temperatures are back above 70°F, pull them out, inspect them, and replant following the same steps above. Resume regular watering once you see new growth emerging.
Troubleshooting common container problems
| Problem | Likely Cause | What to Do |
|---|---|---|
| Tuber rot / mushy tuber | Cold, wet soil; poor drainage; overwatering | Check drainage holes aren't blocked; reduce watering; ensure soil temp is above 70°F; discard badly rotted tubers |
| No growth after planting | Soil too cold; tuber planted upside down; tuber already rotted | Check soil temp with thermometer; make sure eyes are facing up; dig and inspect tuber |
| Pale or washed-out leaf color | Too much direct sun; underfeeding | Move to a spot with afternoon shade; apply balanced liquid fertilizer monthly |
| Scorched brown leaf edges | Too much intense sun; low humidity; heat stress | Move to shadier location; increase humidity; check if soil is drying out too fast |
| Leggy stems, small leaves | Not enough light | Move to a brighter spot with indirect light or gentle morning sun |
| Yellowing leaves (during active growth) | Overwatering, underwatering, or nutrient deficiency | Check soil moisture balance; fertilize if you haven't recently; ensure drainage is working |
| Pests (spider mites, aphids, mealybugs) | Low humidity indoors; stressed plant | Wipe leaves with damp cloth; apply neem oil spray; increase humidity; isolate from other plants |
Spider mites are the most common indoor pest problem for caladiums, especially when air is dry. You'll notice fine webbing on the undersides of leaves and a stippled, dusty look to the leaf surface. A simple neem oil spray (mix per label instructions) applied every 7 to 10 days for a few rounds usually handles it. Keeping humidity up in the first place is the best prevention.
One thing that trips up a lot of beginners: confusing normal dormancy yellowing in fall with a problem. If it's late August or September, temperatures are cooling, and the leaves start to yellow and droop even though you're watering normally, that's just the plant doing its seasonal thing. Reduce water, let it die back gracefully, and focus on good tuber storage so it comes back strong next year. If you want to try a fall-blooming container plant instead, learn how to grow chrysanthemums in pots for reliable color in cooler weather.
Quick-reference checklist for success
- Use a pot with real drainage holes — at least 8 to 10 inches wide for a single tuber
- Mix potting soil with 30% perlite for drainage; skip the gravel layer
- Plant with eyes facing up, 1 to 2 inches deep, only when soil is at or above 70°F
- Start indoors 4 to 6 weeks before last frost if you're in a cooler climate
- Give bright indirect light or 2 to 4 hours of gentle morning sun; protect from afternoon sun
- Keep temperatures above 60°F at all times; never let the pot freeze
- Water when the top inch of soil feels dry; aim for evenly moist, never soggy
- Fertilize with slow-release at planting or liquid fertilizer monthly during growth
- Pinch off flower spikes to redirect energy into the leaves
- When leaves die back in fall, reduce watering and store tubers dry at 55 to 60°F
Caladiums are genuinely one of the most rewarding container plants you can grow if you like bold, colorful foliage without needing full sun. Once you get the warmth and drainage piece right, they're actually pretty low-maintenance. If you're also wondering how to grow dipladenia in pots, the key is choosing the right container size and keeping the watering on schedule for healthy blooms. If you're already growing other foliage plants in containers, caladiums pair beautifully with coleus (which shares similar light and moisture preferences) or make a striking contrast alongside colocasia, which is a related tropical aroid with an equally dramatic look but much larger leaves. If you want a similar dramatic, tropical look, you can also learn how to grow colocasia in pots and match its needs for water, light, and warmth. If you want to add something fast-growing and bright to your container, this is a great companion to coleus, and you can use similar potting and light basics.
FAQ
Can I start caladiums early indoors and move them outside later?
Yes, but only in a narrow window. Put the tubers in as soon as your potting mix is at least 70°F, and keep the pot warm until shoots appear. If you move a warm, newly planted pot into a cold spot (below about 60°F), the tubers often stall, and the risk of rot rises because the mix stays wet longer.
How do I tell normal dormancy from rot in my potted caladium?
When you see leaf yellowing, pause and check the tuber support situation. If the pot stays lightly moist and only the foliage declines, it is probably normal dormancy. If the mix smells sour, stays wet for days, or tubers feel soft when you lift one, the issue is usually overwatering or poor drainage.
What’s the best watering method if I’m not sure whether the soil is dry?
Generally, avoid letting caladiums dry out completely, especially once leaves are up. A practical rule is to water only after the top inch begins to dry, then water thoroughly until excess drains out. If you routinely miss that timing, switch to more perlite or check if your pot size is too large for the number of tubers.
When should I stop watering caladiums in pots for dormancy?
Don’t cut back watering too early if you still have active green growth. Reduce watering only when most leaves begin to yellow and flop, and keep the mix on the drier side while the plant is dying back. For long-term storage in the pot, keep it in a warm, dry place to prevent tubers from softening.
Can I grow caladiums from tubers instead of buying fully sprouted plants?
Yes, you can. The key is that caladium tubers store energy in the living eye area, so planting too deep slows warming and reduces vigor. A common depth target for containers is about 2 inches, with the eye side facing up, then keep soil warm and evenly moist until sprouting.
Why does my caladium look healthy at first, then start failing in the middle of the season?
Choose a pot size based on how many tubers you planted, because overly large pots stay wet longer. For multiple tubers, keep spacing consistent, about 8 to 12 inches apart, and avoid crowding. If your pot is much wider than needed, consider using fewer tubers so the mix dries at a reasonable pace.
Should I fertilize caladiums by foliar spraying, or is root feeding enough?
Foliar fertilizer can work, but it is not necessary, and it can increase salt buildup if you overdo it. For containers, stick to the approach in the article, slow-release at planting or a diluted balanced liquid once a month during active growth, then stop feeding as dormancy starts.
What should I do if the leaves develop brown edges or look bleached?
If you see crispy edges or bleached patches, adjust light first. Move to bright indirect light or morning sun with afternoon shade, and check that the pot is not sitting in intense reflected heat (like near a hot wall). If symptoms continue despite better light, then reassess watering and make sure the soil is not staying waterlogged.
My caladium leaves are yellowing late in the season, should I water more to keep them green?
Expect it in fall, but plan ahead for the storage transition. If leaves are yellowing naturally as temperatures cool, reduce watering and let the plant finish dying back. If you leave tubers in a pot, avoid watering “just in case,” and store the pot in a warm, dry spot to prevent rot.
Can I repot a caladium during the growing season?
Repotting is usually best during dormancy or when you replant in spring, not mid-season. If you must move it, do it carefully and keep roots and tubers minimally disturbed, then maintain warm conditions. Mid-season disruption often causes a temporary slowdown and can stress the tuber if the new mix stays cool and wet.