You can absolutely grow gerbera daisies in pots, and they genuinely thrive in containers when you get a few key things right: good drainage, the right planting depth, enough direct sun, and a regular feeding routine. Get those basics sorted and you'll have bold, cheerful blooms from late spring right through autumn.
How to Grow Gerbera Daisy in Pots: A Step-by-Step Guide

Marcus Whitley
28 Apr 2026

Picking the right pot, spot, and gerbera variety
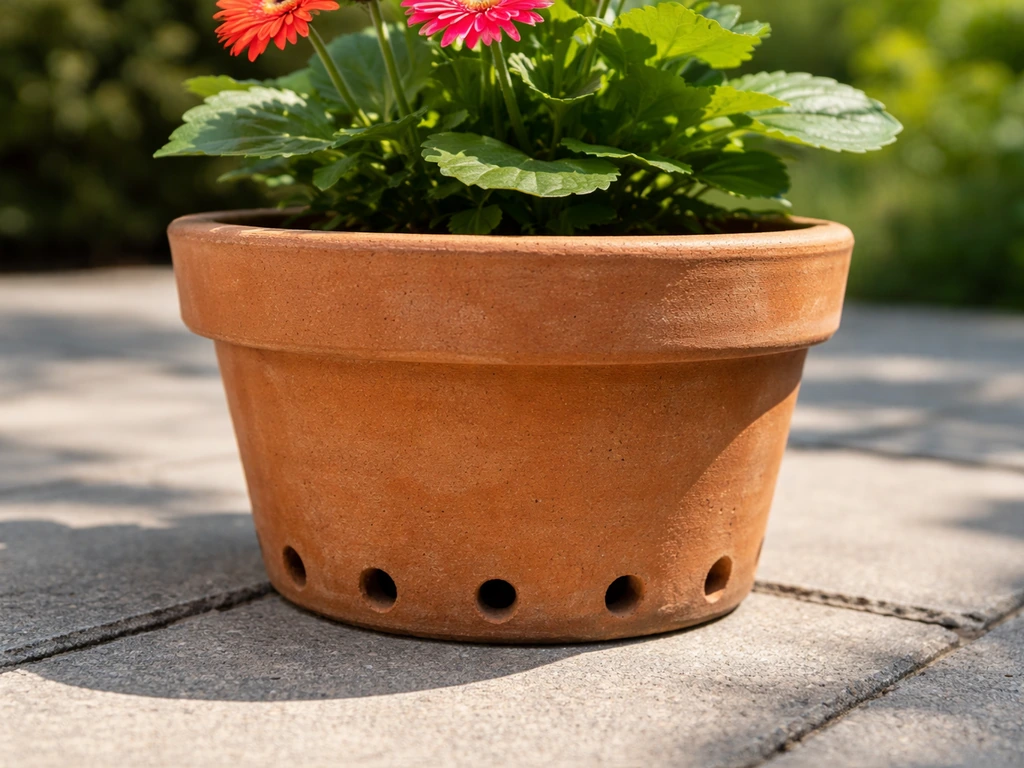
Start with a pot that has generous drainage holes, not just one small hole in the center, but several. Gerberas are extremely sensitive to soggy conditions around their crown (the point where the stem meets the roots), and a pot that holds water even briefly puts you on a fast track to crown rot. In terms of size, go for a pot at least 30 cm (12 inches) in diameter for a single plant. That gives roots room to breathe and the soil volume helps buffer moisture swings. Terracotta is genuinely my favorite material for gerberas because it's porous and dries out a bit faster than plastic, which suits these plants well. If you're in a very hot, dry climate, plastic or glazed ceramic holds moisture longer and can work in your favor.
For location, gerberas need around 4 to 6 hours of direct sun a day to flower reliably. Morning sun with some afternoon shade is the sweet spot, especially in warmer months, full afternoon sun in summer can scorch the leaves and stress the plant into stopping bloom. A south- or east-facing balcony, patio, or windowsill usually works well. If you're growing indoors, place the pot in your brightest spot and supplement with a grow light if needed.
As for variety, compact or dwarf types bred specifically for pot culture are your best friends here. Look for series like 'Revolution', 'Garvinea Sweet', or 'Gel' series gerberas, these stay manageable in containers and tend to be heavier bloomers than the larger landscape types. Standard gerberas work too, but the compact varieties are just better suited to life in a pot and are widely available at garden centers in spring.
The soil mix and drainage setup that actually works
Never use straight garden soil in a gerbera pot. Garden soil compacts in containers, holds too much moisture, and usually sits at the wrong pH. Instead, use a high-quality, well-draining potting mix as your base. I like to mix roughly three parts perlite-amended potting mix with one part coarse perlite or pumice to open up the structure. Gerberas want slightly acidic conditions, aim for a soil pH of around 5. A gerbera cultivation manual recommends keeping soil pH for successful gerbera growing blank" rel="noopener noreferrer">between roughly 5.5 and 6.5 blank" rel="noopener noreferrer">aim for a soil pH of around 5. 5 to 6.2. Most quality potting mixes fall right in this range, but if you're using a mix that feels very alkaline or if your tap water is hard, a little acidic fertilizer or a small dose of sulfur can help dial it in.
At the bottom of your pot, skip the layer of gravel (it actually creates a perched water table and makes drainage worse, not better). Just fill with your amended potting mix and make sure the drainage holes are clear. I sometimes put a piece of mesh or a broken pot shard over the holes to stop soil washing out without blocking water flow.
Starting from seeds vs. nursery plants, and when to plant
If you want fast results, buy nursery transplants. They're widely available in spring, already in bud or bloom, and you can have a flowering pot within a week of buying them. This is honestly the easiest path and what I'd recommend to beginners. Pick a plant with lots of buds rather than already-open flowers, it'll settle into your pot and keep performing for longer.
Growing from seed is satisfying but slow. Gerbera seeds need light to germinate, so don't cover them with soil, press them gently onto the surface of moist seed-starting mix with the pointed end down. Keep them in a warm, bright spot. Expect seedlings to emerge in 14 to 28 days. For best results indoors, give seedlings around 16 hours of light per day under fluorescent or LED grow lights. From sowing to a size ready for transplanting takes roughly 25 to 30 days, and from transplant to first flowers you're looking at 14 to 20 weeks. Yes, that's a long time, which is why most home gardeners start with nursery plants.
When you plant, pay close attention to depth. The crown, where the leaves emerge from, must sit at or just slightly above the soil surface. Burying it even a centimeter or two too deep is one of the most common reasons gerberas fail in pots. It suffocates the crown and invites rot. Plant a little high, not a little deep, every time.
Timing-wise, plant outdoors after your last frost date when nights are consistently above about 10°C (50°F). In most temperate climates that means mid to late spring. If a cold snap is coming and temperatures are dropping into the low 40s°F (around 4°C), bring the pot inside or under cover until it passes.
Watering: the one thing that trips everyone up
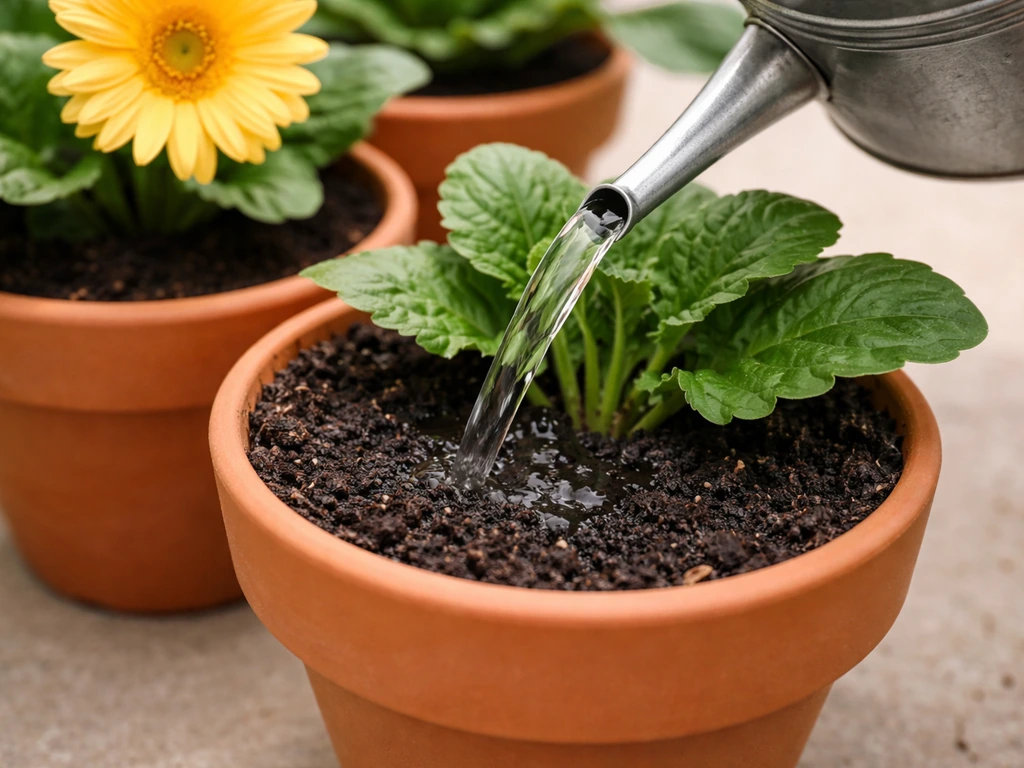
Watering gerberas in pots requires a bit of attention because they hate both extremes, waterlogged soil and completely dried-out soil. If you want to try another container-friendly crop with similar “right moisture and drainage” thinking, see how to grow pickles in a pot. If you want specific watering strategies for your setup, check out how to grow bromeliads in pots and match the light and moisture they need. If you want a deeper guide specifically for gazanias, see how to grow gazania in pots for pot setup, sun needs, and watering tips. The method that works best for me is the finger test: push your finger about 2 cm (an inch) into the soil. If it feels dry at that depth, water thoroughly until it runs freely out of the drainage holes. If it still feels damp, wait another day and test again. In summer, that might mean watering every day or two. In cooler weather or if the pot is in partial shade, you might only water every 3 to 4 days.
When you water, aim at the base of the plant and keep water off the leaves and crown as much as possible. Wet foliage and a wet crown sitting overnight are a setup for fungal problems. Morning watering is ideal, any splash on the leaves dries off during the day. Avoid letting the pot sit in a saucer of standing water. If you use saucers, empty them after watering.
Feeding your gerberas to keep them blooming
Gerberas in pots are heavy feeders and the nutrients in potting mix wash out fast, especially with regular watering. Once your plant is established and actively growing (usually 2 to 3 weeks after planting), start feeding every 2 weeks with a balanced liquid fertilizer. A formula higher in phosphorus and potassium relative to nitrogen works well for encouraging flowers, something like a 10-20-20 or a dedicated bloom fertilizer. Too much nitrogen gives you lush green leaves but fewer flowers.
One thing worth knowing: gerberas are sensitive to salt buildup in the soil. If you're feeding regularly, flush the pot with plain water once a month by watering deeply until a lot of water runs out the bottom. This prevents fertilizer salts from accumulating to levels that damage roots. Commercial growers target substrate electrical conductivity (a measure of dissolved salts) below 1.5 mmhos/cm, in practical terms for home gardeners, that just means don't over-fertilize and do flush the pot occasionally. If you ever notice leaf tip burn or the plant looking stressed despite normal watering, salt buildup is often the culprit.
Light, temperature, and airflow, getting the environment right
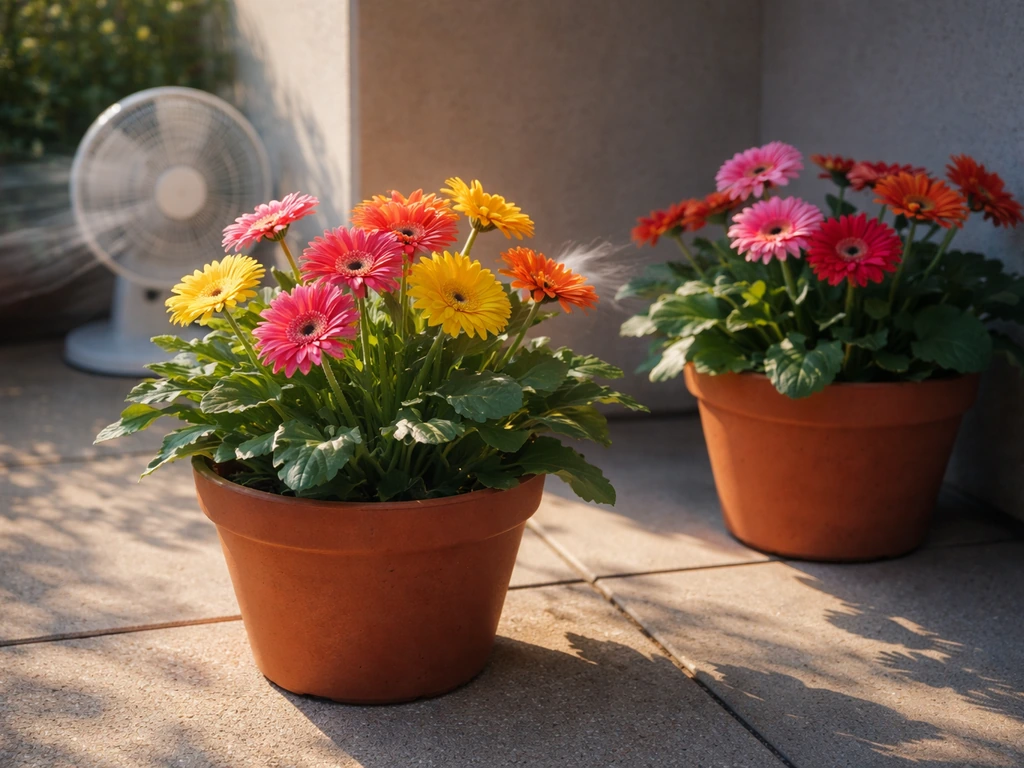
Gerberas bloom best when they get that 4 to 6 hours of direct sun and when temperatures follow a warm-days, cool-nights pattern. Ideal conditions are roughly 22 to 25°C (72 to 77°F) during the day and 12 to 16°C (54 to 61°F) at night. Those cool nights are genuinely important for flower quality and bud set, if nights stay too warm (above about 20°C/68°F consistently), flowering slows down. This is why gerberas often take a pause in the peak of a hot summer and bounce back vigorously in early autumn when nights cool off again.
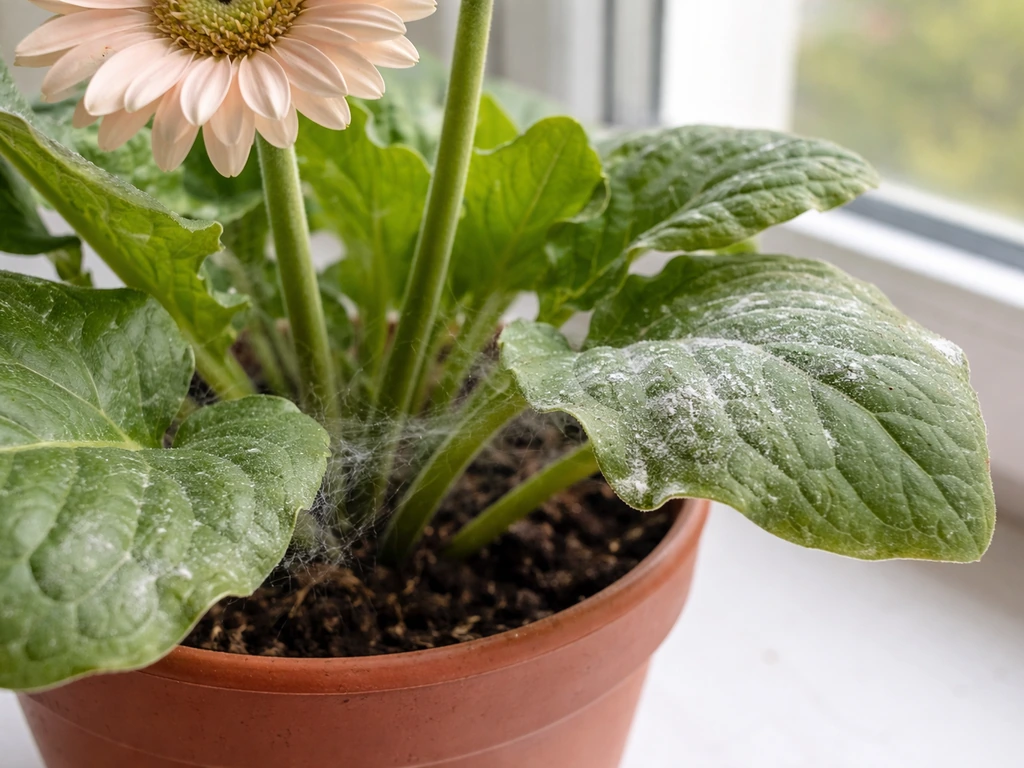
Airflow is one of the most underrated factors in container gerbera care. Good air movement around the foliage reduces the risk of powdery mildew, which is a very common problem on gerberas. Powdery mildew doesn't even need wet leaves to take hold, it spreads in still, humid air. If your pot is tucked into a sheltered corner with no breeze, consider moving it to a more open spot or using a small fan if you're growing indoors. Don't crowd gerbera pots together with other plants to the point where air can't circulate around the leaves.
Ongoing care: deadheading, repotting, and keeping pests in check
Deadheading and managing spent blooms
Deadheading, removing spent flowers, is essential if you want continuous blooms. When a flower fades, trace the stem all the way down to the base of the plant and snap or cut it off there. Don't just remove the flower head and leave a stub; the stem needs to go completely or it sits there and rots. Do this every few days during the growing season and you'll trigger the plant to keep producing new buds. Letting spent flowers go to seed signals the plant to slow down.
Repotting and refreshing the soil
Gerberas in pots benefit from repotting every one to two years, or whenever you notice the plant looking cramped, roots circling the drainage holes, or flowering dropping off despite good care. Spring is the best time to repot, move up one pot size (don't jump to a dramatically larger pot, which holds too much excess moisture). Refresh all the potting mix rather than just topping up, since old mix can become compacted and depleted over time.
Pests and diseases to watch for
The most common problems you'll run into with potted gerberas fall into two categories: pests and fungal issues. On the pest side, keep an eye out for spider mites (look for fine webbing and stippled, silvery leaves, especially in hot dry weather), aphids (clustered on new growth and buds), whiteflies, thrips, and leaf miners. Catching them early makes a big difference. A strong spray of water knocks back mites and aphids. For persistent infestations, insecticidal soap or neem oil spray works well for most soft-bodied pests, just apply in the evening to avoid leaf burn.
For disease, powdery mildew (a white powdery coating on leaves) and root/crown rot are the two biggest threats. Powdery mildew is managed with good airflow and spacing, once you see it, a dilute baking soda spray or potassium bicarbonate fungicide can help slow it. Root rot (often caused by Pythium) and crown rot (often linked to Phytophthora) are both directly tied to overwatering and poor drainage. If a plant collapses suddenly and the base looks brown and mushy, unfortunately that plant is usually beyond saving, but the lesson is to adjust your watering and drainage setup before planting the next one.
Your quick-start checklist
- Choose a pot at least 30 cm (12 inches) wide with multiple drainage holes — terracotta is ideal.
- Fill with a well-draining potting mix amended with extra perlite; target pH 5.5 to 6.2.
- Plant so the crown sits at or just above the soil surface — never bury it.
- Place in a spot with 4 to 6 hours of direct sun, ideally morning sun with afternoon shade.
- Water when the top 2 cm of soil is dry; water at the base, not over the leaves.
- Feed every 2 weeks with a bloom-focused liquid fertilizer once the plant is established.
- Flush the pot with plain water monthly to prevent fertilizer salt buildup.
- Deadhead spent flower stems completely, all the way to the base.
- Ensure good airflow around the pot to prevent powdery mildew.
- Repot every 1 to 2 years in spring with fresh potting mix.
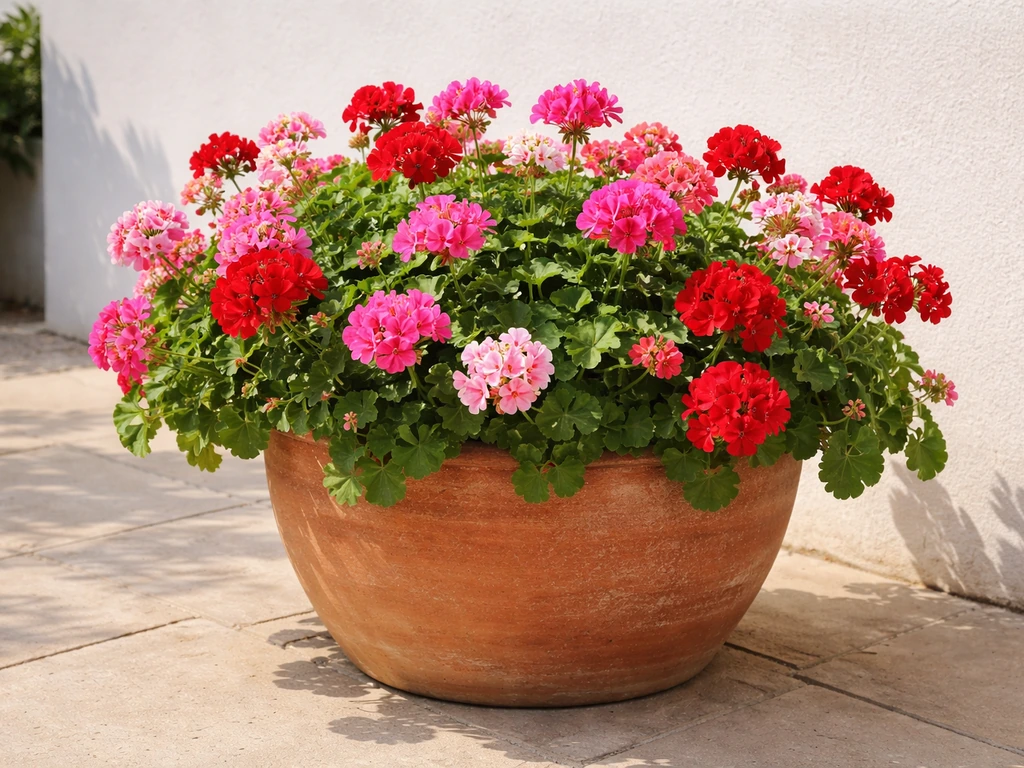
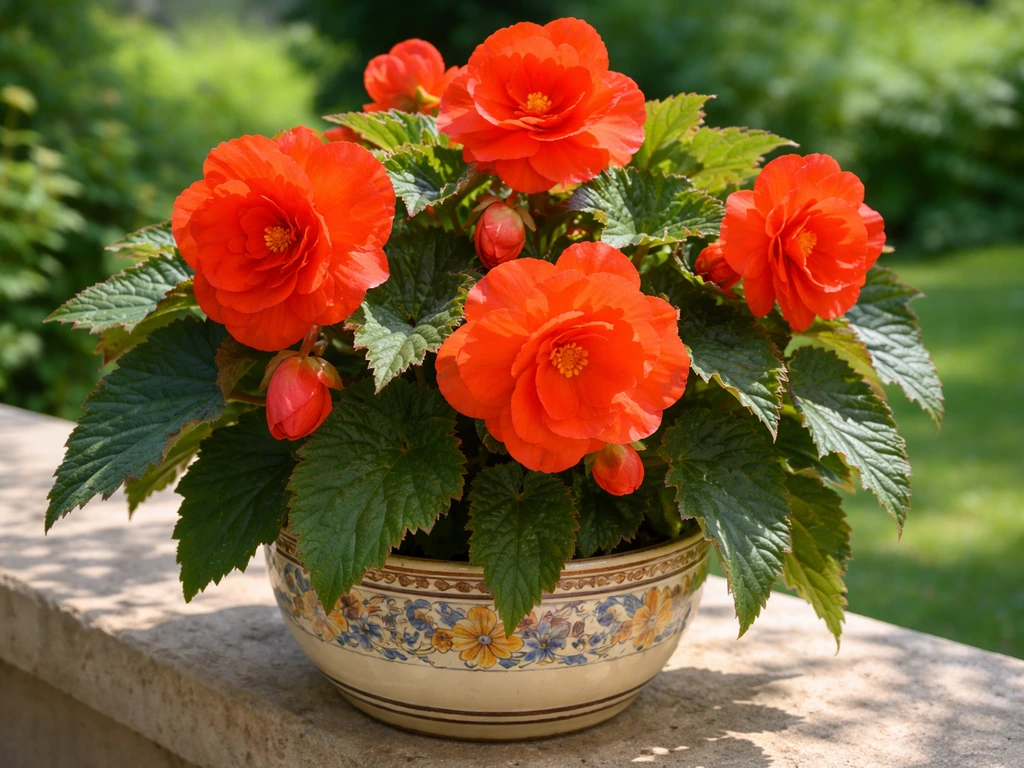
If you enjoy growing flowering plants in containers, the care principles here overlap quite a bit with other popular pot flowers. Geraniums in pots share that same love of good drainage and regular feeding, and begonias in pots similarly demand attention to crown depth and moisture control. If you’re also growing geraniums in pots, the same focus on drainage and consistent feeding will help you avoid common setbacks. Getting gerberas right gives you a real feel for what most flowering container plants need, and from there, it just gets easier.
FAQ
Can I grow a gerbera daisy in a pot indoors year-round?
Yes, but pick a compact pot gerbera, use a full-spectrum grow light that provides real intensity at the leaf level (not just “on”), and keep the crown dry. Rotate the pot weekly so one side does not lean toward the light, and expect more frequent feeding because indoor conditions can reduce drying between waterings.
What should I do if I planted my gerbera too deep in the pot?
If you find the crown is too deep after planting, you can sometimes correct it by carefully lifting the plant, loosening the root ball, and replanting so the crown sits at or just above the soil surface. Do this in spring, keep the root ball intact, and avoid disturbing it during hot weather because it can restart growth slowly.
Does my water quality matter for potted gerberas?
Use tap water if your salts are not building up. If you have hard water or you notice leaf tip burn or crusty residue on the soil surface, switch to filtered or rainwater and increase the monthly flushing. For best results, flush by watering deeply until runoff is substantial.
How can I tell whether I am overwatering or underwatering my gerbera pot?
Signs of underwatering include drooping that rebounds after watering, dry edges, and soil pulling away from the pot sides. Overwatering usually looks like persistent wilting, yellowing, and a plant that declines even after a day or two dries. The fastest check is the finger test at about 2 cm, then adjust watering frequency and confirm drainage holes are clear.
Is it okay to let a potted gerbera sit in a saucer of water?
Saucers should be used carefully, because gerberas do not tolerate sitting in water. If you must use one, empty it every time after watering, and avoid watering at dusk when evaporation is slow. For patios, consider pot feet or raising the pot slightly so runoff can drain away.
How do I adjust feeding if my gerbera has lots of leaves but not many flowers?
Fertilize after the plant is actively pushing new growth, not right after potting up or after you bring a nursery plant home. If you see lots of leaves but few blooms, cut back nitrogen and switch to a bloom-focused fertilizer. If you see burned tips, reduce dose and flush the pot with plain water.
When should I move a nursery gerbera to an outdoor pot, and how do I avoid sun shock?
Yes, but timing matters. Move it outdoors gradually (a week of partial shade to full sun) to prevent leaf scorch, and avoid strong afternoon sun during the first days. If nights are still cool in spring, bring it inside when temperatures drop below about 10°C (50°F) to protect bud set.
Can I prune my potted gerbera, and what’s safe to cut back?
Light pruning can be helpful, remove any dead leaves at the base and remove spent flower stems fully to the base. Avoid cutting healthy stems aggressively, because gerberas do not respond well to heavy pruning in mid-summer heat. Focus on sanitation (clean snips) to reduce disease spread.
What pot size should I use, and can I grow more than one gerbera in a pot?
Start with the plant type and container size. If it is a compact variety, a single plant in about a 30 cm (12 inch) pot is typically enough; going larger is fine only if you use very fast-draining potting mix and do not overwater. If you plant two plants in one pot, increase diameter substantially because crowding reduces airflow and makes mildew more likely.
What’s the best way to troubleshoot sudden decline or collapse in a potted gerbera?
Most issues tie back to two causes: wet conditions around the crown or salt buildup from feeding. If a plant collapses suddenly with a brown, mushy base, assume rot and remove it promptly. For future plants, keep watering consistent, improve drainage, and flush monthly if you fertilize regularly.
How do I repot my gerbera without harming the crown and roots?
Repot in spring and only increase by one pot size to avoid excess unused soil that stays wet longer. Refreshing the entire mix is important, because old potting mix can compact and lose structure. After repotting, keep it in bright light with partial shade for a few days and resume feeding only once it shows new growth.