Ferns thrive in pots when you get three things right: consistent moisture, indirect light, and a mix that drains well but never fully dries out. Set those up correctly from the start and you'll have full, lush fronds. Get them wrong and you'll spend the season staring at crispy brown tips and yellowing leaves wondering what went wrong.
How to Grow Ferns in Pots: Step-by-Step Care Indoors and Out

Marcus Whitley
27 Apr 2026
Picking the right fern for container growing
Not every fern does equally well in a pot, especially outdoors, so choosing the right species from the beginning saves a lot of frustration. The two I keep coming back to are Boston fern (Nephrolepis exaltata 'Bostoniensis') and Japanese holly fern (Cyrtomium falcatum). They're widely available, forgiving for beginners, and genuinely suited to container life.
Boston fern is probably the most popular potted fern in the world for good reason. It produces those long, arching fronds that look incredible in a hanging basket or on a porch. It's a tropical species native to humid forests, so it loves warmth and moisture outdoors in summer. The catch is cold hardiness: it's only reliably perennial outdoors in USDA Zone 10 and warmer. Anywhere cooler than that, treat it as a seasonal container plant and bring it inside before the first frost.
Japanese holly fern is a tougher option if you want something that can handle cooler temperatures. It's winter-hardy in USDA Zones 6 through 10 (some sources extend that to Zone 11), so gardeners in most of the country can leave it outdoors far longer in the season. Its glossy, dark green fronds have a different look from Boston fern but it's genuinely hard to kill once established. If you've failed with Boston fern before, try holly fern.
Maidenhair ferns are beautiful but honestly more demanding. They need specific soil conditions, very consistent moisture, and higher humidity than most container setups provide easily. If you're a beginner, start with Boston or holly fern. Once you've got the rhythm down, maidenhair is worth the extra effort. If you're also exploring other container plants for shady outdoor spots, fuchsias are another genus that shares ferns' preference for indirect light and consistent watering. If you want another pot-friendly option with similar light and watering preferences, learn how to grow fuchsia in pots.
| Fern | Best for | Cold hardiness (USDA) | Container difficulty |
|---|---|---|---|
| Boston fern | Hanging baskets, seasonal outdoor pots | Zone 10+ | Easy |
| Japanese holly fern | Year-round outdoor pots in cooler climates | Zones 6–10 | Easy |
| Maidenhair fern | Sheltered spots with high humidity | Varies by species | Moderate to tricky |
| Staghorn fern | Mounted or large containers, statement piece | Zone 9+ for most | Moderate |
Choosing a pot and drainage setup
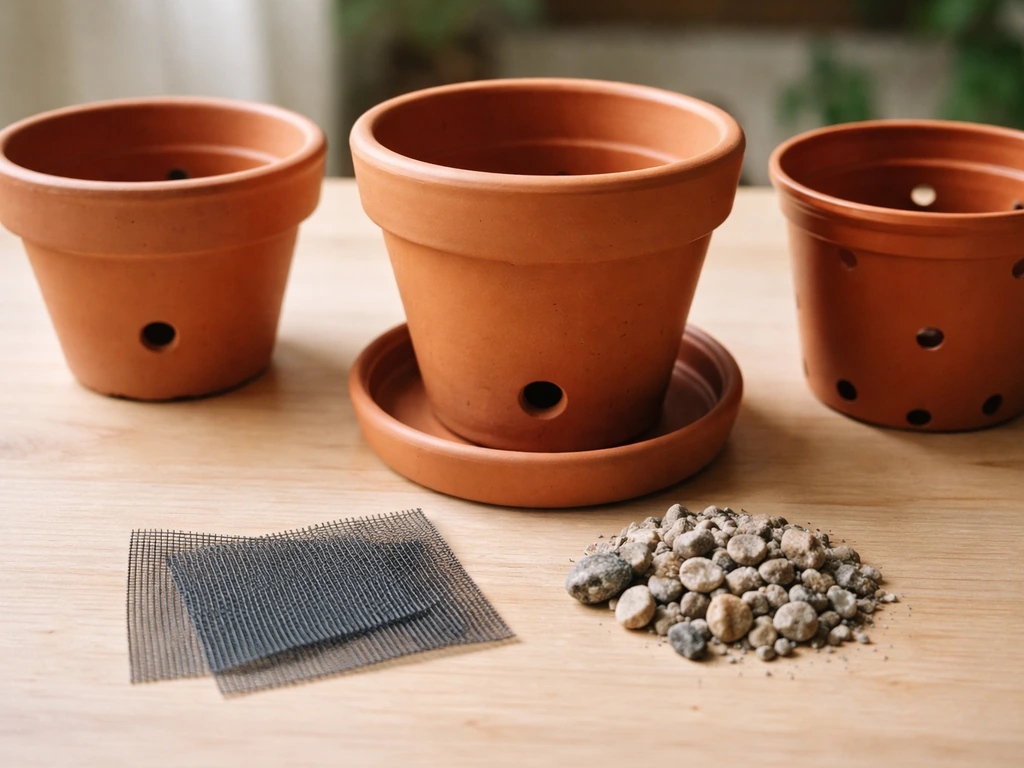
Drainage is the single most important thing to get right with a fern pot. Ferns want consistently moist soil, but sitting in waterlogged mix will rot the roots fast. Every pot you use must have drainage holes at the bottom. No exceptions.
For most ferns, start with a pot that's one size up from what the fern came in at the nursery, so roughly 6 to 8 inches in diameter for a small transplant, or 10 to 12 inches for a medium plant. Going too large too soon is actually a problem because the extra soil around the roots holds moisture longer and can cause rot before the roots have a chance to fill it out. Clay (terracotta) pots are my preference for ferns because they breathe and help prevent overwatering, but plastic pots work fine if you're careful about drainage.
If you want to use a decorative outer container that doesn't have drainage holes, here's the best approach: plant the fern in a plain clay or plastic nursery pot with holes, then set that pot inside the decorative one. You can put an inch of gravel at the bottom of the outer container to lift the inner pot above any water that drains through. Don't just plant directly into a container without drainage and hope for the best. I've done it. It doesn't end well.
Hanging baskets deserve a special mention for Boston ferns. Wire baskets lined with coconut coir are a classic choice and look great, but they dry out faster than solid pots because air circulates around the whole thing. That means more frequent watering, which you'll want to plan for in hot summer weather.
Soil mix and planting instructions
Ferns need a mix that holds moisture but still drains, stays loose and airy, and doesn't compact over time. A basic all-purpose potting mix from a garden center is a reasonable starting point, but it works better with some amendments. NC State Extension also notes that containerized plants rely on soilless substrates or potting mixes because roots are limited to the small volume in the pot, and these mixes supply water, nutrients, and air blank" rel="noopener noreferrer">moisture-retentive but well-draining potting mix. Here's a mix that works well for Boston and holly ferns in containers: For fern soil mixing, Fairfax Gardening notes that container potting mixes may include components such as peat moss, pine bark (or coir), and perlite (or vermiculite), with blank" rel="noopener noreferrer">peat moss helping hold moisture in the mix.
- One quarter regular potting soil or garden soil
- One quarter peat moss (adds moisture retention and acidity)
- One quarter finely chopped pine bark or bark chips (improves drainage and aeration)
- One quarter coarse sand or perlite mixed with small gravel (prevents compaction)
For maidenhair ferns, which need a slightly different setup, shift the proportions: half peat moss, one quarter potting soil, and one quarter of an equal-mix blend of sand, charcoal chips, and aged manure. The charcoal helps with odor control and keeps the mix sweet. It sounds fussy, but it genuinely makes a difference for that species.
When you're ready to plant, here's the process. Fill the pot about one third of the way with your mix. Set the fern in the center so the top of its root ball sits about an inch below the rim of the pot. Fill in around the sides and firm the soil gently, but don't pack it down hard. Water thoroughly right after planting until it runs freely from the drainage holes, then let it settle. If the soil sinks and the plant looks low, add a little more mix on top. Don't bury the crown of the fern (the point where the fronds emerge) or it may rot.
Light, humidity, and watering outdoors
Where to place the pot outside
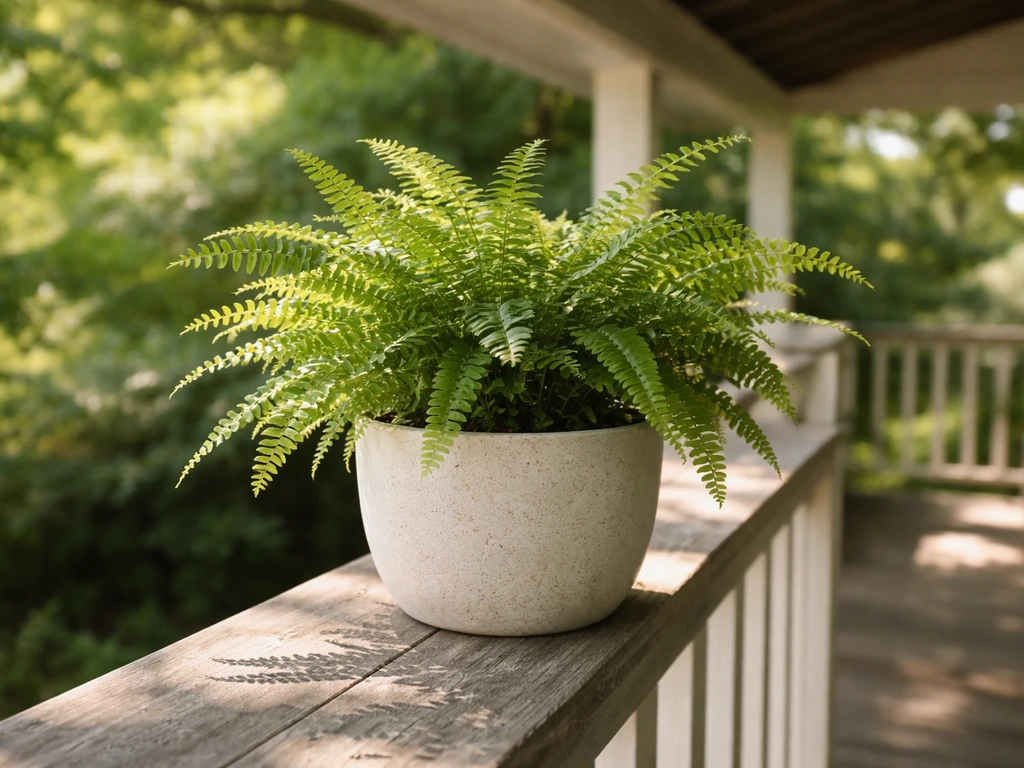
Outdoors, ferns want bright indirect light or dappled shade. Think of a covered porch, the north or east side of a building, or under a tree canopy where light filters through. Direct afternoon sun will scorch the fronds within a few days, especially in summer. Morning sun (before about 10am) is generally fine. If your only outdoor spot gets full afternoon sun, put the fern there and expect problems. Move it or shade it.
Watering consistently (this is where most people go wrong)
Ferns want the soil to stay evenly moist, not soggy, not bone dry. In warm weather outdoors, that usually means watering every one to two days for pots in shade, and potentially daily for hanging baskets or terracotta pots in warmer temperatures. Stick your finger an inch into the soil. If it feels dry at that depth, water it now. If it still feels damp, check again tomorrow.
When you water, do it slowly and thoroughly. Pour water at the base of the plant and keep going until it drains from the bottom. Shallow watering (a quick splash on top) is one of the most common mistakes I see. It wets the surface but leaves the root zone dry, and the fern slowly declines. Water deeply and less often rather than a little every single day.
Humidity outdoors and how to boost it
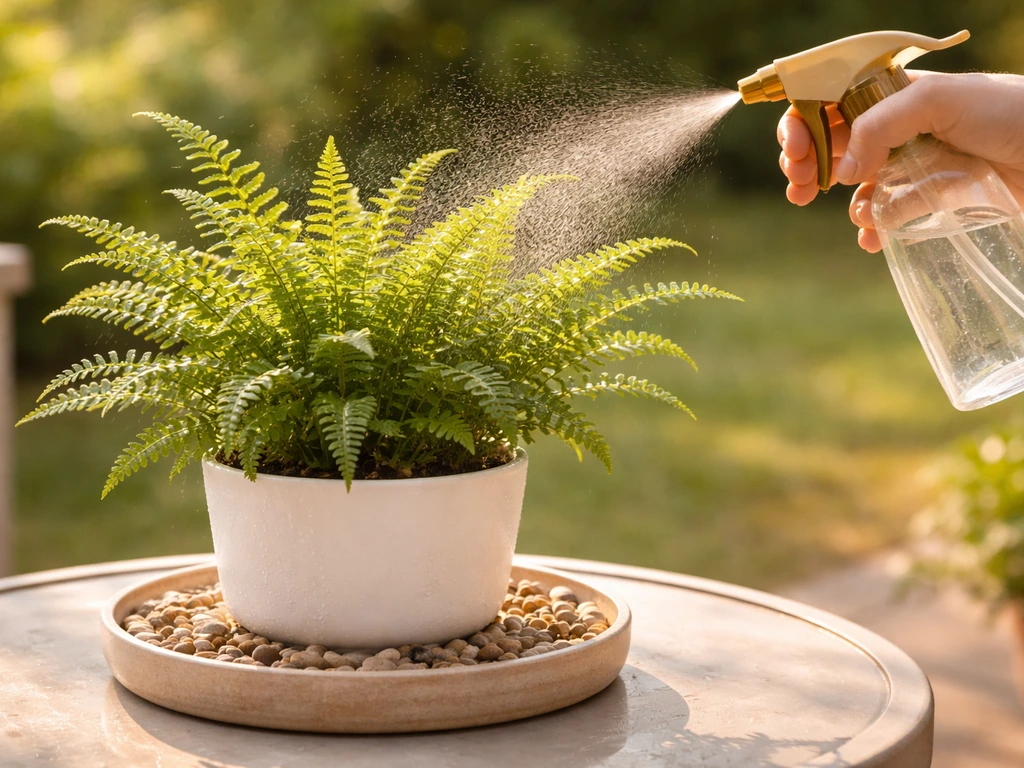
Ferns prefer high humidity. Outdoors in summer this is usually fine, but in hot dry weather or in regions with low humidity, you'll want to help things along. Two practical methods that actually work: First, set the pot on a shallow tray or saucer filled with gravel and water. The water level should be just below the bottom of the pot so the roots aren't sitting in it. As the water evaporates, it raises the humidity right around the plant. Second, mist the fronds with a fine spray bottle or plant mister, particularly in the morning so the foliage dries before evening and reduces the risk of mold.
Fertilizing, grooming, and repotting schedule
Feeding your fern without overdoing it
Ferns are not heavy feeders. Too much fertilizer actually causes more damage than too little, burning the roots and producing weak, floppy growth. From April through September, fertilize once a month with a balanced liquid fertilizer diluted to half strength. Fish emulsion is a great natural option and ferns respond well to it. From October through March, pull back to once every two months. If your fern is actively growing through winter because you're in a warm climate, you can keep the monthly schedule going.
Grooming: what to trim and when
Remove dead, brown, or damaged fronds at the base as soon as you see them. This is purely cosmetic but it also helps air circulate and stops the plant from putting energy into dead material. Use clean scissors or pruning snips. Don't pull fronds off by hand or you can damage the crown. Other than that, ferns don't need shaping or cutting back the way flowering plants do.
When and how to repot
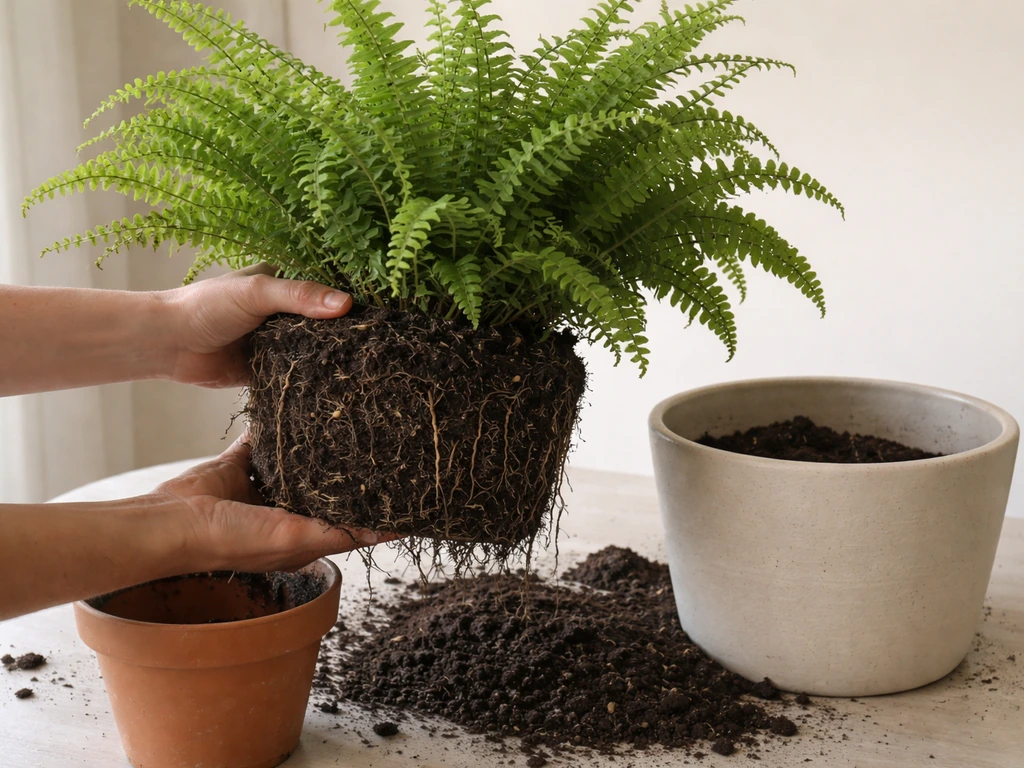
Ferns like Boston and sword varieties can fill a pot fast. You'll know it's time to repot when roots start coming out of the drainage holes, the plant dries out within a day of watering even in cool weather, or growth seems to have stalled. Spring is the best time to repot, just as new growth starts. Move the fern into a pot one size larger, refresh the potting mix, and give it a good water. If the plant has become very large and crowded, you can divide it instead: pull or cut the root ball into two or three sections, each with healthy fronds attached, and pot each one up separately. This is also a free way to get more plants.
Troubleshooting common problems in potted ferns
Most fern problems come down to water (too much or too little) and light (usually too much sun). Here's a quick guide to what you're probably seeing and how to fix it.
| Symptom | Likely cause | Fix |
|---|---|---|
| Brown, crispy leaf tips | Low humidity or underwatering | Water more consistently, add a gravel-and-water humidity tray, mist fronds |
| Yellow fronds across the whole plant | Overwatering or poor drainage | Check drainage holes are clear, let soil dry slightly between waterings, repot if roots are waterlogged |
| Pale or washed-out fronds | Too much direct sun | Move to a shadier spot with indirect or filtered light |
| Leggy, sparse growth | Too little light or underfeeding | Move to a brighter (but still indirect) spot, resume monthly fertilizing |
| White mold on soil surface | Excess moisture and poor air circulation | Reduce watering frequency, remove mold by scraping, improve airflow around pot |
| Wilting despite moist soil | Root rot from waterlogged conditions | Unpot the fern, trim any black/mushy roots, repot in fresh mix with better drainage |
| Small white or brown insects on fronds | Scale, mealybugs, or spider mites | Wipe fronds with a damp cloth, spray with neem oil solution or insecticidal soap |
| Roots circling the bottom or out of drainage holes | Root-bound, needs repotting or dividing | Repot into a larger container or divide the plant in spring |
One thing worth knowing: some browning on older, lower fronds is completely normal. Ferns regularly shed older growth as they push out new fronds. If the new growth coming in looks healthy and green, there's nothing wrong. It's only a problem if browning is spreading to young fronds or covering the whole plant.
Your next steps today
If you're starting fresh, the most useful thing you can do right now is pick up a Boston fern or Japanese holly fern from a nursery or garden center. Once you have the pot and light basics down, you can apply the same container care principles to staghorn fern with a dedicated approach for how to grow staghorn fern in a pot. Both are widely available in spring and summer. Get a pot with drainage holes, mix up or buy a moisture-retentive but well-draining potting mix, and find a spot outdoors with bright indirect light or morning sun only. If you want a broader walkthrough, follow this guide on how to grow pinks in pots for flower-friendly container tips. You can also use the same kind of pot-and-light planning when you’re growing cosmos in containers cosmos pinkie how to grow in pots. Freesias have their own specific container needs, so once your pot and drainage are sorted, follow a pot-specific guide for how to grow freesias in a pot. If you want a different flavor of container gardening, check out how to grow fennel in a pot next for another option that thrives with the right conditions. Plant it up, water it well, and set it on a gravel humidity tray if your climate is dry.
In the first two weeks, check the soil daily. You're building a feel for how fast your specific pot and location dries out, which varies a lot depending on pot size, material, temperature, and shade level. Once you know the rhythm, you can relax into a routine. Most people find ferns much easier than expected once the watering cadence clicks. Stick with it and you'll have a genuinely impressive plant by midsummer.
FAQ
Can I grow ferns in pots using tap water, or do I need filtered water?
In most homes tap water is fine, but if your water is very hard or heavily chlorinated you may notice browning tips over time. Let water sit overnight to let chlorine dissipate, and if you suspect mineral buildup, flush the pot with a slow pour of water until it drains every few weeks.
How do I tell if my fern’s soil is staying moist enough without guessing?
Use a two-check method: stick your finger about 1 inch down to feel moisture, then lift the pot to judge weight. A fern that’s truly happy will feel noticeably lighter on the day it needs water, not a day or two later.
What should I do if my fern starts yellowing but the top of the soil looks wet?
That combination often points to poor drainage or the pot staying waterlogged in the root zone. Check for standing water in the saucer after watering, confirm drainage holes are clear, and consider repotting into a faster-draining mix if the soil smells sour.
Is it better to water from the top or set the pot in a tray?
Top watering is safest for preventing crown rot, pour slowly at the base until it drains. Tray watering can help with humidity, but only keep the water level just below the pot bottom and never let the roots sit in it for long periods.
How often should I mist my fern indoors, and will misting alone be enough?
Misting is helpful for humidity but rarely replaces regular soil watering. Aim misting in the morning, just enough to lightly wet the fronds, and watch airflow, if the room is still and humid you may see mold on foliage.
Do ferns need fertilizer year-round in pots?
No, they prefer light feeding and a rest period. Follow a reduced schedule in cooler months, if your fern keeps actively growing in a warm, bright spot you can continue the lighter monthly routine, but avoid increasing doses.
Can I place a fern near a window that gets bright direct sun for part of the day?
Usually not. Even “brief” direct sun can scorch fronds, especially through glass. If you want to keep it by a window, use sheer curtains or place it slightly back so the light stays indirect.
What’s the best way to remove dead fronds without damaging the crown?
Use clean snips and cut the frond close to the base rather than tugging. If the crown is disturbed, it can slow new growth, so avoid pulling and don’t dig into the center of the plant.
When should I repot a fern, and should I always increase pot size?
Repot in spring when you see roots pushing from drainage holes, rapid drying after watering, or stalled growth. Go only one size larger, if the pot is much bigger it can stay wet too long and increase rot risk.
Can I divide Boston or Japanese holly ferns in a pot to make more plants?
Yes, division is possible when the plant is crowded and has multiple healthy fronds. Do it in spring, use a clean tool to separate the root ball into sections with fronds attached, and keep the new divisions evenly moist while they re-establish.
Are there signs my fern is drying out versus being overwatered?
Drying often starts with crispy edges and fronds that lose their arch. Overwatering more commonly causes yellowing, a limp look, and sometimes a musty smell from the pot. If both are happening, check drainage and adjust watering cadence immediately.
Should I prune ferns or cut back fronds in fall?
Generally no major cutback is needed. Remove only brown or damaged fronds as they appear, if growth slows in colder weather just let the plant hold what’s still alive and focus on correct moisture and light until new fronds resume.
What humidity level should I aim for indoors with potted ferns?
You do not need a specific number, but if your indoor air is very dry you’ll notice crispy tips even with correct watering. If possible, target consistently higher humidity by grouping plants, using a gravel humidity tray, and improving airflow to prevent stagnant, mold-prone conditions.