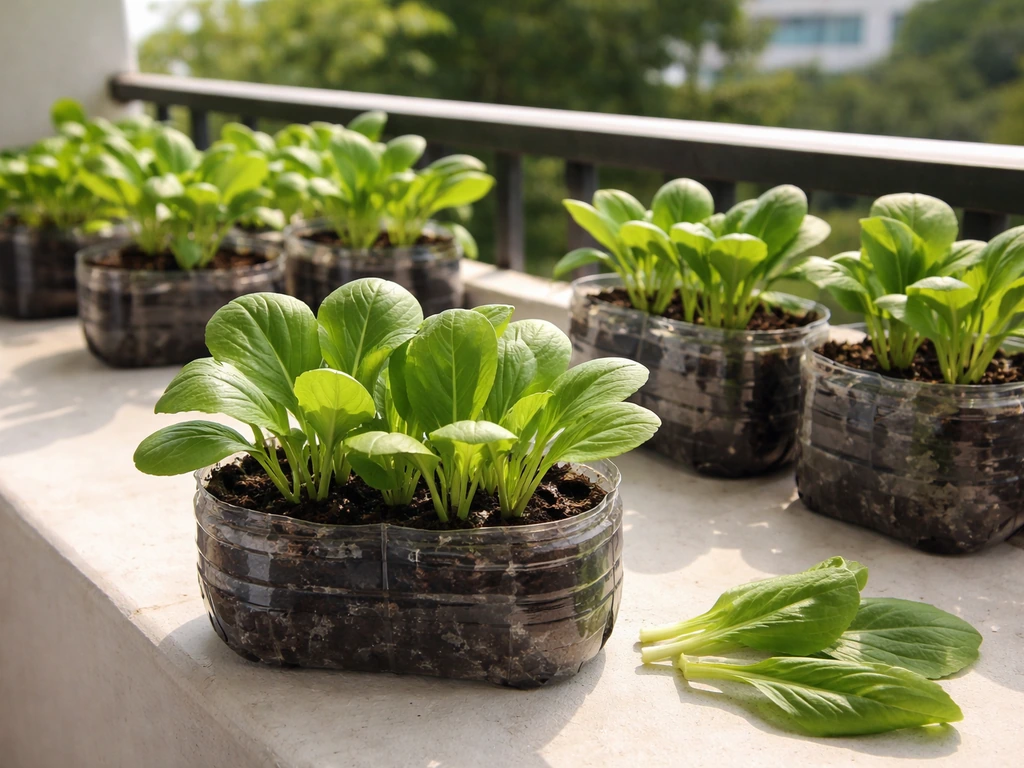
You can grow pechay in plastic bottles and actually get a decent harvest from them. Use 1.5-liter or 2-liter bottles, cut them the right way, fill them with a moisture-retaining mix, and pechay will go from seed to table in as little as 25 to 45 days. This whole setup costs almost nothing, fits on a balcony railing or windowsill, and works surprisingly well because pechay is naturally shallow-rooted and doesn't need deep soil to thrive.
How to Grow Pechay in Plastic Bottles: Step-by-Step

Marcus Whitley
13 May 2026
Why pechay works so well in plastic bottles
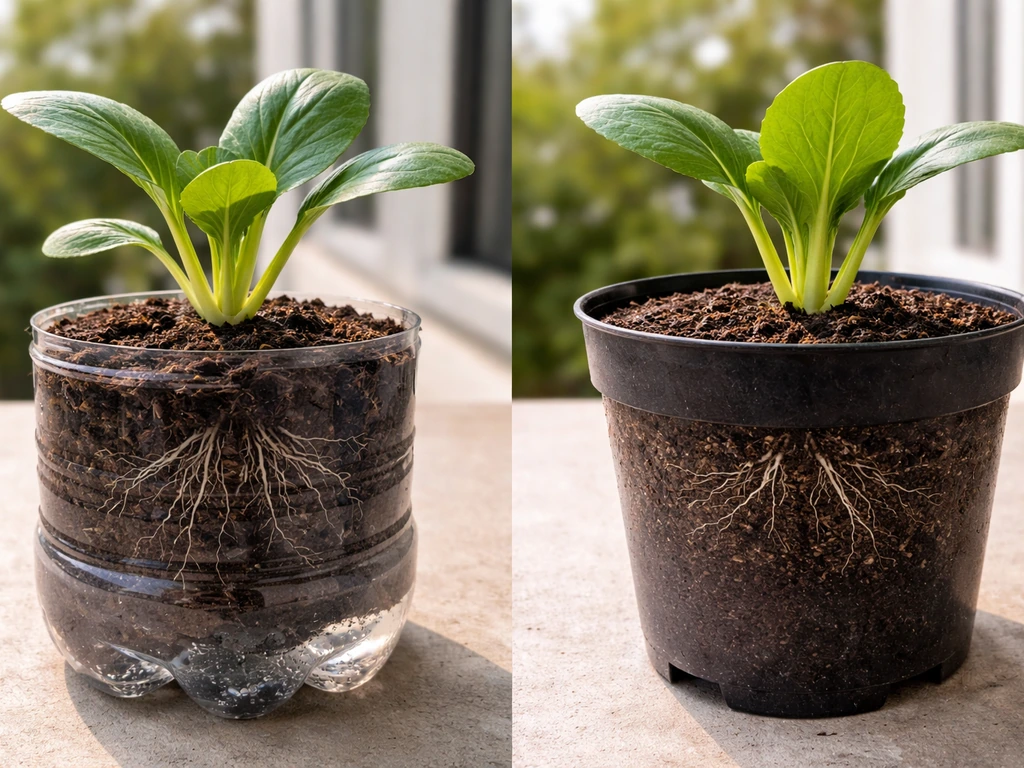
Pechay, also called bok choy or Chinese cabbage, is one of the best leafy vegetables for container growing because its roots stay close to the surface. It doesn't send down a deep taproot the way tomatoes or eggplants do. What it really needs is consistent moisture, steady nutrients, and a bit of sun. If you want to switch crops in pots later, you can also follow a guide on how to grow ladies finger in pots for similar container setup tips. All of those are manageable in a bottle.
The compact size of a plastic bottle actually works in your favor. Smaller soil volume heats and cools faster, which encourages fast germination and quick growth in warm conditions. Since pechay is a cool-to-warm season crop, you do need to manage heat, but more on that later. The key point is: the plant's growth habit and the bottle's properties are a natural match, especially for urban gardeners with limited outdoor space.
Another practical advantage is that bottles are free or nearly free, you can start five or ten at once, and if one fails, you haven't lost much. That makes them perfect for staggered planting, which is the secret to having pechay ready to harvest on a rolling basis rather than all at once.
Bottle setup: cutting, drainage, and planting design
The most common mistake I see beginners make is using bottles that are too small. A 500 ml bottle is really too tight for pechay to reach full size. Go with 1.5-liter or 2-liter bottles. Larger 5-liter water jugs are even better if you have them, and they'll let you grow two or three plants per container.
Horizontal bottle setup (the easiest option)
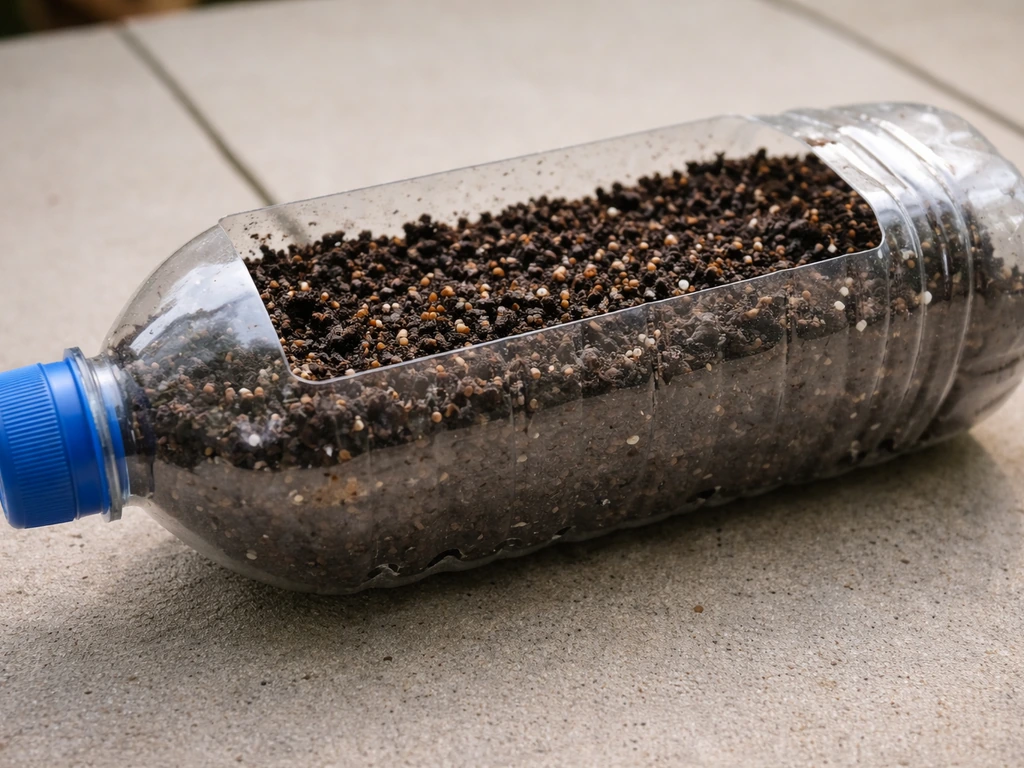
Lay the bottle on its side and cut a rectangular opening along the top (the part that faces up). Leave the caps in place and poke 4 to 6 small drainage holes in the underside using a heated skewer or a nail. This creates a trough-style planter that sits flat and stable. It's ideal for beginners and great for windowsills or shelves.
Vertical hanging bottle setup
For balcony railings or walls, cut the bottom off the bottle entirely and plant into the open bottom, with the cap end hanging down. Drill several holes in the cap for drainage. If you're stacking or hanging multiple bottles vertically, keep about 20 to 30 cm (8 to 12 inches) of vertical spacing between each bottle so leaves have room to spread and airflow stays good. For vertical hanging systems, place a secondary set of drainage holes about 2 to 3 cm above the very bottom of the soil zone. This keeps a tiny reservoir of moisture without waterlogging the roots.
Whatever design you choose, make sure the bottle is stable. Pechay leaves get heavy with water after rain or watering, and a tipping bottle is just frustrating. You can tie horizontal bottles to a frame, trellis, or railing with garden wire or even zip ties.
Soil mix and planting instructions
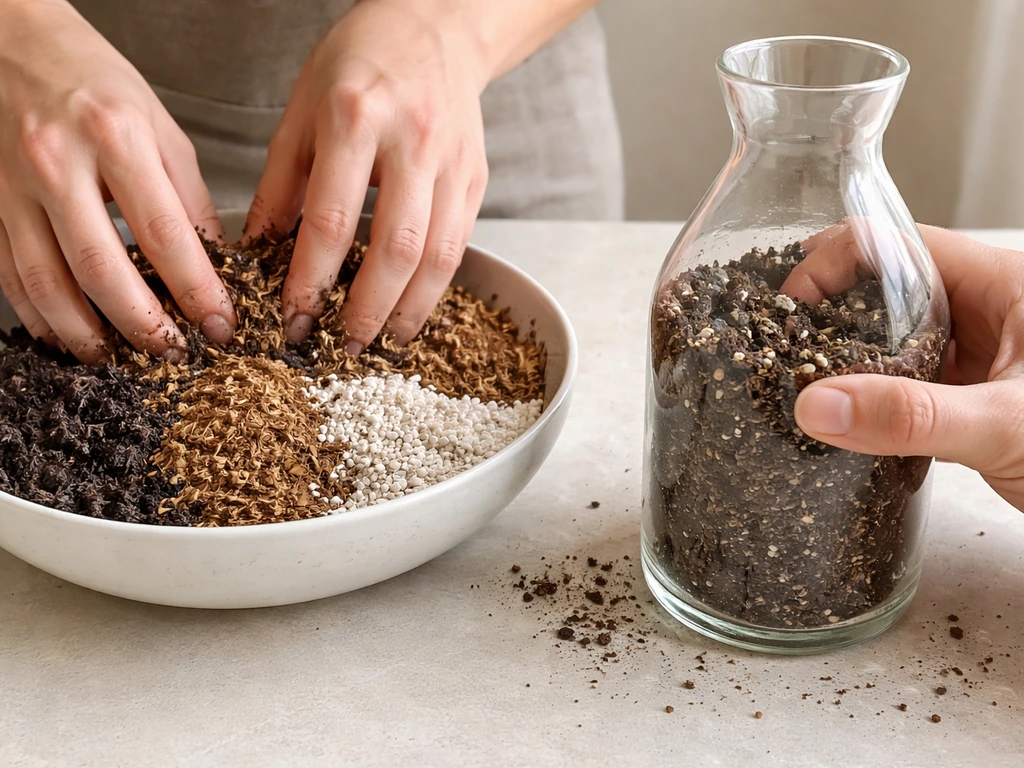
Pechay needs soil that holds moisture but doesn't stay soggy. That combination matters more in a bottle than in a big pot because the soil volume is small and it dries out faster. The pH should sit between 6.0 and 7.5. Here's a simple mix that works well:
- 40% coconut coir or peat moss (retains moisture)
- 25 to 30% compost (nutrients and biological activity)
- 25 to 30% perlite or coarse sand (drainage and aeration)
If you can't find coir or perlite locally, mix two parts garden soil with one part compost and one part sand. It's not as ideal, but it works. Just avoid using pure garden soil in a bottle because it compacts quickly and blocks drainage. Always use fresh, clean potting material, not soil scooped from a corner of the yard, to avoid bringing in soilborne diseases like damping-off right from the start.
Starting from seeds
Fill your prepared bottle with the soil mix to about 2 cm below the rim. Scatter 3 to 4 seeds per bottle (for horizontal setups) or 2 seeds per bottle (for vertical). Press them gently into the surface and cover with about 5 to 8 mm (roughly 1/4 inch) of fine soil. Don't plant deeper than that. Pechay seeds are tiny and burying them too deep means they exhaust their energy before reaching light. Water gently, cover loosely with plastic wrap or a piece of light fabric to hold humidity, and expect to see sprouts in 6 to 10 days.
Transplanting seedlings
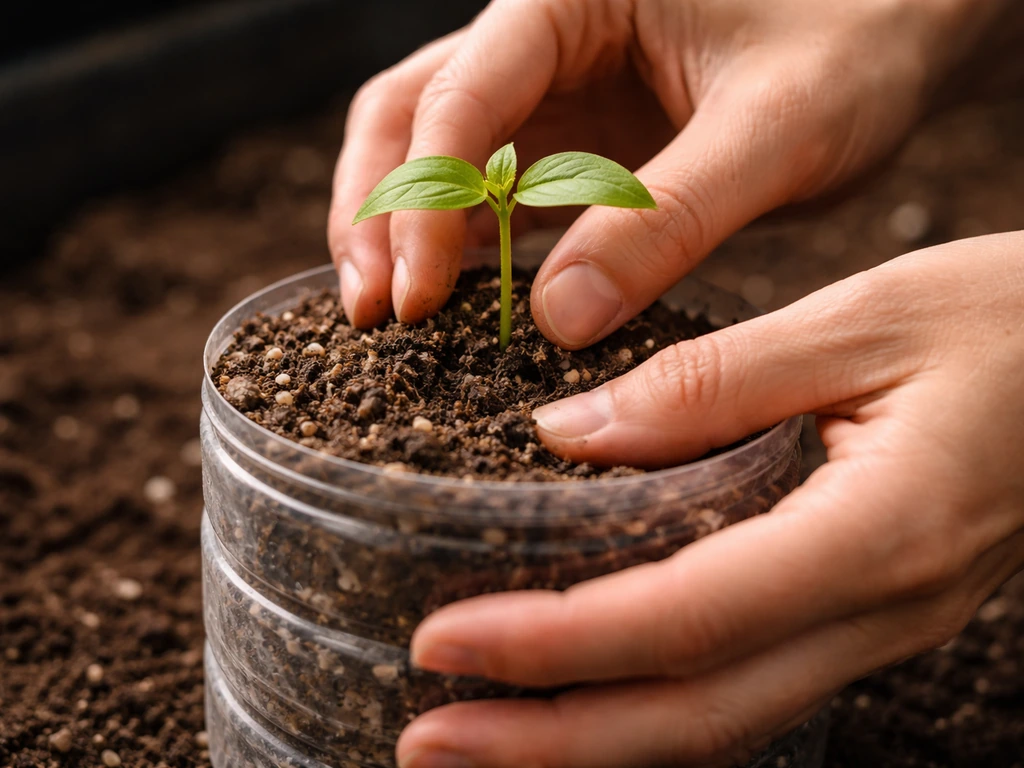
If you're starting seedlings in a tray and moving them to bottles, wait until they're about 5 to 7 cm tall with at least two true leaves. Make a small hole in the center of your bottle's soil, lower the seedling in, and firm the soil gently around the base. Water immediately after planting to settle the roots. One seedling per 1. Once you have the right pot size and soil mix, methi can be grown in the same general way as other leafy greens in containers 1.5-liter bottle. 5-liter bottle is the right spacing for full-sized heads; if you want to harvest baby leaves continuously, you can fit two per bottle.
Watering, sunlight, and temperature tips in bottles
Watering
Small containers dry out faster than big ones, so you'll probably need to water every day or every other day depending on your climate and the season. The rule I follow: stick your finger about 1 to 2 cm into the soil. If it feels dry, water. If it still feels moist, wait. Pechay stressed by drought produces bitter, tough leaves, so consistency matters. Water in the morning when possible so the leaves dry off during the day, which helps prevent fungal problems. Each watering should wet the entire soil mass until a little water drips from the drainage holes, then stop. Never let your bottle sit in a puddle of standing water.
Sunlight
Pechay does best with 4 to 6 hours of direct sunlight daily. A south or east-facing balcony, window ledge, or wall is ideal. It tolerates partial shade better than most vegetables, so if your spot only gets 3 to 4 hours of morning sun, it will still grow, just a little more slowly. What it can't handle well is harsh afternoon sun in hot weather, which pushes it toward bolting (more on that below). If temperatures regularly climb above 30°C (86°F), move your bottles somewhere with afternoon shade or add a light shade cloth.
Temperature
Pechay grows best between 15°C and 25°C (59°F to 77°F). In tropical and subtropical climates, the cooler months are the best time to grow it. If you're in a hot region and growing during summer, use your bottles in a spot that gets morning light only, and keep the soil consistently moist to reduce heat stress. Temperature swings and prolonged heat trigger bolting, where the plant sends up a flower stalk instead of producing leaves. Once that happens, the leaves turn bitter and the harvest is basically over for that plant.
Feeding and growth support for leafy pechay
Pechay is a fast grower and a heavy feeder for its size. In a bottle with limited soil, nutrients get used up quickly. If you started with a good compost-rich mix, you may not need to feed for the first two to three weeks. After that, light feeding every 10 to 14 days keeps growth steady and leaves a good deep green.
For a low-cost option, diluted compost tea or worm casting liquid works well. If you're using commercial fertilizer, choose a balanced one (something like 10-10-10 or a liquid vegetable fertilizer) at half the recommended dose. Overfeeding leafy greens, especially in small containers, leads to salt buildup in the soil, which causes leaf tip burn and root damage. Less is more here. Apply fertilizer to moist soil, never dry, to avoid root burn.
If your pechay starts looking pale or yellow even with regular feeding, it could be a sign the soil pH has drifted. Adding a small amount of garden lime to the potting mix at setup (or topdressing lightly later) helps keep the pH in the right range so nutrients stay available to the roots.
Pest and disease checks
Pechay in bottles is not immune to the usual brassica problems. The good news is that small containers are easy to inspect up close, and catching issues early makes a real difference.
Common pests
- Flea beetles: These tiny jumping beetles chew lots of small holes in leaves. They're especially aggressive on young transplants. The most effective physical barrier is insect netting or row cover placed right after transplanting. Remove it only when you're watering or harvesting.
- Imported cabbage worms and diamondback moth larvae: Check the undersides of leaves regularly for eggs, which look like tiny pale ovals. When you spot small caterpillars, spray with Bacillus thuringiensis (Bt), a naturally occurring bacteria that kills larvae without harming other insects or people. Reapply weekly until the population is gone.
- Aphids: Small soft-bodied insects that cluster on young leaves and stems. Blast them off with a stream of water or use a diluted neem oil spray.
Common diseases
Damping-off is the most common killer of pechay seedlings in bottles. It's caused by soilborne fungi like Pythium and Rhizoctonia, and it shows up as seedlings that suddenly collapse at the base as if pinched. Prevention is the only real cure: use fresh, sterile potting mix, don't overwater, ensure drainage holes are working, and don't crowd seedlings. Britannica notes that damping-off prevention should focus on using light, well-drained, sterile or pasteurized growing mixes and avoiding overwatering, overcrowding, and excess shade blank" rel="noopener noreferrer">use fresh, sterile potting mix. Cornell’s greenhouse guidance notes that using sterile media and focusing on sanitation helps prevent damping-off, and that these pathogens are not considered airborne in practical terms for greenhouse spread blank" rel="noopener noreferrer">use fresh, sterile potting mix. If damping-off hits one bottle, remove the affected plant immediately and don't reuse that soil.
Yellowing leaves can signal overwatering, underwatering, nutrient deficiency, or compacted soggy soil. Check your drainage first, then your watering frequency, then your feeding schedule. Leggy, stretched growth (long stem, small leaves) means not enough light. Move the bottle to a brighter spot. If the plant suddenly sends up a tall central stalk with small leaves, it's bolting due to heat or stress. Harvest whatever leaves you can immediately and start a fresh bottle.
Harvesting schedule and how to keep it producing
Pechay grown in bottles is ready to start harvesting about 25 to 45 days after sowing, depending on the variety and growing conditions. You have two approaches, and I recommend the cut-and-come-again method for bottle growing because it stretches your harvest from a single planting.
Cut-and-come-again harvesting
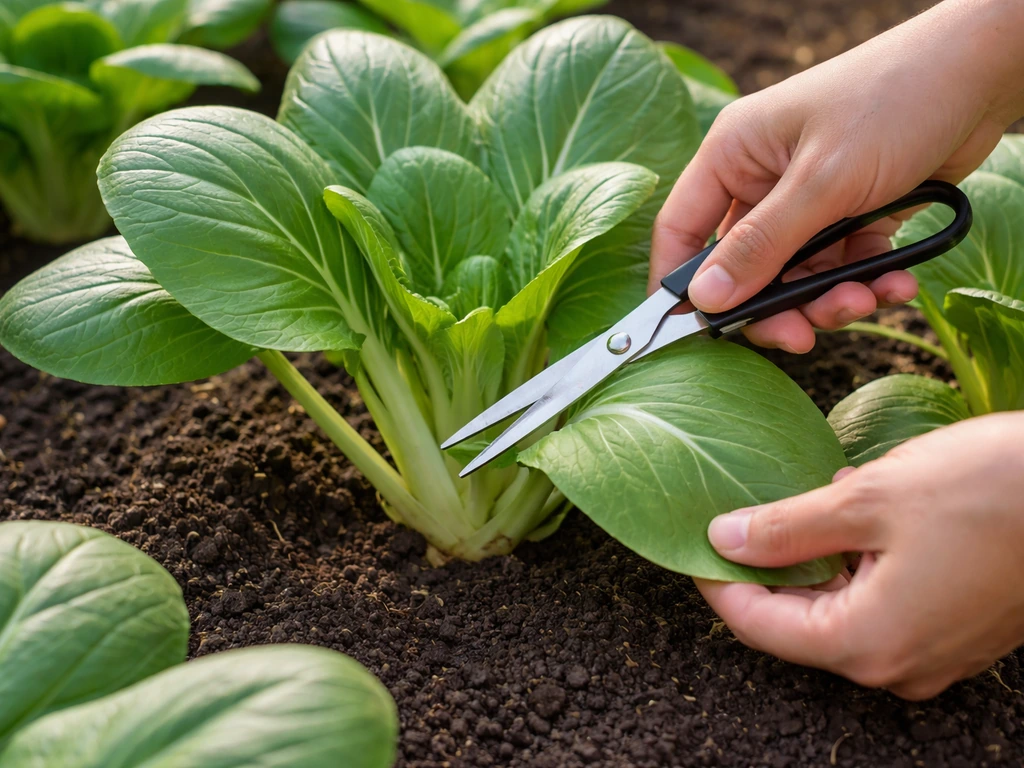
Starting at about 25 days (or when outer leaves are 10 to 15 cm long), snip the outer leaves at the base with clean scissors, leaving the inner smaller leaves and the central growing point intact. The plant will keep producing new leaves from the center. You can repeat this every 7 to 10 days. This method works especially well in warm weather when you want to harvest quickly before the plant bolts.
Full plant harvest
If you want a full head of pechay, wait until the plant reaches 20 to 30 cm tall (usually 35 to 45 days) and cut the whole plant at the base, just above the soil. Sometimes the roots will resprout with a few more leaves after a whole-plant cut, though regrowth is slower and smaller than the first harvest.
Keeping the supply going with staggered sowing
The smartest thing you can do with bottle pechay is start a new batch every two weeks. If you want a similar container-friendly plan, use the same staggered-batch idea when learning how to grow fenugreek in pots so you can harvest fresh leaves consistently. Set up three or four bottles on day one, another three or four on day 14, and so on. By the time the first batch is ready to harvest, the second batch is already well established. This way you're always pulling fresh leaves without a gap. It's the same approach that works well for other quick-growing container greens like pudina and fenugreek.
After harvesting a bottle completely, don't throw out the setup. Empty the old soil (compost it), clean the bottle with diluted bleach water, rinse well, let it dry, and refill with fresh mix. Reusing bottles this way keeps your costs at basically zero after the initial setup, and starting fresh each cycle prevents disease buildup in the soil.
Quick-reference timeline
| Stage | Timeline | What to do |
|---|---|---|
| Sow seeds | Day 0 | Plant seeds 5–8 mm deep, water gently |
| Germination | Day 6–10 | Remove cover, place in bright spot |
| Thin seedlings | Day 14–16 | Keep 1–2 strongest per bottle |
| First liquid feed | Day 18–21 | Half-strength balanced fertilizer |
| First outer leaf harvest | Day 25–30 | Cut-and-come-again outer leaves |
| Full plant harvest | Day 35–45 | Cut whole plant at base |
| Replant | After harvest | Clean bottle, fresh mix, new seeds |
FAQ
How deep should I plant pechay seeds in a plastic bottle?
Yes, but keep it shallow and careful. Covering seeds with more than about 1/4 inch of soil usually delays or prevents sprouting because tiny pechay seeds exhaust their energy before reaching light. If you already planted deep, lightly scratch the surface and topdress with a thin layer only (do not bury again).
Will a single bottle keep producing pechay, or do I need new bottles?
If you want continuous harvest, use cut-and-come-again and start new bottles on a two-week schedule. With bottle pechay, individual plants can keep producing for a few harvest rounds, but heat stress and nutrient depletion eventually reduce leaf quality, so staggered batches prevent an all-at-once harvest gap.
How do I know I’m watering correctly in bottle planters?
Aim for watering until a little water reaches the drainage holes, then stop so the roots are not sitting in a puddle. Overwatering in bottles looks like yellowing and soft leaves, even if the soil feels “wet” but not actually draining. If you see standing water after watering, increase drainage holes or reduce how much you apply per session.
Do I need to thin pechay seedlings in plastic bottles?
Thin to the intended number of plants. Crowded seedlings increase airflow problems and make damping-off more likely. If you sow 3 to 4 seeds in a horizontal bottle, keep only the strongest 1 seedling once plants are established (around the time you would thin for true leaves).
When should I remove plastic wrap or fabric covering after sowing?
After sprouting, stop the humidity cover once seedlings have emerged and are standing on their own, otherwise they stay too damp and can collapse from damping-off. If you used plastic wrap for germination, vent it daily until you remove it completely.
My pechay is turning pale or yellow. What should I check first?
Pale or yellow leaves can happen even when you feed, if the soil pH drifts. A practical step is to check drainage first, then switch to lighter, more frequent feeding rather than heavy doses. If leaves stay pale after 1 to 2 cycles, add a small amount of garden lime at setup or topdress lightly, then observe for new growth color.
How can I prevent bolting in hot weather when growing pechay in bottles?
Bolting can still happen if bottles overheat, especially with afternoon sun or when the soil repeatedly dries out and then gets soaked again. Move bottles to morning-only light, use light shade cloth during heatwaves, and keep moisture steady using the finger test (about 1 to 2 cm into the soil).
What should I do if I see damping-off in one bottle?
If your seedlings suddenly collapse at the base, remove the affected plants and do not reuse the same soil in that bottle. For prevention next time, use fresh sterile potting mix, ensure drainage holes are clear, and avoid watering on a schedule without checking soil moisture first.
How do I avoid fertilizer burn or salt buildup in small bottle soil?
Yes. Because bottle soil dries faster, use a quick test before fertilizing. Feed only when the soil is moist, not dry, to reduce root burn. If you notice salt crust or a very sharp smell in the soil, flush with plain water (watering through once thoroughly) and then wait a few days before the next feeding.
When is the right time to harvest pechay, and should I do whole-plant cuts or outer-leaf cuts?
For a full-size cut, wait until the plant is roughly 20 to 30 cm tall, then cut at the base. For baby leaf harvesting, snip outer leaves when they are about 10 to 15 cm long and leave the central growing point. After whole-plant cutting, regrowth is usually slower and smaller than the first harvest.
My plants look leggy and small. Is it a nutrition problem?
Most varieties tolerate part shade, but if plants become leggy (long stems, small leaves), you need more light rather than more fertilizer. Move bottles closer to the brightest window or balcony side you have, targeting several hours of direct sun, and keep watering consistent so growth stays compact.