Yes, you can absolutely grow lady finger (okra) in pots, and it does surprisingly well when you give it the right conditions. If you want to try a different leafy herb, check out our guide on how to grow methi in pots too grow lady finger (okra) in pots. The short version: use a 5-gallon pot minimum, pick a compact variety, place it in full sun, keep the soil warm and moist but not waterlogged, and harvest frequently. That's the whole game. The rest of this guide walks you through every step so you know exactly what you're doing and why.
How to Grow Ladies Finger in Pots: Step-by-Step Guide

Marcus Whitley
19 Apr 2026
Can okra actually grow well in pots?
Okra is a heat-loving, fast-growing vegetable that takes up a fair amount of vertical space in the ground, which makes people assume it won't work in containers. But it does, with a few adjustments. The key is volume and sunlight. Okra roots need enough room to anchor the plant and access moisture and nutrients consistently. Horticultural guidance from LSU AgCenter and Oklahoma State University both confirm that container okra is viable as long as you use adequate pot size and the right varieties. With compact or dwarf types, you can easily manage a productive okra plant on a balcony, rooftop, or sunny patio.
One thing worth setting realistic expectations on: a single pot will give you a few pods at a time, not bushels. But for a home kitchen, that's usually perfect. If you want more volume, just run two or three pots side by side. The plants also look great, especially burgundy-stem varieties, so they double as ornamental container plants in a sunny spot.
Picking the right pot, location, and variety
Pot size and drainage
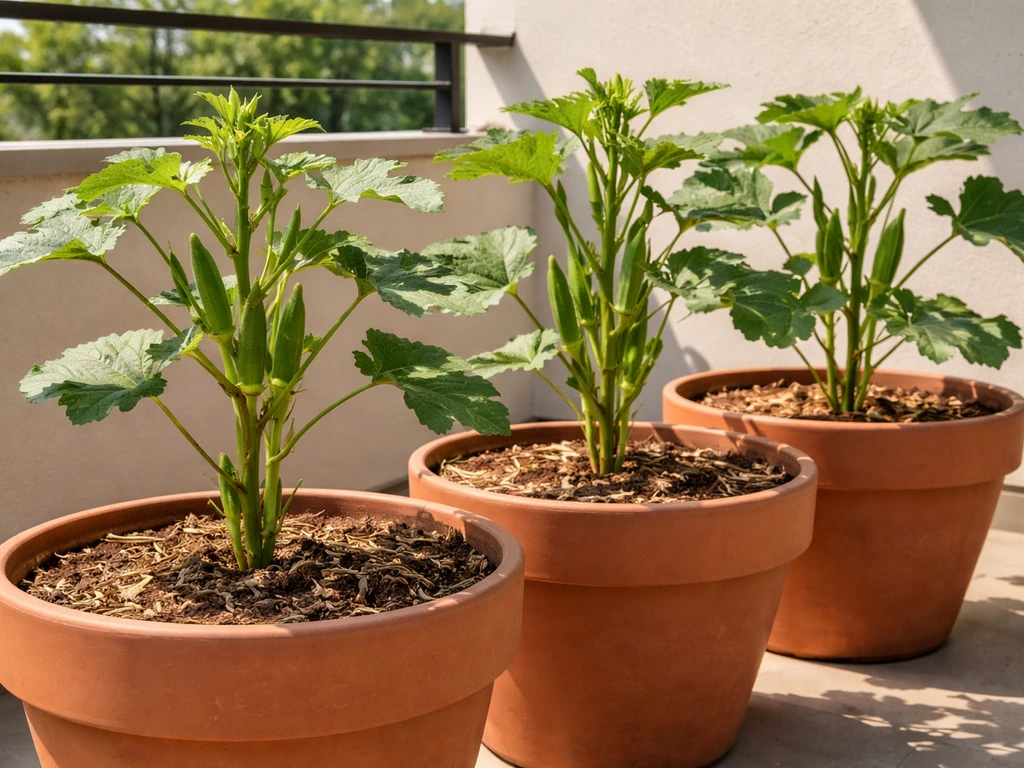
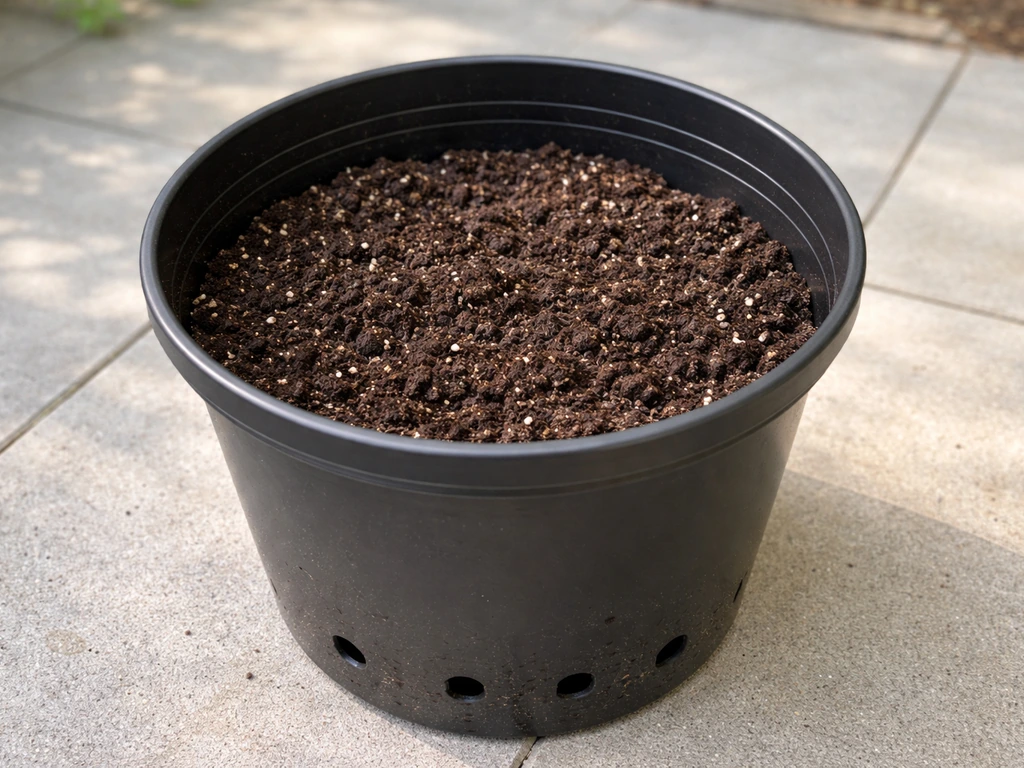
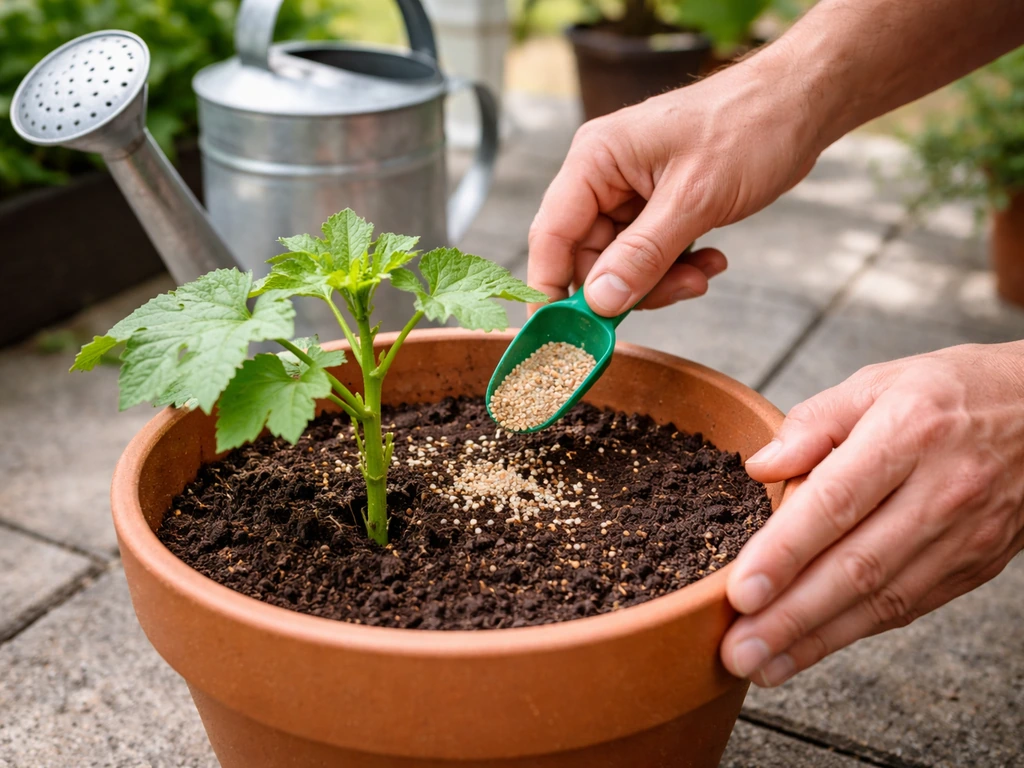
Go with at least a 5-gallon pot per plant. LSU AgCenter’s “Horticulture Hints” advises using adequate container volume for okra, noting that smaller containers can limit root growth Go with at least a 5-gallon pot per plant.. This is the minimum recommended by container vegetable guides, and it's the right call. A smaller pot dries out too fast in summer heat, stresses the roots, and gives you a disappointing harvest. If you have a larger container, say 10–15 gallons, you can grow 2–3 plants in it, but don't crowd them. Drainage holes are non-negotiable. Okra does not tolerate waterlogged roots. If your pot doesn't drain freely, drill extra holes in the bottom before you plant anything.
Material matters less than size and drainage. Plastic pots are lighter and retain moisture longer, which actually helps during peak summer heat. Terracotta looks beautiful but dries out faster and requires more frequent watering. Either works; just adjust your watering rhythm accordingly.
Where to put the pots
Find your sunniest spot. Okra needs at least 5–6 hours of direct sunlight daily, and more is better. It's a warm-season crop that flowers and produces pods through high summer temperatures right up until the first frost, so you want it soaking up every bit of heat and light available. A south or west-facing wall, balcony, or rooftop spot is ideal. Avoid placing pots in areas with cold drafts or deep shade from buildings in the afternoon, as this will delay flowering and reduce your harvest significantly.
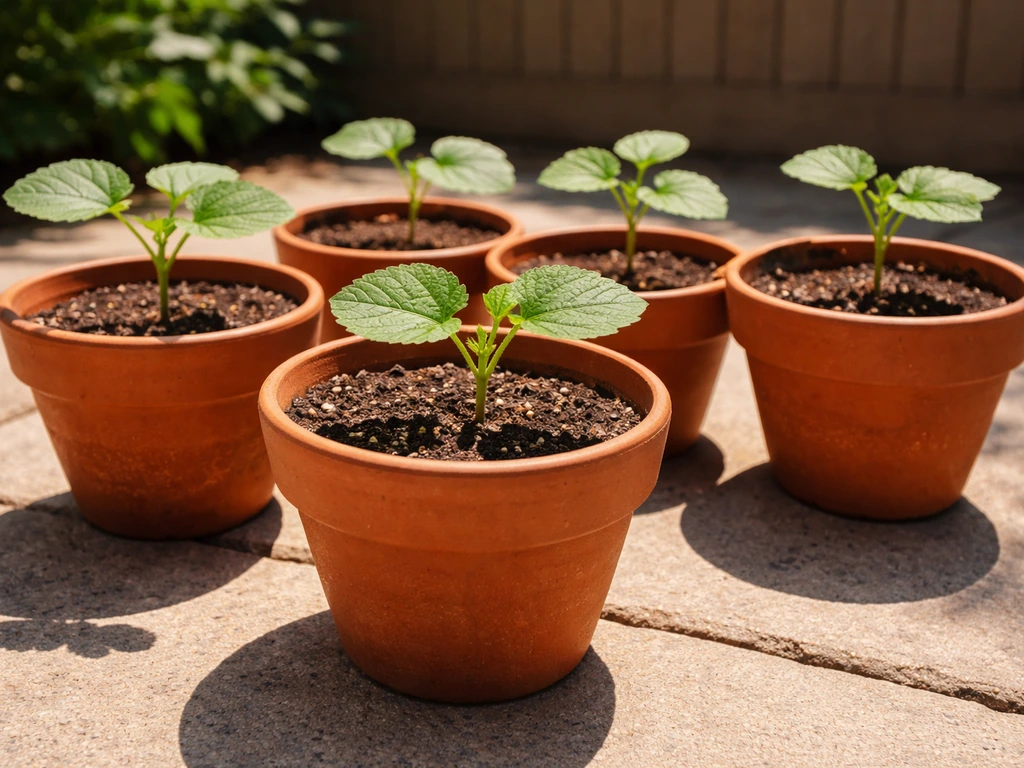
Best varieties for containers
Variety selection makes a real difference in a pot. Standard okra can grow 6 feet tall, which becomes awkward and top-heavy in a container. Stick to dwarf or compact varieties. Here are three that consistently perform well in small spaces:
| Variety | Days to Harvest | Plant Height | Notes |
|---|---|---|---|
| Baby Bubba | 50–53 days | Dwarf/compact | Excellent for small pots; widely recommended for containers |
| Blondy | 48–50 days | ~3 feet | Spineless, early maturing, easy to handle at harvest |
| Burgundy | ~60 days | Compact-medium | Striking red pods; good ornamental value in pots |
Baby Bubba and Blondy are your best starting bets if this is your first time. Both are spineless (no prickly skin when you harvest) and mature quickly. Burgundy is a great choice if you want the container to look good on a patio while also being productive.
Soil mix, planting seeds, and timing
The right soil mix
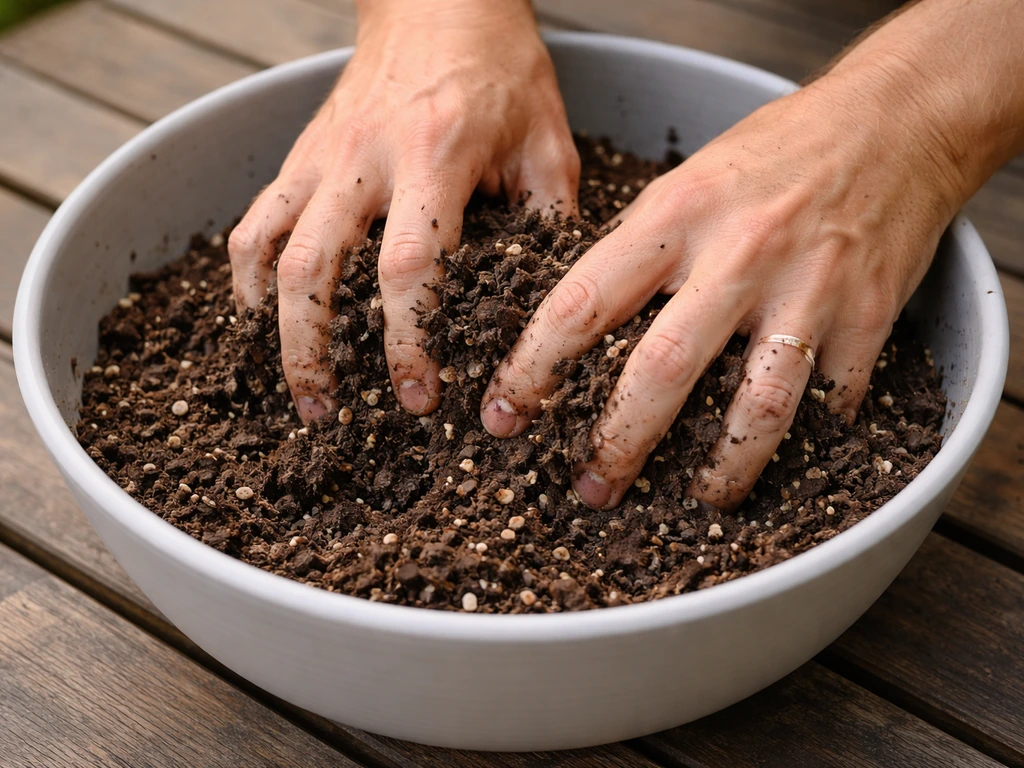
Okra wants a light, well-draining soil that's rich in organic matter. A standard potting mix (not garden soil) is your base. To that, add some compost or well-rotted manure at about 25–30% of the total volume. This gives you the organic matter okra loves without making the mix heavy or prone to waterlogging. Aim for a soil pH between 6.0 and 6.8, which is mildly acidic to near-neutral. Most commercial potting mixes fall right in this range, so you usually don't need to adjust pH unless you're mixing your own from scratch. If you're unsure, a basic soil pH test kit from a garden center costs very little and takes two minutes.
Do not use heavy clay-based garden soil in your containers. It compacts in pots, drains poorly, and creates exactly the kind of waterlogged conditions that rot okra roots and seeds. Keep it light and airy.
When to plant
Timing is everything with okra. It is a warm-season crop through and through. Don't plant until your soil temperature is at least 65–70°F at seed depth, and ideally above 75°F. Seeds sown in cold soil germinate poorly, rot easily, and produce weak yellow seedlings. Stick a basic soil thermometer in your pot before you plant. If you're in a temperate climate, this usually means late spring once nighttime temperatures are consistently above 60°F. In warmer tropical or subtropical climates, you can plant almost year-round with appropriate timing adjustments.
Direct seeding vs. transplanting
Okra prefers to be direct seeded rather than transplanted. The roots don't like disturbance, and transplanted seedlings often sulk and stall. Sow seeds directly into your final container whenever possible. If you must start indoors first because of a short season, use biodegradable peat pots or coir pots that go into the ground without root disturbance.
Sowing depth, spacing, and germination
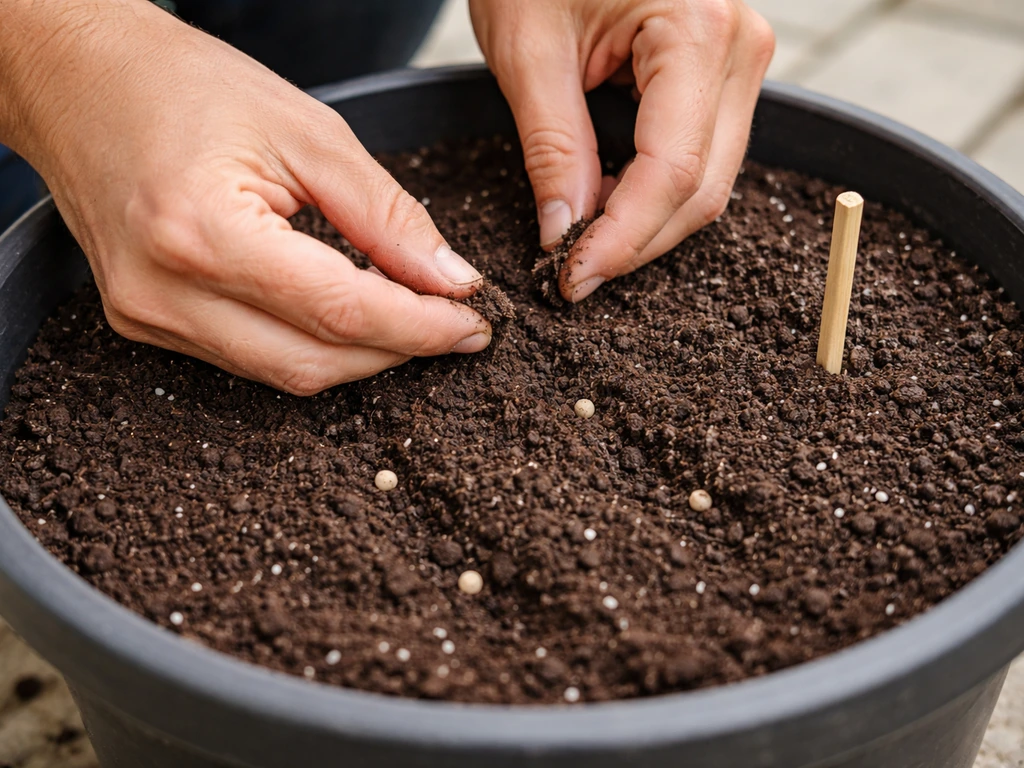
Plant seeds about 3/4 inch deep and place them 3–4 inches apart initially. In a 5-gallon pot, sow 2–3 seeds per pot and thin to the strongest one seedling once they're a few inches tall. In that r/containergardening thread, people blamed poor container okra performance on cramped container size and planting density, suggesting you may need only one plant per container and enough soil space planting 2–3 seeds per pot and thin to the strongest one seedling. If you're using a larger container, you can keep 2 plants in a 10-gallon pot with about 6 inches between them.
Before sowing, soak your okra seeds in water overnight. This softens the hard seed coat and dramatically improves germination speed and rate. Without soaking, germination can take up to 14 days. With soaking in warm conditions (soil at 70–95°F), you'll often see sprouts in 4–7 days. It's a simple step that's very worth doing.
Watering and sun and temperature basics
Okra is drought tolerant once established, but in containers it dries out much faster than in the ground, so you need to water more consistently than you might expect. During the growing season, check your pots daily. Water deeply when the top inch of soil feels dry, and make sure water drains freely from the bottom each time. In hot summer weather, a 5-gallon pot may need watering every day or every other day. Don't let it sit bone dry, and equally important, don't let it sit soggy. That balance is the whole watering job.
Seedlings are the most vulnerable to overwatering. Cold, wet soil below 65°F combined with excess moisture is a recipe for damping off, a fungal problem that collapses seedlings at the soil line. Keep the soil warm and evenly moist during germination, not wet. Once plants are actively growing and the weather is genuinely warm, they become much more forgiving.
For temperature: okra thrives in heat and will flower and produce pods continuously through summer. It actually does better as temperatures climb. Optimal soil temperature for strong growth sits around 70–85°F. Once temperatures cool in autumn and frost threatens, production stops. This is why placing pots in the warmest, sunniest spot you have isn't optional; it directly determines how long your harvest window lasts.
Feeding your container okra the right way
Container plants need more frequent feeding than in-ground plants because watering leaches nutrients out of the pot over time. Start with a balanced fertilizer (like a 10-10-10 granular) worked into your potting mix before planting. This covers the early growth phase. Once your first flower buds appear, switch to a fertilizer with a bit more phosphorus and potassium relative to nitrogen, something like a tomato fertilizer or a bloom-booster formula.
The big mistake people make with okra is overfeeding nitrogen. Too much nitrogen produces a huge, leafy plant with very few pods. Nitrogen drives leafy green growth, which looks impressive but means the plant is prioritizing leaves over fruit. If your okra plant is lush and tall with no pods forming, back off the nitrogen and add some potassium. After the first pods appear, a light liquid feed every 2–3 weeks keeps production going without pushing excessive vegetative growth.
A practical feeding schedule for container okra looks like this:
- At planting: mix a slow-release balanced granular fertilizer into your potting mix
- At first flower bud stage: apply a liquid feed with moderate nitrogen and higher phosphorus/potassium (bloom formula or diluted tomato fertilizer)
- Every 2–3 weeks through harvest: continue light liquid feeding, especially after heavy watering or rain that leaches nutrients
Dealing with pests, diseases, and common problems
Pests to watch for
Aphids are the most common pest on container okra. They cluster on new growth and undersides of leaves, sucking plant sap and causing curled, yellowed foliage. Catch them early by checking your plants every few days. A strong spray of water knocks most off. For persistent infestations, insecticidal soap, neem oil, or azadirachtin-based sprays work well and are safe for food crops when used as directed. Spray in the early morning or evening to avoid burning leaves in direct midday sun.
Other occasional visitors include whiteflies and stink bugs. The same neem oil or insecticidal soap approach handles most of them. Container plants are actually a bit easier to manage for pests because you can move them, inspect them closely, and treat them without worrying about soil runoff into a large garden bed.
Disease prevention
Powdery mildew can show up as white powdery patches on leaves, especially in late summer when days are warm and nights start cooling down. Prevention is the best strategy: ensure good airflow around your pots, don't crowd plants, and avoid wetting foliage when watering. If mildew does appear, a spray of diluted horticultural oil or neem oil can slow it down. Choosing resistant varieties also helps.
Troubleshooting the most common issues
| Problem | Likely Cause | Fix |
|---|---|---|
| Seeds not germinating | Soil too cold (below 65–70°F) | Wait for warmer conditions; soak seeds overnight before planting; use a heat mat if indoors |
| Seedlings yellow and weak | Cold wet soil causing damping off | Improve drainage; reduce watering; ensure soil temp is above 65°F |
| Lots of leaves, no pods | Too much nitrogen fertilizer | Cut back on nitrogen; switch to a bloom/potassium-rich feed |
| Leggy, stretching plant | Not enough sunlight | Move pot to a sunnier spot with 6+ hours of direct sun |
| Pods going tough quickly | Harvesting too infrequently | Harvest every 2–3 days during peak season; pick at 2–4 inches long |
| Wilting despite watering | Root rot from poor drainage | Check drainage holes are clear; repot into fresh well-draining mix if needed |
Harvesting and keeping production going
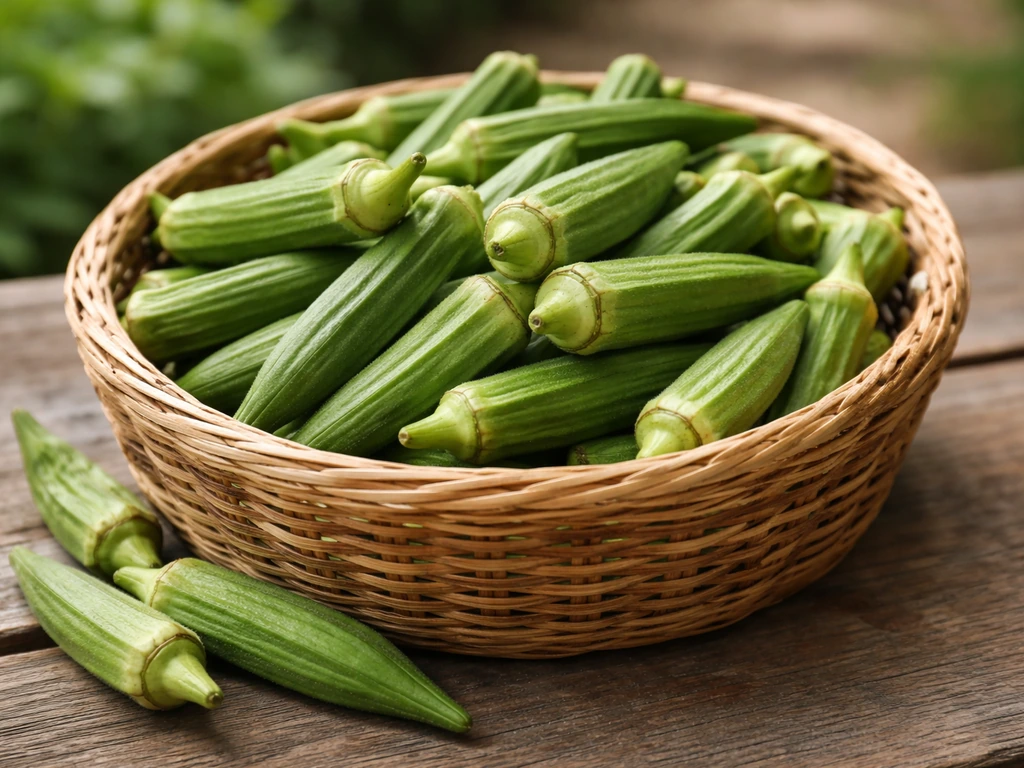
Harvest okra pods when they're 2–4 inches long. At this size, they're tender, flavorful, and easy to cook with. Once pods hit 5 inches or more, they become tough and fibrous and are really only useful for saving seeds. The window between perfect and overripe is surprisingly short, sometimes just a day or two in peak summer heat.
Harvest frequently, ideally every 2–3 days during peak production. Daily harvesting is even better if you can manage it. This isn't just about pod quality; it's about plant productivity. When you leave overripe pods on the plant, the plant gets the signal that it has completed its job (set seed) and slows or stops producing new pods. Remove every pod at the right stage and the plant keeps pumping out new ones. This is the single most effective thing you can do to extend your harvest window.
A useful quality check: pods should be bright green and fleshy with small seeds inside. The seeds should feel barely developed, not hard and large. If you cut a pod open and the seeds are already firm and prominent, you've waited too long. Use that pod in a soup or stew where texture matters less, and make a point of checking every two days going forward.
Pods grow 3–7 days after the flower opens, so once you see those beautiful yellow blooms (similar to hibiscus flowers, same plant family), set a reminder to start checking for harvestable pods within the week. North Carolina Cooperative Extension notes this 3–7 day window as the typical timeline from flower to harvest-ready pod, which is a handy benchmark.
After harvest, your main job is to keep the plant fed and watered consistently so it keeps producing. Remove any yellowing leaves, keep an eye out for pests, and continue your every-2–3-week feeding routine. A well-maintained container okra plant in a warm climate can produce right through summer and into early autumn. When the weather cools and production drops, that's your signal the season is winding down.
Your next steps today
If you're ready to start, here's what to do right now:
- Check your local temperatures. Is your daytime soil temperature consistently above 65–70°F? If yes, you're good to plant. If not, wait a couple of weeks or start seeds indoors in biodegradable pots.
- Get a 5-gallon pot (minimum) with drainage holes. If you have a 10-gallon, even better.
- Mix a light potting mix with about 25% compost. Add a slow-release balanced granular fertilizer to the mix.
- Buy seeds of Baby Bubba, Blondy, or Burgundy. Soak them in water overnight before planting.
- Sow 2–3 seeds per pot at 3/4 inch depth. Place the pot in your sunniest spot.
- Water gently, keep the soil evenly moist but not soggy, and wait. You should see sprouts within 4–10 days in warm conditions.
- Once seedlings are 3–4 inches tall, thin to the single strongest plant per 5-gallon pot.
- Start your bloom-formula feeding when flower buds appear, and commit to checking for harvest-ready pods every 2–3 days once flowering begins.
Growing okra in pots isn't complicated once you understand what the plant actually needs: heat, sun, good drainage, and regular harvesting. If you also want a quick win for leafy greens, see how to grow pechay in pots as a related container option. Get those four things right and you'll have more pods than you know what to do with by midsummer.
If you enjoy growing other vegetables in containers, the same container-friendly approach works well for herbs like pudina (mint) or leafy greens like pechay, and even seeds like fenugreek and methi respond well to the principles of good drainage and consistent care. If you're also growing leafy herbs, see how to grow methi in pots for a closely related container setup.
If you want to grow pudina in pots, use a container with good drainage, give it bright light, and keep the soil evenly moist as the plant settles in herbs like pudina (mint).
FAQ
Why is my potted okra growing leaves but not producing pods?
In a container, the plant often looks fine while pods fail when nitrogen is too high or when it is still too cool. If you see lots of tall leaves but no flowers, switch to a fertilizer ratio higher in phosphorus and potassium, and double-check that your pot is getting at least 5 to 6 hours of direct sun plus warm soil (ideally above 70°F).
Can I start lady finger indoors and transplant it into the pot?
Okra can be started from indoor seedlings, but avoid transplant shock by using biodegradable peat or coir pots and keeping roots intact. If you already transplanted and growth stalled, keep the pot in full sun, water consistently (not soggy), and wait a week to see whether new growth resumes before changing anything else.
How often should I water lady finger in pots, and should I empty the saucer?
Watering frequency depends on heat, pot size, and drainage, so use a simple rule: water deeply when the top inch feels dry. Always empty saucers after watering, and aim for runoff so salts do not build up; if the soil stays wet longer than a day in warm weather, reduce watering and check that drainage holes are clear.
My okra seeds did not germinate. What could be wrong?
If the soil temperature is below 65 to 70°F at seed depth, germination will be poor and seeds can rot even if the surface looks dry. Use a soil thermometer, wait until nights are reliably above about 60°F, and soak seeds overnight to improve the odds when you plant.
Can I grow two okra plants in one pot?
Yes, but crowding reduces airflow and makes watering less even, which can trigger mildew and lower yields. In a 10 to 15 gallon container, keep 2 plants with enough spacing (about 6 inches between plants), and use a compact or dwarf variety so the plants stay manageable.
What causes powdery mildew on container okra, and how do I prevent it?
Powdery mildew usually comes from humidity plus limited airflow, not just “bad luck.” Increase spacing, move pots so leaves do not touch, water the soil rather than the foliage, and treat early with neem or horticultural oil according to label directions, especially during late summer.
How do I get rid of aphids on my potted okra without harming the plant?
If aphids keep returning, treat the first wave promptly and repeat after 5 to 7 days if needed. You can also knock them off with a strong water spray before applying insecticidal soap, and focus sprays on new growth and leaf undersides where they cluster.
My pods are turning tough. When should I harvest in pots?
A pod that is tough and fibrous usually means it stayed on the plant too long, commonly after it reaches around 5 inches. To avoid this, harvest every 2 to 3 days during peak heat, and start checking after you see the flowers because pods are typically ready 3 to 7 days later.
What should I do if I accidentally let some okra pods get overripe?
If pods have lots of firm seeds, the plant is likely already shifting toward seed production. Remove all overripe pods as soon as you notice them, keep feeding lightly (not nitrogen-heavy), and maintain consistent watering so the plant stays in pod-producing mode.
Why are my young okra seedlings collapsing at the soil line?
Container okra can tolerate dry spells once established, but it does not tolerate long periods of cold wet soil during germination. Protect seedlings from cool nights, keep soil evenly moist, and avoid heavy, clay-like mixes that stay wet and compact.
What fertilizer schedule works best for okra growing in containers?
Okra is a heavy feeder in pots, and nutrients wash out faster than in-ground. Start with compost mixed into potting mix, then feed after the first buds appear using a tomato or bloom-type fertilizer (with relatively more phosphorus and potassium) at light intervals every 2 to 3 weeks.