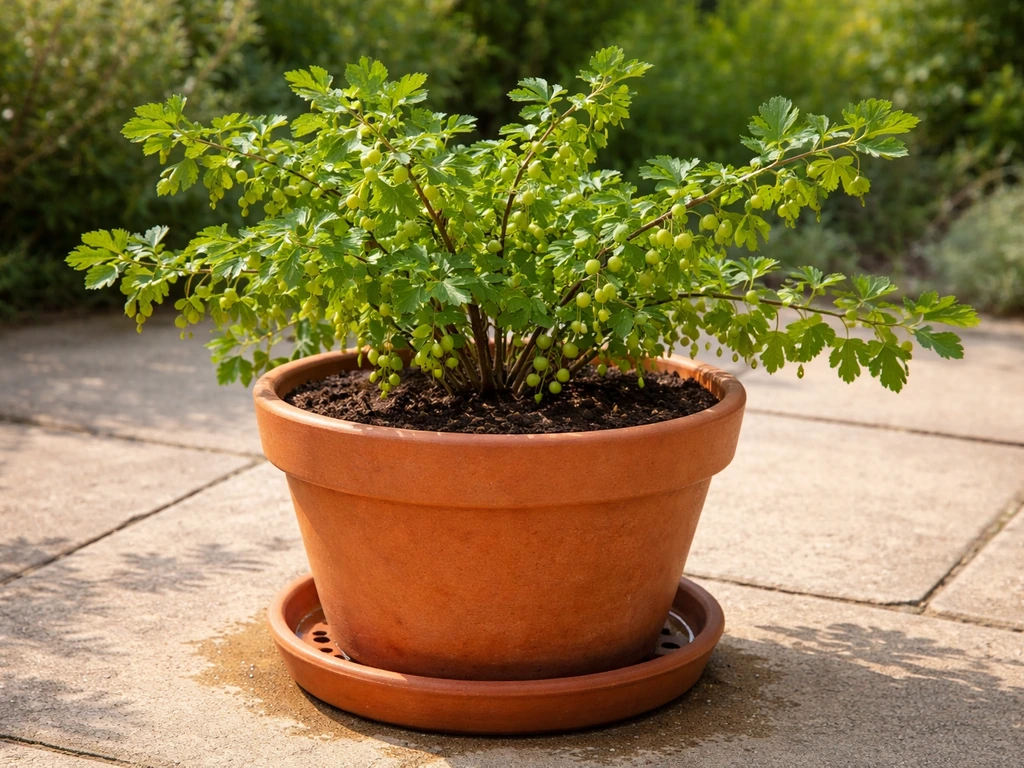
Yes, you can absolutely grow cape gooseberries in pots, and they do surprisingly well in containers if you give them the right setup. You need at least a 12–15 litre pot (think a large bucket or a 30cm diameter container), a well-draining potting mix, a sunny spot, and some patience. For rose gardening in India, the same pot-size and drainage principles apply, but choose a mix and watering schedule that suit your local heat and monsoon patterns how to grow roses in pots in India. First fruits show up around 80–100 days after planting, so this is not a quick crop, but it is genuinely rewarding and very manageable on a balcony, patio, or small garden. Blackcurrants have different needs than cape gooseberries, but you can also grow them successfully in a pot if you choose a large container and keep the soil evenly moist can i grow blackcurrants in a pot.
How to Grow Cape Gooseberry in Pots: A Step-by-Step Guide

What you're actually growing (and why pots suit it)
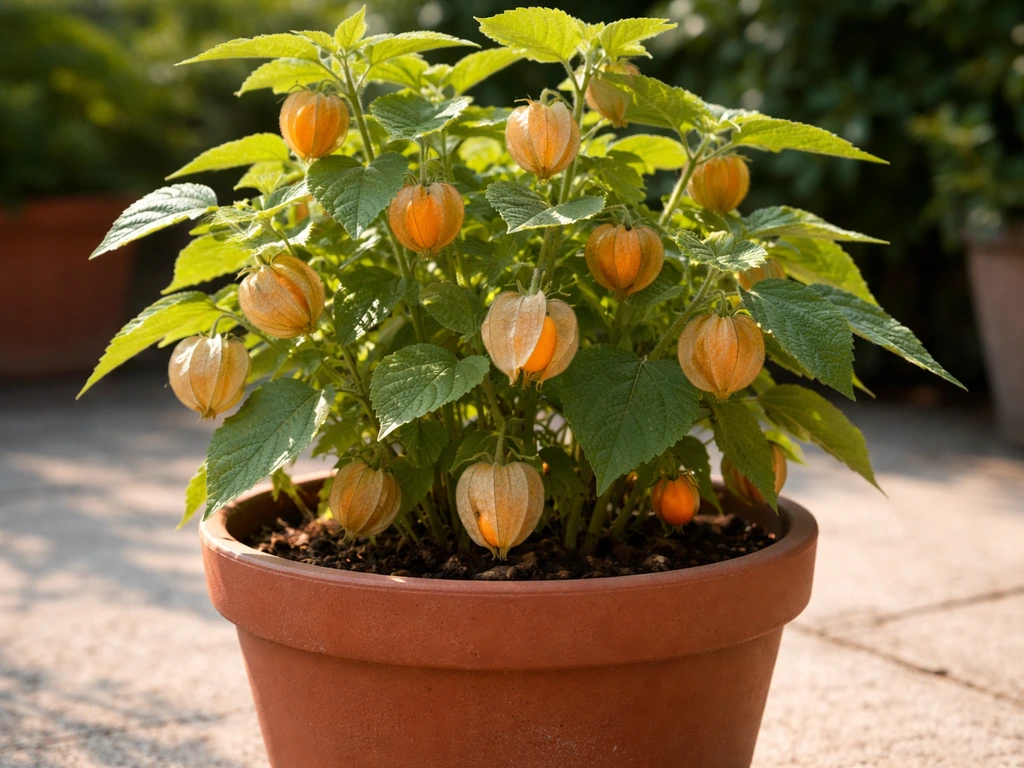
Cape gooseberry, or Physalis peruviana, is sometimes called goldenberry or ground cherry. It's a South American native that grows into a sprawling, bushy plant and produces small, golden-orange fruits wrapped in a papery husk. Those husks are distinctive and make harvesting oddly satisfying. The plant is technically a tender perennial, which means it doesn't die back in winter if you keep it frost-free, but most container growers treat it as an annual and start fresh each season.
What makes cape gooseberry especially good for pot growing is that it's an indeterminate plant. That means it doesn't produce one big crop and stop, it keeps growing, flowering, and setting fruit continuously over a long season. For container gardeners, that's ideal because you're getting a rolling harvest rather than needing to process a glut all at once. It also means the plant genuinely benefits from being managed and shaped in a pot, rather than just left to ramble.
If you've grown strawberries or gooseberries in pots before, you'll find cape gooseberry sits somewhere in between. It's a bit more vigorous than a potted strawberry, but far less demanding than a full fruit bush. Total beginners can absolutely do this.
Choosing the right pot, location, and season
Pot size matters more than you'd think
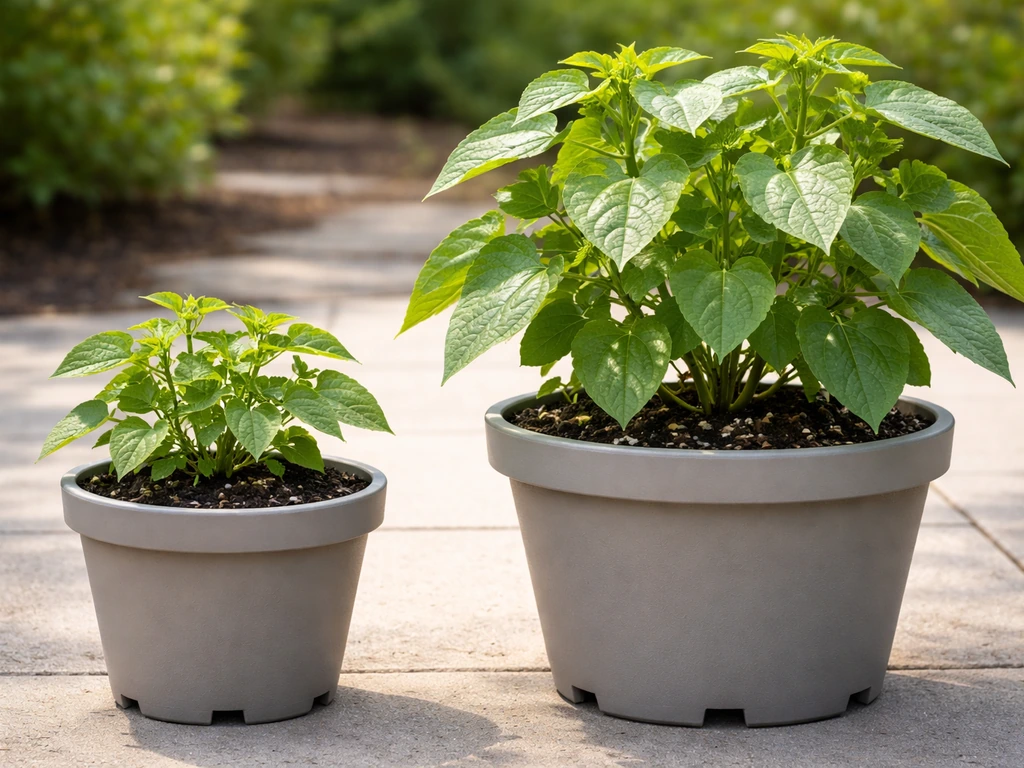
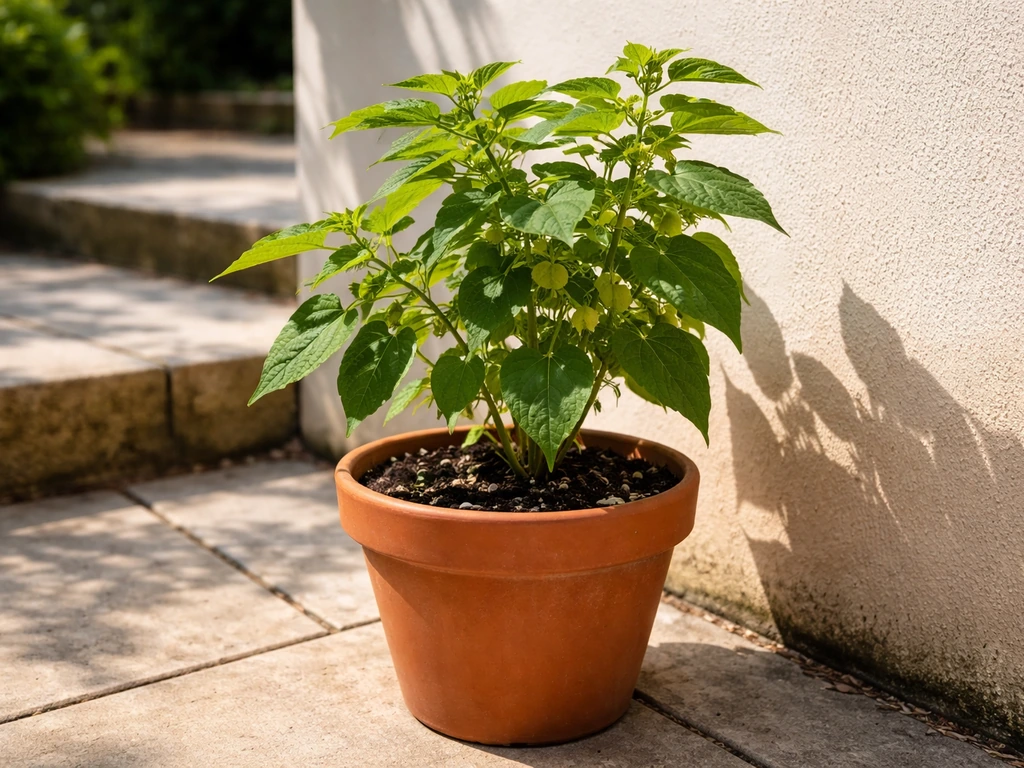
The single most common mistake I see is planting cape gooseberry in too small a pot. This plant can reach 1–1.5 metres tall and produces a lot of foliage before it fruits. In a pot that's too small, the roots get cramped, the soil dries out within hours of watering, and yields drop significantly. Go with at minimum a 12–15 litre pot (roughly 30cm across and 30cm deep). A 20–25 litre pot is better if you have the space, and it will give you noticeably more fruit. Fabric grow bags in that size range are a great option for balconies and rooftops since they're light, breathable, and won't crack.
Whatever container you use, drainage holes are non-negotiable. Cape gooseberry cannot sit in waterlogged soil. If your pot doesn't drain freely, the roots rot quickly and the plant looks like it's wilting no matter how much you water. Terracotta pots drain well and breathe nicely, but they also dry out faster, so you'll be watering more often. Plastic pots hold moisture longer, which can be useful in very hot weather.
Location: give it the sunniest spot you have
Cape gooseberry needs full sun, at least 6 hours of direct sunlight per day, and 8+ hours if you want a generous harvest. On a south-facing balcony or patio in the northern hemisphere, you're in good shape. Because container locations in full sun tend to dry out faster than shade, and breezes can also dry out the container growing medium, choosing and managing sun and airflow matters blank" rel="noopener noreferrer">move the pot to follow the sun. If your only outdoor space gets patchy shade, the plant will grow but will flower and fruit much less prolifically. One of the real advantages of container growing is that you can move the pot to follow the sun, so take advantage of that during the early weeks when the plant is establishing.
Timing your planting right
If you're starting from seed indoors, sow 6–8 weeks before your last frost date. Cape gooseberry needs warm soil (at least 18–20°C) to germinate well, so a heated propagator or a warm windowsill is helpful. Move the pot outside after all frost risk has passed and nighttime temperatures are consistently above 10°C. In the UK, that's typically late May to early June. In warmer climates (southern Europe, India, Australia, or California), you can sow earlier and get plants outdoors sooner. If you’re wondering how to grow fruits in pots in India, focus on sun, fast-draining soil, and consistent watering to match your local heat. Because fruiting kicks in around 80–100 days after planting, getting your timing right means the difference between a full harvest and a race against autumn.
Soil and container setup
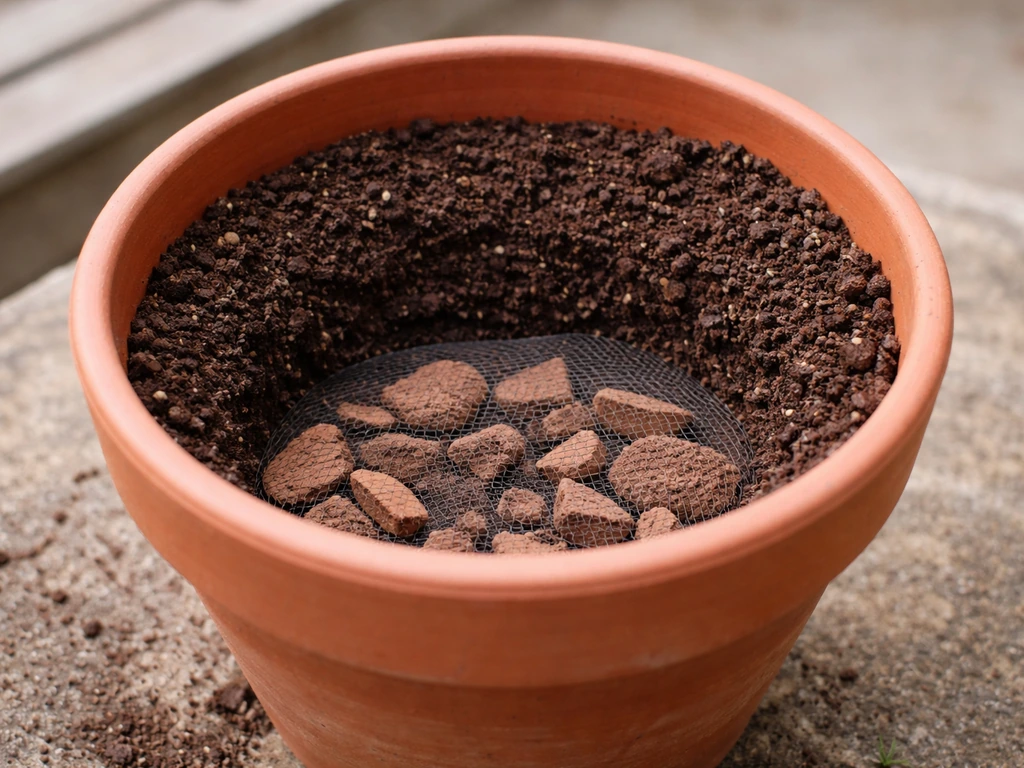
Don't use garden soil in a pot. It compacts, drains poorly, and often brings in pests and diseases. You want a good quality peat-free potting compost as your base. To that, add about 20–30% perlite or coarse horticultural grit to improve drainage and aeration. A mix of roughly 70% compost and 30% perlite works really well for cape gooseberry in containers. If you can get hold of coir (coconut fibre), you can swap in a portion of that for the compost to help with moisture retention without waterlogging.
Before filling your pot, place a layer of broken crocks, gravel, or a piece of mesh over the drainage holes to stop them blocking with compost over time. Fill the pot to about 3–4cm from the rim so you have space to water without it running straight off the edges. If you're growing in a hot climate or a rooftop situation, a layer of mulch on the surface of the pot (wood chips or coir) will slow down moisture loss dramatically.
Watering in a pot requires a bit of a system. Check the soil moisture every day in summer by pushing your finger 2–3cm into the compost. Water thoroughly when the top 2–3cm feels dry, and let the excess drain freely from the bottom. Never let the pot sit in a saucer of standing water. In hot weather, a 12–15 litre pot may need watering every day or even twice a day. Inconsistent watering is one of the main causes of fruit drop in potted cape gooseberries, so getting into a rhythm really matters.
Planting from seed vs buying a transplant
Both routes work, but they suit different situations. Starting from seed is cheaper, gives you more variety options, and is genuinely satisfying. Transplants (young plants from a garden centre or online nursery) save you 6–8 weeks and are the better choice if you're planting late in the season or just want to keep things simple.
| Starting from seed | Buying a transplant | |
|---|---|---|
| Cost | Very low | Moderate |
| Time to harvest | ~100+ days from sowing | ~80–100 days from planting out |
| Effort at start | Needs warm spot for germination, regular checks | Plant straight into pot |
| Variety choice | Wide selection available online | Limited to what's stocked |
| Best for | Early starters and seed savers | Late starters and beginners |
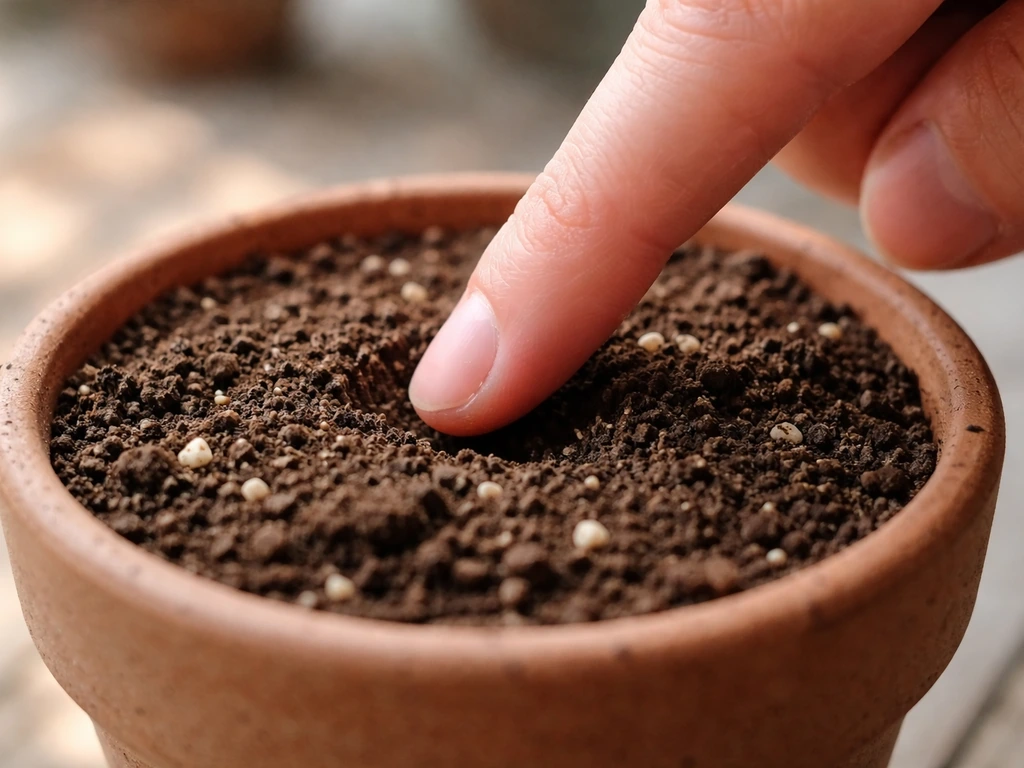
If starting from seed, sow 2–3 seeds per small cell or module, about 5mm deep, and keep the compost consistently moist and warm. Germination typically takes 10–21 days at 20–25°C. Once seedlings have 2–3 sets of true leaves, thin to the strongest one and pot up into a 9cm pot. Harden off transplants (whether you grew them or bought them) by placing them outside for a few hours each day over 7–10 days before leaving them out permanently. This acclimatisation step is really important, skipping it often causes drooping and set-back that takes weeks to recover from.
One plant per 12–15 litre pot is the right spacing. Don't be tempted to cram two plants into one container to save space, they'll compete for nutrients and water and both will underperform. If you want more plants, get more pots. One healthy plant in the right-sized container will produce far more fruit than two stressed ones sharing a crowded pot.
Keeping the plant happy from pot to harvest
Sunlight and temperature
Keep your pot in the sunniest, most sheltered spot available. Cape gooseberry is not frost-hardy at all, even a light frost will kill young plants. If a cold night is forecast, bring the pot inside or cover it with fleece. In cooler climates, a south-facing wall provides useful reflected warmth. Flowering begins around 65–75 days after planting (or 70–80 days in cooler conditions), so if you're counting on the sun to hit a certain spot at that point in the season, plan ahead.
Feeding without overdoing it
This is where a lot of beginners go wrong. Too much nitrogen (the 'N' in NPK fertiliser) pushes the plant into producing masses of leafy growth at the expense of fruit. For the first 4–6 weeks after planting, a balanced liquid feed (like a 10-10-10 or similar all-purpose formula) once a week is fine. Once you start to see flower buds forming, switch to a high-potassium feed, a tomato fertiliser works perfectly here. The higher potassium encourages flowering and fruit development rather than leaf growth. Feed with tomato fertiliser every 7–10 days through the fruiting period, and stop feeding altogether in late summer as the season winds down.
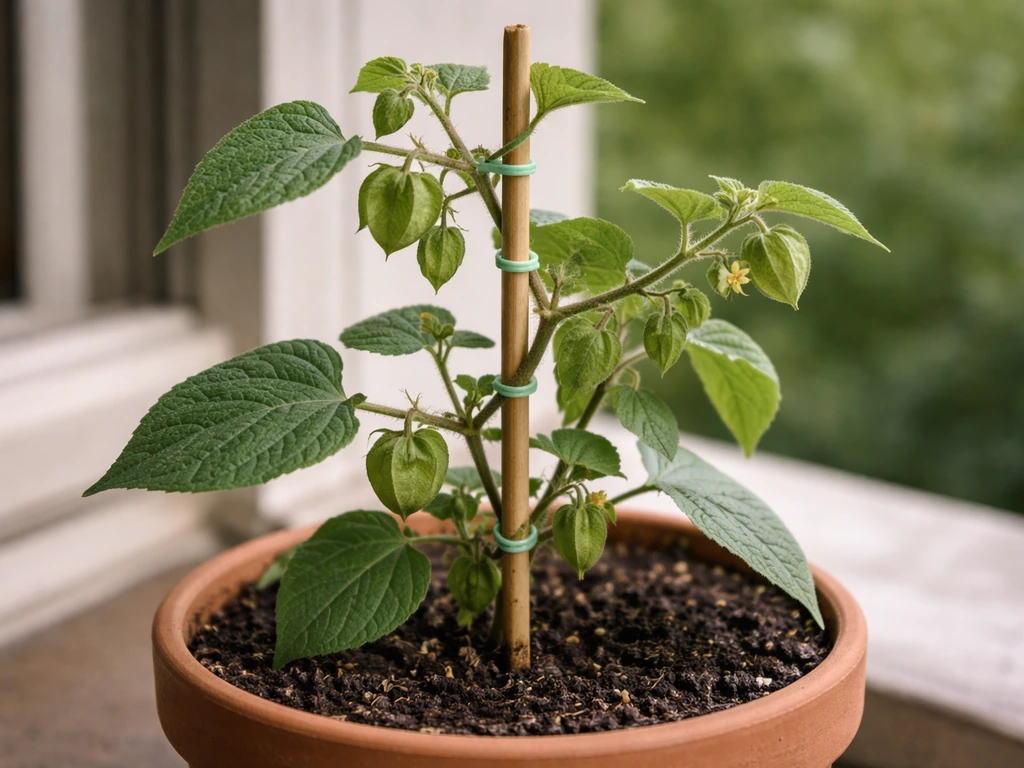
Supporting and training the plant
Cape gooseberry in a pot can get top-heavy and sprawling. Insert a bamboo cane or stake into the pot early (before the roots fill the container, so you don't damage them later) and tie the main stem loosely with soft garden twine as it grows. You can also pinch out the growing tips once the plant reaches about 50–60cm tall. This encourages bushier side branching and more fruiting points, which translates directly to more fruit on a compact plant. It feels counterintuitive to cut a plant back when you want more from it, but it genuinely works.
Pollination in a container
Cape gooseberry is self-fertile, meaning you only need one plant to get fruit, unlike many other fruiting plants. However, pollination still needs to happen, and in a sheltered balcony or indoor setting, there may be fewer bees around to do the job. If you're seeing plenty of flowers but not much fruit forming, give the plants a gentle shake each day when the flowers are open to move the pollen around. This mimics what a bee would do and is surprisingly effective. You can also use a small soft paintbrush to transfer pollen from one flower to another.
Solving common pot problems
Wilting
If your cape gooseberry is wilting, the cause is almost always one of two things: the soil is bone dry, or it's waterlogged. Press your finger into the compost. If it's dry 2cm down, water thoroughly. If it's wet and the pot feels heavy, stop watering and move the pot somewhere it will get more airflow. Wilting from overwatering looks identical to wilting from underwatering, which is why the finger-test habit is so useful. A plant that has been overwatered for a prolonged period may have root rot, which shows up as yellowing leaves and a musty smell from the soil, at that point, you may need to repot into fresh compost, removing any blackened roots.
Pests and diseases
Aphids are the most common pest on potted cape gooseberry. They cluster on new growth and flower buds and can weaken plants quickly. Blast them off with a jet of water or apply an insecticidal soap spray, which is safe to use right up to harvest. Whitefly can also be an issue, especially in warm, sheltered spots, yellow sticky traps hung near the plant are a simple way to monitor and reduce populations. Cape gooseberry can occasionally get fungal issues like powdery mildew, especially if airflow is poor. TNAU IPM package notes that cape gooseberry can be affected by powdery mildew, and the IPM-style pests and diseases categories can help you troubleshoot issues like mildew risk when airflow is poor. Keep some space around the pot and avoid watering late in the evening so leaves don't stay wet overnight.
Nutrient problems
Yellow leaves on a potted plant usually signal a nitrogen deficiency, which is common in containers because nutrients get washed out with repeated watering. Switch to a balanced liquid feed and you should see improvement within 1–2 weeks. Purple-tinted leaves or stems can indicate a phosphorus deficiency, often triggered by cold soil temperatures, if this appears early in the season, wait for the soil to warm up before feeding, as the plant can't absorb phosphorus well below 12°C. Conversely, over-feeding with high-nitrogen fertiliser produces very dark green, lush growth with almost no flowers, if this is happening, stop feeding and let the plant settle for 2–3 weeks before resuming with a low-nitrogen, high-potassium formula.
Fruit drop
Dropping of small, unripe fruit before harvest is one of the more frustrating things about growing cape gooseberry in containers. The most common cause is inconsistent watering, the plant needs consistent moisture during fruit development, and repeated cycles of drought and heavy watering cause it to shed fruit as a stress response. Stick to a regular watering schedule and use mulch on the soil surface to even out moisture loss. Extreme heat, sudden cold snaps, and low pollination can also trigger fruit drop, so keeping the plant sheltered and manually shaking flowers open during heat waves will help.
Harvesting, storing, and setting yourself up for next season
When and how to harvest
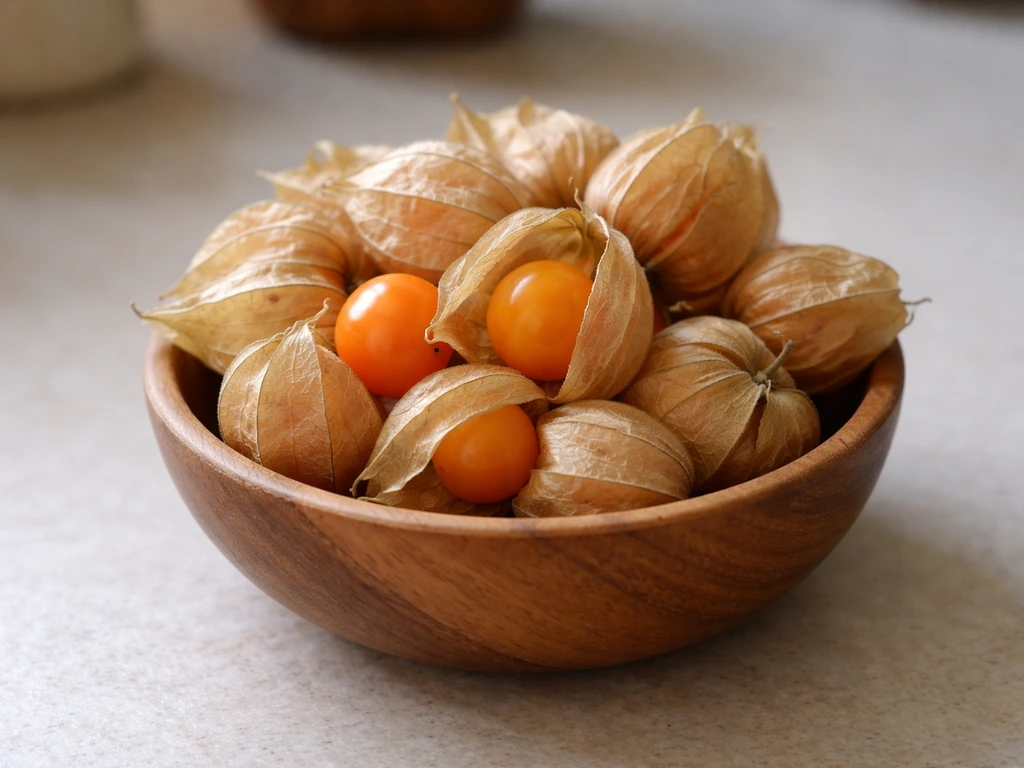
The husks tell you everything. When a cape gooseberry is ready, its papery husk turns from green to a dry, straw-coloured tan or golden-brown. The fruit inside will be golden-orange and will feel slightly soft when you press it gently through the husk. Don't harvest by colour of the fruit alone, always wait for the husk to fully dry. Ripe fruits often fall off the plant on their own, which is why a layer of straw or fine mesh placed around the base of the pot can help you catch any that drop. Expect your first fruits around 80–100 days after planting, with ongoing harvests continuing for weeks or even months as the indeterminate plant keeps flowering.
Storing cape gooseberries
Leave the husks on for storage, they are the best natural packaging the fruit has. Stored in their husks at room temperature, cape gooseberries last 2–3 weeks easily. In the fridge, they'll keep for 4–6 weeks. For longer storage, you can freeze the fruit (remove the husks first), dry them, or turn them into jam. The husks also make a great indicator of freshness: if they feel damp or soft, use the fruit quickly. If they're dry and papery, the fruit inside is still fine.
Getting better yields next time
After your first season, you'll have a clear sense of what the plant needed more of in your specific setup. A few tweaks that consistently improve pot yields include: sizing up to a larger container (even going from 12 litres to 20 litres makes a real difference), starting seeds 2–3 weeks earlier to extend the harvest window, being stricter about switching to high-potassium feed once flower buds appear, and pinching out growing tips earlier to encourage a bushier shape. If you're in a mild climate, cape gooseberry can overwinter as a perennial if you bring the pot inside or into a frost-free greenhouse, overwintered plants fruit significantly earlier and more heavily in their second year. Save seeds from the best fruits by squeezing them out, rinsing off the gel, and drying them on paper before storing in a cool, dry place for next spring.
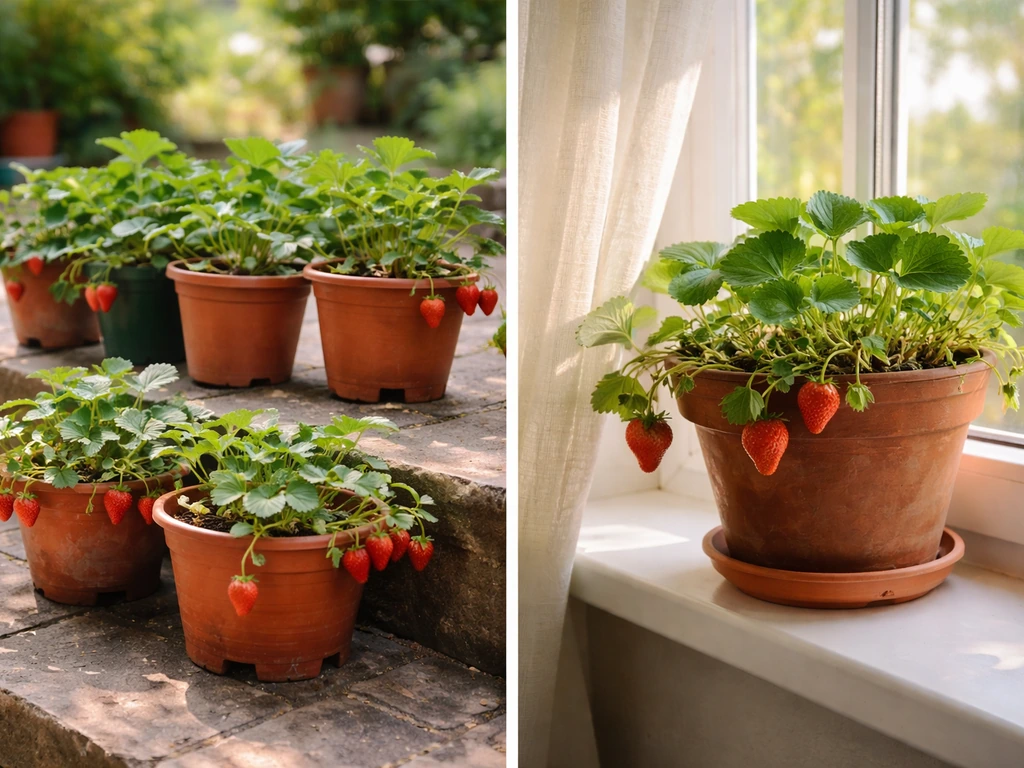
Container fruit growing in general rewards patience and observation. If you're also experimenting with other berries in pots, like goji berries, blackcurrants, or traditional gooseberries, you'll find that many of the same principles around pot size, drainage, and consistent feeding apply across all of them. If you want to try another container berry, learn how to grow strawberry plants in pots for the right pot size, sunlight, and watering routine strawberry plants how to grow in pots. Cape gooseberry is one of the more forgiving options in that group, and once you've got one healthy plant producing fruit on your balcony or patio, you'll want to try more.
FAQ
What is the smallest pot I can use for cape gooseberry in a container, and is 12–15 litres really enough?
At minimum, use a 12–15 litre pot. Anything smaller usually leads to rapid drying, weaker root growth, and fewer fruits because the plant keeps making foliage before it shifts into heavy fruiting. If you want easier watering and more reliable yields, step up to a 20–25 litre pot when space allows.
Can I grow cape gooseberry in a fabric grow bag instead of a rigid pot?
Yes. A fabric grow bag of 20–25 litres is a good match because it breathes and drains well, but it will dry out faster than plastic. Plan to check soil moisture more often, especially during hot spells or windy rooftops.
Do I need to water cape gooseberry daily if it is in the sun?
Not always, but in summer it is common to need daily watering in a 12–15 litre container. Use the finger check (2–3 cm down) and water thoroughly when that layer dries. In very hot weather you may need twice daily, but only if the compost is drying quickly.
What should I do if my cape gooseberry wilts but the soil feels slightly damp?
If the pot feels heavy or stays wet, the issue is likely waterlogging or root stress rather than drought. Stop watering, improve airflow around the plant, and check drainage. If leaves keep yellowing or you notice a musty smell, repot into fresh, well-draining compost.
How can I tell early whether I have an overfeeding problem (especially too much nitrogen)?
Too much nitrogen usually shows as very dark green, fast leafy growth with delayed or weak flowering. If you notice bud formation is lagging, stop high-nitrogen feeding and switch to a high-potassium tomato-style fertiliser once flowers appear, then follow the 7–10 day schedule.
Is manual pollination really necessary in pots, and how do I do it correctly?
If your plants are sheltered and you do not see many pollinators, manual pollination helps. When flowers are open, gently shake the plant or tap the flower clusters to move pollen. You can also use a small soft brush to transfer pollen between flowers, focusing on the open blossoms during the same time window each day.
My plant has flowers but the fruit drops before ripening. What are the most likely causes?
The biggest trigger is inconsistent moisture during fruit development (dry spells followed by heavy watering). Other common causes include heat stress, sudden cold, low pollination, or nutrient imbalance from continuing high-nitrogen feed. Keep watering steady, mulch the surface, and stop high-nitrogen fertiliser once flowering begins.
When should I harvest cape gooseberries in pots, if the husk is still turning colour?
Harvest when the husk is fully dry and straw-colored to golden-brown. Do not rely on the internal fruit colour alone. Ripe fruits often drop, so placing a thin layer of straw or fine mesh around the base helps you catch fallen ones.
Can I leave cape gooseberry in the pot over winter?
Sometimes, but it depends on frost protection. In climates with light frost risk, most container growers treat it as annual. If you can keep it frost-free (indoors, or in a frost-safe greenhouse), it may overwinter as a perennial and can fruit earlier in the next season.
What should I do if my cape gooseberry leaves turn yellow or purple, but I’m not sure why?
Yellow leaves in containers often point to nitrogen deficiency, especially after nutrients wash out, so switch to a balanced liquid feed. Purple-tinted stems or leaves can indicate cold soil and reduced phosphorus uptake, especially early in the season, so wait until temperatures are consistently warmer before feeding.
Which pests should I watch for first on potted cape gooseberry?
Aphids usually appear first, clustering on new growth and flower buds. Check stems and underside of leaves regularly, and treat early with a strong water jet or insecticidal soap. Sticky yellow traps help you detect whitefly and monitor pressure before infestations explode.
How do I improve drainage reliably when I’m worried my potting mix might stay wet?
Always confirm there are clear drainage holes, and add a thin barrier over them (mesh or crocks) to prevent compost from clogging. Use a high-drainage mix (potting compost plus perlite or coarse grit) and avoid using garden soil, which compacts and holds water too long in containers.