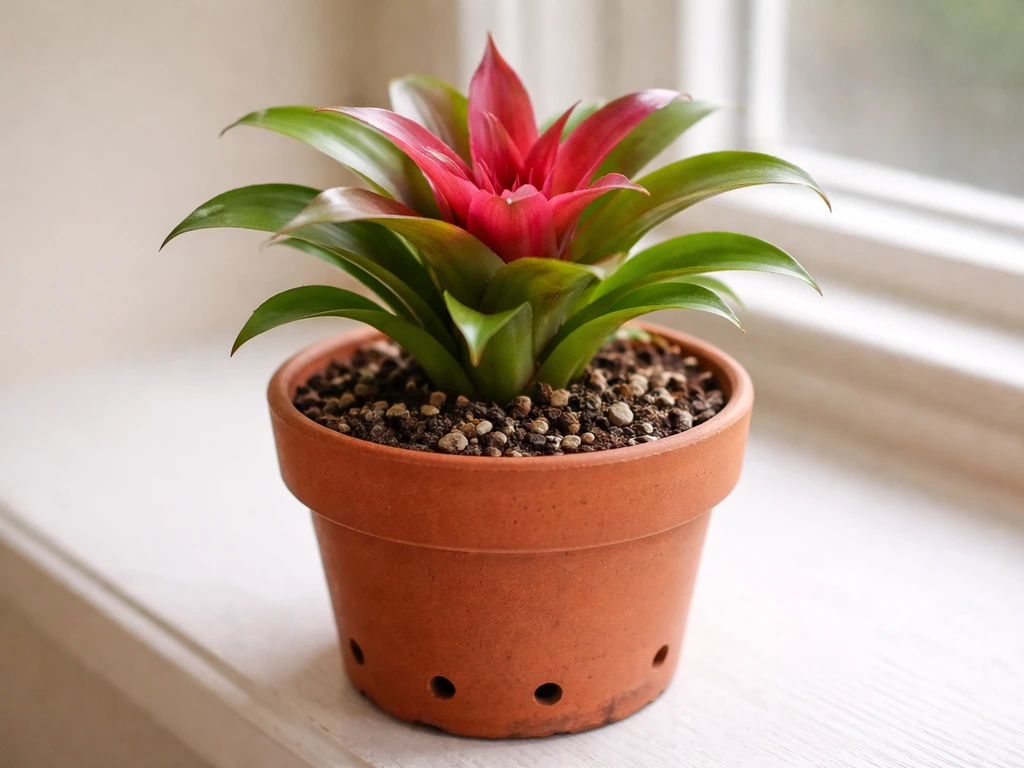
Bromeliads are one of the best plants you can grow in a pot, especially if you're short on space or new to container gardening. They stay compact, tolerate indoor conditions better than most tropical plants, and reward you with genuinely striking color for weeks or even months. The key is getting three things right from the start: an airy, fast-draining mix (not standard potting soil), a small pot with good drainage, and a watering routine that matches whether your bromeliad holds water in its central cup or not. Get those basics down and the rest is pretty forgiving.
How to Grow Bromeliads in Pots: Complete Container Guide

Marcus Whitley
5 May 2026

Choosing the right bromeliad type for pots
Not all bromeliads behave the same way in a container, so it's worth knowing what you're working with before you buy. The most common genera you'll find at garden centers and nurseries each have their own personality.
| Genus | Common Name | Growth Habit | Good for Pots? |
|---|---|---|---|
| Guzmania | Guzmania | Rosette/tank-forming, soft leaves | Excellent indoors |
| Neoregelia | Painted Fingernail | Rosette/tank-forming, vivid color | Excellent indoors/out |
| Aechmea | Urn/Vase Plant | Tank-forming, sturdy leaves | Great, handles lower light |
| Cryptanthus | Earth Star | Flat rosette, terrestrial | Excellent for small pots |
| Billbergia | Billbergia | Epiphytic, clumping | Easy, very adaptable |
| Dyckia | Dyckia | Clumping, stiff spiny leaves | Good outdoors in sun |
For complete beginners, I'd recommend starting with a Guzmania or Aechmea. You'll find them everywhere, they're tough, and they put on a real show. Cryptanthus (earth stars) are fantastic if you want something tiny and unusual for a small windowsill pot. Dyckia is more of a desert-adapted plant and can handle more direct sun, but it's a bit pricklier to handle, literally. The big distinction that affects how you care for them is whether they're 'tank-formers' (they have a central cup that holds water) or not. Guzmania, Aechmea, and Neoregelia are classic tank-formers. Cryptanthus and Dyckia are not.
A useful rule of thumb: bromeliads with soft, flexible leaves generally prefer lower, more indirect light, while those with hard, stiff leaves can tolerate brighter conditions. Keep that in mind as you decide where to put yours.
Best pot, drainage, and potting mix
Pot size and drainage
Bromeliads have surprisingly small root systems for how dramatic they look. Most full-sized plants genuinely don't need anything bigger than a 6-inch pot, and young plants or pups are perfectly happy in 4-inch containers. Going too big is one of the most common mistakes people make: extra soil volume holds excess moisture, which leads to root rot faster than almost anything else. Keep it snug.
Drainage holes are non-negotiable. If you've fallen in love with a beautiful ceramic or decorative brass planter that has no drainage, don't plant directly into it. Instead, pot your bromeliad into a plain plastic nursery pot with several drainage holes, then slip that inside the decorative outer pot (called a cachepot). Just remember to tip out any water that collects in the bottom of the outer pot after watering.
The right potting mix
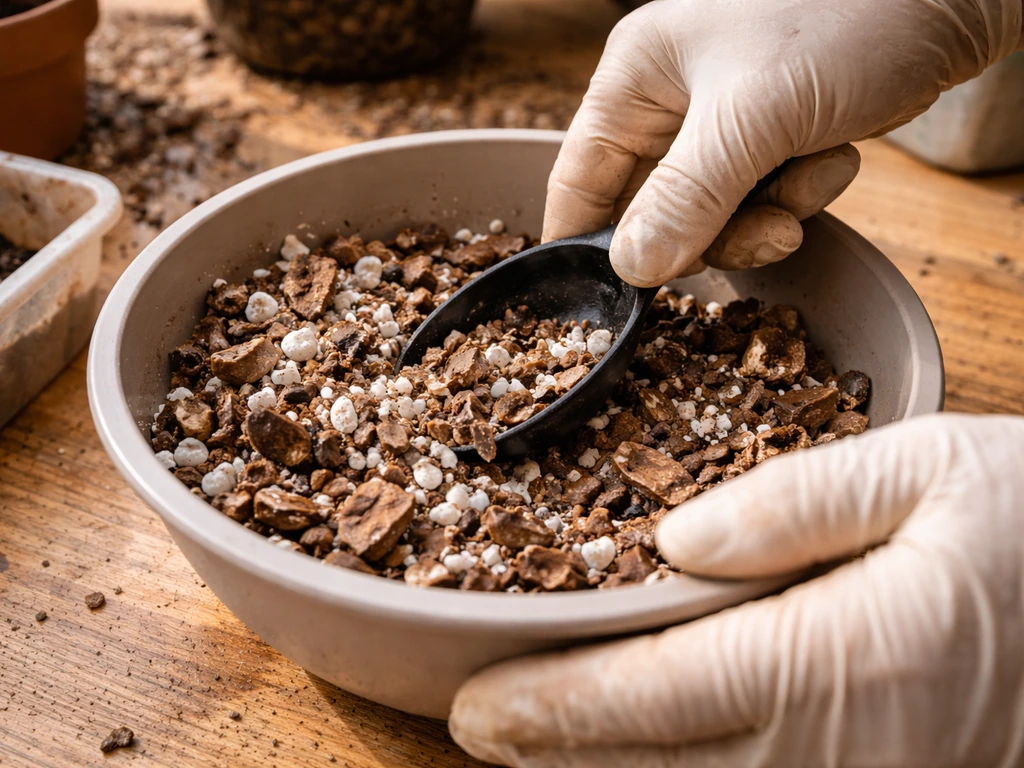
Standard potting soil is too dense and holds too much water for most bromeliads. What you want is something loose, airy, and fast-draining that still holds just enough moisture. A good bromeliad mix typically combines orchid bark, perlite or pumice, a small amount of peat or coco coir, and optionally a little horticultural charcoal to keep things fresh. You can buy premade bromeliad or orchid mixes, or blend your own using roughly 50% bark and 50% perlite/peat mix. The goal is a medium that drains freely within seconds of watering and doesn't compact into a soggy block. If you find a nice bag labeled 'bromeliad mix' or 'epiphytic mix' at your garden center, that's a solid ready-to-go option.
Light, temperature, and placement indoors vs outdoors
Most bromeliads want bright, indirect light. Think the light you'd get a few feet back from a sunny window, or right in front of an east- or west-facing window. In lux terms, they're happiest between about 10,000 and 20,000 lux. Direct midday sun through a south-facing window can bleach or scorch soft-leaved varieties, so be careful there. If your leaves start looking washed out or develop brown, crispy patches, that's usually too much direct sun.
Indoors, an east or west-facing windowsill is often ideal. If your only option is a north-facing room with low light, your bromeliad will survive but may grow slowly and produce less vivid color. A grow light set to run 12 to 14 hours a day can genuinely help in this situation. Outdoors during summer, a sheltered spot with morning sun and afternoon shade works well for most types. If you want to move a potted bromeliad outside for the warmer months, acclimate it gradually over a week or two rather than going straight from a dim interior to bright sun.
Temperature-wise, most bromeliads are comfortable in the same range humans are: 60 to 80°F (15 to 27°C) is the sweet spot. They don't like cold drafts, air conditioning vents blowing directly on them, or temperatures dropping below about 50°F (10°C). If you're growing outdoors and nights get cool in autumn, bring them inside before the temperature dips.
How to water bromeliads correctly (tank vs non-tank)
Watering bromeliads is the area where most beginners go wrong, and it splits into two approaches depending on whether your plant is a tank-former or not.
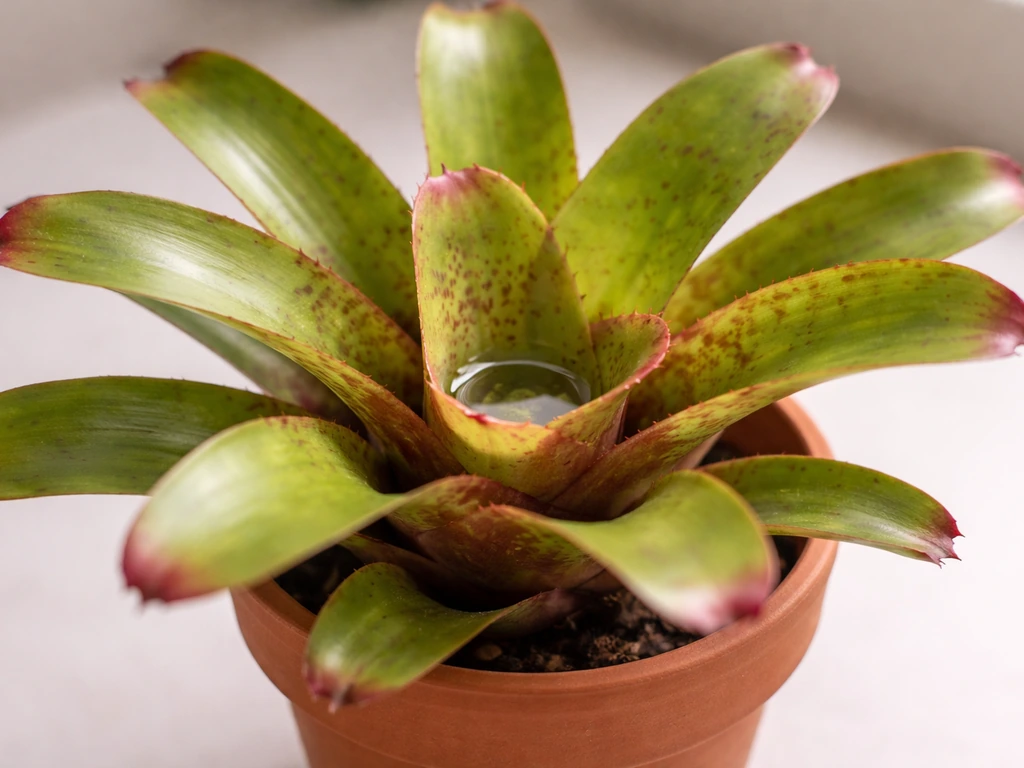
Tank-forming bromeliads (Guzmania, Aechmea, Neoregelia)
Tank-forming bromeliads have a central rosette cup that's designed to hold water in nature. You should keep this cup partially filled at all times, but here's the catch: don't let the water sit and stagnate. Stagnant water in the cup is a direct invitation for fungal rot and unpleasant smells. The practical rule is to rinse out the cup at least every other week, pour it dry, and refill with fresh water. The Illawarra Bromeliad Society newsletter emphasizes careful watering for bromeliads, including keeping the cup or leaf bases filled so they overflow slightly, and avoiding hot water from garden hoses rinse out the cup at least every other week, pour it dry, and refill with fresh water. Using distilled or collected rainwater is genuinely better here because tap water can leave mineral deposits over time, and those salts can damage the plant.
For the potting medium itself, water it thoroughly about once a week in summer (let water run freely out of the drainage holes) and back off to every two weeks or less in winter. Wait until the top few inches of the mix feel dry before watering again. Never let the pot sit in a saucer of standing water.
Non-tank bromeliads (Cryptanthus, Dyckia)
For bromeliads without a central cup, you're watering just the growing medium, same as you would most houseplants. Soak the mix thoroughly, let it drain completely, then let the top few inches dry out before watering again. In warm months, this is roughly once a week. In winter, you might go two to three weeks between waterings. When in doubt, underwater rather than overwater. Root rot from soggy soil is far more common and harder to fix than underwatering.
Air circulation matters more than you'd think
One thing that often gets overlooked: good airflow around your bromeliad helps prevent crown and root rot significantly. If your plant is in a stuffy corner with no air movement, even correct watering might not be enough. Occasionally placing it near an open window or running a small fan nearby (not blasting it directly, just moving the air in the room) makes a real difference.
Fertilizing and general care schedule
Bromeliads are light feeders. They don't need much fertilizer, and overfeeding is genuinely worse than underfeeding. The go-to approach is a balanced, water-soluble fertilizer (something like a 10-10-10 or 20-20-20 formula) diluted to about one-quarter of the recommended strength. So if the label says one teaspoon per gallon, use a quarter teaspoon. Apply this during the active growing season, roughly spring through early autumn, about once a month.
For tank-forming varieties, you can add diluted liquid fertilizer directly to the central cup as well as to the soil, but never put granular, solid, or powder fertilizer into the cup. That will burn the plant. And avoid fertilizing entirely when the plant is dormant or growing slowly in winter.
Over time, mineral and fertilizer salts can build up in the potting medium. Every four to eight weeks, it's worth doing a deep flush: water the pot slowly and thoroughly with clean tepid water (rainwater or distilled is best), letting it drain completely, and repeating once or twice. This washes away accumulated salts before they cause leaf tip burn or root damage.
Simple seasonal care schedule
| Season | Watering | Fertilizing | Other |
|---|---|---|---|
| Spring | Weekly when dry | 1/4 strength monthly, resume | Repot or separate pups if needed |
| Summer | Weekly or when soil dry | 1/4 strength monthly | Move outdoors if desired; flush salts every 4-8 weeks |
| Autumn | Reduce slightly | Stop or reduce to every 6 weeks | Bring indoors before temps drop below 50°F |
| Winter | Every 2-3 weeks | Skip | Ensure good light; watch for rot in low-light conditions |
Propagation: growing bromeliad pups in containers
Here's one of the most exciting things about bromeliads: after the parent plant flowers (which is often its one and only bloom), it starts producing offsets called pups around the base. The mother plant slowly declines, but those pups are your next generation of plants. One bromeliad can produce several pups over the following year or two, so you can keep the cycle going indefinitely.
When to separate pups
The right time to remove a pup is when it's roughly one-quarter to one-half the size of the parent plant. A good way to judge readiness: gently squeeze the base of the pup. If it feels firm and solid rather than soft and tender, it's ready to separate. Pups that are too small won't have enough stored energy to root well on their own.
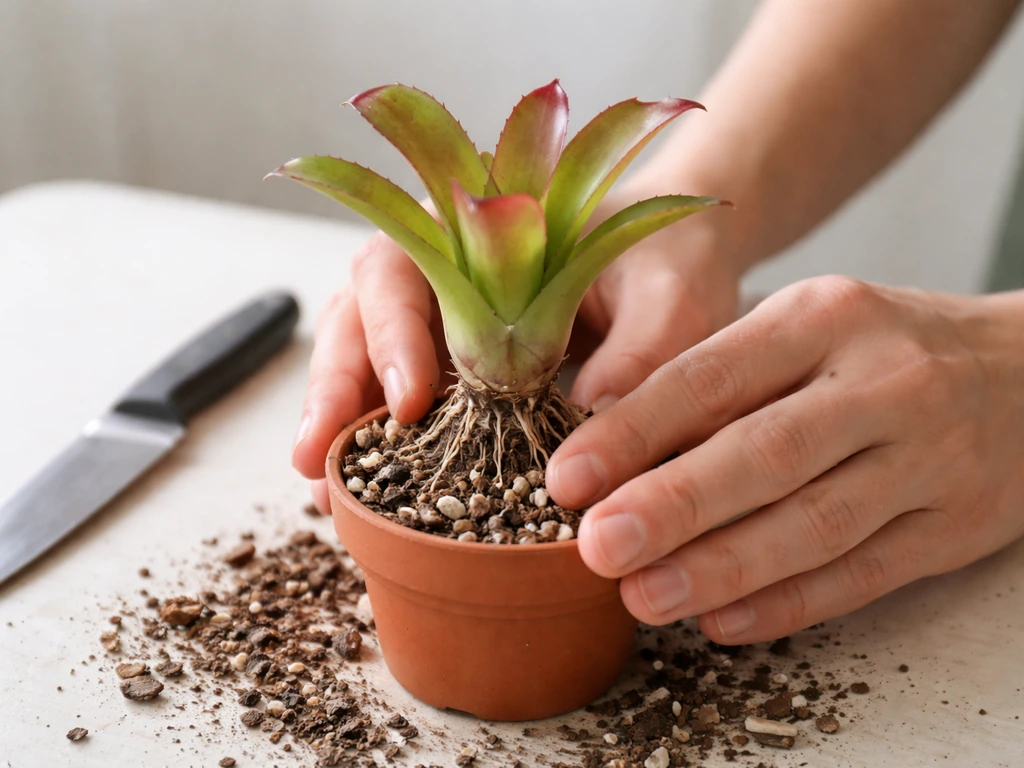
How to pot up pups
- Use a clean, sharp blade (sterilize it with rubbing alcohol first) to cut the pup as close to the mother plant's base as possible, getting a bit of the base with it.
- If the cut end looks soft or wet, let it callous over in a dry spot for a few hours before potting.
- Optionally dip the cut end in a little rooting hormone powder and dust with a small amount of fungicide powder. This isn't strictly necessary but gives the pup a better start.
- Fill a 4-inch pot with your airy bromeliad mix and make a small hole in the center.
- Place the pup into the hole so it sits at the same depth it was on the mother plant. Do not bury it deeply or cover the base of the leaves.
- If the pup is top-heavy and keeps flopping over, stake it loosely with a small bamboo stick and a soft tie until the roots establish.
- Water lightly and place in bright indirect light. Keep the mix just barely moist for the first few weeks while roots develop.
Give the pup a few weeks to a couple of months to root in. You'll know it's rooted when it starts showing new growth or resists a gentle tug. From there, treat it exactly like a mature bromeliad.
Repotting, long-term maintenance, and troubleshooting
When and how to repot
Bromeliads don't need repotting often. Every two to three years is typically enough, and spring is the ideal time to do it. The main reasons to repot are: the potting mix has broken down and become dense and water-retaining (this usually happens after two years with organic-heavy mixes), you need to separate pups from the mother plant, or the plant has clearly outgrown its container. When you do repot, go up only one pot size (so a 4-inch to a 6-inch, not a 4-inch straight to a 10-inch). If you are wondering how to grow gazania in pots, start with the same idea and choose a container that has plenty of drainage and only a small amount of extra room for the roots repot, go up only one pot size. Plant at the same depth the bromeliad was sitting before, making sure the base of the leaves sits just at or slightly above the soil line to prevent crown rot.
Common problems and quick fixes
| Problem | Likely Cause | Fix |
|---|---|---|
| Mushy base or crown | Root or crown rot from overwatering | Remove affected tissue, let dry, repot into fresh mix; improve drainage |
| Brown, crispy leaf tips | Mineral/salt buildup or low humidity | Flush pot with clean water; use rainwater; mist occasionally |
| Pale, washed-out leaves | Too much direct sun | Move to bright indirect light or shade from direct sun |
| Dark, leggy growth | Too little light | Move closer to window or add a grow light |
| Slow growth, no color | Low light + low fertilizer | Improve light first; add 1/4-strength fertilizer monthly |
| Foul smell from cup | Stagnant water in tank | Rinse and flush cup; refill with fresh distilled or rainwater |
| Pup won't stand upright | Roots not yet established | Stake loosely with a small stick until it anchors itself |
Long-term maintenance rhythm
Once you get the hang of it, bromeliads are genuinely low-maintenance container plants. The main ongoing tasks are refreshing the water in tank-forming types every week or two, watering the medium when it dries out, giving a light feed monthly during the growing season, and flushing the pot with clean water every month or two to prevent salt buildup. Watch for pups forming after your plant blooms, pot them up when they're ready, and you'll have a continuous supply of new plants without ever buying another one. If you enjoy the process of keeping tropical plants in pots, you might find bromeliads make a natural companion to other flowering container plants like begonias or gerbera daisies, since they share a preference for bright indirect light and careful watering. If you want to grow pickles in a pot instead, you can use a similar container setup and keep the mix evenly moist while the plants develop how to grow pickles in a pot. If you want a fuller flowering display, you can also use the same bright, careful container care approach to grow gerbera daisy in pots gerbera daisies. If you're also curious about how to grow geraniums in pots, the same container basics like drainage and consistent watering will help you get great results. If you're also wondering how to grow begonias in pots, stick to a well-draining mix and water only when the top layer starts to dry.
Small failures are part of learning this. I've lost a bromeliad to root rot from a pot with poor drainage, and I've had pups that refused to root because I separated them too early. Both taught me more than any success did. Start with one or two plants, nail down the watering and light, and the rest follows naturally.
FAQ
What should I do if my bromeliad cup turns brown or starts smelling?
That usually points to stagnant, contaminated water. Empty the cup completely, rinse the rosette with clean water, then refill with fresh water only after excess drains from the pot. Increase airflow around the plant and flush the medium when you do a cup reset, since rot can start in the center and spread into the base.
Should I mist bromeliads that have a tank cup?
Not as a substitute for watering. Misting may raise humidity briefly, but tank-formers still need the cup managed (filled partially, then refreshed, never allowed to sit dirty). For non-tank types, misting should be light and infrequent, since the mix still must dry between waterings.
How do I tell if I’m underwatering versus overwatering a potted bromeliad?
Overwatering commonly shows soft, translucent leaves, a loose or collapsing base, and persistent dampness in the mix. Underwatering more often causes crisp, dry leaf tips and a tighter, firm look overall. Use the “top few inches dry” check, then adjust frequency rather than watering on a strict calendar.
Can I use hard tap water in my bromeliad pots?
You can, but plan for faster mineral buildup. If you use tap water, flush the pot more often (closer to every 4 weeks) and consider using filtered water for topping off the tank cup. If leaves develop white crust, leaf tip browning, or dullness, switch to rainwater or distilled for the next cycle.
Do bromeliads need fertilizer in a container, and what’s the safest way to apply it?
They need very little. Use a diluted soluble fertilizer at about one-quarter strength, apply only during active growth, and skip feeding if the plant is slow or stressed (recent repotting, low light, or cold drafts). For tank-formers, keep solids and granules out of the cup, and prefer liquid only in small amounts.
Is it okay if my cachepot collects water after watering?
It’s not ideal for long periods. After watering, remove the standing water from the decorative outer pot promptly. A small amount that evaporates quickly is usually fine, but consistently wet bottoms raise the odds of crown and root rot.
My bromeliad isn’t blooming. How long can it take in a pot, and what triggers it?
Tank-formers often bloom when they mature and have enough bright indirect light, not from frequent feeding. Give stable light near an east or west window, keep temperatures steady, and avoid over-fertilizing. If pups are forming heavily but no bloom occurs, the plant may be getting too little light or too much nitrogen.
When should I move a bromeliad outdoors for summer?
Move it only after nights are consistently above about 50°F (10°C). Start with morning sun and afternoon shade, and acclimate gradually over 1 to 2 weeks. If you see leaf bleaching or sudden crisp patches, bring it back indoors or reduce direct sun.
Can I grow multiple bromeliads in one pot?
Yes, but only if they are similar in light needs and you can keep drainage and airflow strong. Avoid overcrowding, since bromeliads can retain moisture in tight clusters, increasing crown rot risk. Separate plants into their own snug pots once they start competing or when pups multiply.
What pot material works best for bromeliads in containers?
Terracotta can help the medium dry faster, which is beneficial if you tend to overwater. Plastic nursery pots are often safest because you can control drainage and prevent hidden waterlogging. Either works, as long as you use a fast-draining mix and never let the pot sit in standing water.
How do I know if a pup is ready to separate, and what’s the biggest mistake?
A good readiness sign is firmness at the base, the pup being about one-quarter to one-half the parent’s size, and minimal tenderness when you gently squeeze. The most common mistake is separating too early, which leaves it with insufficient stored energy to root, causing it to stall for months.
Should I trim brown leaf tips or cut back the leaves after issues?
You can snip off clearly dead, dry tip sections with clean scissors, but avoid cutting into the healthy green tissue or removing the central rosette. If browning is progressing quickly, focus on fixing the root cause (light imbalance, water stagnation, or salt buildup) rather than pruning alone.
Do bromeliads need to be repotted more often if I used organic-heavy mix?
Yes, usually. Organic mixes break down and compact faster, which can turn a previously fast-draining pot into one that stays wet. If you notice the medium staying damp, odor changes, or slow drainage, repot sooner than the usual 2 to 3 year window, ideally in spring.