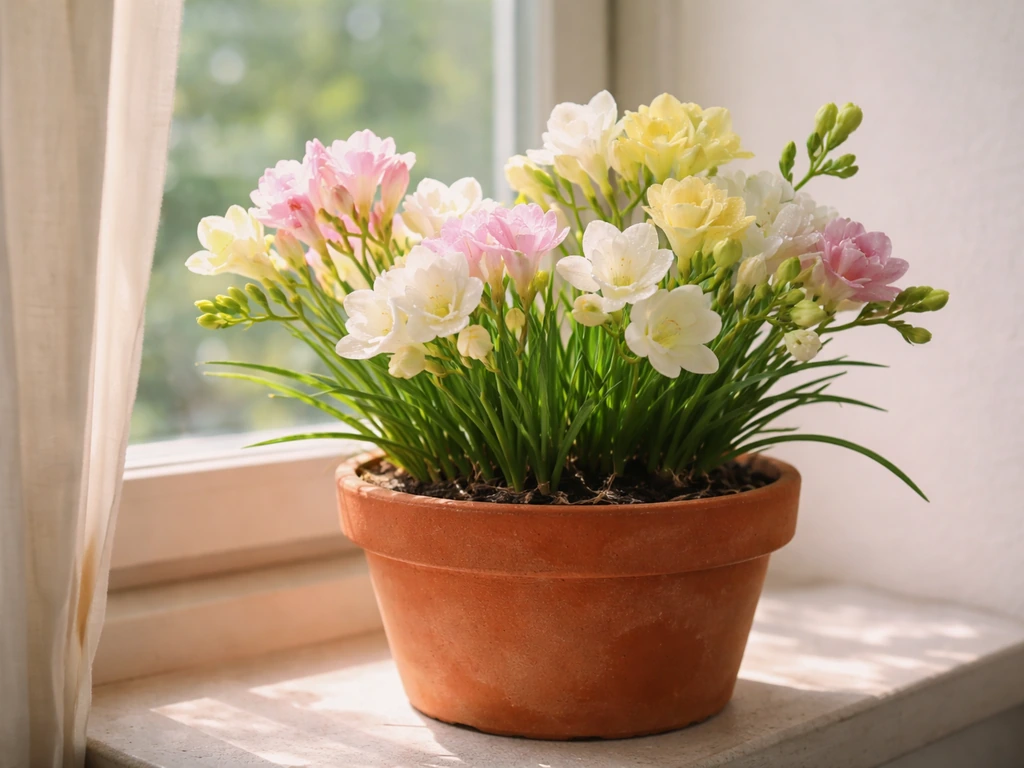
Yes, freesias grow really well in pots, and honestly they're one of the more rewarding bulbs you can grow in a container. If you want to try a different leafy container project, you can also learn how to grow staghorn fern in a pot. They stay compact, they smell incredible, and you don't need a garden bed or a greenhouse to pull it off. The key things you need to get right are drainage, a cool start, and good light once they get going. Get those three things sorted and you'll have those gorgeous, fragrant blooms in about 10 to 12 weeks from planting.
How to Grow Freesias in a Pot: Step-by-Step Guide

Marcus Whitley
3 May 2026
Can freesias actually grow in pots? Here's the honest answer
Freesias are genuinely well-suited to container growing, more so than a lot of other bulbs. They're naturally small plants, they don't need masses of root space, and they actually prefer the slightly controlled environment a pot gives you. The RHS specifically recommends pot cultivation for freesias, as long as you can offer them somewhere cool, light, and airy, like a porch, conservatory, or a bright but cool room indoors. For pot-grown freesias, the RHS recommends free-draining potting compost with added grit, grown somewhere light, cool, and airy, such as a porch, conservatory, or a bright but cool room. That's not a long list of requirements.
The one thing to be honest about is that freesias are fussier about temperature than, say, tulips or daffodils. They need a cool period to trigger flowering, and if your space runs warm all the time, you'll get lots of leafy growth and very few flowers. But as long as you can give them that cool staging period (around 5°C for three to four weeks at the start), you're in great shape. More on exactly how to do that below.
Choosing the right pot: size, depth, and drainage
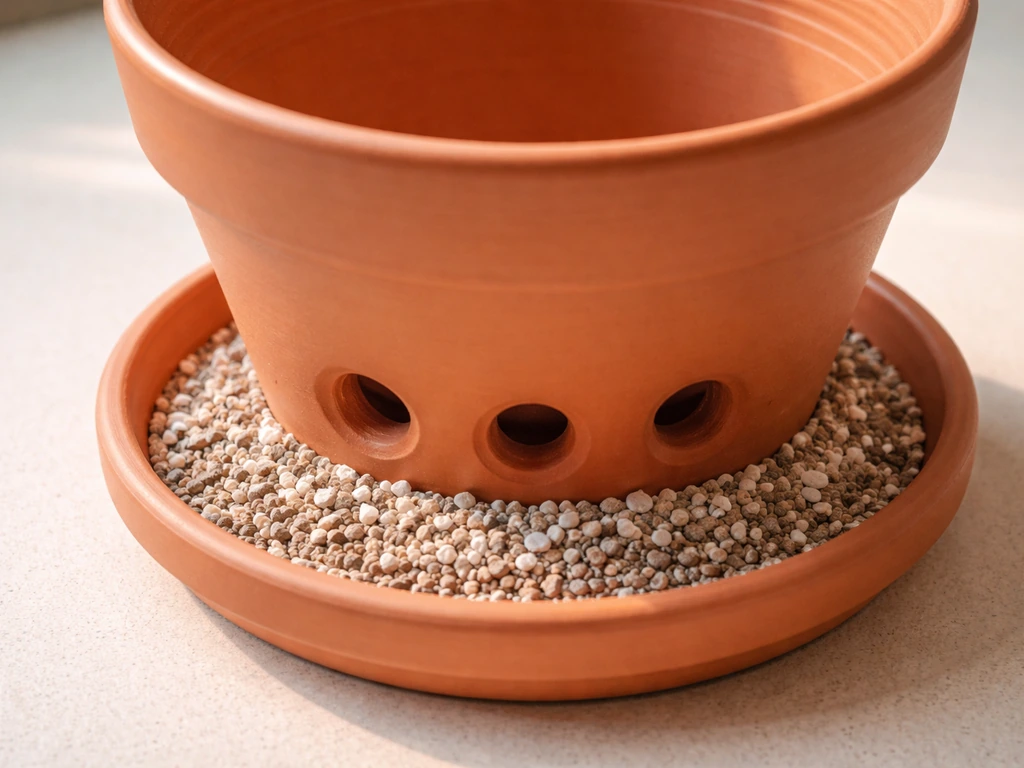
Freesias don't need enormous pots, but they do need ones with decent depth and, absolutely non-negotiably, good drainage holes. A waterlogged corm will rot before it ever flowers, so if the pot doesn't drain freely, don't use it.
For a practical starting point, a pot that's at least 20 to 30 cm (around 8 to 12 inches) in both diameter and depth works well for a nice little cluster of corms. A 15 cm diameter pot can comfortably hold 5 to 7 corms if you want something smaller on a windowsill. If you're going bigger, a 30 cm pot gives you room for a good display and a bit more buffer in terms of moisture management, which makes things easier if you're still finding your feet. Terracotta is a great choice because it breathes and dries out more evenly than plastic, which reduces rot risk, but any container with proper drainage holes will work.
Before you add any compost, put a layer of crocks (broken pot pieces) or coarse gravel over the drainage holes to stop the mix from washing through. It's a small step but it really does help keep drainage consistent.
Picking your freesia corms: size, timing, and varieties
When you're buying freesia corms, size matters more than you might expect. Bigger, firmer corms consistently produce better quality flowers with larger blooms. Buy from a reputable supplier and avoid anything that feels soft, shrivelled, or lightweight, those are signs the corm is already struggling. It's one of those things where spending a little more on good stock pays off in actual flowers rather than disappointment.
Timing depends on where you are and what you're aiming for. In temperate climates (UK, northern Europe, similar zones), corms are typically available and planted in late winter to spring for late spring to summer flowers. In warmer climates like USDA zone 9 and above, you'd plant in autumn, somewhere between August and December, for spring flowering. The 10 to 12 week bloom window from planting is fairly reliable once conditions are right, so you can work backwards from when you want flowers.
For varieties, you're spoiled for choice. Single-flowered types tend to be more fragrant, while doubles give a fuller, showier bloom. Both work perfectly in pots. Popular cultivars include 'Blue Heaven', 'White Swan', and mixed colour selections that give you a lovely range in one container. Honestly, any named hybrid from a decent supplier will perform well in a pot, so choose based on colour and whether scent is a priority for you.
Potting mix and how to plant freesia corms
The right soil mix
Freesias need free-draining compost above everything else. A standard potting mix works as a base, but mix in a generous amount of horticultural grit or perlite, roughly one part grit to three parts compost, to improve drainage and prevent the soggy conditions that cause rot. Avoid heavy, peat-free mixes that compact easily; they hold too much moisture. The RHS recommends potting compost with added grit specifically for freesia containers, and from experience, that combination is pretty hard to beat.
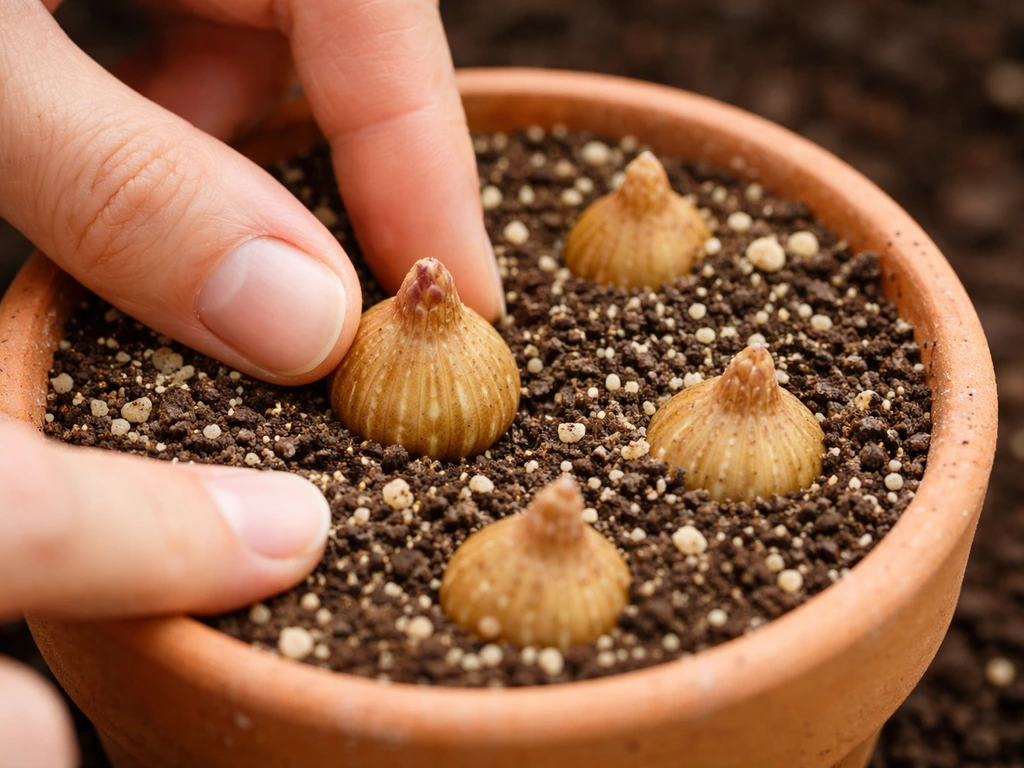
Planting depth and spacing
Plant freesia corms pointed tip upward (the pointed end is the growing tip, the flatter, more rounded end goes down). Plant them about 2 to 5 cm deep, so roughly 1 to 2 inches, with the tip just at or just below the compost surface. In UMN Extension's freesia planting-depth guidance, lighter soils may require planting a bit deeper, while heavier soils (like clays) call for shallower planting Plant them about 2 to 5 cm deep. Some guidance suggests the tip can sit just above compost level, which also works fine. Don't plant them too deep; freesias are shallow-rooted and planting too deep can slow or prevent emergence.
Space corms about 5 cm (2 inches) apart from each other. In a 15 cm pot you can fit 5 to 7 corms; in an 11 cm pot, 3 to 5 corms works well. In a larger 30 cm container, you can go up to 12 to 15 corms for a really full display. Planting them fairly close together is fine and actually looks better once they're flowering.
One optional but worthwhile step borrowed from commercial growers: before planting, give your corms a 15 to 20 minute soak in water (you can add a very dilute fungicide if you have it). This rehydrates them slightly and reduces the risk of any fungal rot taking hold in the early weeks. Not essential, but a good habit if you've had rot problems before.
Light, temperature, and watering: the day-to-day conditions
The cool start they need
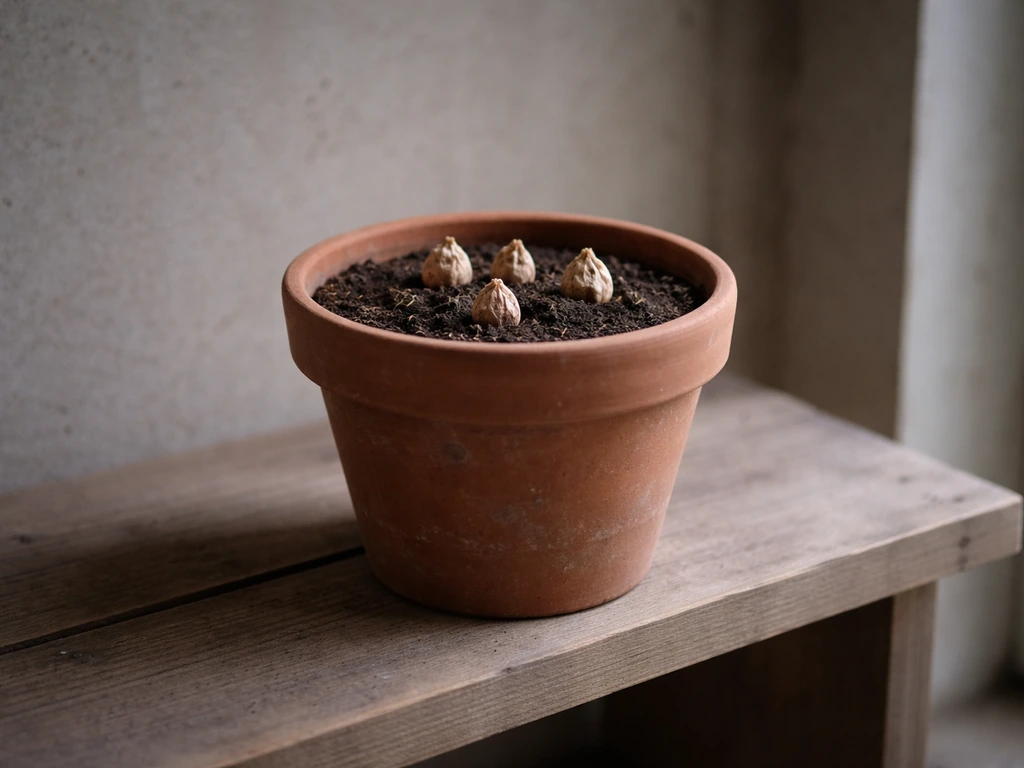
After planting, put the pot somewhere cool, around 5°C (41°F), for three to four weeks. A shaded, frost-free shed, an unheated porch, or even a cool garage all work. This cool period is what triggers the corms into proper growth and eventually flowering. Skip it and you risk getting leafy green stems that just... don't flower. After that cool staging period, move the pot to somewhere brighter and a bit warmer, around 10 to 15°C (50 to 59°F), with good ventilation. A conservatory, cool greenhouse, or a bright north- or east-facing windowsill indoors is ideal.
Light requirements
Once the shoots appear and you've moved the pot to warmer conditions, freesias want as much bright light as you can give them. A south or west-facing windowsill is ideal if you're growing indoors. They won't perform well in a dark corner; low light leads to weak, floppy stems and poor flower development. If you're growing outside after the cold period has passed and there's no frost risk, a sheltered sunny spot is perfect.
Watering

During the initial cool period, water sparingly. The compost should be just barely moist, not wet. Once you move the pot to warmer conditions and the shoots start growing, water more regularly but always let the top centimetre of compost dry out between waterings. Freesias do not like sitting in wet compost at any stage. If you want more detailed guidance on how to grow pinks in pots, make sure your container has the right drainage and watering routine Freesias do not like sitting in wet compost at any stage.. When in doubt, underwater rather than overwater. The gritty mix you used will help enormously here by preventing water from pooling around the corms.
Feeding, supporting the stems, and keeping flower quality high
When and how to feed
Start feeding once the stems are around 15 cm (6 inches) tall. At that point, a balanced liquid fertiliser applied every two to four weeks is all you need. A standard 5-10-5 or similar balanced NPK fertiliser works well, or use a liquid tomato feed (which is slightly higher in potassium and great for flower production) once flowering begins. MSU Extension research recommends starting nitrogen feeding at around the 6-inch stem stage to support flower development, and in practice that timing works really well. Don't start feeding too early or you'll push a lot of leafy growth at the expense of flowers.
Supporting floppy stems
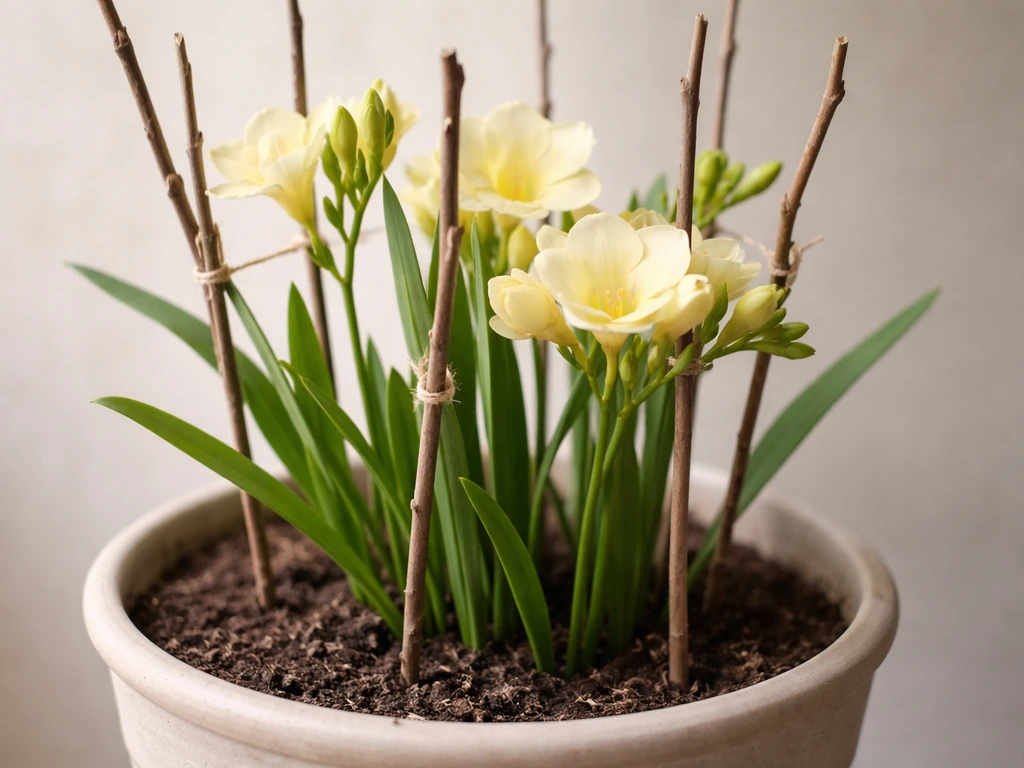
Freesia stems are slender and can flop over, especially in a pot where they don't have neighbouring plants to lean on. Twiggy sticks (hazel or similar) pushed into the compost work brilliantly and look natural. You can also use small bamboo canes with a loop of soft twine. Put supports in early, before the stems get tall enough to need them, because trying to stake them after they've bent usually just causes damage. Growing freesias in a sheltered spot also reduces wind-flop, which is a real issue outdoors.
From planting to blooming: the full lifecycle
What to expect and when
| Stage | Timeframe | What to do |
|---|---|---|
| Planting | Week 0 | Plant corms 2-5 cm deep, 5 cm apart, in gritty compost |
| Cool staging | Weeks 1-4 | Keep at 5°C in a cool, shaded, frost-free spot; water sparingly |
| Move to warmth and light | Week 4-5 | Move to 10-15°C with good light and ventilation as shoots appear |
| Active growth | Weeks 5-9 | Water regularly (let top compost dry between waterings); begin feeding at 15 cm height |
| Flowering | Weeks 10-12 | Deadhead spent blooms; continue watering and feeding; support stems |
| Post-bloom foliage phase | Weeks 12-16+ | Keep watering and feeding until leaves yellow and wither naturally |
| Corm dormancy | Once foliage is fully brown | Stop watering; lift corms or leave in dry pot; store for next season |
During flowering

When flowers open, remove faded blooms as they go over. This keeps the plant looking tidy and directs energy toward the remaining buds on the spike. Freesia flower spikes open progressively from the bottom up, so you'll get a few weeks of blooms from each stem. Keep watering and feeding throughout this period. Don't be tempted to stop once the first flowers fade.
After flowering: what to do with your corms
This is the part most people get wrong because it feels counterintuitive. After the flowers are done, the plant still needs your attention. Keep watering and feeding until the leaves turn yellow and start to wither naturally. The plant is using that time to replenish the corm for next year. Once the foliage has gone fully yellow and brown, stop watering completely.
At that point, you have two options. In warmer climates (zone 9 and above), you can leave corms in their pot in a cool, dry place until the next planting season. In colder areas where frosts are a risk, lift the corms once the foliage is completely dry, shake off the compost, and store them somewhere dry and frost-free, like a paper bag in a cool shed or garage, until you're ready to plant again the following year. They'll bloom again for you, and often get better with age as the corms bulk up.
One thing to keep in mind: over time, a pot of freesias will produce offsets (small baby corms) around the main corm. You can separate these and pot them on, though smaller offsets may take a season or two before they're big enough to flower. It's a free way to build up your stock, which is always satisfying.
A few final tips to set yourself up for success
- Buy the biggest, firmest corms you can find. Corm size directly affects flower quality, so this is not the place to go cheap.
- Don't skip the cool staging period. It genuinely is what makes the difference between a pot that flowers and one that just grows leaves.
- Use a gritty, free-draining mix and resist the urge to overwater, especially in the early weeks.
- Put your supports in early, before the stems need them, so you don't accidentally snap anything.
- If you want fragrance above all else, look for single-flowered varieties. They tend to be much more scented than the doubles.
- Don't throw the corms away after flowering. With a bit of care through the post-bloom phase, they'll come back and often perform even better the following year.
Growing freesias in a pot is genuinely one of the most rewarding things you can do in a small space. The scent alone is worth the effort, and once you've done it once you'll find the process becomes second nature. If you enjoy growing fragrant flowers in containers, it's also worth exploring how pinks and fuchsia perform in pots since they bring similar rewards in a container garden with different seasonal timing. If you want a different kind of container crop next, learn how to grow fennel in a pot too. If you want a different type of container plant, you can also learn how to grow ferns in pots for a lush, shaded look.
FAQ
What do I do if my freesia only grows leaves but won’t flower in my pot?
Most often it’s because the corms didn’t get cold enough for long enough. Recheck that you gave about three to four weeks near 5°C before moving them to warmth. If you kept them too warm during the staging period, the fix is usually only possible by replanting with a proper cool start, not by changing light after the fact.
How can I tell whether I’m watering correctly in a freesia pot?
During the cool period, the compost should feel barely moist, never wet. In the active growth phase, water only after the top centimetre dries out. If the pot stays heavy and damp or you see a sour smell, reduce frequency and consider improving the grit/perlite ratio next time.
My corms rotted, what caused it and how do I prevent it?
Rot in pots is usually due to waterlogged compost, poor drainage holes, or planting in an overly moisture-retentive mix. Use a free-draining compost with grit or perlite, ensure the pot has clear drainage holes, and avoid saucers that collect water (empty them after watering). If rot happens again, inspect corms for softness and soak only healthy ones briefly before planting.
Can I grow freesia indoors year-round in the same pot?
They still need a cold period to trigger flowering, even indoors. If you do not have a consistently cool, frost-free spot to stage them around 5°C for three to four weeks, you will likely get leaves only. Plan for a cool garage, porch, or unheated room during that initial phase.
Is it better to plant freesia corms in the same container every year or replant fresh corms?
You can replant from the same corm line, because offsets will form. However, expect smaller offsets to take one or two seasons before they bloom well. For a reliable first display, start with good-sized corms, then gradually build up with offsets for future years.
What’s the best way to support freesia stems so they don’t flop?
Install supports early, when you first see shoots, because staking after the stems bend often causes damage. Use twiggy sticks or short canes and gently tie with soft twine, leaving a little slack as stems keep growing.
Should I remove the first flowers immediately or wait?
Remove faded blooms as they finish opening, but keep the whole flower spike intact unless it has fully finished and withers. Because spikes open from the bottom upward, deadheading progressively helps the plant focus energy on remaining buds on the same spike.
Do I need to feed freesia before they start growing shoots?
No. Feeding too early can encourage leafy growth at the expense of blooms. Start feeding once stems are around 15 cm tall, then switch to a potassium-favoring approach when flowering begins (for example a tomato-type liquid feed).
Can I place the pot outside after the cool period, even if temperatures dip?
Yes, as long as frost is unlikely. Choose a sheltered, sunny spot only after you are confident nights are frost-free, since a sudden frost can damage tender growth and reduce flowering quality.
How do I store freesia corms after flowering in colder climates?
Let foliage yellow and wither naturally first, then stop watering completely. Once the leaves are fully dry, lift corms, shake off compost, and store in a dry, frost-free place (a paper bag in a cool shed or garage works well). Avoid sealed plastic bags, since trapped moisture can promote rot.
Why are my flowers weak or the stems too floppy even with supports?
Low light after the cool period can produce weak stems and poor flower development. Move the pot to the brightest available spot once shoots appear, ideally a south or west-facing windowsill indoors, and avoid dark corners.