Yes, impatiens grow beautifully in pots, and honestly they might be one of the best flowers you can choose for container gardening. They bloom generously, come in a huge range of colors, and thrive in shadier spots where most flowering plants struggle. Get the pot size, watering routine, and light conditions right, and they'll pump out color from late spring all the way through to the first frost.
How to Grow Impatiens in Pots: Step-by-Step Container Care

Marcus Whitley
2 May 2026
Can impatiens grow in pots (and when they work best)
Impatiens are genuinely well-suited to containers. In fact, growing them in pots gives you more control over their moisture levels and position, which is exactly what these plants need. They're moisture-loving by nature, and a pot lets you water them consistently without relying on inconsistent rainfall or competing with tree roots the way you would in a garden bed.
Where impatiens really shine in containers is in spots with partial to full shade. If you have a north-facing balcony, a shaded patio, or a doorstep that doesn't get much direct sun, impatiens will thrive where petunias or pansies would struggle. They're a reliable answer to the 'what do I grow here?' question for low-light spaces.
One important thing to know upfront: impatiens are tender plants. They don't tolerate cold, and they won't survive frost. In most temperate climates, they're grown as annuals, meaning you plant them for one season and start fresh the next year. The RHS is clear that impatiens used in container displays are typically dug up and composted at the end of the growing season. Don't treat this as a failure. It's just how these plants work, and once you know that going in, you can enjoy them for what they are: incredible short-season performers.
Choosing the right pot, location, and plant types
What size pot do impatiens need?
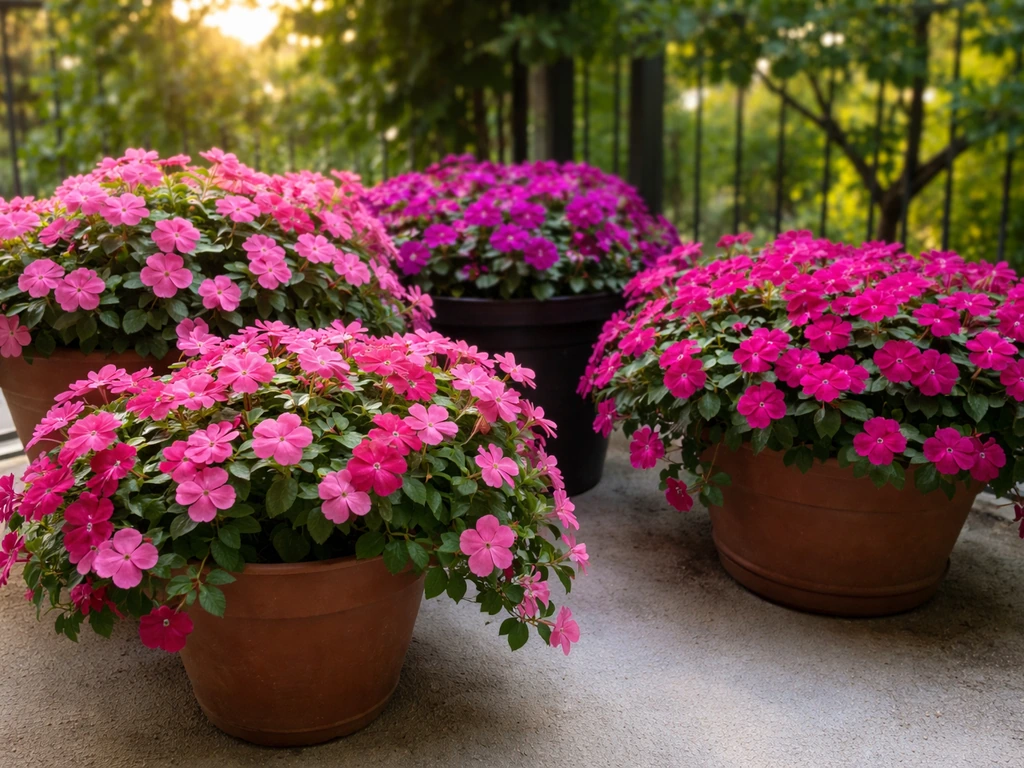
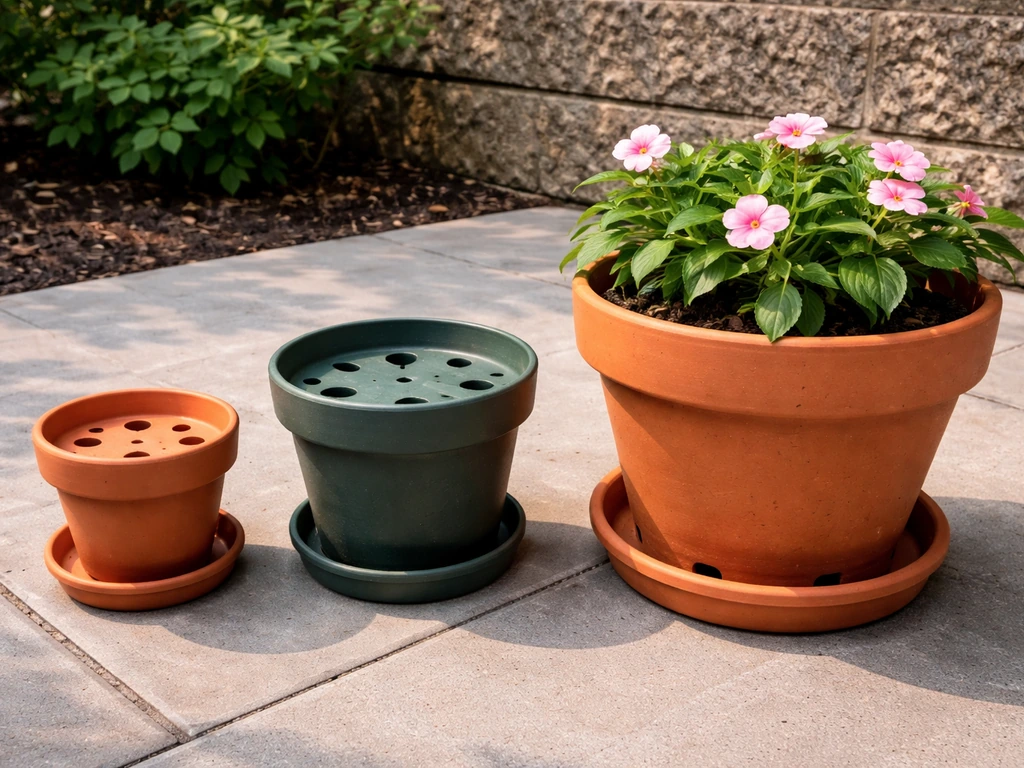
Go bigger than you think you need. A single impatiens plant can survive in a 6-inch pot, but for a full, lush display, aim for at least a 10 to 12-inch pot for three plants. If you want a showstopper hanging basket or large planter, a 14 to 16-inch container lets you pack in five or more plants and creates that dense, mounded look impatiens are famous for. The key rule is this: the smaller the pot, the faster it dries out, and impatiens really don't forgive dry soil. A bigger pot gives you a little more buffer time between waterings.
Always choose a pot with drainage holes at the bottom. This is non-negotiable. Impatiens love moisture but they'll rot quickly if they're sitting in waterlogged soil with nowhere for the excess water to go. If you fall in love with a decorative pot that doesn't have holes, use it as an outer sleeve and plant into a plain plastic nursery pot that fits inside it.
Where to put your pot
Impatiens prefer bright, indirect light or dappled shade. A spot that gets morning sun and afternoon shade is ideal. Heather is another great option for containers, and the key is choosing a sunny spot, acidic potting mix, and keeping the soil consistently moist how to grow heather in pots. They can handle a few hours of direct sun in cooler climates, but in hot summers, full afternoon sun will fry them fast, causing wilting and poor flowering. If your only option is full sun, look for New Guinea impatiens varieties, which are more sun-tolerant than the standard types.
Which type of impatiens should you grow?
| Type | Sun tolerance | Pot size suitability | Best for |
|---|---|---|---|
| Standard impatiens (Impatiens walleriana) | Partial to full shade | All pot sizes | Shaded balconies, patios, and doorsteps |
| New Guinea impatiens (Impatiens hawkeri) | Part shade to full sun | Larger pots (12 inches+) | Sunnier spots, bold statement planters |
| Double impatiens | Partial shade | Medium to large pots | Decorative displays, rose-like blooms |
For most beginners in shaded spots, standard impatiens are the easiest and most forgiving. New Guinea impatiens are worth the upgrade if you want larger flowers and have a sunnier position. Whichever type you choose, buy healthy transplants from a nursery rather than starting from seed, especially if it's your first time. They take a long time from seed and it just isn't worth the hassle when transplants are widely available and cheap.
Soil and drainage setup for container impatiens
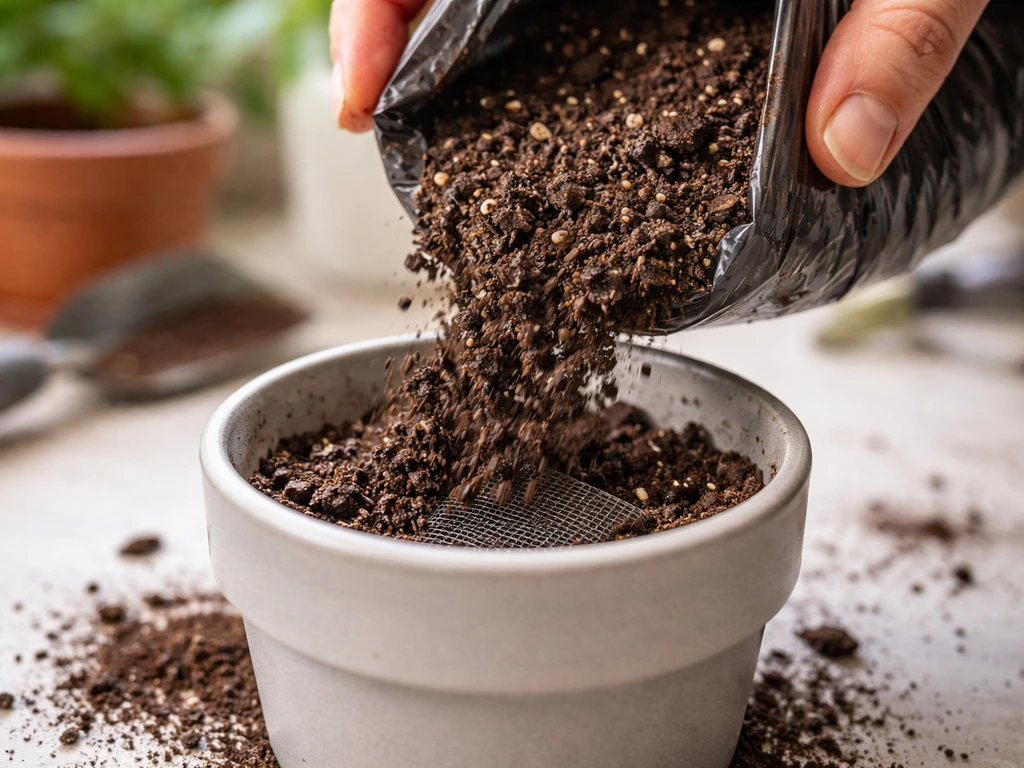
Use a good-quality potting mix, not garden soil. For best results, UMN Extension recommends choosing blank" rel="noopener noreferrer">a soil pH of 6 to 6.5 and using soil with plenty of organic matter when growing impatiens in containers. Garden soil compacts in containers, drains poorly, and brings in pests and disease. A standard peat or coir-based potting mix works well. If you want to give your impatiens the best start, blank" rel="noopener noreferrer">mix in about 20 percent perlite (those little white pellets you see in bagged mix) to improve drainage and aeration. Impatiens want their roots consistently moist, not soggy, and perlite helps you hit that sweet spot.
Before adding soil, place a piece of mesh or a coffee filter over the drainage holes at the bottom of the pot. This stops soil from washing out every time you water while still letting excess water escape freely. Don't bother with a thick layer of gravel at the bottom, despite what you might have heard. Research shows it actually raises the water table inside the pot rather than improving drainage. Just fill straight with your prepared potting mix.
Fill the pot to about 2 inches below the rim. That gap matters because it gives you space to water without the water running straight off the top before it can soak in. It also leaves room for mulch if you want to add a thin layer to help retain moisture between waterings.
Step-by-step planting in containers
- Wait until after your last frost date before planting impatiens outdoors. Impatiens are cold-sensitive and even a light frost will kill them. UMN Extension specifically advises not rushing this step. Check your local last frost date and add a week or two of buffer if your springs run cold.
- Harden off transplants if they've been indoors or in a greenhouse. Set them outside in a sheltered spot for a few hours each day over five to seven days before putting them in their final pot. This gets them used to outdoor conditions gradually.
- Prepare your pot with drainage mesh at the bottom and fill with your potting mix and perlite blend to about 2 inches below the rim.
- Dig a hole in the soil roughly the same depth and width as the root ball of your transplant. Gently loosen the roots slightly if they look tightly wound or circling the base of the nursery pot.
- Place the plant in the hole so the top of the root ball sits level with the surface of the potting mix. Planting too deep can cause stem rot.
- Fill in around the plant, pressing the soil down lightly to remove air pockets, but don't compact it too hard.
- Space multiple plants about 8 to 12 inches apart in larger pots. It might look sparse at first, but they fill in quickly.
- Water thoroughly right after planting until water runs out of the drainage holes. This settles the soil and gets the roots in contact with moist growing medium from day one.
- Move the pot to its intended location and keep it there. Impatiens don't love being shuffled around once they're settled.
Watering and fertilizing schedule in pots
How often to water
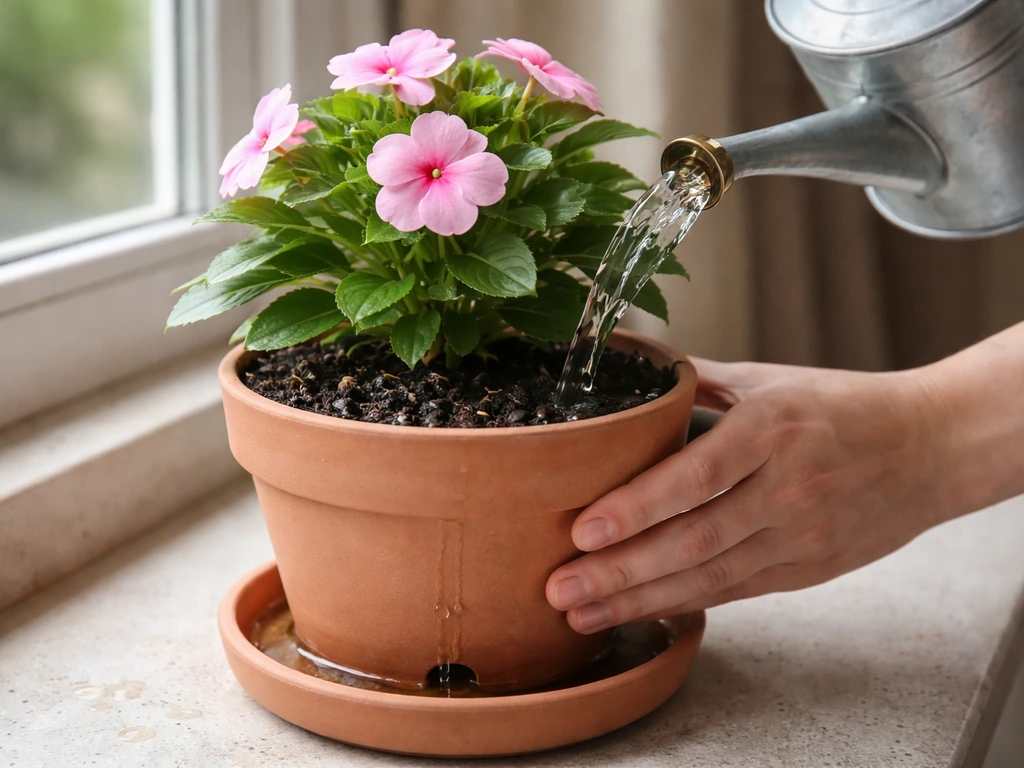
Watering is the single most important thing you'll do for pot-grown impatiens, and it's where most people go wrong in one direction or the other. Container impatiens often need daily watering in warm weather. That's not an exaggeration. The combination of a pot heating up in summer, roots competing for moisture, and impatiens' naturally thirsty nature means the soil can dry out fast. Stick your finger about an inch into the soil each morning. If it feels dry at that depth, water it. If it still feels moist, hold off.
Water deeply each time, not just a splash on the surface. Water until it flows freely from the drainage holes. This ensures the whole root zone gets moisture, not just the top layer. If you want to expand into more drought-tolerant blooms, check out how to grow proteas in pots and match their light and watering needs. Shallow watering leads to shallow roots and plants that wilt at the first sign of heat. If your saucer fills up, empty it after about 30 minutes so the roots aren't sitting in standing water.
Fertilizing routine
Potting mix starts with some built-in nutrients, but in containers those get used up and washed out quickly with regular watering. To keep impatiens blooming heavily all season, feed them regularly. A balanced liquid fertilizer (look for something like a 10-10-10 or a bloom formula like 15-30-15) diluted to half-strength and applied every one to two weeks works really well. Alternatively, mix a slow-release granular fertilizer into your potting mix at planting time and it'll feed the plants for several months with minimal effort. I usually do both: slow-release at planting, plus a liquid feed every couple of weeks once flowering kicks off. It sounds like a lot, but it takes about two minutes.
Avoid overfeeding with high-nitrogen fertilizers. Too much nitrogen pushes leafy green growth at the expense of flowers, which is the opposite of what you want. If your plants look lush and green but aren't blooming well, back off on the nitrogen and switch to a bloom-boosting formula with higher phosphorus (the middle number on the label).
Light, temperature, and seasonal care
Impatiens are warm-season plants through and through. They want temperatures between about 60 and 85 degrees Fahrenheit (15 to 29 degrees Celsius) to perform at their best. Below 50 degrees Fahrenheit (10 degrees Celsius) they start to sulk, and anything close to freezing will kill them. If you get an unexpected cold snap after planting, move pots indoors overnight or cover them with a frost cloth. One of the big advantages of growing in pots is that you can do exactly that.
In terms of light, aim for three to six hours of indirect or filtered light per day for standard varieties. A spot under a tree canopy, beside a wall, or on a shaded porch is often perfect. New Guinea impatiens can handle more, up to six or eight hours, including some direct sun if temperatures aren't extreme. In midsummer heat waves, even shade-loving impatiens benefit from a little extra afternoon protection.
As autumn approaches and temperatures start dropping, your impatiens will naturally start to decline. In temperate climates, most gardeners simply enjoy them until the first frost kills them off, then compost the spent plants and start fresh next year. If you're in a frost-free climate or have a warm indoor space, you can try overwintering cuttings by taking healthy stem cuttings in early autumn, rooting them in water or moist perlite, and keeping them as small plants indoors over winter. It requires some effort but is doable if you have a particularly special variety you want to keep.
Common problems and fixes (droop, pests, flowering issues)
Wilting and drooping
Droopy impatiens are almost always a watering problem, but it can go either way. If the soil is dry and the plant is drooping, water it deeply and it should perk back up within an hour or two. If the soil is wet and the plant is drooping, you likely have root rot from overwatering or poor drainage. Check the drainage holes aren't blocked and let the pot dry out before watering again. In severe cases of root rot you may need to repot into fresh soil after trimming any black or mushy roots.
Leggy growth and no flowers
If your impatiens are getting tall and straggly with few flowers, they're most likely not getting enough light or they're being overfed with nitrogen. Move the pot to a brighter spot (not full sun, but more indirect light) and cut back on high-nitrogen fertilizer. You can also pinch back the long stems by about a third, which encourages the plant to branch out and produce more blooms. It feels harsh but it works.
Common pests
- Aphids: Look for clusters of tiny green or black insects on new growth. Knock them off with a strong jet of water or use an insecticidal soap spray.
- Spider mites: Tiny red or brown mites that cause stippled, dry-looking leaves, often in hot and dry conditions. Increase humidity around the plant and treat with neem oil or insecticidal soap.
- Vine weevil: If plants suddenly collapse and the root ball has no roots or shows fat white grubs, you've got vine weevil. Use a nematode drench (biological control) or replace the soil entirely.
- Fungus gnats: Small flies hovering around the soil surface, with larvae that can damage roots. Let the top inch of soil dry out between waterings and use yellow sticky traps to catch adults.
Impatiens downy mildew
This is a serious disease that has affected standard impatiens in many regions over the past decade or so. Infected plants show yellowing leaves, stunted growth, and white fuzz on the undersides of leaves before collapsing completely. There's no treatment once a plant is infected. Remove and bin (don't compost) affected plants immediately to prevent spread. If downy mildew is a known problem in your area, look for resistant varieties or switch to New Guinea impatiens, which are not affected by the same strain.
How to keep impatiens thriving long-term (deadheading and replanting)
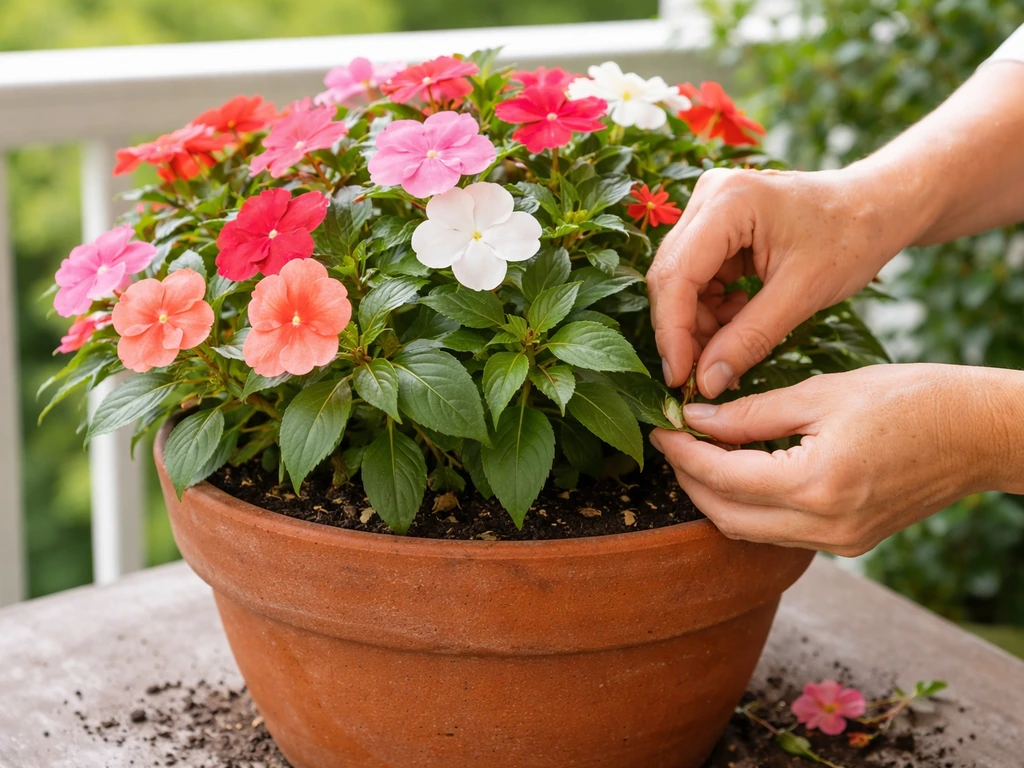
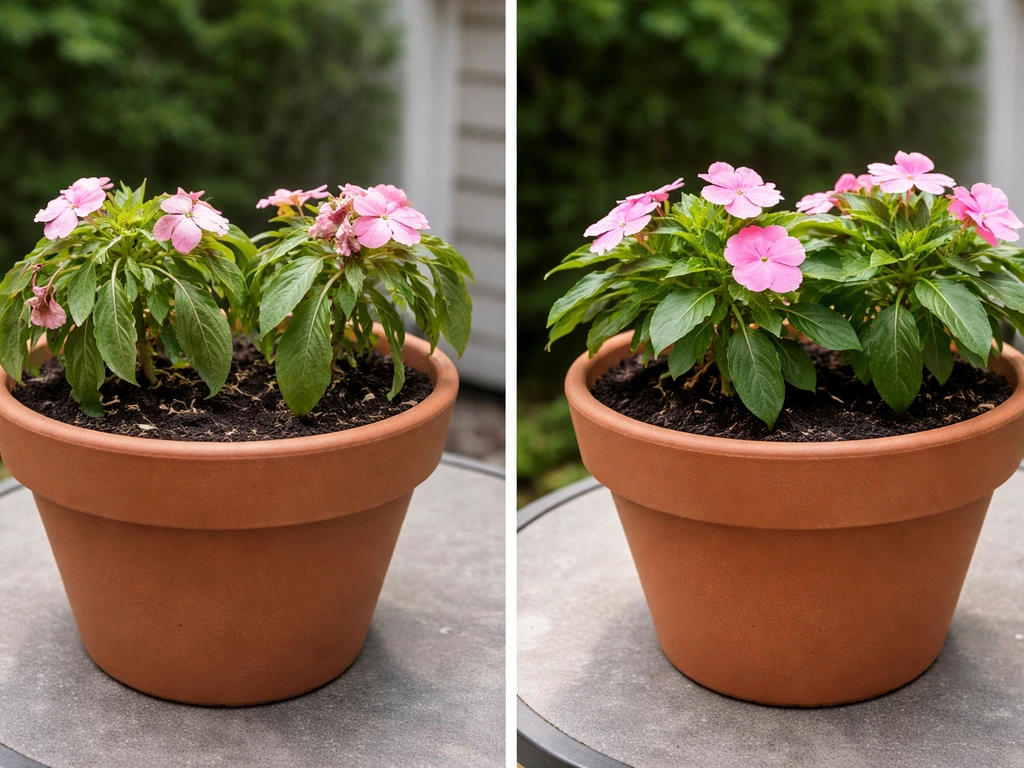
One of the great things about impatiens is that most modern varieties are self-cleaning, meaning the spent flowers drop off on their own and you don't have to deadhead them. That said, if you notice the plant looking tired or congested with old flower material, a quick pinch-over helps. Pinching means removing the faded flowers and the top inch or two of stem between your thumb and forefinger. This redirects the plant's energy into producing fresh growth and new blooms rather than setting seed.
If your impatiens start looking leggy or sparse mid-season, don't give up on them. Cut the whole plant back by about half, give it a good feed with a bloom fertilizer, and water consistently. Within two to three weeks you'll usually see a flush of fresh growth and flowers. This mid-season rejuvenation trick is worth doing once in late summer, especially if the plants have been through a particularly hot spell.
At the end of the season, once the first frost hits or the plants start to look genuinely spent, pull them out, compost the plant material, and either store your pot or replant it with something suited to the cooler months. Come next spring, start fresh with new impatiens transplants. You'll likely find that once you've grown them successfully in pots once, you'll want to do it again every year. They really are that rewarding.
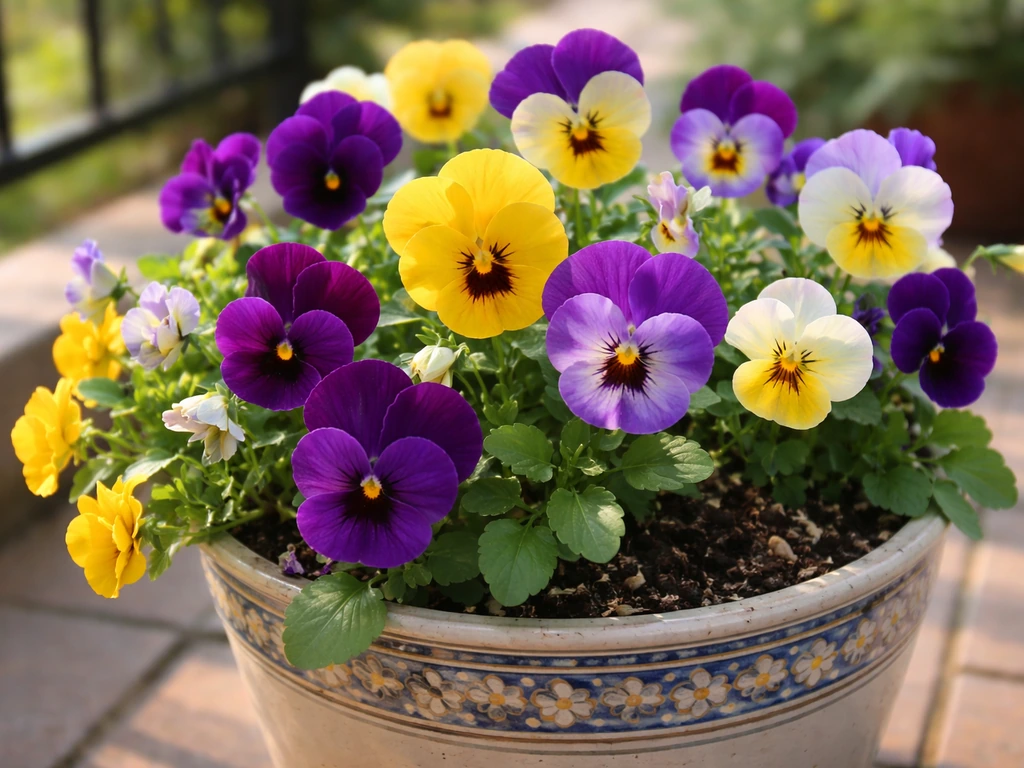
If you enjoy growing shade-tolerant flowering plants in containers, it's worth exploring other options that complement impatiens well. Pansies, for example, are cool-season performers that can fill your pots earlier in spring before impatiens go in, while petunias can take over the sunnier spots impatiens can't handle. If you want to try them too, follow a few key steps for how to grow pansies in pots so they establish quickly and keep blooming. Building a seasonal container rotation means you always have something colorful going on, no matter the time of year.
FAQ
How often should I water impatiens in pots if I don’t want to check soil every day?
Use a simple schedule, then adjust with one quick finger check. In hot weather many container impatiens need watering daily, but if your pot is larger, shaded, or the weather is cooler you may only need every other day. A good shortcut is to water when the top inch dries, and if you consistently need more than 2 to 3 days between waterings, increase pot size or improve mix (add perlite).
What’s the best way to tell if my impatiens are overwatered or underwatered?
Look at the soil at the same depth each morning. Drooping with dry soil means underwatering, drooping with consistently wet soil suggests root stress from waterlogging or poor drainage. Also check drainage after watering, if water sits in the saucer or never flows out quickly, that’s a red flag for overwatering risk.
Can I use mulch on top of the potting mix to reduce watering?
Yes, but keep it thin and avoid piling it against the stems. A light layer helps slow evaporation, but impatiens still want consistently moist soil, so mulch is not a substitute for regular watering in heat. Leave a small gap around the base of the plant so airflow stays good and you don’t encourage rot.
Why are my impatiens flowering but the plant looks unhealthy or spotty?
Check fertilizer type and light first. Too much nitrogen often produces lush leaves with weak flowering, while too much sun can cause stress that looks like poor bloom and tired foliage. If you also see pale leaves or wilting despite moist soil, your mix may be compacted or low in nutrients, switch to fresh potting mix and use half-strength balanced liquid fertilizer.
Is it okay to grow impatiens in a pot that dries out quickly, like a terracotta container?
It can work, but you’ll usually have to water more often because terracotta loses moisture faster. If you want terracotta, pair it with a larger pot size and a mix with perlite to buffer moisture, and plan to check soil daily during warm spells. Using a plastic nursery pot inside the decorative container can also help stabilize moisture levels.
How many impatiens should I plant in one container?
Follow the pot size logic, larger pots support more plants without drying out too fast. As a practical guide, 10 to 12 inch containers commonly handle about three plants, while 14 to 16 inch planters can hold five or more for a dense mound. If your plants start to compete, you’ll see faster drying and fewer blooms, then you should thin or move to a bigger pot.
Should I fertilize when planting, or wait until the plants look hungry?
Fertilize at planting if you want steady bloom, either with a slow-release granular mixed into the potting mix or a first half-strength liquid feeding after the plants establish. In containers, nutrients wash out quickly, so waiting too long often leads to fading blooms mid-season. If you use slow-release only, supplement with liquid fertilizer once you see active flowering.
What should I do if the potting mix is staying wet for days?
First confirm the pot has working drainage holes and nothing is blocking them. Then reduce saturation by adjusting your watering, and consider repotting if the mix is compacted or hydrophobic. Refreshing the potting mix with a peat or coir-based blend plus perlite usually fixes chronic wetness faster than trying to “water less” indefinitely.
Can I grow standard impatiens in full sun if I water a lot?
Usually not reliably, even with frequent watering. Standard impatiens often struggle with full afternoon sun because heat stress can outpace how quickly you can keep the root zone moist, leading to wilting and weak flowering. If full sun is unavoidable, switch to sun-tolerant New Guinea varieties and provide afternoon protection when temperatures spike.
My impatiens got tall and leggy, but I moved them to more shade, why?
Legginess usually means insufficient light or too much nitrogen, not too much shade. Move to brighter indirect or filtered light, avoid full sun, and reduce nitrogen-heavy fertilizer. Pinching back the top portion can help, but if light levels remain low, the plant will keep stretching.
Are self-cleaning impatiens truly no-deadhead, or should I still pinch blooms sometimes?
Most will drop spent flowers on their own, but occasional pinch-over helps when the plant looks congested or tired with old flower material. You can also pinch to encourage new branching, focus on removing the top portion between faded blooms rather than clearing every individual flower if the plant is already producing fresh growth.
What’s the safest way to handle downy mildew if I suspect it?
Treat it as a removal-only problem. Remove and discard affected plants immediately and do not compost them, then avoid replanting the same pot mix without fully refreshing the soil. If you’ve had outbreaks in your area, choose resistant varieties or switch to New Guinea impatiens to reduce risk.
Can I overwinter impatiens by keeping them outdoors?
In most places, no, they are tender and don’t survive frost. If nights drop below about 50 degrees Fahrenheit, move pots indoors or protect them with frost cloth, ideally keeping them in a bright spot with less temperature stress. Overwintering works best as a small indoor plant or rooted cuttings rather than expecting outdoor survival.