Growing potted plants is genuinely one of the most accessible things you can do as a gardener, and it works whether you have a sprawling backyard, a tiny balcony, or just a sunny windowsill. The core process is straightforward: Growing potted plants is genuinely one of the most accessible things you can do as a gardener, and it works whether you have a sprawling backyard, a tiny balcony, or just a sunny windowsill. The core process is straightforward: pick the right pot and plant, set it up with good drainage and proper soil, get into a watering and feeding rhythm, and pay attention when something looks off. That's really it. how to grow the best pot plants, set it up with good drainage and proper soil, get into a watering and feeding rhythm, and pay attention when something looks off. That's really it. The details matter, though, and getting them right early saves you a lot of dead plants and frustration. So let's go through everything step by step.
How to Grow Potted Plants: Step-by-Step Container Care

Picking the right plant and pot size
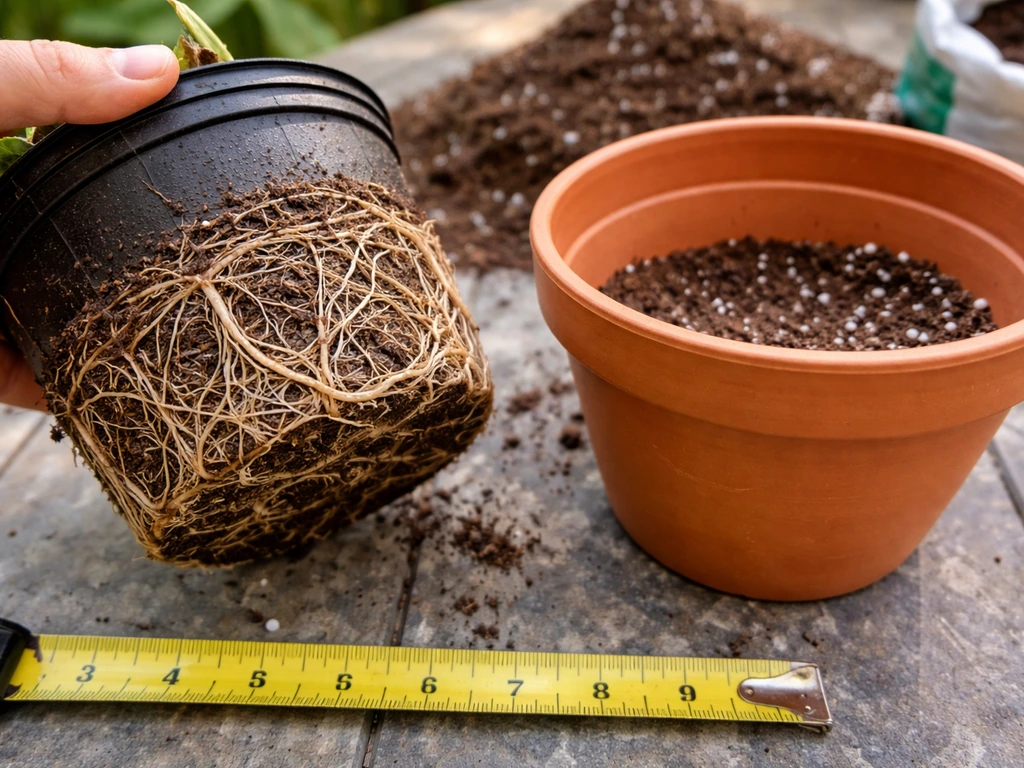
The single most common mistake beginners make is putting a plant in a pot that's too small. Roots need room to grow, and when they run out of space, the plant stresses out, stops performing well, and eventually declines. At the same time, dropping a tiny seedling into a massive container isn't great either, because all that extra soil holds moisture the roots can't use, which can lead to rot.
For small containers (8 inches in diameter or less), aim for a pot about 1 to 2 inches wider than the plant's current root ball. That gives the roots room to expand without drowning them in excess soil. For edibles, think bigger: tomatoes need a container at least 20 inches across, peppers at least 16 inches, carrots at least 12 inches deep, and most herbs and flowers can get by with a 10-inch pot as a minimum. A good general rule for vegetables is a container that holds 2 to 5 gallons of soil and is at least 12 inches deep. That depth is what lets roots develop properly.
Also think about the plant's mature size when it's fully grown, not just how it looks right now. A pepper seedling might look fine in a small starter pot, but by midsummer it'll be root-bound and struggling if you didn't size up. And if you're growing anything tall or top-heavy, like a standard tomato or a tall ornamental grass, use a heavier container. Lightweight plastic pots tip over in the wind, and nothing is more disheartening than finding your plant face-down on the patio.
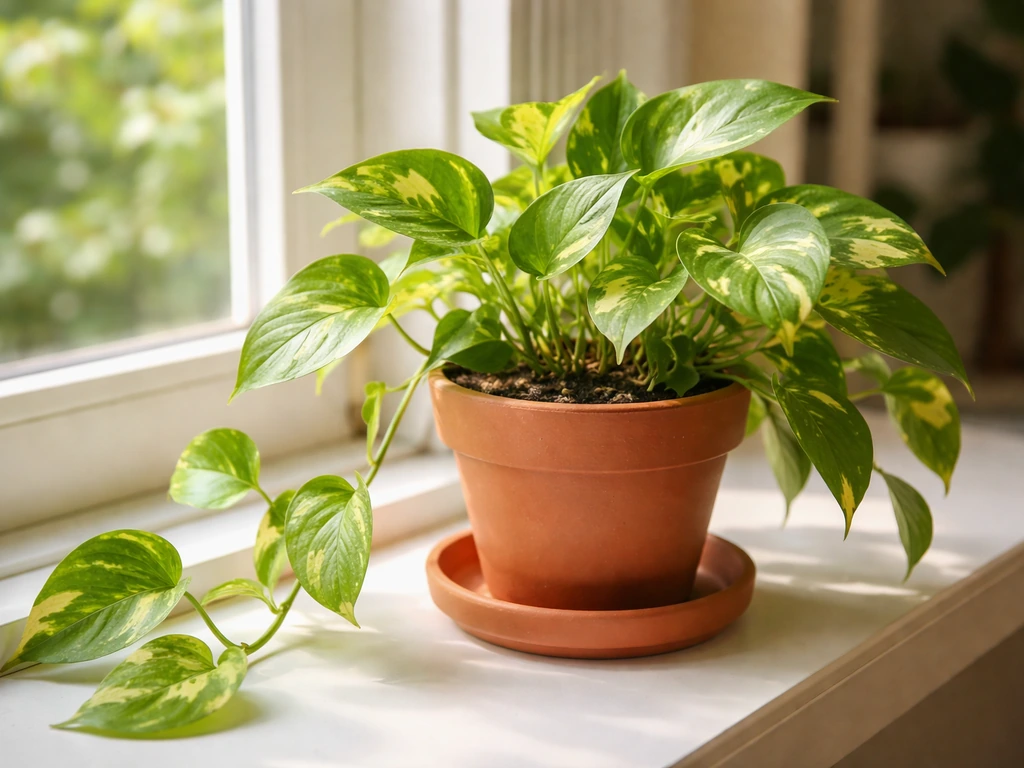
As for what to grow: almost anything works in a pot if the container is the right size. Once you know the basics, you can use the same pot size, drainage, soil, and watering rhythm to learn how to grow money plant in pot successfully. Flowers, herbs, vegetables, dwarf fruit trees, even small shrubs are all fair game. If you're new to container gardening, herbs like basil, mint, and chives are forgiving and rewarding starters. Lettuce, radishes, and compact bush beans are great first edibles. Once you've got a season or two under your belt, you can push into more ambitious territory.
Drainage and pot setup: don't skip this part
Drainage is non-negotiable. Roots sitting in standing water will rot, and it happens faster than you'd expect. Every container you use needs drainage holes at the bottom. For a 4 to 6 inch pot, that means 3 to 6 holes, each about a quarter-inch wide. Larger pots need proportionally more. If you've fallen in love with a decorative pot that has no holes, use the double-pot method: plant in a plain nursery pot with good drainage, then drop that pot inside the decorative one. The plant gets drainage, you get the look you wanted. Win-win.
Saucers are useful for catching water runoff and protecting your floors or deck, but empty them out after watering. If water pools in the saucer and sits there, the soil wicks it back up and you're back to soggy roots. A quick tip-and-pour about 30 minutes after watering is a habit worth building.
For soil, always use a commercial potting mix formulated for containers, not garden soil dug from the ground. Garden soil compacts in pots, blocks drainage, and often brings weed seeds and pathogens along with it. Look for a lightweight potting mix that drains well and doesn't feel heavy or dense when wet. Some bags labeled as 'potting soil' are actually heavier blends that don't drain as well in containers, so check the texture. You want something that feels almost fluffy when dry. If you're growing succulents or cacti, add extra perlite to improve drainage even further. For vegetables and flowers, a standard quality potting mix works well right out of the bag.
Planting basics: timing, depth, spacing, and repotting
Timing depends on what you're growing. Frost-sensitive plants like tomatoes, peppers, and basil go outside after your last frost date, which in most of the US falls somewhere between late March and mid-May depending on your location. Cool-season crops like lettuce, spinach, and pansies can go out earlier in spring and again in fall. If you're keeping plants indoors year-round, timing is less critical, but matching light levels and temperature to the plant's preferences still matters.
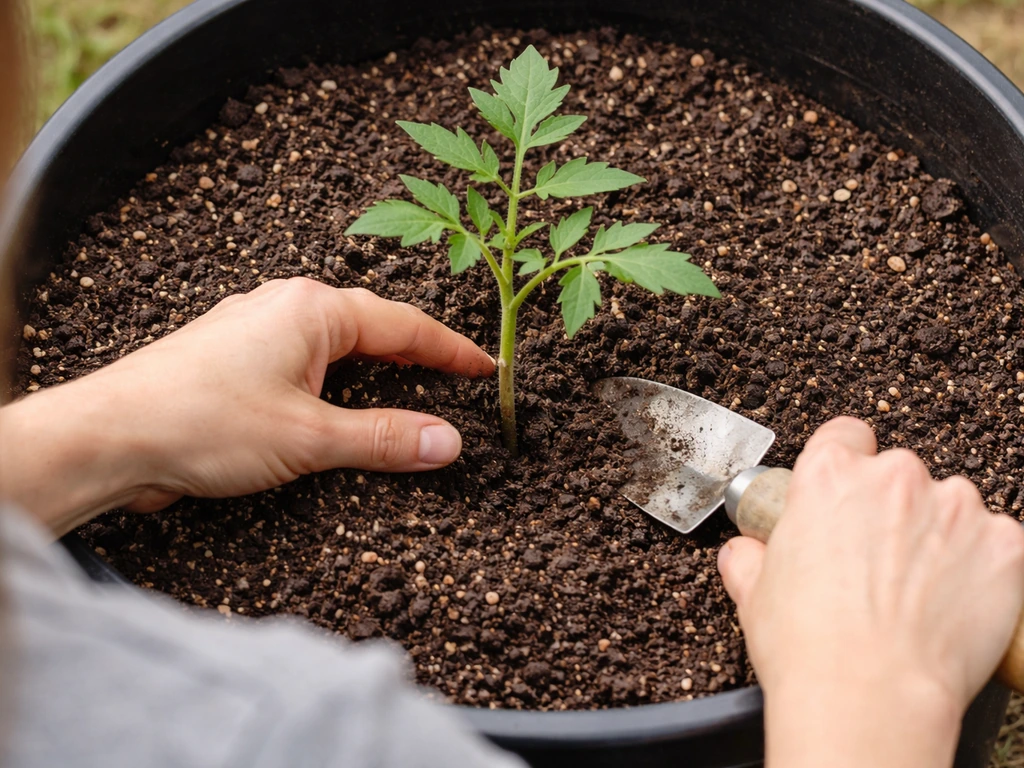
When planting, set the plant at roughly the same depth it was growing in its nursery pot. Most plants don't want to be buried deeper than that. Tomatoes are a notable exception since they can root from buried stems, but for everything else, match the original depth. Fill in around the root ball with fresh potting mix, press gently to remove air pockets, and water thoroughly right after planting.
Spacing in pots matters more than people think. It's tempting to cram several plants into one container for a lush look, and you can do it with compatible plants, but overcrowding leads to competition for water, nutrients, and light. A good rule: if plants are supposed to be spaced 12 inches apart in the ground, give them at least that much space in the pot.
Repotting is something you'll need to do every year or two for most plants, or any time you see roots circling the bottom of the pot, poking out the drainage holes, or the plant wilting quickly after every watering. When you repot, move up just one pot size at a time, gently loosen the root ball, trim any obviously dead or circling roots, and refresh with new potting mix. Spring is usually the best time to repot, just before the main growing season kicks off.
Watering your containers: how often and how much
Container plants dry out much faster than plants growing in the ground. The limited soil volume, combined with sun, wind, and temperature, means you can go from perfectly moist to bone dry in a day or two, especially in summer. This is the biggest adjustment people make when they come to container gardening from ground-bed gardening.
The most reliable way to know when to water is the finger test.
When you do water, water thoroughly. Pour slowly and evenly until water runs out the drainage holes at the bottom, then stop. That ensures the entire root zone gets moisture, not just the top inch. If water runs straight through almost immediately, the mix may have dried out and shrunk away from the pot walls, leaving gaps. In that case, water slowly a couple of times in succession or set the pot in a tray of water for 20 to 30 minutes so the mix can rehydrate from the bottom.
One more thing: misting your plants with a spray bottle does very little to help moisture-stressed plants. It can briefly raise humidity around the leaves, but the effect lasts only minutes. If a plant needs water, water the soil properly.
Light, placement, and getting temperature and airflow right
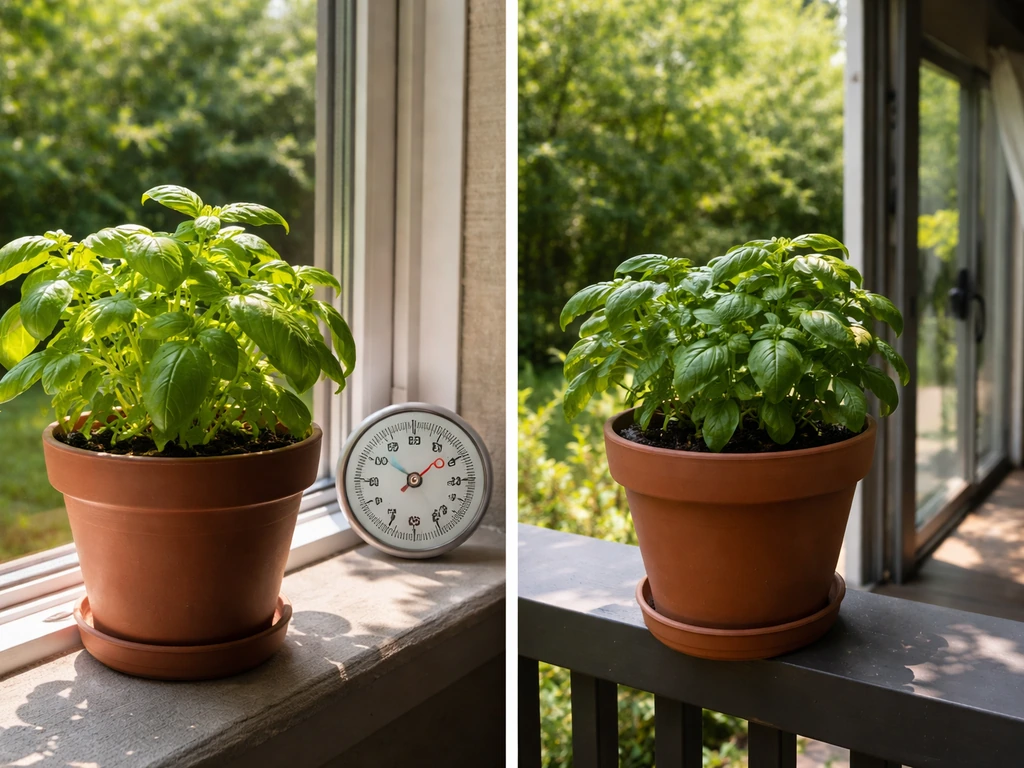
Most flowering plants and vegetables need full sun, meaning at least 6 to 8 hours of direct sunlight per day. That's worth checking before you place your pots. Stand in your intended spot in the morning and track how many hours of direct sun it actually gets. A spot that looks bright might only get 3 to 4 hours of direct light once you factor in shadows from buildings, fences, or trees.
One major advantage of containers is that you can move them. If a spot isn't working, pick up the pot and try somewhere else. South and west-facing spots typically get the most sun in the northern hemisphere. East-facing spots give gentler morning sun, which works well for herbs and leafy greens that can bolt or stress in intense afternoon heat.
Airflow matters more than most people realize. Good air circulation around your plants reduces the risk of fungal issues like powdery mildew, which tends to thrive when temperatures are warm and nights are humid. Don't crowd pots so tightly together that air can't move between them. If you're growing indoors, a small fan running on low for a few hours a day improves airflow and actually helps strengthen stems.
Temperature is mostly about matching your plant's preferences to your climate and season. Cold-sensitive plants need to come inside before frost. Some plants, like lavender or rosemary, tolerate light frost but not a hard freeze. If you're unsure, look up the hardiness zone for your plant and compare it to yours. When temperatures swing dramatically, like a late cold snap in spring, be ready to move containers to a sheltered spot or cover them overnight.
Feeding your potted plants: fertilizer made simple
Here's something that surprises a lot of new container gardeners: even if you start with a good potting mix, nutrients deplete fast. Every time you water, some nutrients leach out through the drainage holes. In the ground, plant roots can forage for minerals across a wide area. In a pot, they're working with whatever is in that limited volume of soil. This means regular feeding is not optional, it's essential.
The easiest approach is to mix a slow-release granular fertilizer into your potting mix at the start of the season when you plant. These are small coated pellets that release nutrients gradually over several months as you water. Check the label for the correct amount based on your container size. This gives your plants a steady baseline of nutrition without you having to remember to feed them every week.
That said, slow-release fertilizer isn't always enough on its own for heavy feeders like tomatoes or flowering annuals at peak season. Supplement with a water-soluble fertilizer every 2 to 4 weeks during active growth. Mix it according to package directions and apply it when you water. Don't assume more is better: over-fertilizing causes salt buildup in the soil, which can actually burn roots. If you see a white crusty residue on the soil surface or around the pot, that's salt accumulation, and it's time to flush the pot thoroughly with plain water.
One important caveat: if your potting mix already contains fertilizer (check the bag label), hold off on adding more for the first 2 to 6 weeks after planting. You don't need to double up right away. Let the plant settle in, watch how it grows, and start supplemental feeding once it's established and actively pushing new growth.
A quick note if you use self-watering or subirrigation pots with a water reservoir at the bottom: never add fertilizer directly to the reservoir. Dissolved fertilizer sitting in the reservoir can concentrate over time and raise salt levels enough to damage or burn roots.
Ongoing care and fixing common problems
Once your plants are established and growing, the main job is staying observant. Most problems are fixable if you catch them early. Here are the issues you're most likely to run into.
Root-bound plants
A root-bound plant has run out of room to grow. Signs include roots visibly circling the bottom of the pot or poking out the drainage holes, soil that dries out almost immediately after watering, and a plant that looks stunted even though you're feeding and watering correctly. The fix is repotting into a container one size up, refreshing the potting mix, and gently loosening any tightly wound roots before replanting. This is one of the most common and easily overlooked issues in container gardening, and solving it often revives a struggling plant almost immediately.
Yellowing leaves
Yellow leaves have several possible causes, so you need to do a bit of detective work. If the yellowing starts on older, lower leaves first, it's often a nitrogen deficiency, which means it's time to fertilize. If the whole plant looks washed out and pale, check your light levels. If leaves are yellow and the soil is consistently soggy, overwatering and poor drainage are the likely culprits. And if the plant has been stressed by temperature extremes or inconsistent watering, yellow leaves can show up from that too. Go through the list: light, water, drainage, nutrients, temperature. Usually one of those is the issue.
Wilting
Wilting usually means underwatering, but not always. Do the finger test first. If the soil is dry 2 inches down, water thoroughly and most plants will perk up within an hour or two. If the soil is actually wet and the plant is still wilting, overwatering or root rot is likely. Let the soil dry out more between waterings and check whether the drainage is working properly. In extreme heat, some plants wilt temporarily during the hottest part of the afternoon even when properly watered, then recover in the evening. That's normal and not a cause for panic.
Pests
The most common insect pests you'll encounter on container plants are aphids, spider mites, and whiteflies. Aphids are small, soft-bodied insects that cluster on new growth and leaf undersides. Spider mites are tiny (often barely visible) and leave fine webbing on leaves, especially in hot dry conditions. Whiteflies flutter up in a cloud when you disturb the plant. All three can be managed with a strong spray of water to knock them off, followed by insecticidal soap spray if the infestation persists. The key is catching them early, so make a habit of looking at the undersides of leaves when you water. By the time a plant looks visibly distressed from pests, the population is already large and harder to manage.
Fungal issues like powdery mildew
Powdery mildew shows up as a white or grey powdery coating on leaves, and it tends to appear during warm days combined with humid nights. It won't kill a plant outright, but it weakens it and spreads fast. Good airflow between plants is your best prevention. If you spot it early, remove affected leaves and improve spacing. Baking soda sprays (a teaspoon per litre of water with a few drops of dish soap) can slow its spread, though severely affected plants may need a fungicide. Squash, cucumbers, and zucchini are particularly prone to it, so keep an eye on those.
Regular grooming keeps plants productive
Deadheading (removing spent flowers) keeps flowering plants producing new blooms instead of putting energy into seed production. Pinching back leggy herbs like basil encourages bushier growth. For vegetables, removing dead or yellowing leaves improves airflow and redirects energy to fruit production. None of this needs to be complicated. A quick once-over when you water, snipping anything dead or spent, goes a long way over the course of a season.
A simple routine to pull it all together
Container gardening rewards consistency more than perfection. You don't need to do everything flawlessly, but you do need to show up regularly. Here's a simple weekly rhythm that works for most container setups:
- Check soil moisture daily in hot weather (every 2 to 3 days in cooler seasons) using the finger test, and water thoroughly when the top 2 inches feel dry.
- Every time you water, take 30 seconds to look at the leaves, stems, and undersides for any signs of pests or disease.
- Once a week, remove dead flowers, yellowing leaves, and any obviously dead material.
- Every 2 to 4 weeks during active growing season, apply a water-soluble fertilizer if you're not relying solely on slow-release granules.
- At the start of each new season, assess whether any plants need repotting and refresh the top inch or two of potting mix with fresh mix if the soil has compacted.
That's genuinely it. The more you grow, the more intuitive it becomes. You'll start to recognize what a thirsty plant looks like versus a root-bound one, and you'll get a feel for how fast your specific pots dry out in your specific climate. Every small failure teaches you something, and in container gardening, the investment is low enough that mistakes don't set you back much. Start with one or two pots, get comfortable, and add more from there. Before long you'll be the person your neighbours come to for advice.
FAQ
My potted plant wilts even after watering, what should I check first?
If your plants keep wilting despite you watering, the issue is often not “too little water,” it’s poor drainage or roots circling inside a pot that’s now too tight. Check that water runs out the drainage holes within a reasonable time, then lift the pot to feel weight (dry pots are noticeably lighter). If water is staying in the bottom, drill or replace the pot, and consider repotting one size up with fresh potting mix.
How often should I water potted plants if I want a simple routine?
Use the plant’s preferred watering pattern, not a fixed schedule. For most container plants, water when the top couple inches feel dry using the finger test, then water thoroughly until runoff, wait a bit, and only rewater if the pot feels light again. If you water every day “just in case,” you can create soggy roots and leach nutrients faster than the plant can use them.
Can I bottom-water containers instead of watering from the top?
Yes, but only if the potting mix is fully rehydrating and draining well. A 10 to 30 minute bottom soak can help when the mix has pulled away from the pot walls, but don’t leave pots soaking for hours, especially in cool weather. After soaking, let excess drain completely, and empty any saucer so the roots are not sitting in water.
Why does my potting mix crust over or look salty, and what do I do?
A common reason is salts from hard water and fertilizers building up, especially when you only water lightly. Look for white crust on the soil surface or around the rim, then flush by running plain water through the pot until you see steady runoff for several minutes. Repeat seasonally or whenever you notice buildup, and avoid adding fertilizer until you’ve confirmed the mix is not already charged.
Should I mist or spray leaves to prevent diseases and improve humidity?
To avoid fungal and pest problems, you want even moisture on the soil, not constantly wet leaves. Water early in the day so foliage dries quickly, aim the stream at the soil, and improve airflow if plants are bunched together. Misting leaves rarely fixes the real moisture need, and it can encourage leaf diseases in humid conditions.
My buds fall off when I move the pot, is there a way to prevent that?
Move the pot less during flowering. Light and temperature swings can trigger bud drop, especially for peppers, tomatoes, and many flowering annuals. When you do reposition, do it in small increments over a couple of days, and avoid changing exposure from bright sun to deep shade overnight.
My plant has lots of leaves but not many flowers or fruit, what’s wrong?
For many container crops, “too much” nitrogen creates lush leaves with fewer flowers or fruits. If you see big green growth but little blooming on flowering plants, switch to a fertilizer formulated for blooms, or pause nitrogen-heavy feeding until flowering starts. Also confirm you are using the correct pot size, because root stress can limit fruit set even with good feeding.
How can I tell when my container plant needs repotting, and what’s the safest approach?
If roots are circling or you see roots emerging from drainage holes, don’t just keep pruning the top and hope. Repotting is the solution, usually moving up just one pot size, loosening circling roots, and refreshing the mix. Waiting too long often leads to chronic stunting because the root system can’t access water evenly.
Does pot material change how I should water and care for potted plants?
Yes, but in different ways. Terracotta tends to dry out faster and may need more frequent watering, while plastic holds moisture longer. If you switch materials, adjust your watering frequency and watch for the first couple of weeks, because the same soil volume will dry at a different rate depending on the pot.
How should I fertilize with self-watering (reservoir) pots?
Self-watering pots are great for consistency, but they can also hide drainage problems if the roots never get a chance to oxygenate. Keep the reservoir filled at the level your specific pot recommends, but still check soil moisture and drainage behavior regularly, and never add fertilizer directly into the reservoir. For heavy feeders, use a measured, water-soluble fertilizer method that matches how the pot delivers nutrients.