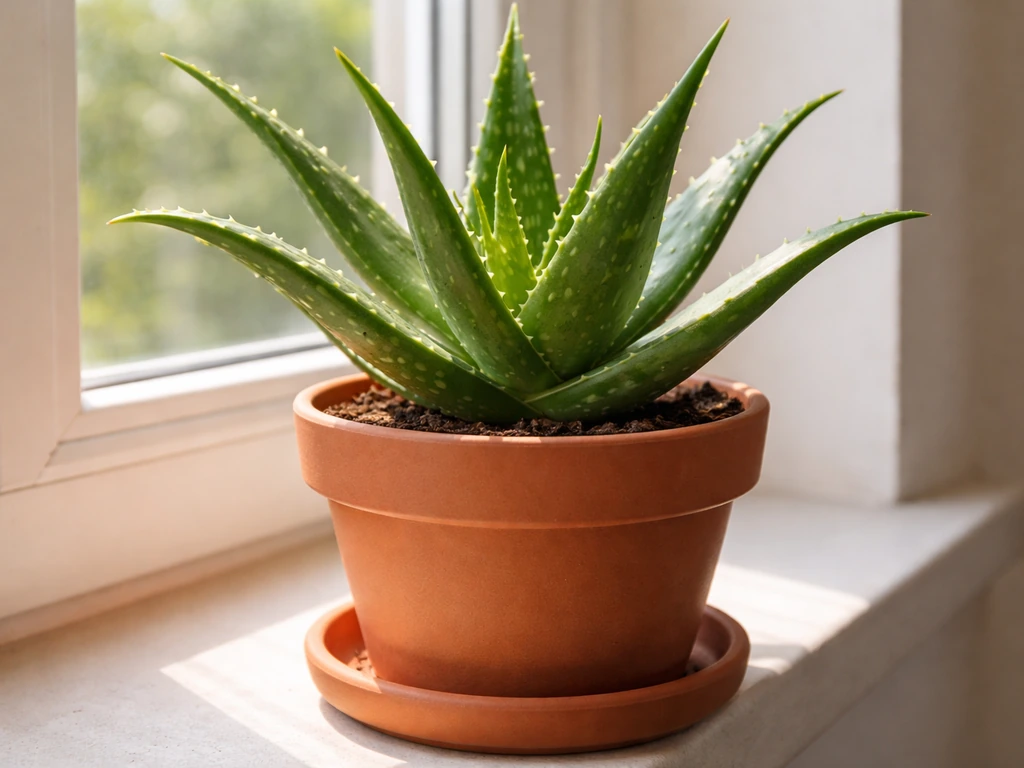
Yes, aloe vera grows really well in a pot, and you don't need a big one to get started. In fact, aloe actually prefers being a little snug in its container rather than swimming in too much soil. The two things that will make or break a potted aloe are drainage and watering discipline. Get those right, and this plant is almost impossible to kill. Get them wrong, and you'll end up with the classic mushy, yellowing mess that makes beginners think they have a brown thumb. You don't. You just need the right setup, and this guide walks you through every step.
How to Grow Aloe Vera Plant in a Pot: Step-by-Step

Marcus Whitley
20 Apr 2026
What size pot does aloe vera actually need?
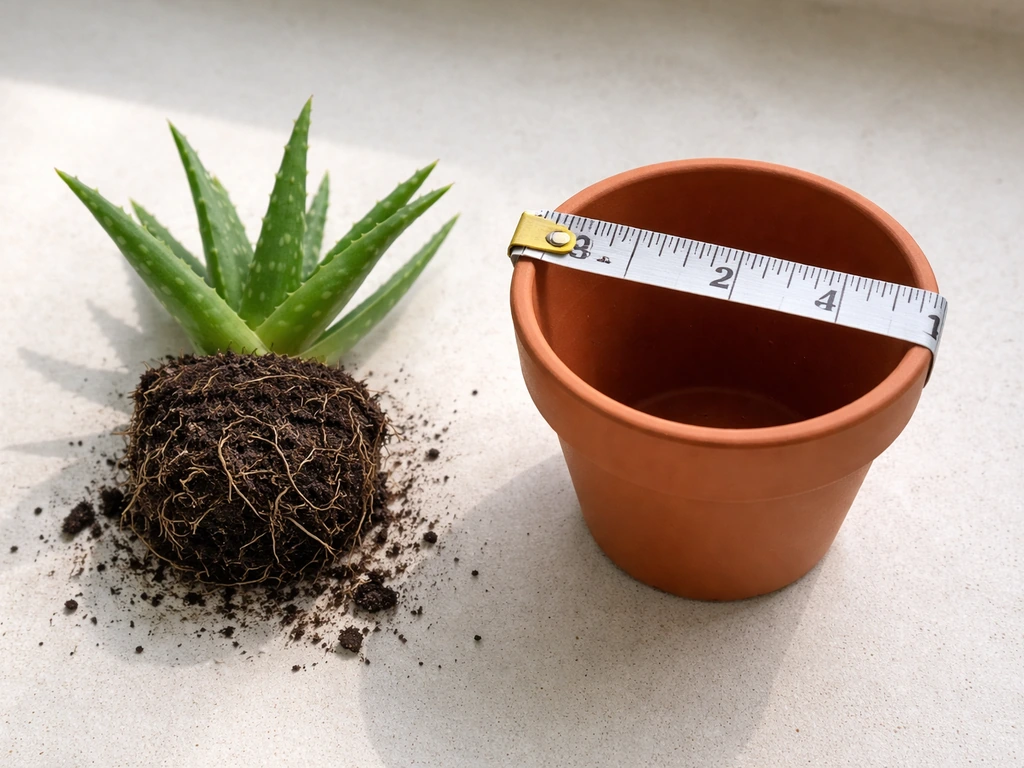
Start with a pot that's just slightly larger than the root ball of your plant, typically 4 to 6 inches in diameter for a young or small aloe. That might feel tiny, but aloe stores water in its leaves, not its roots, so a huge pot just means a lot of extra soil staying wet for too long. That leftover moisture is exactly what causes root rot.
For a small aloe, a 4-inch pot is perfectly fine and actually ideal. If you're buying a starter plant from a nursery that's already in a 4-inch nursery pot, you don't even need to repot right away unless the roots are visibly bursting out the bottom. As the plant matures and offsets (baby plants, called pups) start appearing, you can move up to a 6- or 8-inch pot. A full-grown aloe that's been producing pups for a few years might eventually need a 10- to 12-inch pot, but that's years away.
The one non-negotiable for any size pot: it must have drainage holes. This isn't optional. If you fall in love with a decorative pot that has no holes, use it as a cachepot (a decorative outer sleeve) and keep the aloe in a plain nursery pot with holes inside it. Never let aloe sit in a sealed container without drainage.
Soil and drainage: this is where most people go wrong
Regular potting soil holds too much moisture for aloe vera. It's designed for plants that like consistent moisture, which aloe is not. You need a mix that drains fast and doesn't compact into a soggy block around the roots.
The blend recommended by UF/IFAS Extension works really well for potted aloe: mix potting soil, coarse sand, and perlite in a 3:2:1 ratio. Use a well-drained soil mix, and UF/IFAS Extension notes that potting-mix blends can be made by starting with potting mix and adding sand and perlite blank" rel="noopener noreferrer">UF/IFAS Extension potting-mix blends with sand and perlite. That means three parts regular potting mix, two parts coarse sand (not fine beach sand, which actually compacts), and one part perlite (those little white volcanic glass bits you see in bagged soil). This ratio gives you a mix that drains quickly after watering but still holds enough nutrients and structure to support the plant. You can also buy a pre-made cactus and succulent mix from any garden center, and that works fine on its own or mixed 50/50 with perlite to improve drainage even further.
At the bottom of your pot, you don't need a thick layer of gravel or rocks. That's actually a myth that can make drainage worse by creating a saturated zone above the gravel layer. Just make sure your drainage holes are clear and your soil mix is fast-draining from top to bottom. If you're using a saucer under the pot, empty it after every watering. Missouri Extension specifically recommends discarding any water still sitting in the saucer one hour after watering, so the roots never sit in moisture.
Light and watering: the daily and weekly routine
Getting the light right
Aloe vera is a high-light plant. Indoors, that means a south- or west-facing window is your best bet. Missouri Extension also notes that south, east, or west windows are generally excellent for many potted plants, helping prevent issues linked to poor light a south- or west-facing window is your best bet. East-facing windows can work if the plant gets a few hours of direct morning sun. North-facing windows generally don't provide enough light, and the plant will start stretching toward the light source (a condition called etiolation), producing pale, floppy leaves that lean awkwardly to one side.
If you only have lower-light windows, you have two options: a grow light set on a timer for 12 to 14 hours a day, or moving the plant outdoors during warmer months. Aloe does beautifully outside in summer as long as you introduce it to direct sun gradually over a couple of weeks, since moving it straight from a dim indoor spot to blazing afternoon sun can cause sunscald (bleached, papery patches on the leaves). Outdoors, a spot with morning sun and afternoon shade is the sweet spot.
Watering schedule for potted aloe
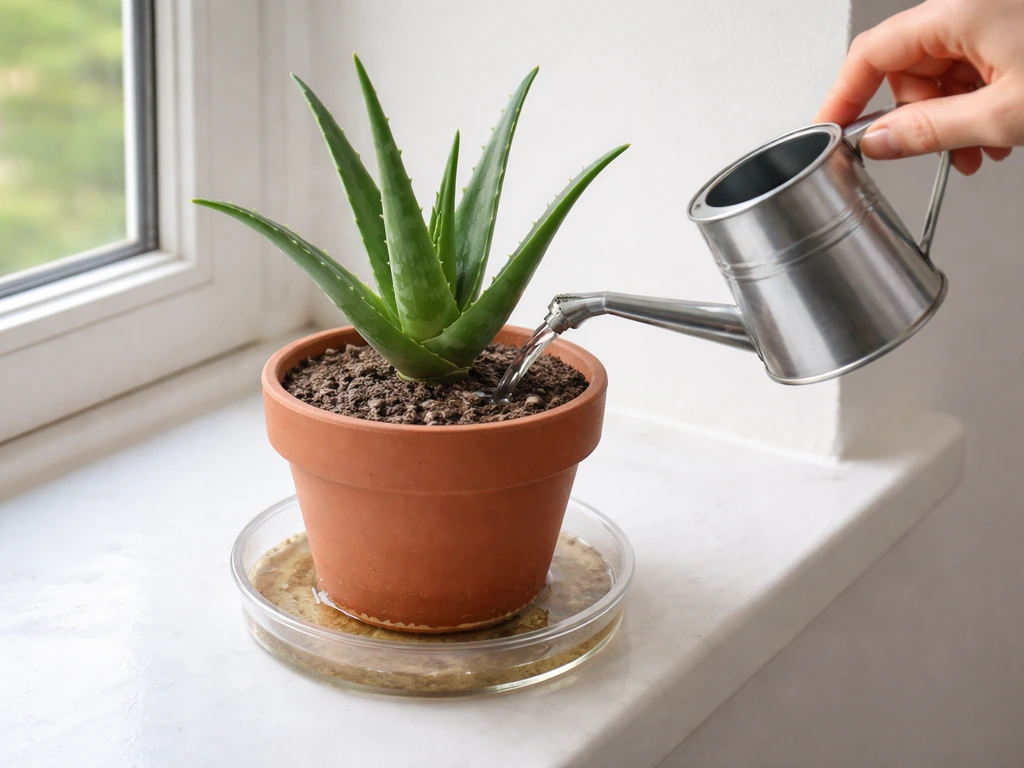
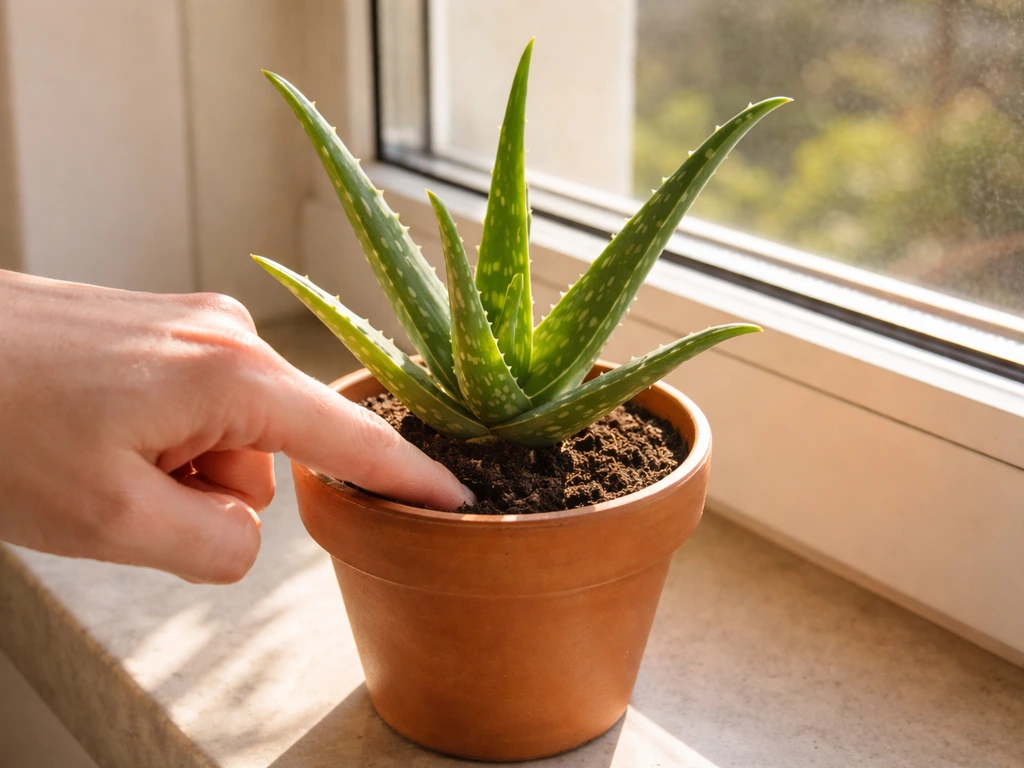
The most common mistake with aloe is watering on a fixed schedule regardless of what the soil is doing. Instead, water when the soil is completely dry. Stick your finger 2 inches into the soil. If it's still slightly cool or damp, wait. If it's bone dry all the way down, water thoroughly until it runs out the drainage holes.
In practice, for a typical indoor environment, that works out to roughly every 2 to 3 weeks during spring and summer when the plant is actively growing. In winter, aloe slows down and barely needs water at all, so once a month or even less is usually enough. A pot in a warm, sunny south-facing window will dry out faster than one in a cooler, dimmer spot, so always check the soil rather than counting days.
How to plant aloe vera in a pot, step by step
- Choose a pot with drainage holes that's about 1 to 2 inches wider than the plant's root ball. Terracotta pots are great for aloe because they're porous and help wick away excess moisture, but plastic or glazed ceramic pots work fine too as long as they drain well.
- Fill the pot about one-third full with your fast-draining soil mix (the 3: 2:1 blend of potting soil, coarse sand, and perlite, or a cactus mix with added perlite).
- If you're planting a purchased aloe from a nursery pot, gently squeeze the nursery pot to loosen the root ball and slide the plant out. Shake off any old soggy soil from the roots, and inspect them. Trim off any black or mushy roots with clean scissors.
- Set the plant in the new pot so the base of the leaves sits about half an inch to one inch below the rim of the pot. This gives you room to water without overflow and keeps the base of the plant slightly elevated from sitting against wet soil.
- Fill in around the roots with your soil mix, pressing it gently to eliminate big air pockets. Don't pack it down hard.
- Wait 3 to 5 days before watering for the first time. This gives any roots that were disturbed during planting a chance to settle and reduces the risk of rot in a freshly disturbed root system.
- Place the pot in your brightest window. If you're planting an offset or pup rather than a full plant, let the cut end callus (dry out) for 4 to 7 days before planting. This forms a protective layer over the cut that dramatically reduces rot risk.
Planting a pup (offset) is a great way to multiply your collection for free. Once a pup is a couple of inches tall and has its own visible roots, you can gently separate it from the mother plant with a clean knife or by hand if it comes away easily. Let the cut end dry out for those 4 to 7 days, then plant it just like a mature plant, in a small 3- or 4-inch pot with the same fast-draining mix.
Troubleshooting common potted aloe problems
| Problem | Likely Cause | Fix |
|---|---|---|
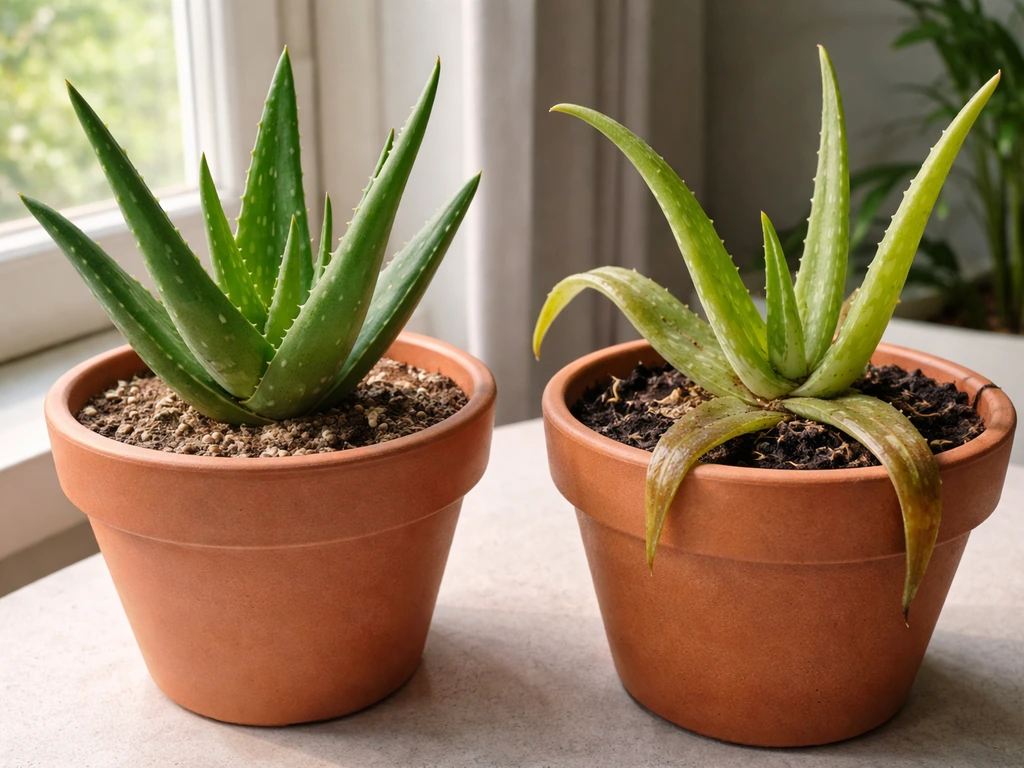
| Mushy, translucent leaves | Overwatering or poor drainage | Let soil dry completely; check drainage holes are clear; repot into fresh fast-draining mix if roots are rotting |
| Yellow leaves | Overwatering, direct cold drafts, or root rot | Cut back watering; move away from cold windows or air conditioning vents; inspect roots and trim any black ones |
| Leaves stretching toward one side or growing tall and floppy | Not enough light (etiolation) | Move to a brighter window or add a grow light; the lean won't fully reverse but new growth will be more upright |
| Brown, papery patches on leaves | Sunscald from sudden exposure to intense direct sun | Move to a spot with slightly filtered light or introduce to direct sun more gradually over 2 weeks |
| Shriveled, wrinkled leaves | Underwatering or the plant is too rootbound | Water thoroughly and check if roots are circling the pot; if so, repot into a slightly larger container |
| White crusty deposits on soil surface or pot | Mineral buildup from tap water or fertilizer | Flush soil thoroughly with water occasionally; consider using filtered or rainwater |
Root rot is the most serious issue and the hardest to reverse once it's advanced. If you pull the plant out and find more than half the roots are black and mushy, act fast: trim all the rotten roots back to healthy tissue, let the plant sit out of soil for a day or two to dry out the root system, then repot into completely fresh, dry soil. Don't water for at least a week after replanting. It sounds harsh, but it genuinely gives the plant its best shot.
Care calendar and knowing when to repot
Seasonal care at a glance
| Season | Watering | Light | Other Care |
|---|---|---|---|
| Spring | Every 2–3 weeks as soil dries out | Bright window; start transitioning outdoor plants outside | Good time to repot or separate pups; start fertilizing lightly once a month |
| Summer | Every 2–3 weeks; more often if very hot and dry | Full sun outdoors or south/west window indoors | Watch for sunscald if moving outside; water more if temperatures are very high |
| Autumn | Gradually reduce to once a month | Keep in brightest available window | Bring outdoor plants back inside before temps drop below 50°F (10°C) |
| Winter | Once a month or less; soil must be fully dry first | South-facing window or grow light | No fertilizer; minimal intervention; plant is dormant |
When and how to repot
Repot aloe when it becomes top-heavy and keeps tipping over, when roots are visibly growing out of the drainage holes, or when you can see the plant is clearly cramped and pups are crowding the pot. This usually happens every 2 to 3 years for an actively growing plant. When you do repot, only go up one pot size (about 1 to 2 inches wider in diameter). Jumping to a much larger pot too quickly means too much extra soil that stays wet too long.
Spring is the best time to repot because the plant is coming out of its winter rest and ready to push new roots. When repotting, always use fresh soil mix. The old mix loses structure over time and drains less effectively, which is one of the sneaky causes of root rot in older potted aloes.
Managing growth and pups in a small space
Aloe vera in a pot will stay more compact than one planted in the ground, which is actually ideal for small spaces and urban gardening. The pups it produces are free plants, and once they're a couple of inches tall with their own root system, you can separate and pot them up, give them away, or use them. Removing pups also redirects the mother plant's energy back into its own leaves, keeping the plant tidier and more manageable.
If you're tight on space, one aloe in a 6-inch terracotta pot on a sunny windowsill is genuinely a self-contained setup. It won't take over your apartment. And once you've got the watering rhythm down, it's one of the lower-maintenance plants you can grow indoors. If you enjoy container succulents, it's worth exploring other plants in a similar vein, like blue glow agave or agapanthus, which also do well in pots with bright light and good drainage. If you want something with a similar container-friendly vibe, follow the same core ideas as you learn how to grow blue glow agave in pots. Agapanthus can also thrive in containers as long as you use a fast-draining potting mix and give it plenty of bright light how to grow agapanthus in a pot. The container care principles overlap quite a bit.
The main thing to hold onto from all of this: less water than you think, more light than you think, and a soil mix that doesn't hold moisture. If you're also wondering how to grow alstroemeria in pots, the key is choosing a roomy container with drainage and keeping the soil evenly moist but not soggy. You can apply the same container mindset to other flowers too, such as learning how to grow alyssum in pots. Nail those three, and your potted aloe will be happily producing new leaves and pups for years.
FAQ
Can I grow aloe vera in a decorative pot that looks nice but has no drainage holes?
Yes, but only if it stays a cachepot. Put the aloe in a smaller plastic or ceramic nursery pot with drainage holes, then place that inside the decorative cover pot. Never let water collect at the bottom of the outer pot, and empty any saucer after watering.
What’s the best way to tell if my aloe needs water if I can’t easily stick my finger deep into the soil?
Lift the pot instead of guessing. When the pot feels noticeably light compared with after a fresh watering, the soil is likely dry enough to water. You can also use a wooden skewer or chopstick inserted to near the bottom, if moisture shows on it, wait.
Should I mist aloe vera or wipe the leaves with water?
Avoid misting as a watering substitute. Aloe stores water in its leaves and prefers dry conditions. If you wipe dust from the leaves, use a lightly damp cloth and let the plant dry fully afterward, especially around the leaf bases.
How do I prevent sunscald when moving my aloe outdoors?
Introduce it gradually. Start with morning sun and afternoon shade for about a week or two, then increase sun exposure slowly. If you notice bleached or papery patches, move it back to lighter shade and let the damaged area recover.
My aloe leaves look pale or stretched, what should I do?
That usually means it’s getting too little light. Move it closer to a bright window or add a grow light, then rotate the pot weekly so one side doesn’t keep stretching toward the light source.
Is it normal for aloe leaves to wrinkle or shrink?
Mild wrinkling can happen as the plant uses stored moisture, especially in winter or after underwatering. However, if leaves also feel soft and the base looks translucent, that points more toward overwatering and possible early rot. Check the soil first, dry soil needs water, damp soil needs less.
What does it mean if the base of the aloe is mushy or leaves are yellowing?
Yellowing from the top can be normal with older leaves, but mushy tissue at the base is a warning sign for root or crown rot. Remove from the pot, inspect roots and the crown, trim rotten parts, let it dry briefly, then repot into fresh, dry mix.
Do I need to fertilize potted aloe, and if so, how often?
Generally, aloe is slow-growing indoors and doesn’t need frequent feeding. If you fertilize, do it lightly during active growth, about once in spring to summer, using a cactus or succulent fertilizer diluted to half strength, then stop in winter.
How should I handle aloe pups, when is it safe to separate them?
Separate only when the pup is a few inches tall and has visible roots or a clear attachment that comes away easily. After cutting, let the cut portion dry for several days before potting, and keep the new pot slightly drier than you would for a mature plant.
What pot material is best for aloe vera in a pot?
Terracotta is a good choice because it breathes and dries faster, which helps prevent overwatering. Plastic holds moisture longer, so you may need to water less often. No matter the material, drainage holes and fast-draining soil matter most.
Can I use sand from the beach for the soil mix?
No, avoid fine beach sand. It compacts and can lock in moisture around the roots. Use coarse sand or perlite, and if you use a pre-made cactus mix, add extra perlite to improve airflow and drainage.
Why does my aloe keep falling over or getting top-heavy?
This often happens when the plant outgrows the pot or the root system becomes unstable. Repot into the next slightly larger size, keep the plant centered, and ensure the soil mix is draining and not staying overly wet, which can weaken roots.