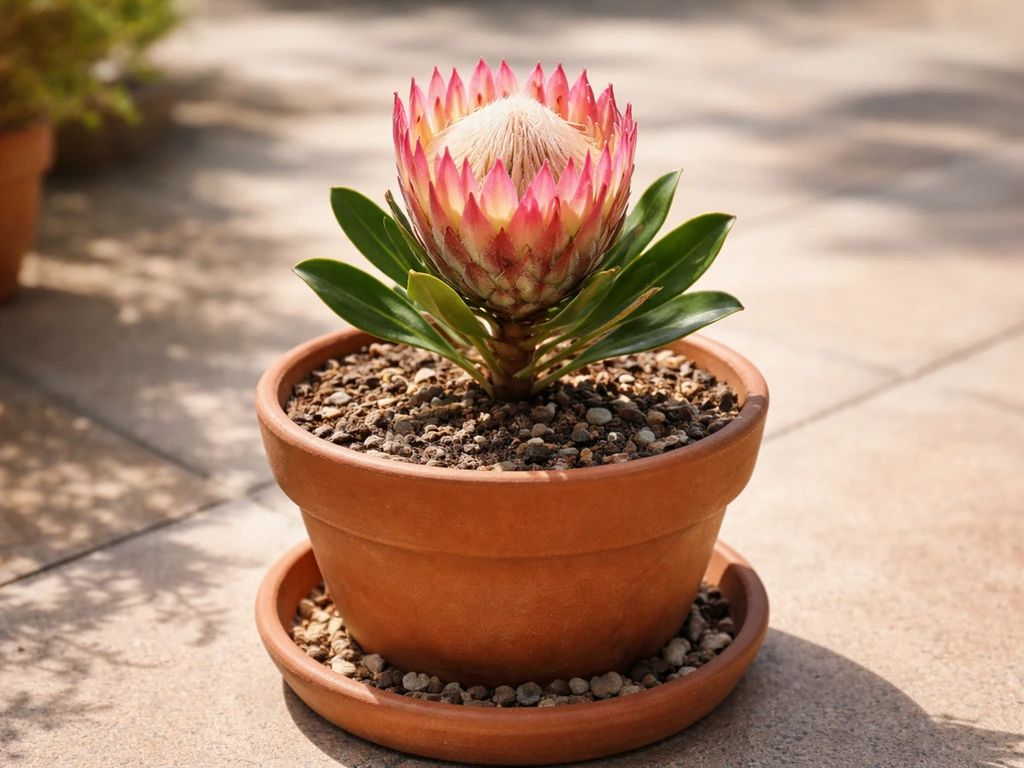
You can absolutely grow proteas in pots, and they can thrive in containers as long as you get three things right from the start: a compact variety, a gritty free-draining mix, and a watering habit that leans dry rather than wet. Miss any one of those and you'll struggle. Nail all three and you'll get those spectacular flowerheads on your balcony or patio that most people assume only happen in gardens with acres of space.
How to Grow Proteas in Pots: Step-by-Step Care Guide

Marcus Whitley
17 May 2026
Choosing the right protea type for a pot
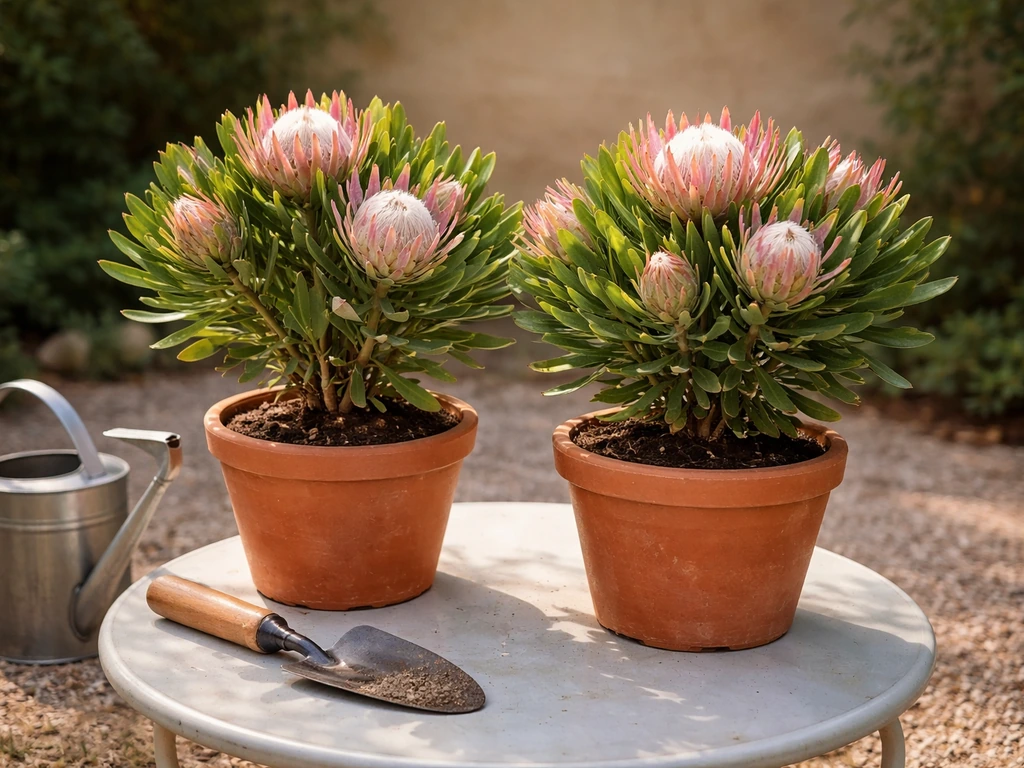
This is where most people go wrong before they even buy a plant. The protea family is huge, and some species grow into shrubs 3 to 4 metres tall with root systems to match. Those will never be happy in a pot long-term, no matter how big the container. For containers, you want compact-growing varieties that top out around 75 cm to 1 metre tall and wide. That's a manageable size for a large pot, a sunny balcony, or a courtyard corner.
Compact protea shrubs in that 0.75–1 m size range are genuinely well-suited to large pots and sunny balconies. Varieties like Protea compacta and some of the cultivated hybrids stay within that range when grown in containers, where the pot itself naturally restricts growth a little. Protea 'Susara' is another cultivar worth looking up at specialist nurseries if you want something with a known, manageable mature size. For example, RHS provides cultivar-level information for Protea 'Susara', including its formal mature size in its plant profile known, manageable mature size. When you're at the nursery, look at the mature height on the label and aim for anything described as 'compact', 'dwarf', or suited to 'small gardens'. If the label says it grows to 2 metres plus, put it back.
It's also worth knowing that proteas do not like hot, humid conditions. If you're in a subtropical area with long stretches above 30°C combined with humidity over 80%, you'll face an uphill battle. Proteas originate from the fynbos of South Africa and parts of Australia where summers are warm but dry and winters are cool and wet. Replicating that pattern as much as possible, even in a pot, makes everything else easier.
Pot size, drainage, and the ideal container setup
Start with a pot that's at least 40–50 cm in diameter and has multiple drainage holes in the base. I say multiple because one hole is often not enough once you add a heavy gritty mix. Drainage is not optional with proteas. It is the single biggest factor separating success from failure in containers. Phytophthora root rot, one of the most common and lethal protea killers, takes hold directly in waterlogged soil. Give water nowhere to escape and you're setting up a root rot environment.
Terracotta pots work really well for proteas because the porous walls allow some moisture to escape through the sides, keeping the root zone drier. Plastic pots retain more moisture, so if that's what you're using, be even more conservative with watering. Whatever material you choose, raise the pot slightly off the ground using pot feet or bricks so water can flow freely out of the drainage holes and nothing is sitting in a puddle underneath.
If you're using a decorative outer pot or a drip tray, check it after every watering and tip out any water that collects. Protea roots sitting above standing water in a saucer are still in trouble, even if the pot itself has holes. This is a simple habit that a lot of people skip, and it costs them the plant.
- Minimum pot size: 40–50 cm diameter for a compact variety
- Multiple drainage holes are essential, not just one
- Terracotta is preferable to plastic for better moisture regulation
- Raise pots off surfaces to allow free drainage
- Never let the pot sit in standing water, even temporarily
Best potting mix and amendments for protea roots
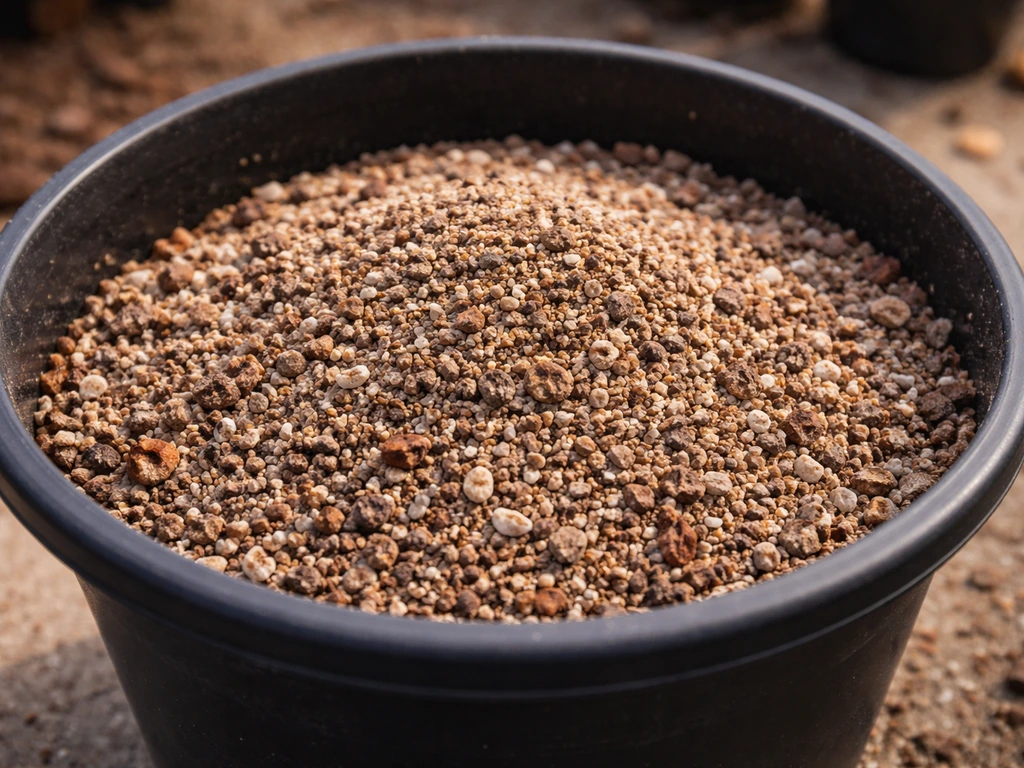
Standard potting mix from the hardware store will not work here. It retains too much moisture and is usually too rich in phosphorus, which is genuinely toxic to proteas at even moderate levels. You need something gritty, open, and fast-draining that mimics the poor, rocky soils proteas evolved in.
The best approach is to either buy a specialist native or protea potting mix (look for one marketed for Australian natives or South African plants) or build your own. A solid DIY mix is roughly 60% coarse native potting mix or fine bark, 20% coarse perlite, and 20% horticultural sand or grit. The perlite and sand are not optional extras. They are what keep the mix open so air reaches the roots and water passes through rather than pooling. Proteas have specialized fine 'proteoid' roots that are adapted for nutrient-poor soils. Those roots are highly sensitive and do not tolerate heavy, moisture-retentive mixes.
Avoid any mix that contains added fertilizers, especially phosphorus-based ones. Also avoid mixes that include mushroom compost or manure, as both tend to be high in phosphorus. If your existing garden has been treated with general fertilizers, don't use soil from those beds to top up your pot either. Fresh, lean mix every time is the right call.
Light, temperature, and watering schedule in containers
Getting the light right
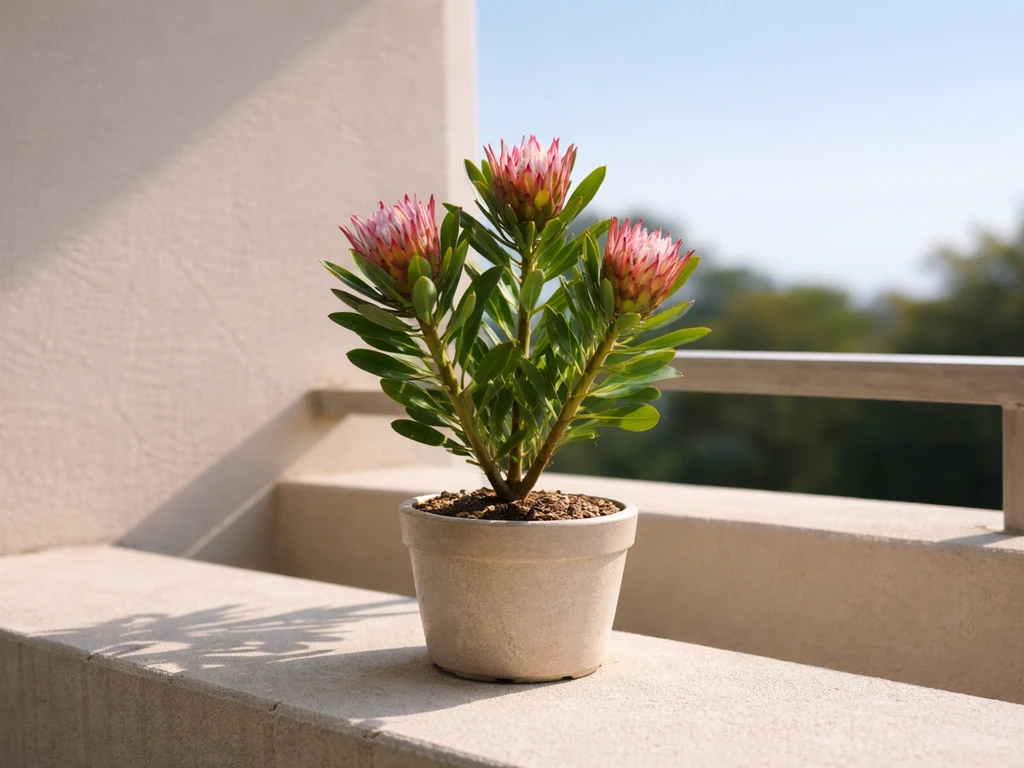
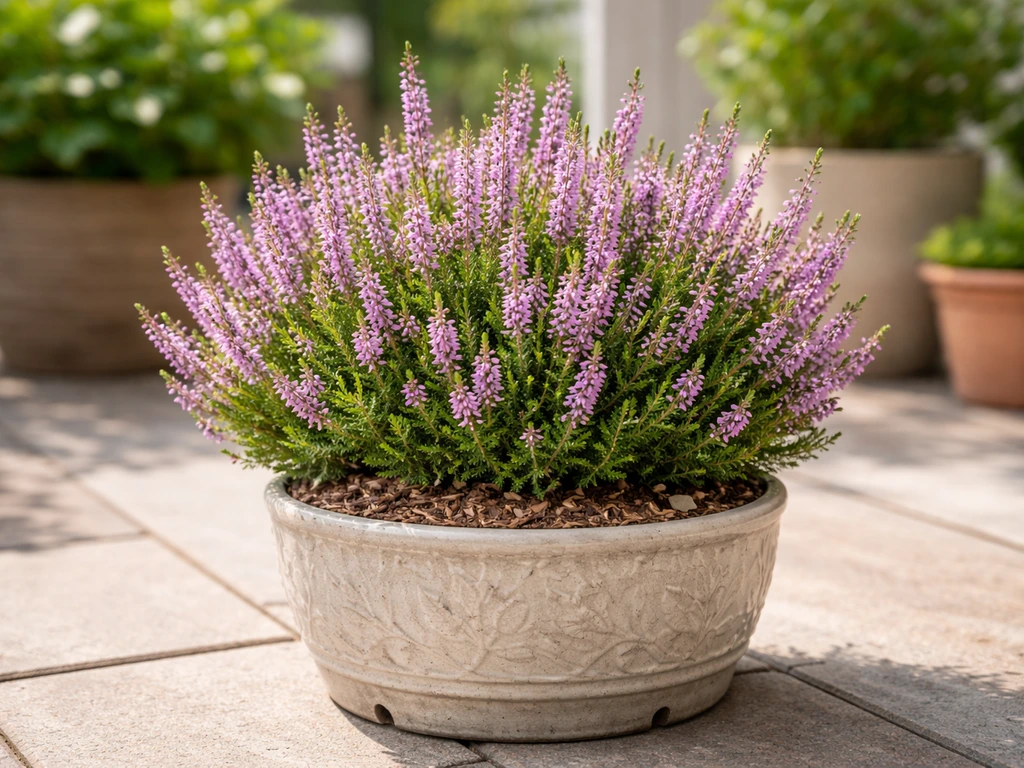
Proteas need full sun, ideally 6 hours or more of direct sunlight per day. A south-facing balcony (in the southern hemisphere) or a north-facing one (in the northern hemisphere) that gets unobstructed sun for most of the day is ideal. In a shaded spot, you'll get leggy growth and very few flowers. If you're in a high-rise apartment with limited direct sun, proteas are genuinely not the right plant for your conditions. For those situations, look at something like heather in pots, which tolerates partial shade far better.
Temperature and seasonal considerations
Most container-suitable proteas handle light frosts but suffer badly if overwatered or overfertilized going into winter, which makes them far more vulnerable to frost damage. In climates with cold winters, move pots to a sheltered spot (against a wall, under an overhang) once temperatures drop consistently below around 5°C. Don't move them into a warm indoor space though. Proteas need that cool winter period to set flower buds.
Watering: the most important habit to get right

The UC Santa Cruz Arboretum puts it clearly: potted proteas must not be overwatered, but they also must not be allowed to dry out completely. That balance sounds tricky but in practice it's manageable once you develop the habit of checking the mix before watering rather than watering on a fixed schedule. Push your finger 3–4 cm into the mix. If it feels damp, wait. If it feels dry at that depth, water thoroughly until it runs freely from the drainage holes, then leave it alone until it dries out again. For a step-by-step container approach, see how to grow plants in serenitea pot so you can set up the right light, drainage, and watering habit water thoroughly until it runs freely from the drainage holes.
In warm growing months (spring and summer), this might mean watering every 5 to 7 days depending on your climate and pot size. In cooler months, you might go 10 to 14 days or longer between waterings. Never water on autopilot. The mix and the season tell you when to water, not the calendar. And always use the drainage check above. If water is still sitting in your tray 30 minutes after watering, tip it out immediately.
Fertilizing (and what to avoid) for healthy blooms
Fertilizing proteas requires a lighter touch than almost any other container plant you've probably grown. These plants evolved in nutrient-poor soils, so the fertilizers that would boost a tomato or petunia can genuinely kill a protea. Phosphorus is the main culprit. Even small amounts of standard fertilizer that's high in phosphorus can cause root damage and leaf burn, and at higher levels it is fatal.
Use a fertilizer specifically formulated for Australian native plants or one labelled as low-phosphorus or phosphorus-free. The Botanic Gardens of Sydney recommend a very mild soluble fertilizer or coated slow-release pellets with low or zero phosphorus, applied during the active growing phase (spring and early summer). Protea Atlas research points to small amounts of nitrogen as genuinely useful, specifically acid-forming options like ammonium sulfate, used at very low rates. If you want a simple routine, a slow-release native plant fertilizer applied once in early spring at half the recommended rate is enough for most seasons.
Do not fertilize in autumn or winter. Feeding during the dormant period pushes soft new growth that is frost-sensitive and prone to disease. And remember: well-fed proteas that then hit a cold snap are more likely to be damaged by frost than plants that have been kept lean and hardened off naturally.
| Fertilizer Type | Phosphorus Level | Safe for Proteas? | When to Use |
|---|---|---|---|
| Native plant slow-release pellets | Low or zero | Yes | Once in early spring |
| Mild soluble native fertilizer | Low or zero | Yes | Spring, diluted to half strength |
| General-purpose fertilizer | High | No | Never |
| Mushroom compost or manure | High | No | Never |
| Ammonium sulfate (trace amounts) | None | Yes, cautiously | Spring only, very low rate |
Ongoing care: pruning, repotting, and managing plant stress
Pruning after flowering
Once a flower has finished and starts to look spent and brown, cut the stem back by about one-third to a healthy set of leaves. This is the standard prune-after-flowering approach, and it does two important things: it encourages branching that will carry next season's flowers, and it removes dead wood where fungal diseases like to take hold. Don't over-prune by cutting deep into old, woody stems with no leaves. Those sections rarely reshoot on proteas. Keep cuts to younger growth with visible foliage, and always use clean, sharp secateurs.
Judicious pruning can actually increase the number of flowerheads the following year, so this is one maintenance task that genuinely pays off. I find that doing a light shaping at the same time, just tidying the outline of the plant, also keeps container-grown proteas looking intentional rather than scraggly.
Repotting: when and how
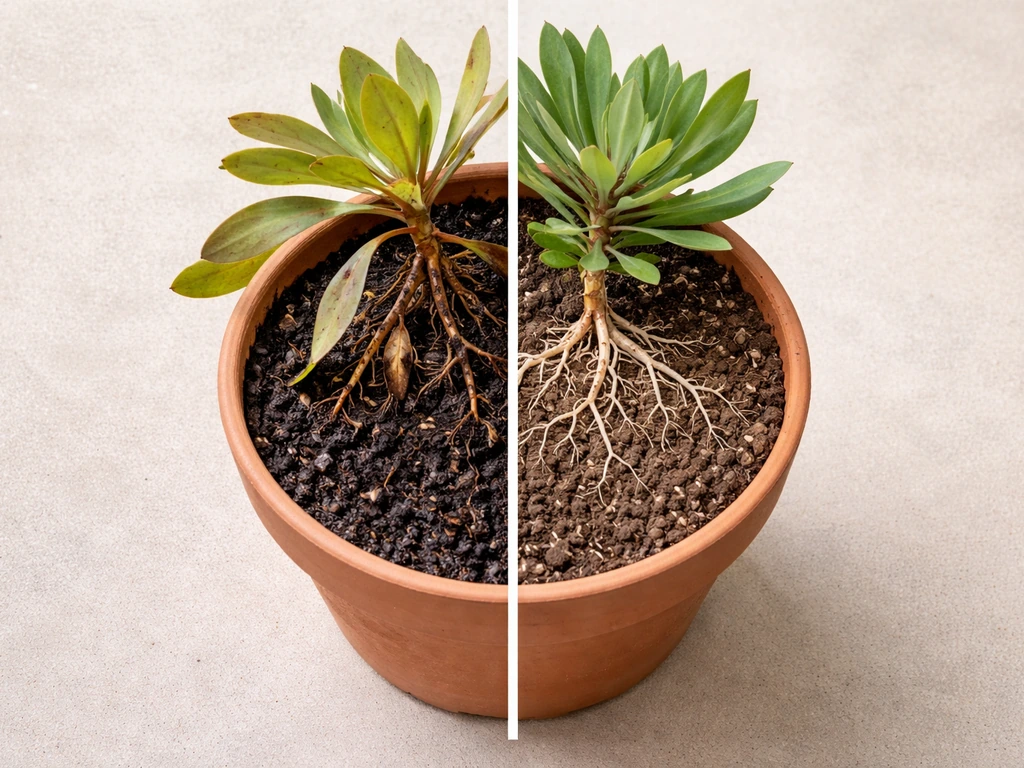
Proteas in containers don't need to be repotted often. In fact, they tend to bloom better when slightly root-bound. A good rule of thumb is to repot every 3 to 4 years, or sooner if you see roots circling the base of the pot or growing out of the drainage holes. Spring is the best time to repot, before the main growing season kicks in. Go up only one pot size at a time, roughly 5–8 cm larger in diameter. Too large a pot holds too much moisture in the unused mix, which creates the same wet conditions you've been working hard to avoid.
When repotting, handle the rootball gently. Proteas have fine, specialized roots that don't bounce back well from rough treatment. If you see circling roots at the base, tease them out gently rather than cutting them back hard. After repotting, water the plant in well and then hold off additional watering for at least a week, letting the plant settle without the stress of excess moisture. Expect a short period of adjustment where the plant looks a little flat. That's normal and not a sign you've done something wrong.
Seasonal transitions and stress management
Container-grown plants are more exposed to temperature swings than their in-ground counterparts, and proteas feel this more than many plants. Moving pots during extreme heat (above 35°C for several days) to a slightly sheltered spot with afternoon shade can prevent heat stress. In cold climates, the same logic applies in reverse: shelter from hard frost without moving into warmth. Gradually adjusting the plant's position over several days is kinder than a sudden move from a full-sun spot to deep shade or vice versa.
Common problems in potted proteas and quick fixes
Root rot and soggy soil
This is the number one killer of potted proteas, and it almost always comes down to either overwatering, poor drainage, or both. Signs include yellowing leaves that start at the base, soft brown stems at soil level, and a plant that looks wilted even though the soil is wet. If you catch it early, take the plant out of its pot, shake off as much wet mix as you can, cut away any black or mushy roots with sterile scissors, let the rootball air out for a few hours, and repot into fresh dry gritty mix. Remove any standing water from saucers immediately and check your watering routine going forward. If the rot is widespread and most of the roots are gone, the plant is unlikely to recover.
Browning leaf tips and edges
Brown tips that look scorched usually point to one of three things: phosphorus toxicity from the wrong fertilizer, salt buildup in the mix from tap water over time, or heat and sun stress on a pot that's overheating. Check your fertilizer first. If you've used anything other than a low-phosphorus native feed, flush the pot with water several times to dilute any buildup and switch fertilizers. If your tap water is very alkaline or high in minerals, using rainwater or filtered water where possible will reduce salt accumulation over time.
No flowers or very few flowers
Poor flowering in container proteas usually means not enough direct sun, or the plant was pruned at the wrong time (cutting off the developing buds in late summer or autumn before they can open). Make sure the pot is in at least 6 hours of direct sun. If pruning was recent and poorly timed, give the plant a full season to reset. Also check that it had a proper cool period over winter. Proteas need that temperature drop to trigger flowering. If your winters are warm and you keep the plant in a heated space, bud set will be poor regardless of everything else.
Yellowing leaves (not from root rot)
General yellowing across the plant without the soggy soil signs can indicate nitrogen deficiency, especially in a plant that hasn't been fertilized in a long time. A careful application of a low-phosphorus native fertilizer in spring should address this within a few weeks. Don't overcorrect by applying double doses. A gentle, low feed given once is far safer than a heavy application that tips into phosphorus toxicity territory.
Shock after repotting
A protea that looks droopy or loses some leaves immediately after repotting is most likely in transplant shock, which is a normal stress response to root disturbance. Place it in a sheltered spot with bright but indirect light for one to two weeks, water it once to settle the mix, and then leave it alone. Resist the urge to fertilize during this period. Most plants recover within two to four weeks once the roots begin to re-establish in the new mix. If it's still deteriorating after a month, check the roots again for signs of rot.
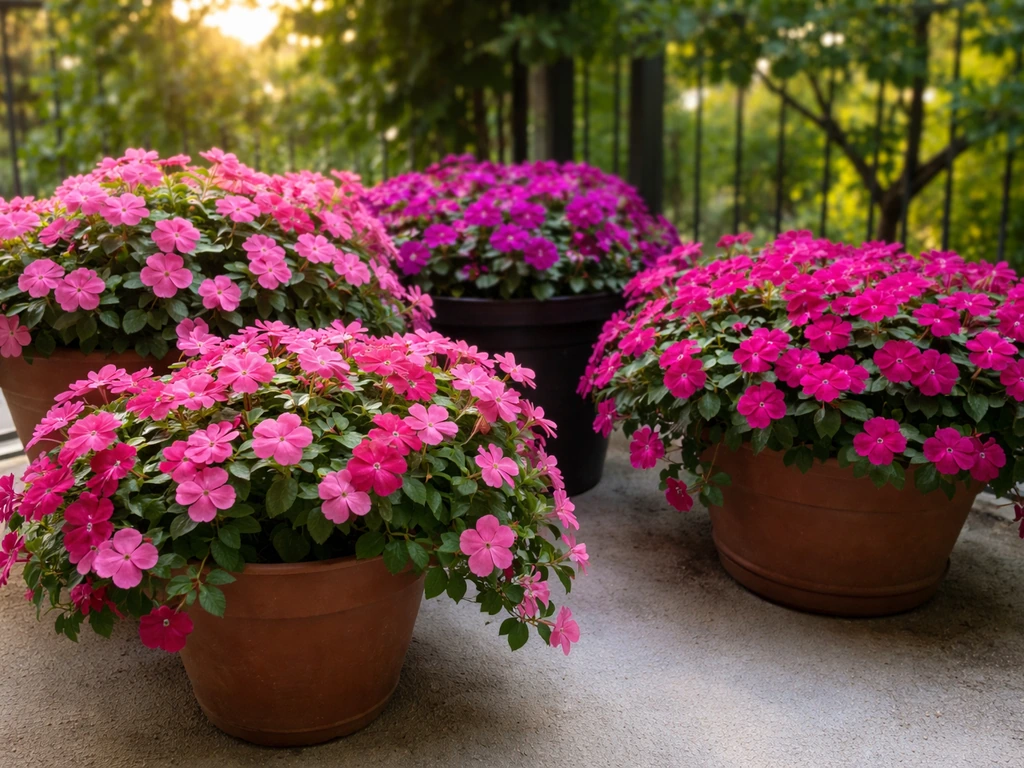
Growing proteas in pots is one of those things that feels intimidating at first but clicks once you understand what the plant actually needs: lean soil, excellent drainage, lots of sun, and restrained watering. If you want another pot-friendly flowering option, pansies also do best when you match their container needs for sun, consistent moisture, and fertile potting mix lean soil, excellent drainage, lots of sun, and restrained watering. Get those basics in place, choose a compact variety, and you'll have one of the most striking container plants you can grow at home. If you enjoy growing other flowering plants in pots, heather makes for a great low-maintenance companion that shares a similar preference for lean, acidic, well-drained conditions. If you want a different container flower, learn how to grow impatiens in pots so you can match the right light and watering for their needs. You can use the same container mindset for petunias too, focusing on the right pot size, drainage, and consistent watering other flowering plants in pots.
FAQ
What pot size is the minimum for growing proteas successfully in pots?
Aim for at least 40 to 50 cm in diameter for an established plant, because smaller pots dry out and heat up too fast, which increases stress and bud drop. Also choose a container with several drainage holes (not just one) to prevent localized waterlogging in the center.
Can I grow proteas in a small balcony container, like 20 to 30 cm wide?
It’s usually not a long-term success plan. Small pots swing between drought and overheating quickly, and proteas hate being either waterlogged or repeatedly allowed to fully dry out. If you must use a smaller pot, plan for more frequent checks, use extra gritty mix, and expect a shorter lifespan.
Do I need to use rainwater or filtered water to prevent problems?
Not strictly, but it helps. If your tap water is hard or very alkaline, salts can build up and cause brown, scorched tips. A practical approach is to use filtered or rainwater when possible, and every few months do a thorough flush to move salts down and out through the drainage holes.
How do I tell the difference between overwatering and fertilizer problems?
Overwatering commonly comes with soggy mix symptoms, wilting despite wet soil, and yellowing that starts at the base. Fertilizer issues more often show up as brown tip burn or leaf discoloration even when the soil isn’t staying wet. If you’re seeing burn, review the fertilizer label first, then confirm drainage by checking whether any water remains in the saucer after 30 minutes.
Should I fertilize right after planting or repotting my protea?
No. After repotting or a root trim for rot, wait at least a few weeks before feeding, because stressed roots are less able to handle nutrients. Use plain water to settle the mix, and resume low-phosphorus feeding only during active growth.
What fertilizer should I avoid completely, even if it’s “native plant” labeled?
Avoid anything that lists phosphorus as a major ingredient or that includes added phosphorus-rich amendments (including some composted products). If the bag doesn’t clearly indicate low or zero phosphorus, don’t guess, because proteas can be harmed at moderate phosphorus levels.
How often should I water a potted protea in winter?
Base it on the 3 to 4 cm finger test rather than a calendar, but in cooler months you’ll typically water much less, sometimes every 10 to 14 days or longer. The key is to keep the mix from staying damp for long periods, especially if your winter days are cloudy and growth slows.
Is it better to keep my protea pot outside year-round?
It depends on your minimum temperatures and your ability to protect from frost while keeping a cool winter period. In cold climates, shelter the pot from freezing wind and heavy frost, but don’t move it indoors to a warm room, because that can prevent proper bud initiation.
How should I protect proteas in pots from frost without overwatering them?
Use a sheltered location (near a wall, under an overhang), and cover the plant during freezing nights if needed, while still ensuring the pot drains well. Don’t water right before a cold snap unless the mix is already due, because adding water then freezing can increase root stress.
Do proteas need deadheading, or should I just prune after flowering?
After flowers fade, pruning about one-third back to a healthy leaf set is the main task. Deadheading small spent blooms can be done for appearance, but avoid cutting into woody older sections that lack visible foliage, because proteas often won’t reshoot from bare wood.
When is the best time to repot, and what should I do with circling roots?
Repot in spring before the main growing season. If roots are circling, gently tease them out rather than cutting aggressively, because protea fine roots recover slowly. Increase pot size only slightly (about 5 to 8 cm wider) to avoid excess unused mix holding moisture.
Why does my protea have lots of leaves but few flowers?
Common causes are insufficient direct sun (less than about 6 hours), poor timing of pruning that removes developing buds, or a winter that is too warm indoors without a cool period. Check also that you didn’t over-fertilize, because excessive feeding can reduce flowering quality.
What are the first signs of root rot in container proteas?
Early warning signs include yellowing starting at the base, stems near the soil line turning soft or brown, and a wilted look even when the mix is wet. If you see those patterns, act quickly by removing the plant, trimming black or mushy roots, letting the rootball air out, and repotting into fresh dry gritty mix.
My protea looks droopy right after I repotted it, will it recover?
Often yes. Droop immediately after repotting is usually transplant shock. Keep it in bright but indirect light for 1 to 2 weeks, water only once to settle the mix, then avoid fertilizing and keep handling to a minimum until new growth resumes.