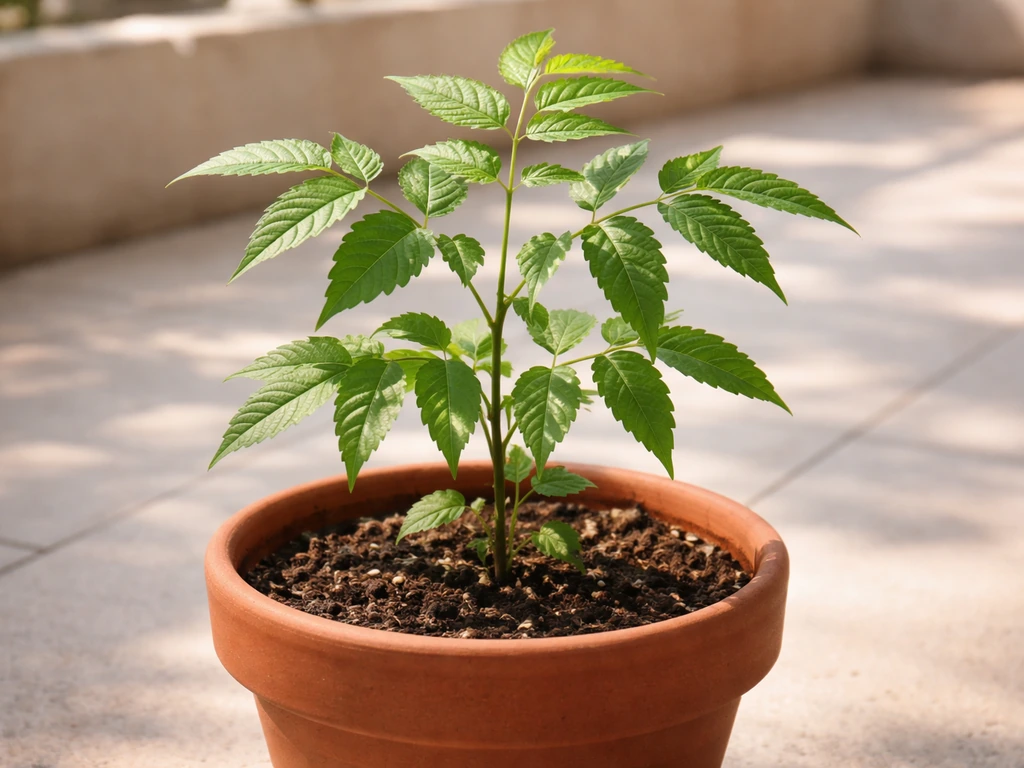
Yes, you can absolutely grow a neem tree in a pot, and it works really well as long as you respect two things: give it full sun and don't let it sit in soggy soil. In a container, neem won't reach its wild height of 15 to 35 meters, but it will grow into a handsome, manageable tree you can keep on a balcony, patio, or sunny terrace. Start with a pot that's at least 12 to 16 inches in diameter, use a fast-draining loamy mix with a pH between 6.2 and 7.0, water deeply but only when the top inch of soil is dry, and prune it every spring to keep the size in check. That's the whole game in one breath. The rest of this guide fills in the details.
How to Grow Neem Plant in a Pot: Step by Step Guide

Marcus Whitley
19 May 2026
Can neem actually thrive in a pot (and what should you expect)?
Neem (Azadirachta indica) is a tropical tree that evolved in dry, warm climates where it pushes roots deep into the earth. In the ground it can eventually hit 15 to 35 meters tall. In a pot, that's obviously not happening, and that's fine. Container life naturally limits root expansion, which slows the above-ground growth too. Think of it less like a full-sized tree and more like a large, useful shrub or patio statement plant that you're training, not just growing.
In terms of cold tolerance, neem is not particularly tough. Most care guides report that it can technically survive down to around -12°C (10°F) for very short spells, but practically speaking, anything below about -1°C (30°F) for more than a brief frost is risky for a pot-grown specimen with exposed roots. The beauty of container growing is that you can move it indoors or into a sheltered spot when temperatures drop, which is a huge advantage over in-ground planting in cooler climates.
Expect slow to moderate growth in the first year, especially while the plant is establishing roots in the new container. Don't panic if it seems to just sit there for a while. Once the root system fills the pot, you'll see noticeably faster top growth. Just set your expectations for a long-term project, not a quick win, and you'll enjoy every small milestone along the way.
Picking the right neem plant and getting your pot set up
Starting material: seedling vs. cutting
The easiest way to start is with a young nursery-grown seedling, ideally one that's already 6 to 12 inches tall. Seedlings establish more reliably than rooted cuttings, and you skip the fiddly germination stage. If you're buying from a local nursery, look for a plant with healthy green leaves, a firm stem, and no signs of yellowing or root crowding out of the drainage holes. Avoid seedlings with spotted, wilted, or pale leaves, those are usually stressed before they even get to you.
If you want to start from seed, it's doable but the seeds lose viability fast, often within a few weeks of the fruit falling, so use fresh seed if you go that route. Germination typically takes 1 to 3 weeks in warm conditions. For most home gardeners, buying a small seedling saves a lot of time and frustration.
Choosing the right pot
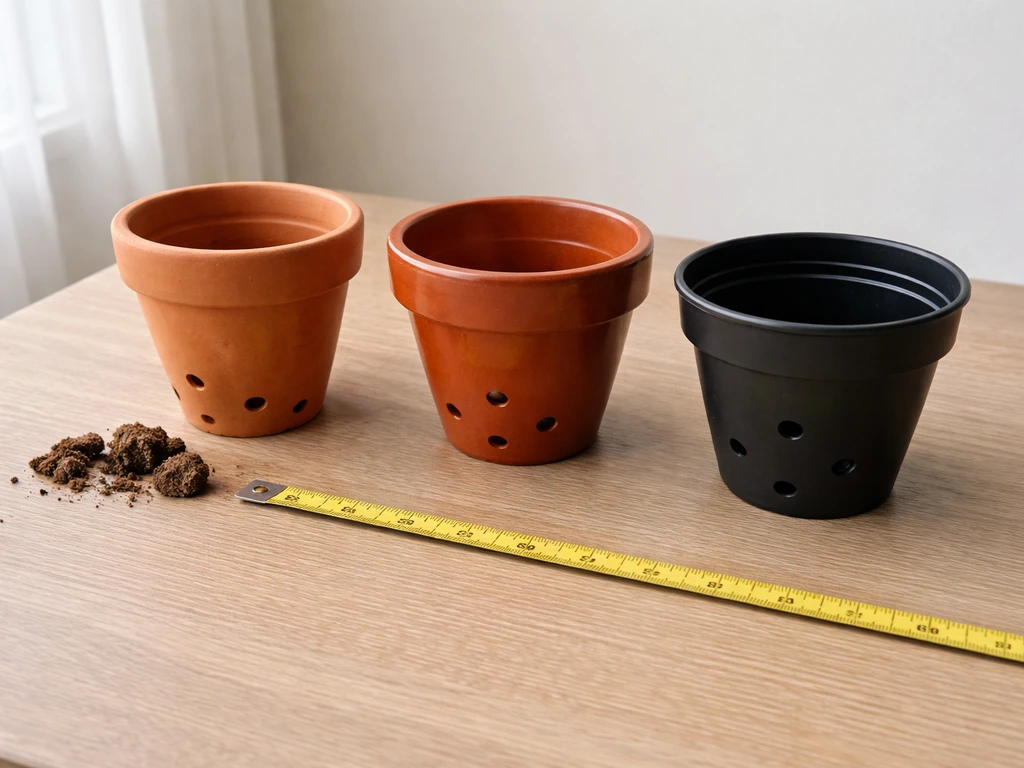
For a young seedling that's roughly 6 to 12 inches tall, start with a pot that's 10 to 12 inches in diameter. Going too big too soon is a real problem with neem because excess soil holds moisture longer than the roots can use, and that leads to root rot. As the tree grows and roots fill the current container, step up to a pot that's about 3 to 4 inches larger in diameter each time you repot. For smaller pots under 8 inches, a 1 to 2 inch increase is enough. Ultimately, a mature container neem will be happiest in a 20 to 24 inch pot or a large wooden half-barrel equivalent.
Material matters too. Unglazed terracotta looks great and breathes well, but it loses water quickly, which means more frequent watering in hot weather. Plastic and glazed ceramic retain moisture longer, which can be helpful in dry climates but risky if you tend to overwater. Whichever material you choose, make absolutely sure the pot has multiple drainage holes at the bottom. Not one, several. This is non-negotiable for neem.
Getting the potting mix and drainage right
Neem prefers deep, fertile, well-drained loamy soil with a pH in the range of about 6.2 to 7.0. Standard heavy garden soil is a bad choice for containers because it compacts, drains poorly, and suffocates roots. Instead, build a mix that drains fast but still holds some nutrients.
A reliable starting mix for container neem is roughly 60% good quality potting compost, 20% perlite or coarse river sand, and 20% garden loam if you have it (or just increase the perlite). The compost provides nutrients and structure, and the perlite or sand opens up the mix so water flows through rather than pooling. You can also add a small handful of neem cake or well-rotted compost for an organic nutrient boost at planting time.
Drainage setup at the bottom of the pot is just as important as the mix itself. Place a thin layer of coarse gravel or broken pot shards over the drainage holes to stop soil from blocking them over time. If your pot sits in a saucer, empty that saucer regularly after watering so the roots aren't sitting in standing water. A pot that drains properly but then sits in a puddle defeats the whole purpose. For double-potting setups where you slide the growing pot into a decorative outer pot, make sure you drill or pierce holes in any solid liners so water doesn't get trapped inside.
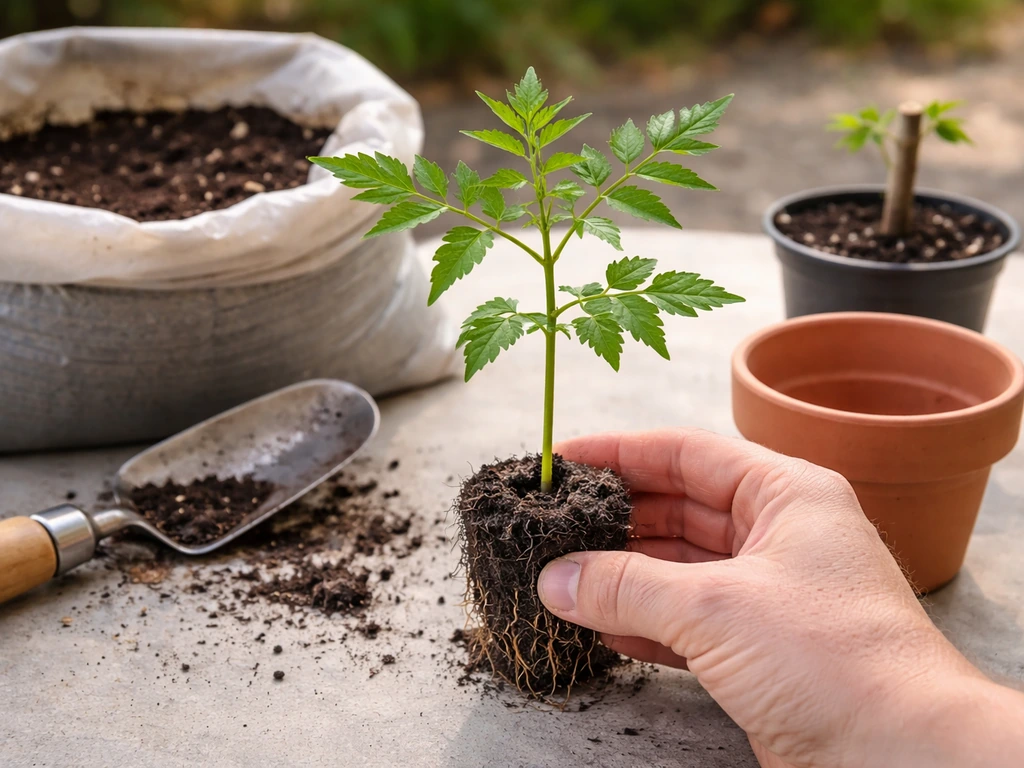
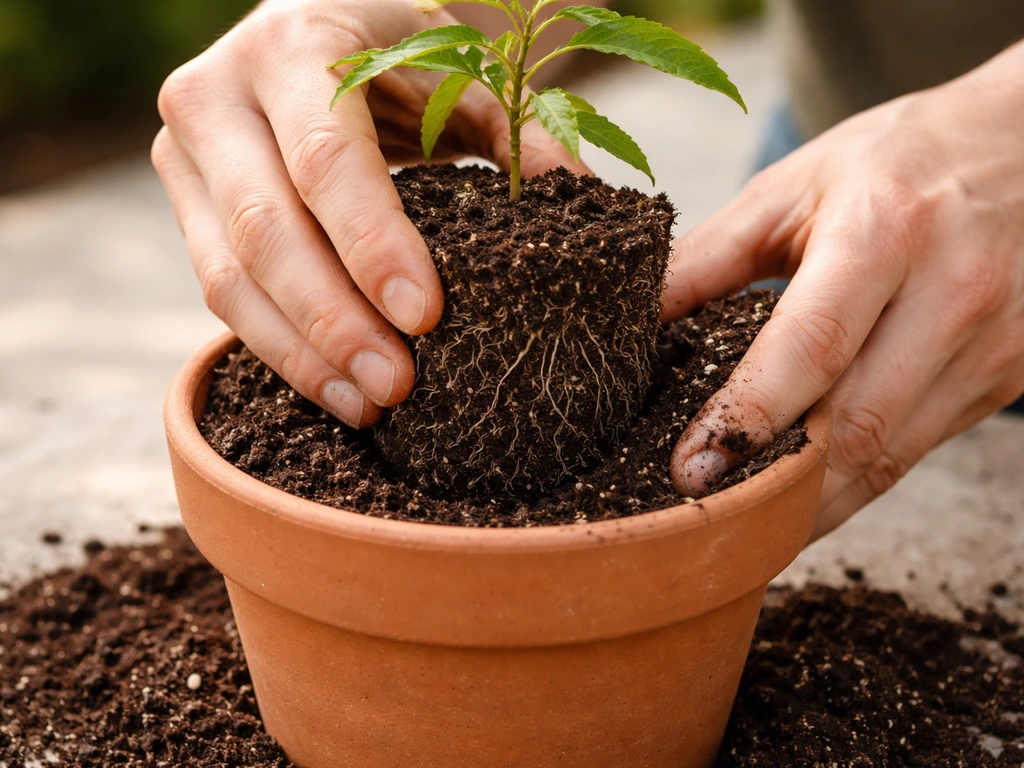
Step-by-step: how to plant neem in a pot
- Choose a pot that's 10 to 12 inches in diameter for a young seedling, or 3 to 4 inches wider than the seedling's current root ball if it's a larger transplant. Make sure it has multiple drainage holes.
- Cover the drainage holes with a single layer of coarse gravel, broken pot pieces, or a cut piece of mesh. You want water to flow out freely but not take all the soil with it.
- Mix your potting medium: 60% compost, 20% perlite, 20% loam (or use 40% perlite if you don't have loam). Optionally add a small amount of slow-release granular fertilizer at this stage.
- Fill the pot about one-third of the way with your mix, then gently remove the seedling from its nursery container. Loosen any tightly coiled roots at the base with your fingers so they can spread outward.
- Place the seedling in the center of the pot so the root collar (where the stem meets the roots) sits about 1 to 2 inches below the rim of the pot. This gap allows you to water without spilling.
- Fill in around the roots with your potting mix, pressing it gently to remove large air pockets. Don't pack it down hard; you want the mix to stay loose and airy.
- Water thoroughly until water runs freely from the drainage holes. This settles the mix around the roots and gives you a clear read on how well the pot drains.
- Place the pot in the sunniest spot you have. Do not move it into shade to help it 'adjust.' Neem needs full sun from day one.
Light, watering, and feeding your container neem
Light
Neem is a full-sun plant. Minimum 6 hours of direct sunlight per day, and ideally 8 or more. A south- or west-facing balcony, rooftop, or patio is ideal. If your neem doesn't get enough light, it will grow slowly, stretch toward the light, and become weak and spindly. There's no workaround here. If your space only gets partial sun, a different plant like curry leaf (which tolerates slightly more shade) might be a better fit.
Watering
Watering is where most people go wrong with container neem. Overwatering kills it faster than underwatering. The rule is simple: water deeply when the top 1 inch of soil feels dry, and stop watering until it dries out again. In hot summer weather with a pot in full sun, that might be every 1 to 2 days. In cooler seasons or partial shade, it could be every 4 to 5 days. Don't go by a fixed schedule; go by the soil.
At the same time, don't let the pot dry out completely to the point where the soil pulls away from the sides of the pot or turns to dust. Letting it get bone dry repeatedly damages the fine feeder roots and stresses the plant significantly, sometimes causing leaf drop or flower drop in older plants. There's a sweet spot between moist and saturated that neem really likes, and you'll develop a feel for it after a few weeks.
Fertilizing
Container-grown neem benefits from regular feeding because nutrients leach out of the pot every time you water. During the active growing season (spring through late summer), apply a balanced blank" rel="noopener noreferrer">slow-release fertilizer with equal NPK numbers, something like a 10-10-10 granular formula, once every 4 to 6 weeks. Slow-release forms are worth the slightly higher cost because they feed steadily with each watering rather than dumping nutrients all at once, which can burn roots and cause waste. ForwardPlant suggests using a balanced NPK fertilizer such as 10-10-10 and recommends slow-release fertilizer during warmer months to reduce application frequency and nutrient runoff blank" rel="noopener noreferrer">Slow-release forms are worth the slightly higher cost. In autumn and winter, when the tree slows down, stop fertilizing altogether. You don't want to push tender new growth right before cold weather hits.
Pruning, size control, and sorting out common problems
Keeping neem manageable with pruning
Pruning is your main tool for keeping a container neem at a workable size and shape. The best time to prune is in early to mid spring, just as the tree is coming out of its slower winter period and before a big flush of new growth. Avoid heavy pruning in autumn or winter.
When you cut, make each cut at roughly a 45-degree angle, about a quarter inch above an outward-facing bud. This angle helps water run off the cut surface rather than pooling, and targeting outward-facing buds means the new growth extends away from the center rather than inward, keeping the canopy open and well-ventilated. Use thinning cuts (removing a branch all the way back to where it joins a larger branch) to reduce density, and heading cuts (snipping the tip of a branch) to encourage bushier, more compact growth. Both are useful and you'll likely use both as the tree develops.
Once your neem starts to get root-bound, you have two options: pot up into a larger container, or root-prune and return it to the same pot. Root pruning involves carefully removing the plant, trimming the outer roots back by about 20 to 25%, and replanting in fresh mix. If you go this route, keep the new pot no more than about 2 inches wider than the current one. Root pruning is a bit nerve-wracking the first time, but neem handles it well if you do it in spring and water it in properly afterward.
Common problems and how to fix them
| Problem | Likely Cause | What to Do |
|---|---|---|
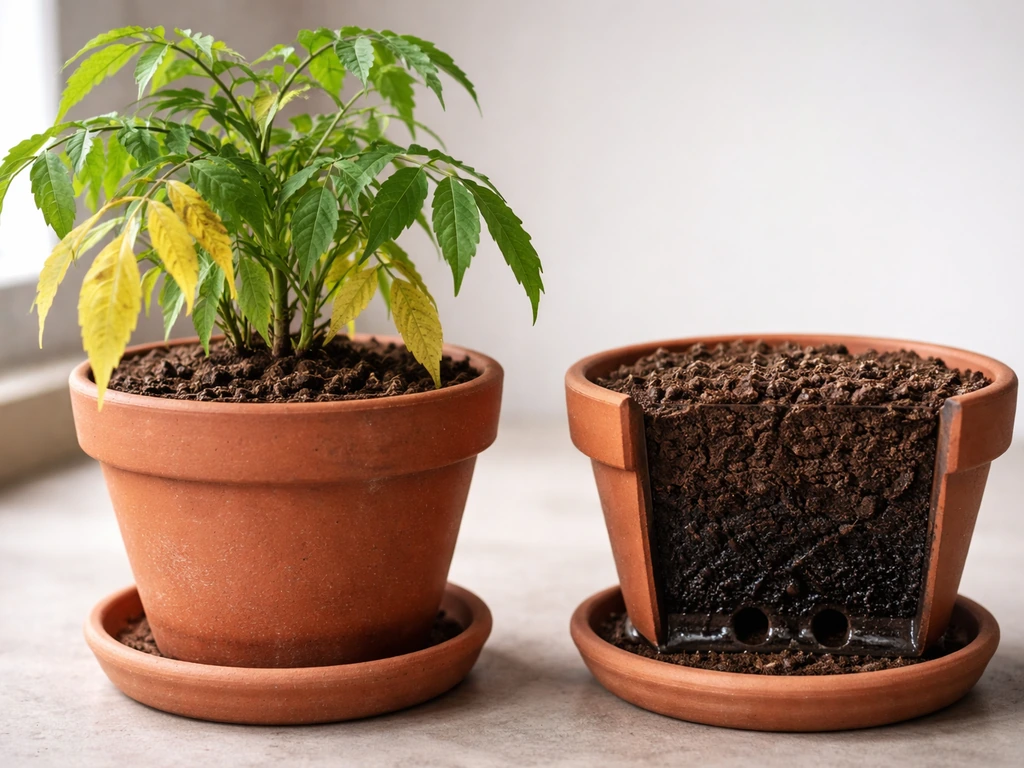
| Yellow leaves (widespread) | Overwatering or waterlogged roots | Check drainage holes, reduce watering frequency, ensure saucer is emptied after watering |
| Yellow leaves (older/lower leaves only) | Natural leaf drop or minor nutrient deficiency | Apply a balanced fertilizer; if just a few old leaves, it's normal |
| Dark, mushy roots with sour smell | Root rot from prolonged overwatering | Remove affected roots, repot in fresh well-draining mix, hold off watering for a few days |
| Slow or no growth | Not enough light, pot too large, or wrong season | Move to a sunnier spot, check root fill in current pot, wait for spring warmth |
| Leggy, stretched growth | Insufficient light | Move to a location with at least 6 to 8 hours of direct sun daily |
| White crusty deposits on pot or soil surface | Salt and mineral build-up from water and fertilizer | Flush the pot thoroughly with water, reduce fertilizer dose, repot if build-up is severe |
| Leaf drop after repotting | Transplant stress | Normal in most cases; keep in full sun, water appropriately, and give it 2 to 4 weeks to settle |
Root rot is the single most common killer of container neem, and it's almost always caused by overwatering combined with poor drainage. If you catch it early, when just a few roots are affected, you can usually save the plant by cutting away the damaged roots with sterile scissors, letting the remaining roots air-dry for 30 minutes, and repotting into fresh, dry mix. Don't water heavily right away; let the plant recover for a couple of days first.
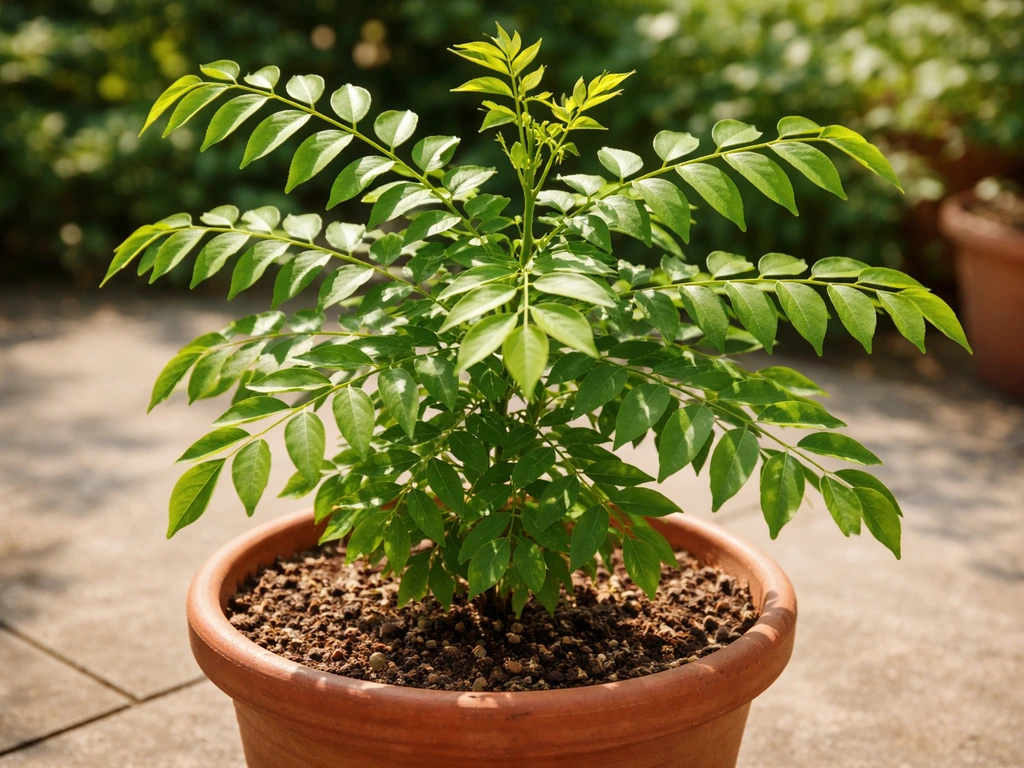
If you enjoy growing other useful plants in pots, neem fits naturally alongside projects like growing curry leaf plant or bay leaves in containers, all of which share similar needs for full sun, well-draining soil, and careful watering. If you want a different aromatic tropical herb to grow in a pot, see how to grow betel leaf plant in pot next growing other useful plants in pots. Bay leaves in pots also prefer full sun, fast-draining soil, and careful watering to keep the roots healthy bay leaves in containers. If you’re also interested in curry leaf, the same container basics apply: a warm sunny spot, a well-draining mix, and watering only when the top layer dries growing curry leaf plant. The skills you build with one transfer directly to the others, so consider this your gateway into a whole category of low-maintenance aromatic and useful container plants.
Growing neem in a pot is genuinely achievable even for beginners, and the rewards go beyond just having a great-looking plant. If you also want to grow elkhorns in pots, you can use the same container mindset about drainage, light, and consistent care to help both plants thrive grow neem in a pot. If you want to try another fragrant container herb, learn how to grow elaichi in a pot for similar sun and watering guidance adapted to spices. Edelweiss can also be grown in a pot if you mimic its cool, well-drained conditions and give it enough light Growing neem in a pot. Yes, elephant ears can also be grown in containers, as long as you choose the right pot size and keep the soil consistently warm and moist how to grow elephant ears in a pot. You'll have a living source of neem leaves for natural pest control, organic gardening use, and all the traditional applications that make this tree so valued. Get the drainage right, give it sun, and prune it every spring, and you'll have a healthy container neem that stays productive for years. In the same way you set up and maintain a neem container, you can also learn how to grow a henna plant in a pot by focusing on sun, drainage, and consistent moisture how to grow henna plant in pot.
FAQ
How can I tell if my potted neem is getting enough sun?
Look for dark green, sturdy new growth and a tight canopy. If you see pale leaves, long internodes (stretched gaps between leaves), or the top leaning hard toward one direction, it is not getting the minimum light (aim for 8 hours of direct sun if possible). Rotate the pot every 1 to 2 weeks so growth stays balanced.
What’s the best way to water neem in a pot if the weather changes week to week?
Use the “top 1 inch dry” test, then water until excess drains out the bottom. In practice, hot sunny spells may be every 1 to 2 days, but if your pot material is terracotta, it can dry faster than you expect even in mild weather. Always empty any saucer after 10 to 20 minutes so the roots never sit in runoff.
Can I grow neem indoors year-round in a container?
Only if you can provide very bright light, ideally several hours of direct sun, or a strong grow light setup. Indoors it also tends to dry more slowly and overwatering becomes more likely, so shorten the watering frequency only after you confirm the soil actually dries at the 1 inch level.
My neem leaves are turning yellow. What does that usually mean in pots?
Yellowing most commonly points to overwatering and low aeration, especially if drainage is poor or the pot sits in a saucer. Check drainage first, then inspect roots if symptoms persist: healthy roots are firm and light-colored, damaged roots are brown and mushy. Let the mix dry more between waterings and avoid fertilizing until the plant stabilizes.
How do I prevent soil from blocking drainage holes over time?
The article suggests gravel or shards, and the practical extra step is to keep the potting mix from washing down by using a mix that stays structured (potting compost plus perlite/sand). Periodically check that water exits quickly after watering, if it trickles, flush the system and consider repotting with fresh, aerated mix.
When is the right time to repot, and should I repot if the tree seems fine?
Repot when roots begin circling the pot or when water runs through too fast and dry patches appear, often every 1 to 2 years for container neem. If the plant is actively growing and looks healthy, avoid unnecessary repotting mid-summer. Spring is the safest window for pot-ups or root pruning.
Can I propagate neem from cuttings in a pot?
It is usually unreliable compared with starting from fresh seed or buying a nursery seedling. Neem cuttings often root slowly and may fail without controlled conditions, so for beginner container growing, choose a healthy seedling or very fresh seed instead.
My neem is root-bound, should I pot up or root-prune?
Potting up is the calmer first choice if you still have room for a bigger pot. Root-pruning is better when you want to keep the tree size stable, but do it in spring and keep the new pot only slightly larger (about 2 inches wider than the current one). After root work, avoid heavy watering and fertilizing for a short recovery period.
How do I recover neem after root rot starts?
If you see ongoing wilting with wet soil, act fast: remove the plant, trim away mushy roots with sterile scissors, and let remaining roots air-dry briefly before replanting in fresh, drier mix. Keep it in bright shade for a couple of days and resume watering only when the top inch dries again, do not “drown” it to compensate.
What pests or leaf problems should I watch for on container neem?
Common container issues include scale, mealybugs, and occasional leaf spot under poor airflow. Because neem is hardy, most pest problems start when the plant is stressed (too little light, chronic overwatering, or inconsistent watering). Rinse the foliage and improve sun and ventilation first, then treat with an appropriate targeted method if pests persist.