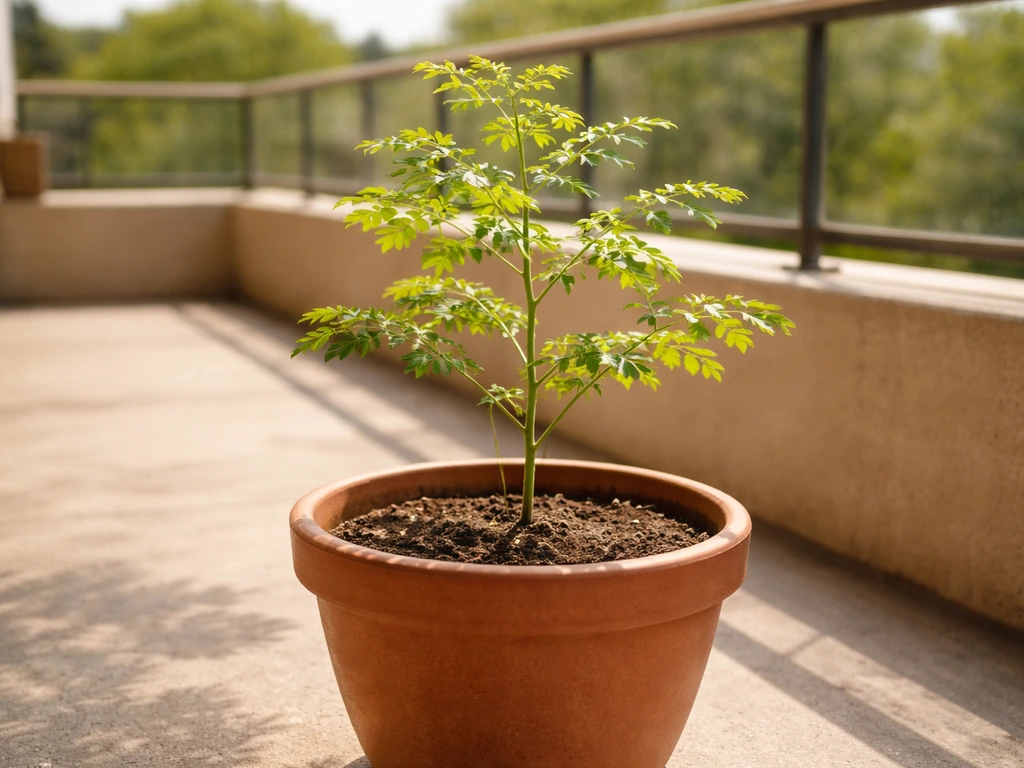
Yes, moringa absolutely can grow in a pot, and it can do really well if you give it the right setup. The honest caveat is that moringa is technically a tree that can hit 25 to 30 meters tall in the ground, so container growing is about managing that energy rather than unleashing it. With the right pot, a free-draining soil mix, full sun, and regular pruning, you can keep a healthy moringa in a container for years and harvest fresh leaves from it consistently. This guide walks you through everything from picking your pot to troubleshooting the problems that trip most people up.
How to Grow Moringa in Pots: Step-by-Step Container Guide

Marcus Whitley
22 Apr 2026
Can moringa actually grow in a pot (and is it right for you)?
Moringa can be grown in large containers, especially when the tree is young. It thrives best in open ground if you want full size, but for balconies, patios, urban apartments, and anyone without a garden bed, a container works well as long as you stay on top of pruning and drainage. The plant's roots are aggressive and the top growth is vigorous, so the container genuinely constrains it, which is actually the point. You are not trying to grow a full moringa tree, you are growing a compact, productive shrub-like plant that gives you leaves on demand.
This approach works best for anyone in a warm climate (or willing to bring the pot indoors during cold months), someone with a sunny balcony, rooftop, or south-facing windowsill, or a beginner who wants fast results since moringa is one of the faster-growing plants you can put in a container. If you have grown herbs like ajwain in pots or have tried something more demanding like courgettes from seed, moringa at the container stage is a similar level of commitment, just with more pruning involved. If you have tried something more demanding like courgettes from seed in pots, the container stage for moringa is a similar level of commitment, just with more pruning involved. If you want to grow ajwain in pots from seeds, the key is using fast-draining soil and giving the seedlings steady warmth until they establish grown herbs like ajwain in pots.
Choosing the right pot, location, and plant size to start with
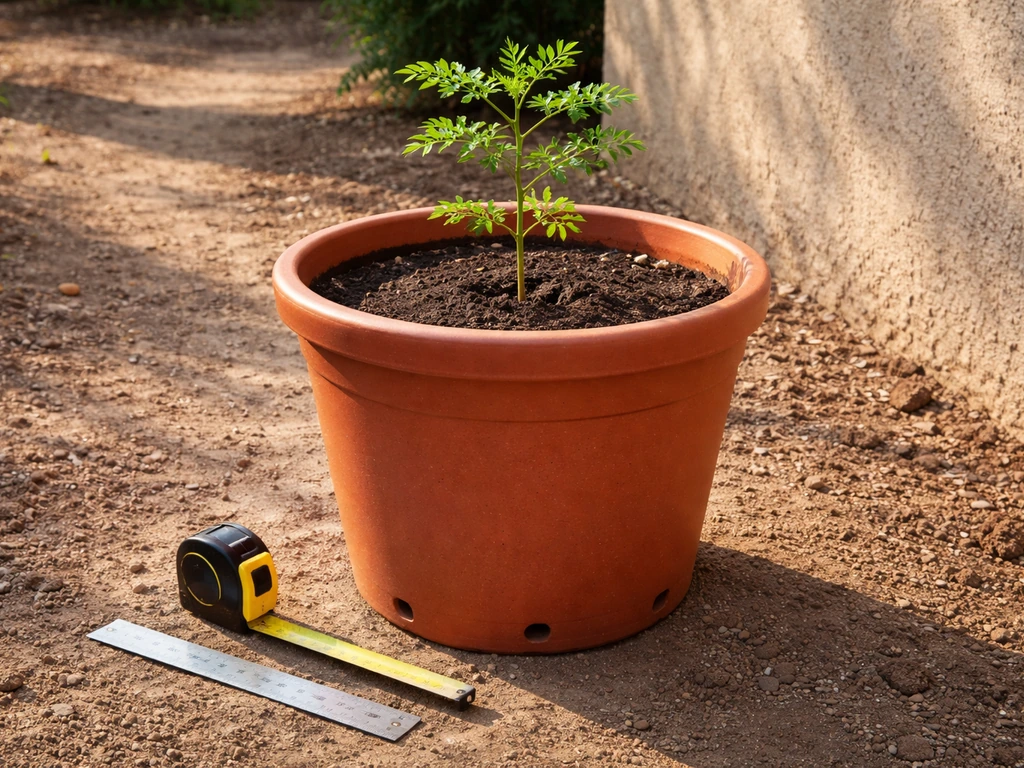
The minimum pot size I recommend starting with is 45 to 60 cm (18 to 24 inches) deep and at least 30 to 45 cm (12 to 18 inches) in diameter. Moringa has a taproot that wants to go down, so depth matters more than width at first. The pot must have multiple drainage holes at the bottom. A single small hole is not enough. If you are repurposing an old container, drill extra holes before you plant anything.
For material, terracotta breathes well and helps prevent overwatering, which is the number one killer of potted moringa. Plastic pots work too but you need to be more careful about watering frequency. Fabric grow bags are an excellent option if you are on a budget or limited on space since they air-prune the roots naturally and drain well.
Location is non-negotiable: moringa needs full sun, meaning at least 6 to 8 hours of direct sunlight per day. A south-facing or west-facing spot is ideal. If you only have partial shade, the plant will grow leggy, weak, and unproductive. This is not a plant you can tuck into a dim corner and expect results from.
As for starting with seeds versus a seedling, both work. Seeds are cheaper and give you full control, but seedlings from a nursery give you a head start of several weeks. If you are buying a seedling, choose one that is under 60 cm tall so it transitions easily to container life. Larger, more established trees can be potted too, but root disturbance is stressful for them and recovery takes longer.
Getting the soil mix and drainage right
Moringa hates sitting in wet soil. In the ground it tolerates poor sandy soil precisely because it drains fast. In a container, you need to recreate that drainage artificially. A good mix is roughly 60% quality potting compost, 30% perlite or coarse sand, and 10% fine grit or small stones. This keeps the mix loose, airy, and fast-draining while still holding enough nutrients for the plant to feed on.
Do not use regular garden soil in a pot. It compacts badly in containers, drains poorly, and will cause the root rot that leads to yellowing leaves. If you can only get one material beyond basic potting mix, make it perlite. Even mixing one part perlite into two parts store-bought potting compost makes a significant difference compared to compost alone.
Before you fill your pot, place a layer of small stones or broken crockery over the drainage holes at the bottom. This stops soil from washing through the holes while still letting water escape freely. Then fill to about 5 cm below the rim to leave room for watering without overflow.
Starting moringa in a pot: seeds or seedlings
Growing from seed
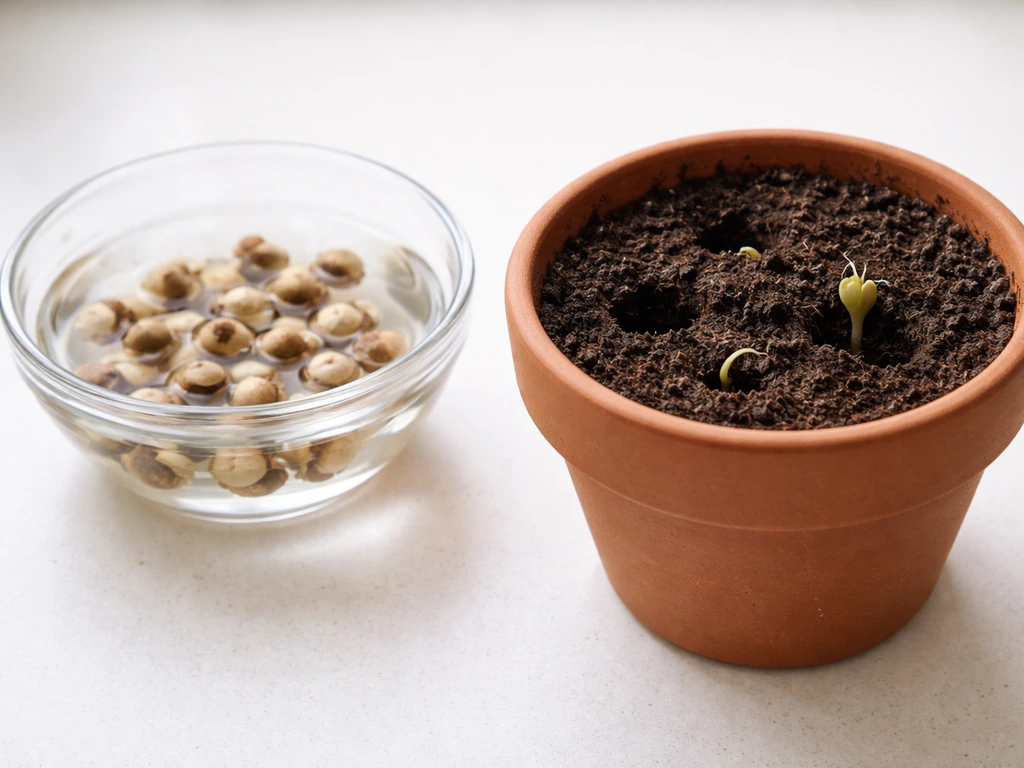
Moringa seeds germinate in as little as 3 to 7 days under warm conditions, though the full window is up to 14 to 21 days if temperatures are cooler. The ideal soil temperature is around 21 to 32°C. Before sowing, there is a bit of debate about soaking. A 24-hour soak in clean room-temperature water is commonly recommended and does work, but research comparing seed treatments found that alternate wetting and drying (moistening the seeds for periods and letting them dry slightly between) actually achieved the highest germination rate at around 89% and faster sprouting at a mean of about 8.4 days, compared to roughly 74% germination with prolonged soaking. My practical take: soak the seeds for 12 to 18 hours rather than a full 24, then sow them and keep the mix consistently moist but not saturated. You will get reliable results.
- Soak seeds in clean room-temperature water for 12 to 18 hours.
- Fill your prepared container (or a smaller starting pot) with your free-draining soil mix.
- Push each seed about 1.5 cm deep and cover lightly.
- Water gently so the topsoil is moist but not waterlogged.
- Place the pot in a warm, sunny spot or cover loosely with clear plastic to retain warmth and moisture.
- Check daily and keep the topsoil just barely moist until the seedling emerges.
- Once the seedling appears (usually within a week to two weeks), remove any cover and ensure it gets full sun immediately.
If you are starting seeds indoors in a smaller pot, you can try what some growers call the bottle method: use a sealed warm container at about 21 to 32°C with damp material around the seeds until the root tip (the radicle) just appears, then transfer to your main pot immediately. This speeds things up in cooler environments.
Planting a seedling or young tree
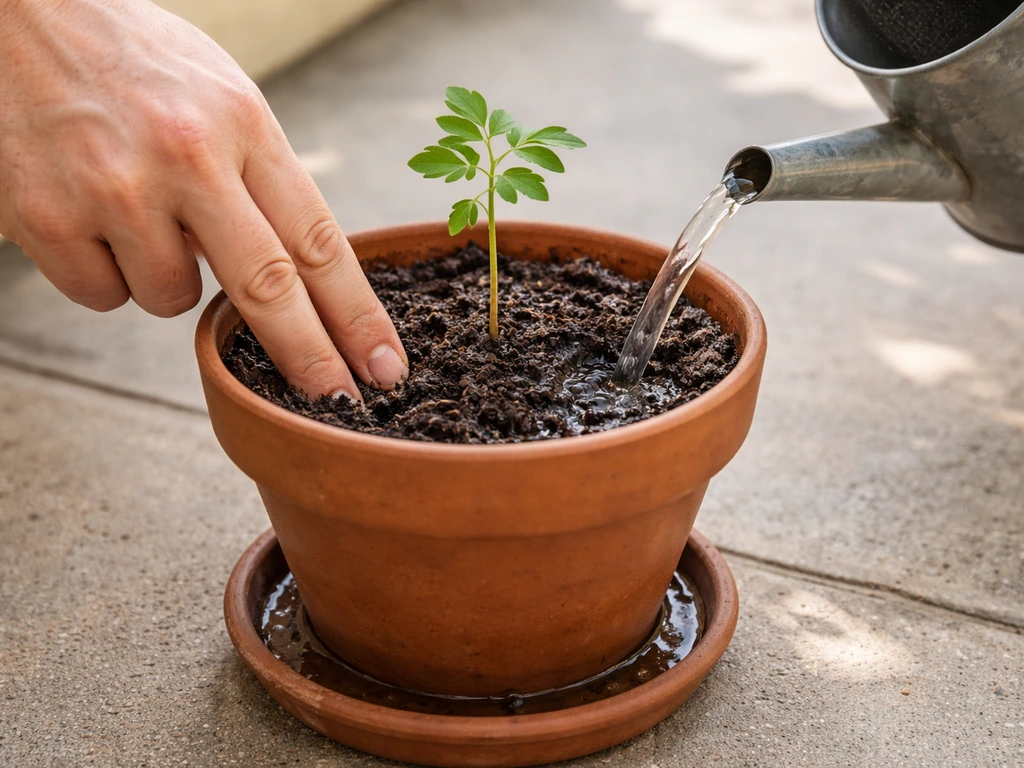
If you are starting with a nursery seedling, water it well an hour before transplanting. Ease it out of its nursery container carefully, disturbing the root ball as little as possible. Place it in your prepared pot so the top of the root ball sits about 3 to 4 cm below the rim, backfill with your soil mix, firm it gently, and water in thoroughly. Do not fertilize for the first two to three weeks while the roots settle. Keep the pot in full sun from day one.
Watering, feeding, and light for container moringa
Watering
The rule is simple: check the top 3 to 5 cm of soil. If it is still damp, do not water. If it is dry, water thoroughly until it drains from the bottom. In hot summer weather that might mean watering every two to three days. In cooler or wetter periods, it could be once a week or less. Never water on a fixed schedule without checking the soil first. Overwatering is the single most common cause of potted moringa failure, and it shows up as yellowing leaves that people often misread as a nutrient problem.
Feeding
Moringa is a moderately hungry plant in a container because it cannot send roots out to forage. A balanced NPK fertilizer works well, with nitrogen being the most important element since you are growing mainly for leaves. One practical approach based on research guidance is to apply a balanced fertilizer at the time of planting or early establishment, then supplement with a nitrogen-rich feed every four to six weeks through the growing season. A rough per-plant guide from cultivation research suggests something in the range of 44 g nitrogen, 16 g phosphorus, and 30 g potassium per tree per season, timed around the plant's active growth phases. In container terms, a slow-release granular fertilizer applied every two to three months combined with a diluted liquid feed every few weeks during peak growing season covers this well. Always water before fertilizing to avoid burning roots.
Light
There is no workaround here. Moringa needs full, direct sun for the majority of the day. Six hours is the absolute minimum; eight or more is better. If you are growing indoors, place the pot directly in front of your sunniest window and consider a grow light to supplement in winter months. A moringa getting insufficient light will stretch toward whatever light source it can find, producing long weak stems with sparse leaves, which brings us to the next section.
Pruning, root management, and keeping it a manageable size
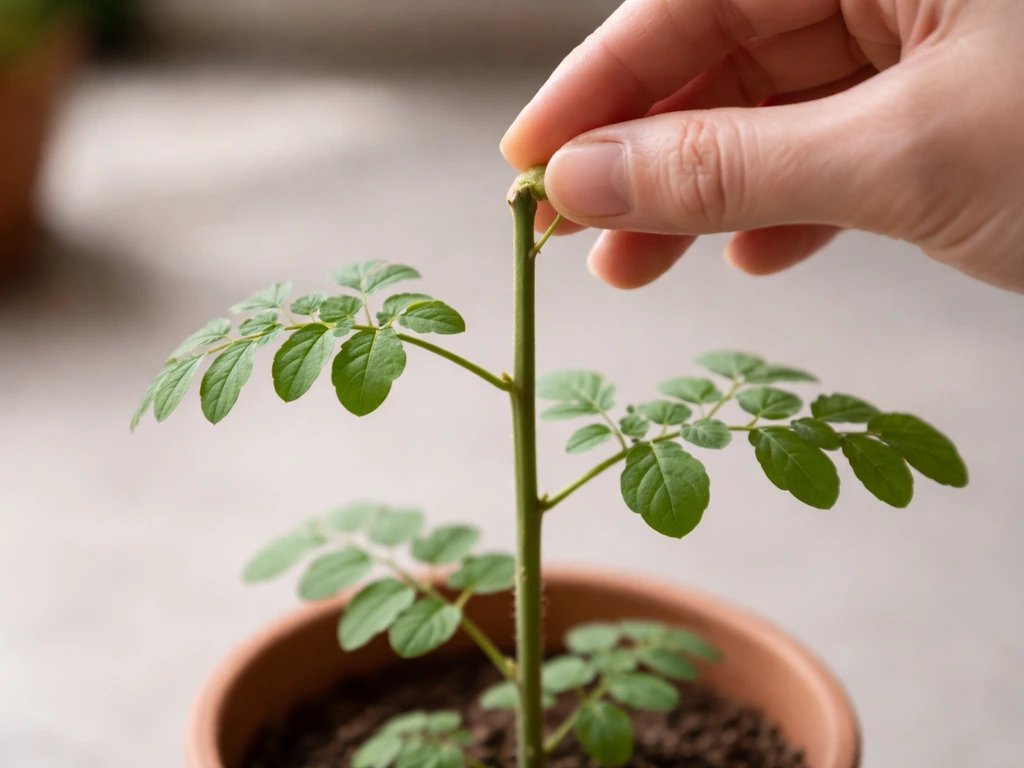
This is the part most beginners skip and then regret. Pruning a potted moringa is not optional, it is what keeps the whole system working. Without it, the tree puts all its energy into height, becomes unstable in its container, and stops producing the bushy leafy growth you actually want.
The first prune happens early. When your moringa reaches about 60 cm tall, pinch or snip the terminal growing tip (the topmost shoot) about 10 cm from the top. This is called pinching, and it redirects the plant's energy into side branches rather than upward growth. You will see two to four new lateral shoots emerge within a week or two. This is exactly what you want: a compact, multi-branched plant rather than a single tall stem.
After that first pinch, continue harvesting leaves and tips regularly. Every time you harvest from a branch tip, you are effectively pruning it and encouraging bushier growth. For established container moringa, an annual hard prune back to around 1 meter in height keeps the plant productive and the root system from overwhelming the pot. Do this at the start of the growing season or just before you expect the most active growth.
On root management: moringa roots grow fast and will eventually fill a container. When you see roots emerging from drainage holes or the plant showing signs of stress despite good care (slowing growth, leaves dropping quickly, soil drying out within hours of watering), it is time to act. Cornell Cooperative Extension also links insufficient container drainage and excess-water conditions to root rot, and recommends removing the plant from its container to blank" rel="noopener noreferrer">inspect the roots if you suspect it. You have two options: move up to a larger pot (go up one size, not two, or the excess soil holds too much moisture), or root prune. Root pruning means gently removing the plant from its pot, trimming back about a quarter of the root ball with clean scissors, and repotting into fresh mix in the same container. Do this in spring and the plant will bounce back quickly.
Common problems and how to fix them
| Problem | Likely Cause | What to Do |
|---|---|---|
| Leggy, stretched stems with few leaves | Not enough direct sunlight | Move pot to a sunnier spot immediately; pinch the tips to encourage branching; add a grow light if indoors |
| Yellow leaves (especially lower ones) | Overwatering or poor drainage | Let the soil dry out fully before next watering; if drainage holes are blocked, clear them; if compaction is the issue, repot with more perlite |
| Seeds not germinating after 3 weeks | Too cold, too wet, or old seed | Check temperature is above 21°C; make sure soil is moist not soggy; try fresh seeds with a shorter soak (12 hours) |
| Wilting despite moist soil | Root rot from waterlogging | Remove plant, inspect roots, cut off any black or mushy sections, repot in fresh free-draining mix, reduce watering |
| Tiny insects on leaves or webbing underneath | Spider mites, aphids, or thrips | Spray both sides of leaves thoroughly with water; increase humidity around the plant; use neem oil solution if infestation persists |
| Stunted growth in active season | Nutrient deficiency in container | Apply a balanced liquid fertilizer; ensure pot is large enough; check roots are not pot-bound |
Spider mites are the most common pest issue I see with container moringa, especially in warm dry indoor environments. They set up on the undersides of leaves and cause a dusty, speckled appearance. A strong rinse of both leaf surfaces and increasing the humidity around the pot deals with most mild infestations. Spray thoroughly, hit both sides of every leaf, and repeat every few days for two weeks. Neem oil diluted in water is a reliable step up if plain water is not enough.
Germination failure usually comes down to one of three things: temperature too low, soil too wet, or seeds that are too old. Moringa seeds lose viability quickly, especially if stored in humid conditions. Fresh seeds from a reliable source and a warm spot (above 21°C) solve most germination problems before they start.
Your next steps starting today
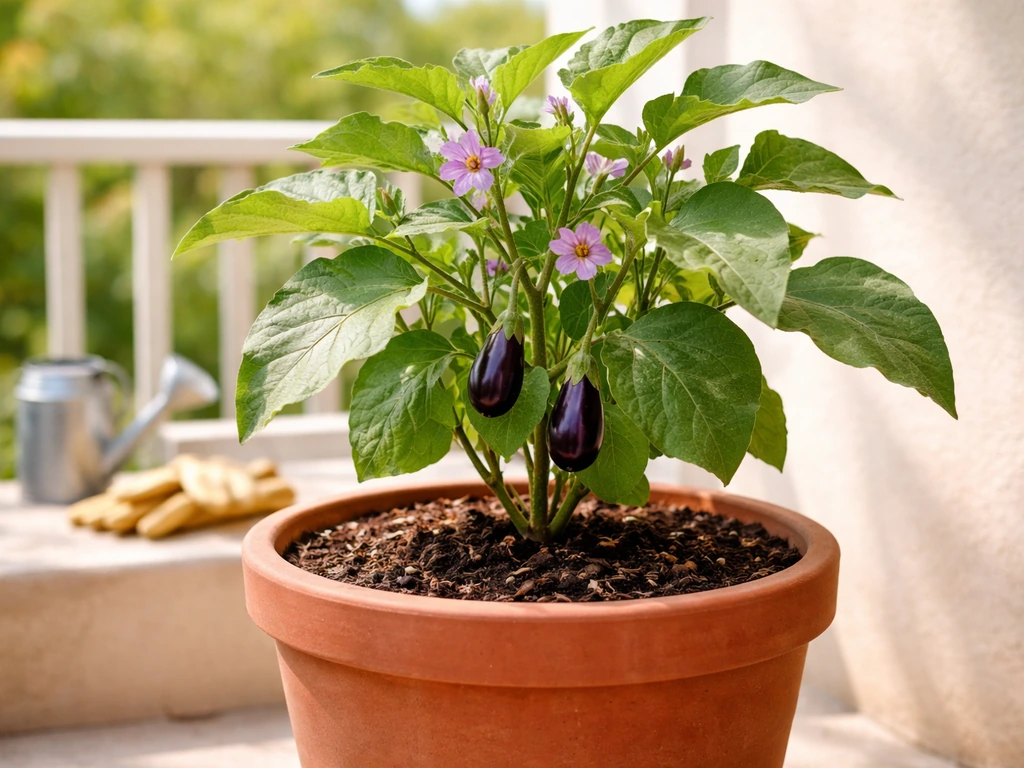
If you want to get started today, here is exactly what to do. Source fresh moringa seeds or a small seedling from a nursery. If you are specifically trying to figure out how to grow brinjal in pot, you can adapt your container setup and watering habits for a different kind of nightshade crop moringa seeds. Get a deep pot, at least 45 cm deep, with multiple drainage holes. Mix your potting compost with perlite at roughly a 2:1 ratio. Soak your seeds for 12 to 18 hours, then sow them 1.5 cm deep in your prepared pot and set it somewhere that gets direct sun all day. Keep the soil just moist while waiting for germination, which should happen within one to two weeks in warm conditions. Once your seedling hits 60 cm, do your first pinch. Water only when the top few centimetres of soil are dry, feed with a balanced fertilizer every few weeks through the growing season, and harvest leaves regularly to keep the plant bushy. That is genuinely the whole system. If you are also wondering about growing mogra in a container, the same focus on sunlight and drainage will help you start the right way how to grow mogra plant in pot. Once established, follow a simple brahmi care routine for potted plants so you can keep it healthy and productive brahmi plant in pot. The plants that fail are almost always overwatered in poor-draining soil in too little sun, so if you get those three things right, you are most of the way there. If you want a full walkthrough, read this guide on how to grow brinjal in pot, including what size container to use and how to manage watering. If you want a full walkthrough, read this guide on how to grow brinjal in pot, including what size container to use and how to manage watering how to grow aubergines in pots.
FAQ
Can I keep a potted moringa outdoors year-round?
Yes, but you need to treat it like a frost-sensitive patio plant. Move the pot indoors before temperatures drop into the mid or low 10°C range, keep it as bright as possible (a sunny window or grow light), and water only when the top few centimeters dry out. Avoid cold, dark corners because the combination slows growth and increases the risk of overwatering.
When should I prune or pinch moringa that I’m growing in a pot?
Start pruning as soon as the plant is about 60 cm tall, pinch the top about 10 cm, then harvest regularly to encourage branching. If you wait too long, the plant becomes tall and leggy, and you will spend more time correcting structure later. For containers, this early pinching is the difference between a productive shrub and a single-stem plant.
My moringa leaves are yellow. How do I know if it’s overwatering or a nutrient problem?
If leaves turn yellow but the soil stays wet or never dries, the usual cause is waterlogged roots, not lack of fertilizer. The fix is to check drainage first, then water only after the top 3 to 5 cm dries. If you see persistent yellowing despite correct watering, do a quick root check, because root rot can start before the plant looks “collapsed.”
What pot size is actually necessary for moringa in a container?
Many people underestimate pot depth. A container that is shallow may not support the taproot, and the plant can struggle even if the mix is correct. Use at least 45 to 60 cm deep and make sure the pot has multiple drainage holes, then confirm water drains quickly by running water through the mix before planting.
Should I fertilize potted moringa on a strict schedule?
Don’t apply fertilizer on a fixed calendar if the plant is not actively growing, especially in winter or indoors with limited light. When growth slows, reduce feeding frequency or stop temporarily, because nutrients build up in a closed pot. A practical rule is to feed mainly during bright, warm periods, and always water first to reduce the chance of root burn.
My moringa is dropping leaves. How can I diagnose what’s wrong?
Most of the time, the best response is not to “water more.” Instead, confirm airflow and drainage, then adjust watering to your soil drying rate. If soil dries in hours after watering, you likely have an overly fast-drying mix or a pot that’s too small, and you may need to move up one pot size. If soil stays wet for days, you need more perlite/coarse material and better drainage.
When is the best time to root prune a moringa growing in a pot?
For potted moringa, root pruning is usually done in spring, when the plant is ready to regrow. Trim about a quarter of the root ball with clean scissors, repot into fresh fast-draining mix, then keep it in full sun and water normally for the next few weeks. Avoid doing it during cold, low-light periods because recovery is slower.
Can I move my moringa from a nursery pot into a bigger pot later?
Yes, but only after the plant is established enough to handle a transplant shock. Use the container mix and full sun conditions immediately after moving, and keep the root ball intact as much as possible. If you transplant a nursery seedling to a much larger pot at once, the extra soil can stay wet too long, which increases root-rot risk.
What are the most common reasons moringa seeds won’t sprout in pots?
If germination fails, check seed freshness first, then temperature, then moisture level. Old seeds often do not respond even if you soak them, and low temperatures slow or stop sprouting. Overwet conditions can also reduce germination, so keep the mix consistently moist, not saturated, during the waiting period.
Is a fabric grow bag a good option for growing moringa in a pot?
A grow bag can be easier than a rigid plastic pot because it drains well and air-prunes roots, but it dries out faster. In hot weather you may need to check the pot daily, because waiting until the soil is fully bone-dry can stress the plant. If you choose a fabric bag, you must be extra consistent with checking the top layer before watering.