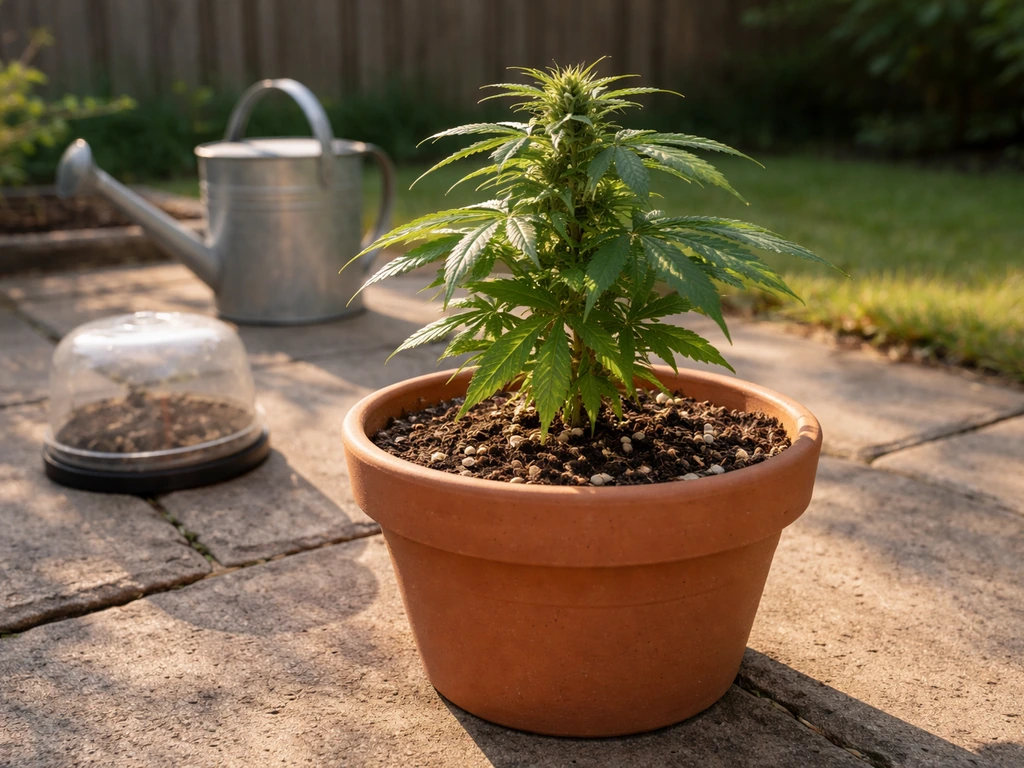
You can absolutely grow autoflower seeds in pots outside, and honestly, it's one of the most beginner-friendly ways to get started. Pick a fabric pot in the 3–5 gallon range (or up to 7 gallons if you have the space), fill it with a light, airy potting mix, pop your seed about half an inch deep, set the pot in the sunniest spot you can find, and water carefully.
How to Grow Autoflower Seeds Outside in Pots

Marcus Whitley
11 Jun 2026
Most autoflowers will go from seed to harvest in 10–12 weeks without you needing to worry about light schedules, seasonal timing, or complicated training. This guide walks you through every step, including what to do if you're growing indoors in pots instead. If you want the general basics of how to grow a flower in a pot alongside these autoflower steps, use this pot setup as your starting point.
If you're looking for ideas beyond autoflowers, you can also explore the best flowers to grow from seed in pots for reliable container blooms. If you want a full, start-to-finish plan, see our guide on how to grow potted flowers growing indoors in pots.
Choosing autoflower seeds and setting yourself up for success in pots
The biggest advantage autoflowers have over regular or photoperiod plants is that they flower based on age, not the number of hours of light they get each day. That means you can grow them outdoors in pots without stressing about the season flipping or shading them at night. They stay compact, they move fast, and most varieties are genuinely forgiving for first-time growers.
For containers specifically, you want a variety that stays manageable in size. Something like Auto Night Queen (indica-dominant, typically 50–70 cm tall, ready in around 10 weeks) is a great choice if you're working with a balcony, patio, or small outdoor space. Mango Runtz from Mephisto Genetics is another strong pick, finishing in about 74–77 days from sprout and described by the breeders themselves as doing well in a simple soil mix with minimal training. If you have more room and want bigger yields, Ultimate Auto can hit 1–1.5 meters and is noted to yield generously even when grown outdoors in a pot, though it needs strong light and about 12 weeks.
A quick note before you buy: autoflowers are sold as feminized seeds in most cases, meaning you'll almost certainly get a flowering plant and not a male. Buy from a reputable seed bank, store unused seeds in a cool, dark, dry place (a sealed container in the fridge works perfectly), and check the expected height and harvest time on the packet before committing to a variety.
Pot size, soil, and containers: what to use and why
Container choice matters more for autoflowers than almost any other plant. Because autoflowers have a fixed lifespan and hate being stressed, you want to start them in their final pot and leave them there. If you're also trying to solve container limits for other plants, see more on how to get a large pot to grow fluxweed as a related option. No repotting. Every time you transplant an autoflower, you risk stunting it during a growth window it can never recover from.
What size pot should you use?
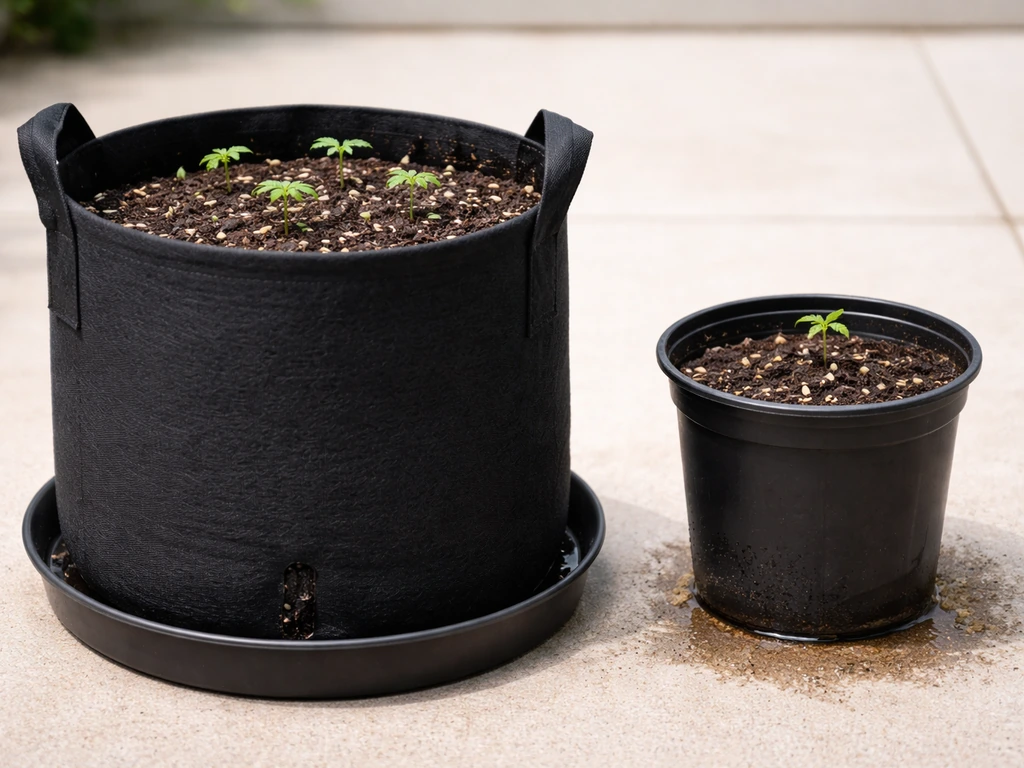
For outdoor growing, a 5–7 gallon (roughly 20–25 liters) pot is the sweet spot for a single autoflower plant. Indoors, you can get away with a 3–5 gallon pot, and going much bigger indoors can actually slow early growth without improving your final yield. The most common pot sizes you'll see recommended are 7, 9, and 11 liters for compact varieties, scaling up to 15–20 liters for taller, longer-flowering strains outdoors.
Fabric pots vs plastic pots
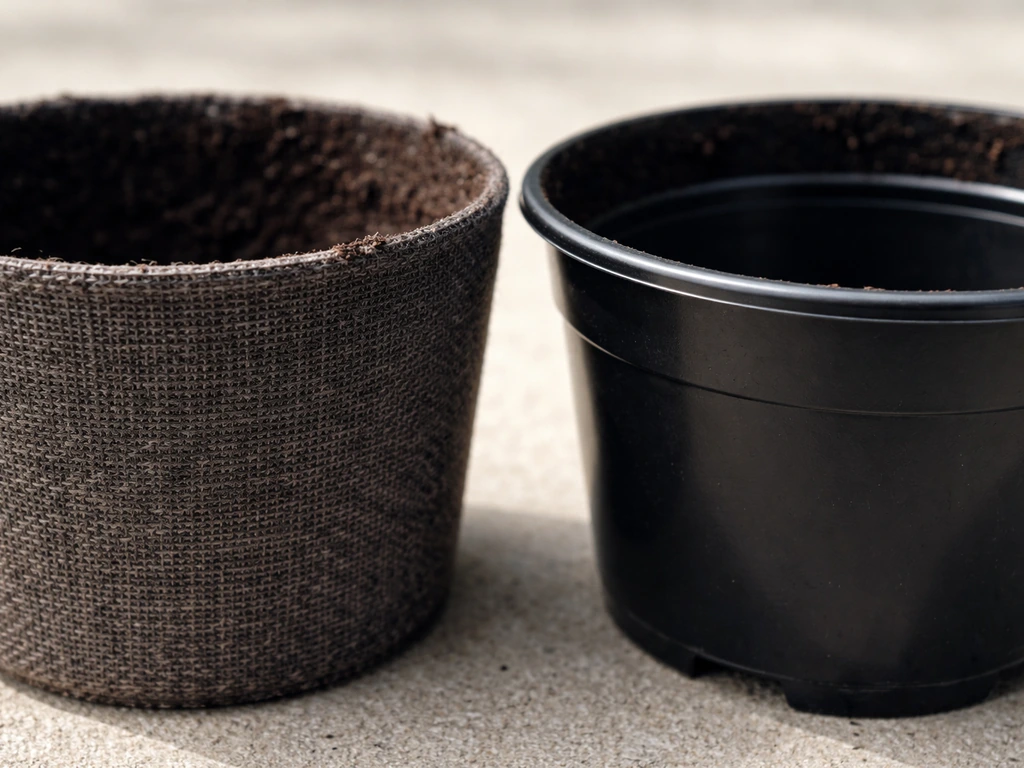
Fabric pots are genuinely worth the small extra cost. They allow air to reach the roots, which naturally stops roots from circling the pot (a process called air pruning). Solid plastic containers are more likely to cause root-bound conditions, especially over a 10–12 week grow. Fabric pots also dry out faster, which helps you avoid overwatering, and they're easy to move around. The only downside is they need watering slightly more often in hot weather.
What soil should you use?
Use a light, well-draining potting mix. If you are specifically wondering how to grow carnations in a pot, the same basics of choosing the right container size and using well-draining soil will help you succeed. A basic peat or coco-based potting mix with added perlite (about 20–30% perlite by volume) works really well. Avoid anything labeled as heavy garden soil or topsoil.
Those compact in containers and waterlog easily. Coco coir is a popular alternative to soil and gives you a wider margin for error with watering, but unlike soil it contains no nutrients of its own, so you'll need to follow a feeding schedule from the very first week. For beginners, a quality potting mix with some slow-release nutrients already in it is the easier starting point.
| Medium | Drainage | Nutrients included | Watering frequency | Best for |
|---|---|---|---|---|
| Potting mix with perlite | Good | Yes (light) | Every 1–3 days | Beginners, low-maintenance grows |
| Coco coir | Excellent | No | Daily | Experienced growers, precise feeding |
| Heavy garden soil | Poor | Variable | Varies | Not recommended for containers |
Germination and planting steps (indoor and outdoor)

There are two reliable methods for germinating autoflower seeds: the paper towel method and direct sowing. If you want the best results, focus on the best flowers to grow from seed in pots that match your sunlight and space. Both work well. The paper towel method gives you more visibility into what's happening, which is reassuring if you're new to this.
Paper towel method (recommended for beginners)
- Place your seed in a glass of plain water (room temperature) for 12–24 hours. You'll often see the seed crack slightly and a small white tail start to emerge.
- Transfer the seed to a damp paper towel, fold it over, and place it between two plates or in a sealed plastic bag to hold moisture.
- Keep it somewhere warm, around 20–25°C (68–77°F), and check every 12 hours.
- Once the taproot (the white root) is about 0.5–1 cm long, it's ready to plant.
- Make a small hole about 0.5–1.5 cm (roughly half an inch) deep in your pre-moistened potting mix.
- Place the seed taproot-down in the hole and lightly cover it. Do not pack the soil down hard.
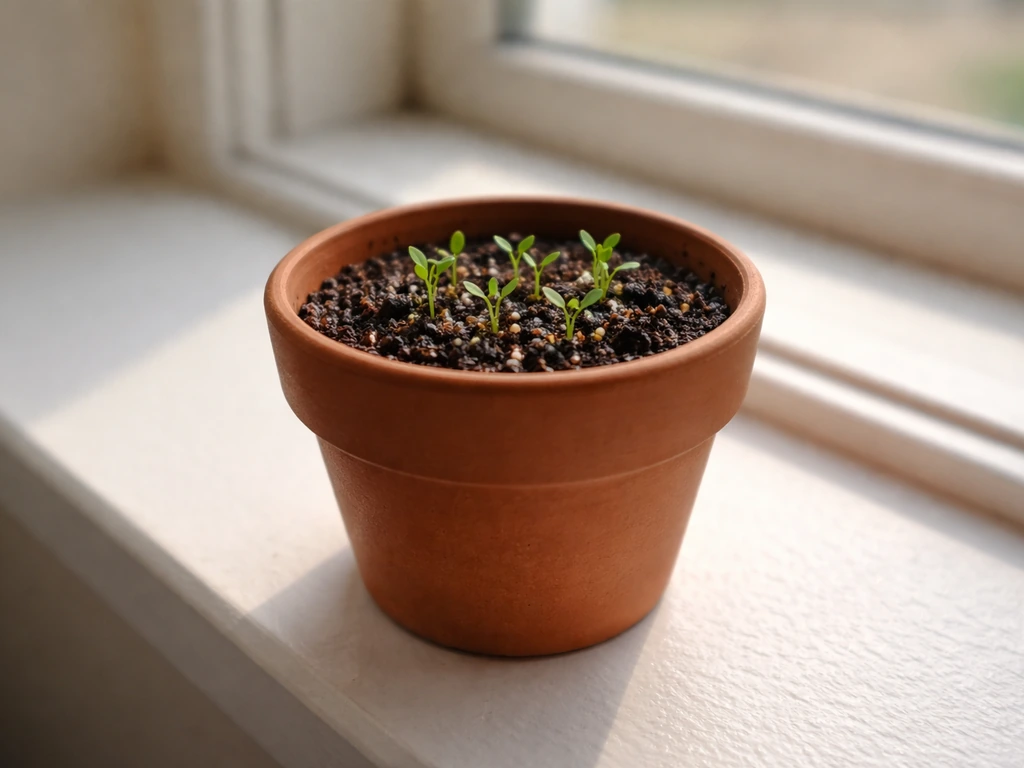
- Mist the surface gently and keep the pot somewhere warm. Your seedling should emerge within 1–3 days.
Direct sow method
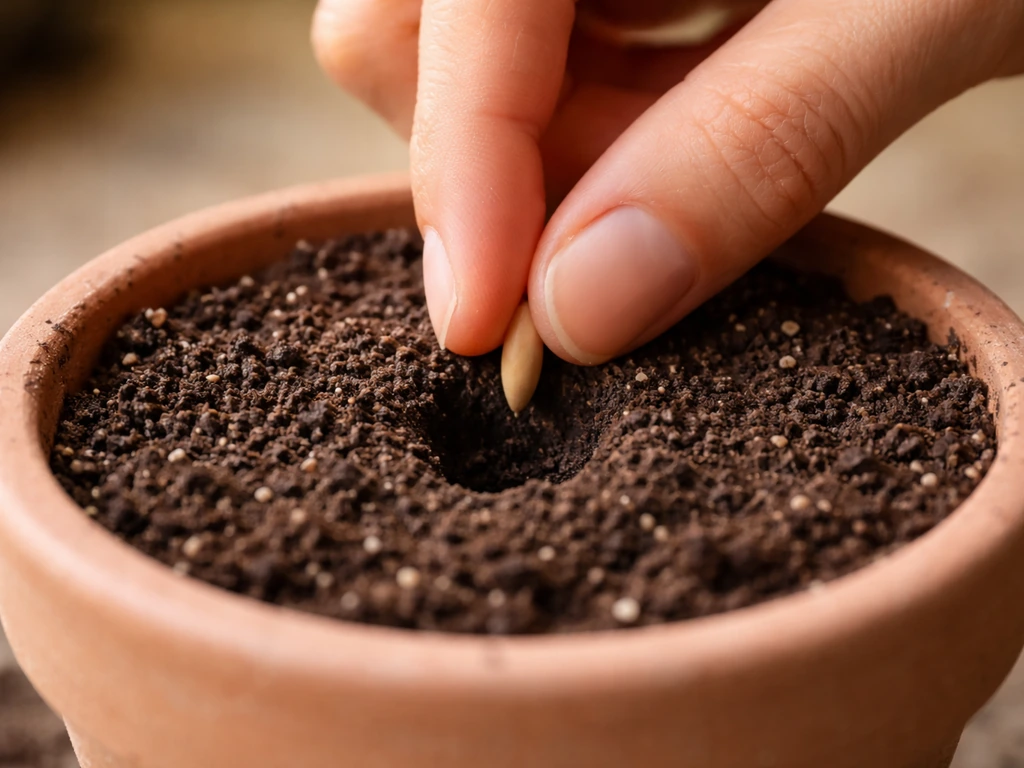
If you prefer to skip the paper towel step, you can sow directly into your final pot. Moisten the soil first, poke a hole about half an inch deep, drop the seed in pointed end down, and cover lightly. When you plant germinated seeds, point the white root downward into the growing medium so the seedling does not have to reorient itself. Keep the top layer of soil consistently moist (not soggy) until the seedling breaks the surface. This method is simple and works fine, though you're flying blind until the sprout appears.
A note on timing for outdoor growing: autoflowers don't care about day length, so you can start them almost any time the temperatures are reliably above 15°C (59°F). In the northern hemisphere, late April through August works well for outdoor pot grows. In June right now, you're in a great window to get started immediately.
Light and placement: maximizing sun outside vs grow-light indoors
Outdoors: find the sunniest spot you can
Autoflowers are sun-hungry. The more direct sunlight they get, the better they do. Ideally you want 6–8 hours of direct sun per day as a minimum, and 10–12+ hours is even better. One of the biggest advantages of growing in pots outdoors is that you can move them. Start your day by checking where the sun hits first, and rotate your pots every day or two so all sides of the plant get equal light exposure. This simple habit makes a noticeable difference in even, bushy growth.
For Auto Night Queen specifically, the breeders recommend placing it in a very sunny spot with as little shade as possible. South-facing walls, open patios, and rooftop spaces are all ideal. Avoid placing pots in corners where buildings or fences block morning or afternoon sun.
Indoors: grow lights and light schedules
If you're growing autoflowers indoors in pots, you'll need a grow light. The most popular choice right now is an LED grow light, which runs cooler and uses less electricity than older HPS (high-pressure sodium) bulbs. A single quality LED in the 200–400 watt range is enough for one to four plants in a small tent or room.
Because autoflowers flower regardless of light schedule, you have flexibility here. Most indoor growers run an 18-hour light, 6-hour dark schedule from seed to harvest, which gives plants plenty of energy without running your electricity bill through the roof. Some growers use 20/4 or even 24 hours of light, but 18/6 is the practical sweet spot for beginners. Keep the light at the manufacturer's recommended height above the canopy to avoid light burn, and make sure air can circulate around the plants.
Watering and feeding autoflowers in containers (from sprout to late flower)

How to water without overwatering
Overwatering is the number one mistake beginners make with autoflowers in pots, and it shows up as yellowing leaves and slow growth that looks like a nutrient problem but is actually a root problem. The fix is simple: always let the pot dry out between waterings. A practical trick is to lift the pot when it's fully watered and again a day or two later. When it feels noticeably lighter, roughly half the weight of a fully saturated pot, it's time to water again. In soil, this usually means watering every 1–3 days during the middle of the grow. In coco, you'll water daily.
When you do water, water thoroughly until you see runoff come out of the drainage holes at the bottom. This flushes any salt buildup and ensures the entire root zone is getting moisture. If water isn't running out the bottom, either your pot has no drainage holes (fix this immediately) or your soil is hydrophobic (let it soak for a few minutes before watering again). Fabric pots naturally encourage good drainage and make this process easier.
pH: the thing most beginners skip
This is worth understanding before you feed anything. Cannabis roots can only absorb nutrients within certain pH ranges. If your water or nutrient solution is outside that range, nutrients get locked out no matter how much you feed. In soil, aim for pH 6.2–6.8. In coco coir, aim for 5.8–6.2. A cheap pH test kit or a digital pH meter (around $15–20) is one of the most useful tools you can buy. Check and adjust the pH of your water every time you feed.
Feeding schedule: week by week
Autoflowers are lighter feeders than photoperiod plants. If you're using a quality potting mix with nutrients in it, you may not need to add anything for the first 3–4 weeks. After that, a simple 3-part nutrient kit (grow, bloom, micro, or similar) works well. Start at about half the manufacturer's recommended dose and watch how your plant responds before increasing.
| Growth Stage | Weeks (approx.) | What to feed | Target EC (PPM) |
|---|---|---|---|
| Seedling | Weeks 1–2 | Plain pH-adjusted water only | < 0.4 EC |
| Vegetative | Weeks 3–5 | Light nitrogen-forward feed | 0.8–1.2 EC |
| Early flower | Weeks 5–8 | Balanced or bloom-forward feed | 1.2–1.6 EC |
| Late flower / ripening | Weeks 8–10+ | Bloom feed, reducing nitrogen | 1.0–1.4 EC (500–700 PPM) |
| Flush (2 weeks pre-harvest) | Final 1–2 weeks | Plain pH-adjusted water only | < 0.4 EC |
About two to three weeks before harvest, most growers flush their plants by watering heavily with plain pH-adjusted water until it runs out the bottom, then letting the pot dry before repeating. This leaches accumulated salts from the soil and is said to improve the final taste and smoothness of the harvest. Keep flushing regularly for that final stretch and then harvest when the plant tells you it's ready.
Outdoor-specific vs indoor-specific care: temperature, weather, and airflow
Outdoor pots: managing weather
One of the best parts of growing autoflowers in pots outdoors is that you can move them. This is a genuine advantage over growing in the ground. If a storm is rolling in, bring them under cover. If there's a cold snap below 10°C (50°F), move them inside for the night. Autoflowers prefer temperatures between 18–28°C (65–82°F) during the day. They'll survive slightly outside that range but growth slows below 15°C and heat stress sets in above 30°C.
Heavy rain is one of the bigger outdoor risks, particularly once the plant starts flowering. Wet, dense buds sitting in cool humid air are a recipe for bud rot (botrytis), especially on compact indica-dominant varieties like Auto Night Queen. Move pots under a porch or roof overhang during prolonged rain, and try to keep humidity around the flowering canopy below 50% where possible. If you're in a naturally humid climate, choosing a more open, sativa-leaning autoflower variety with airier buds can reduce your rot risk.
Indoor pots: temperature, humidity, and airflow
Indoors, you have more control but also more responsibility. Aim for 40–50% relative humidity during flowering to discourage botrytis and spider mites. A small oscillating fan blowing gently across (not directly into) the canopy improves airflow, strengthens stems, and keeps humidity from settling around the buds. During the vegetative stage, slightly higher humidity (50–60%) is fine and actually encourages healthy growth. Temperature targets are the same as outdoors: 18–28°C during the light period, with a small drop at night.
Training autoflowers: keep it simple
Here's honest advice: don't top or fim (techniques that involve cutting the main growing tip) autoflowers unless you really know what you're doing. Because autoflowers grow on a fixed timer, any stress you cause eats into their limited growth window. Breeders like North Atlantic Seed Co. explicitly advise against topping Auto Night Queen, and note that if any leaf removal is done, it should be minimal and only after the stretching phase is over.
Low-stress training (LST), which involves gently bending and tying stems rather than cutting them, is a much safer option that can improve light penetration without stressing the plant. If you're a beginner, though, just let it grow naturally and focus on getting the basics right. A happy, untrained autoflower will usually outperform a stressed, over-trained one.
Troubleshooting plus harvesting timeline and next steps
Common problems and fixes
| Problem | Likely cause | What to do |
|---|---|---|
| Yellowing leaves (early) | Overwatering or nutrient lockout from wrong pH | Check pH, let pot dry out, reduce watering frequency |
| Slow or stunted growth | Root stress, cold temps, or too little light | Move pot to warmer/sunnier spot, check for root-bound conditions |
| White powdery coating on leaves | Powdery mildew (fungus) | Improve airflow, reduce humidity, remove affected leaves |
| Grey fuzzy patches on buds | Botrytis (bud rot) | Remove affected material immediately, lower humidity below 50%, improve airflow |
| Tiny webs on underside of leaves | Spider mites | Treat with neem oil spray (vegetative stage only, never on flowers), improve airflow |
| Small flies around soil, slow droopy growth | Fungus gnats (larvae in soil) | Let soil dry more between waterings, use sticky yellow traps |
| Nutrient burn (brown leaf tips) | Overfeeding | Flush with plain water, reduce feed to half dose |
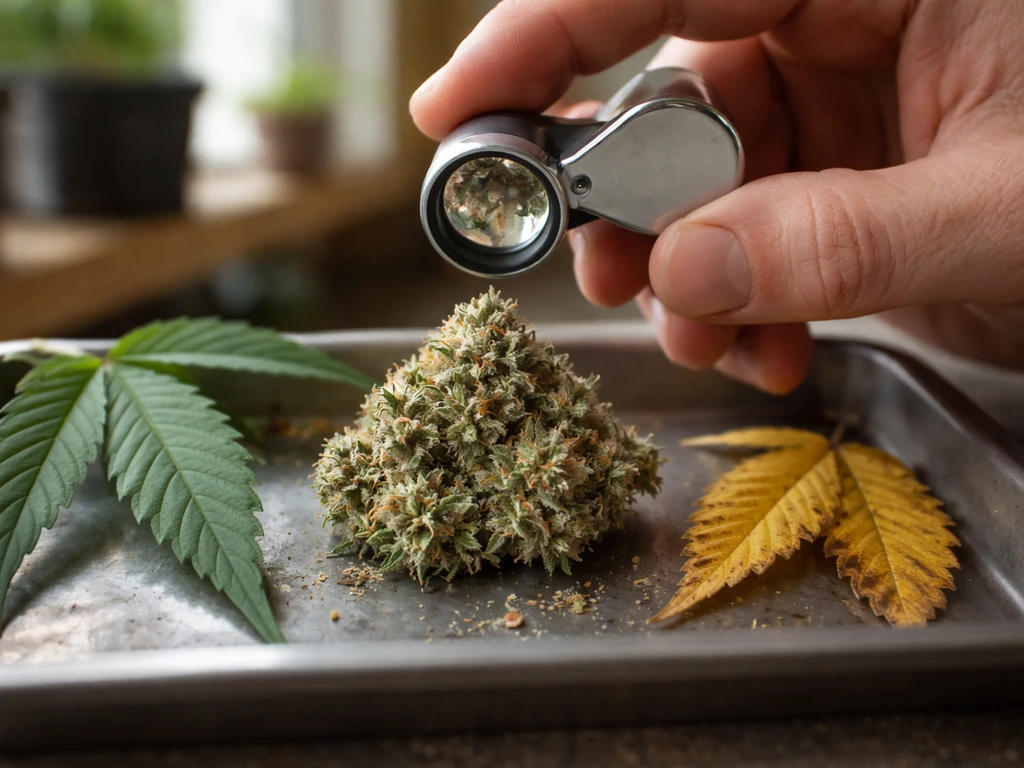
When to harvest
Most autoflowers are ready in 10–12 weeks from seed. The best way to check is by looking at the trichomes (the tiny resin glands on the buds) under a jeweler's loupe or a cheap digital microscope. Clear trichomes mean too early. Milky/cloudy trichomes mean peak THC. Amber trichomes mean the effect is shifting toward more relaxing. Most growers harvest when there's a mix of mostly cloudy with about 20–30% amber. If you don't have a loupe, watch the pistils (the white hairs) on the buds: when 70–90% have turned orange or red and the buds have stopped growing and are swelling up, you're getting close.
Your getting-started checklist
- Choose a compact autoflower strain suited to containers (Auto Night Queen, Mango Runtz, or similar)
- Buy a 5–7 gallon fabric pot for outdoor grows, or a 3–5 gallon fabric pot for indoors
- Mix a quality potting mix with 20–30% perlite added
- Have a pH meter or pH test kit on hand before you start feeding
- Germinate using the paper towel method, then plant taproot-down at 0.5–1 cm depth
- Place outdoors in the sunniest available spot, or set up an 18/6 light schedule indoors
- Water only when the pot feels noticeably lighter, always watering until runoff appears
- Start feeding at half-dose around week 3–4, scaling up through flower
- Begin flushing with plain water 2 weeks before expected harvest
- Monitor for pests, mold, and bud rot weekly, especially once flowering starts
- Harvest when trichomes are mostly cloudy with some amber, roughly 10–12 weeks from seed
Growing autoflowers in pots is one of the most satisfying and manageable projects in container gardening. The fixed timeline takes the guesswork out of planning, the compact size suits patios and balconies perfectly, and each grow teaches you something new. If your first one doesn't go perfectly, that's completely normal. Most of the common issues (overwatering, wrong pH, not enough light) are easy to correct once you've seen them once. Get started today, keep notes on what you do and when, and you'll be harvesting in about 10–12 weeks.
FAQ
Should I start autoflower seeds indoors and then move them outside in pots?
You can, but keep it minimal to avoid root stress. If you germinate indoors, transplant into the final pot only once the seedling has its first true leaves, and do it on a mild, overcast day. After moving outside, avoid leaving it outdoors overnight until nighttime temps are consistently above about 15°C (59°F).
How deep should I plant autoflower seeds in a pot outdoors?
A half-inch (about 1.2 cm) is a good target. Planting deeper slows emergence, which matters because autoflowers have a fixed lifespan, and seeds that sit too shallow can dry out quickly in sun and wind. Keep the top layer lightly moist until you see the sprout.
What’s the best way to tell if my pot is getting enough drainage outdoors?
Before sowing, pour water through the empty pot and confirm you get runoff within seconds and steady flow through the drainage holes. If water sits or only trickles out, switch potting mix or container immediately, because poor drainage during flowering increases rot risk and can also lock up roots.
How often should I rotate my outdoor pots, and does it really matter?
Rotate every day or two, or whenever the sun angle changes noticeably on the patio. Uneven light can cause one side to lag and results in a lopsided canopy that catches less light overall. Rotating is especially helpful in corners or near walls where light comes from only one direction.
Do I need to use a humidity dome or cover for germination in pots?
Usually not outdoors once temperatures are above 15°C (59°F). If nights are cooler, a clear cover can help during the coldest hours, but remove it during daytime so airflow doesn’t become stagnant and so you don’t overheat seedlings in direct sun.
How much rain is too much for autoflowers growing in pots?
Short heavy bursts are manageable if pots drain well, but prolonged downpours during flowering are the danger period. If buds stay wet for hours with cool temperatures, risk of bud rot rises quickly. During extended rain, move pots under cover and ensure water can drain freely through the bottom.
Should I move my pots inside during hot weather, not just cold snaps?
In extreme heat (above about 30°C or 86°F), consider shade cloth or partial protection rather than full indoors, because indoor placement can change airflow and humidity. If moving inside, keep it near a bright window or under appropriate light, and don’t delay watering cycles once the pot dries out.
What if my autoflower seems stunted early, can I fix it later?
Early stunting is often from root disturbance, overwatering, or incorrect pH. You usually cannot reverse a lost growth window, so focus on stopping the cause fast, then maintain steady conditions. Check drainage, let the pot dry between waterings, and verify pH of feed water if you start nutrients.
How do I know whether I should start feeding, given I’m using a pre-fertilized potting mix?
Wait until you see the plant approaching its early growth stage beyond the initial flush, typically around 3 to 4 weeks from sprout. If leaves are deep green and growth is steady, you can hold off. If growth slows while the plant isn’t overwatered and gets good sun, then start with a reduced dose rather than jumping to full strength.
Is flushing always necessary for outdoor autoflowers in pots?
It’s optional. Flushing is most helpful if your soil or inputs build up salts or if you suspect nutrient issues. If you already used correct pH and a light feeding schedule, you may get similar results without aggressive flushing, but you should still water with pH-adjusted water in the final stretch.
How can I prevent overwatering when the pot dries slower after rain?
Base watering on pot weight, not the calendar. After rain, lift the pot to confirm it has dried to a lighter weight before watering again. If you get frequent damp conditions, use a slightly larger pot size within your range and prioritize breathable fabric pots plus well-draining mix.
Can I grow multiple autoflowers in one pot outdoors?
It’s possible but usually not ideal in the pot sizes recommended for autoflowers. Even compact varieties compete for light and moisture, and crowded plants increase humidity around foliage during rain. If you must, plan spacing within the pot so each plant still has its own root volume, and expect lower yields per plant.
When harvesting, should I harvest by trichomes or pistils if they disagree?
Trichomes are more reliable, but pistils can still guide timing if you cannot check resin. If most trichomes are mostly cloudy with some amber, that’s typically peak timing even if some pistils look late or still white. If trichomes are mostly clear, wait, because premature harvest is the most common quality loss.
What’s a simple way to track problems early in my first outdoor pot grow?
Keep a small log with date, watering (amount or pot weight change), outdoor high and low temps, and any feeding or pH adjustments. Photos once per week from the same angle make it easier to spot nutrient, light, or watering issues before they become irreversible stunting.