Growing flower plants in pots is completely doable, even if you have nothing but a balcony, a windowsill, or a tiny patch of concrete out front. The short answer: pick a pot with drainage holes, fill it with a quality potting mix (not garden soil), choose flowers suited to your light conditions, water consistently, and feed every week or two once they start growing. That's the core of it. The rest of this guide fills in the practical details so you actually get flowers, not just a pot of struggling green leaves.
How to Grow Flower Plants in Pots: Step by Step Guide

Marcus Whitley
17 Apr 2026
Picking the right pot and the right spot

The pot you choose matters more than most people realize. The single non-negotiable feature is drainage holes. Oklahoma State University Extension is clear on this: containers need drainage at or near the bottom, because waterlogged soil causes disease and can kill plants outright. If you fall in love with a decorative pot that has no holes, use it as an outer sleeve and put your actual plant in a plain nursery pot inside it. Colorado State University Extension notes you can also drill drainage holes yourself if needed. A saucer underneath is fine for catching drips indoors, but don't let standing water sit in it for more than a day or two.
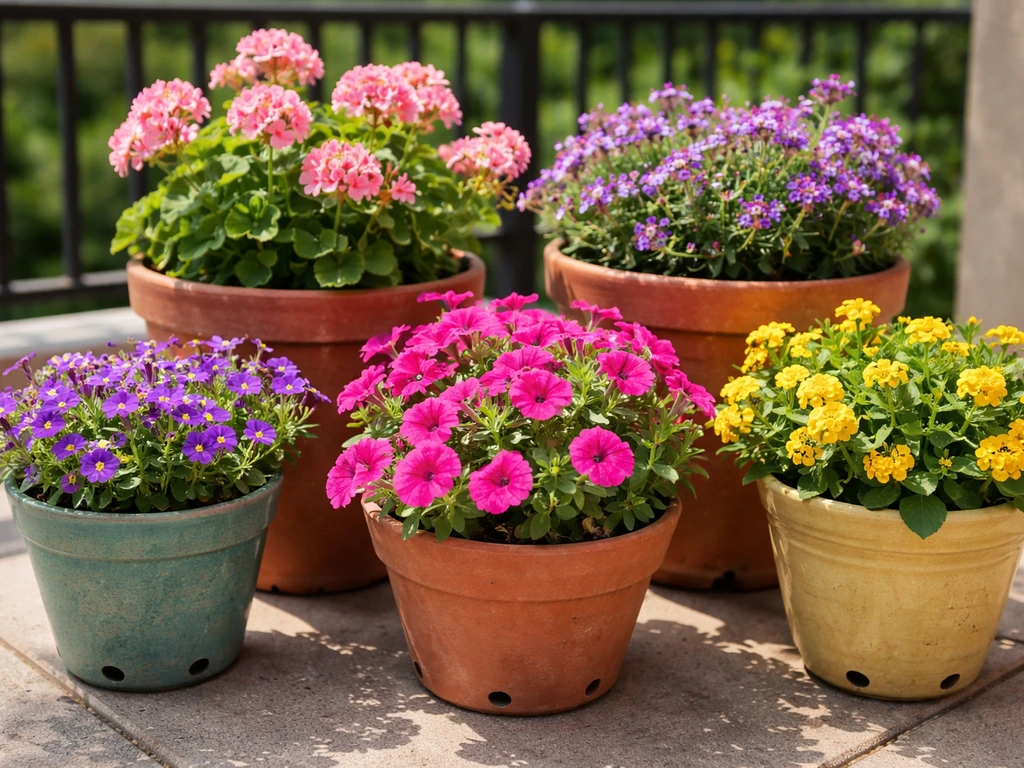
Pot size is a bigger deal than people expect. University of Illinois Extension points out that if a pot is too large for the plant, all that extra soil stays wet for a long time, which dramatically increases the risk of root rot. If it's too small, you'll be watering constantly and the plant gets root-bound fast. A good rule of thumb: the pot should comfortably fit the plant's fully-grown root system with a couple of inches to spare. For most annual flowers like petunias or marigolds, a 10 to 14 inch pot works well. For larger plants or mixed plantings, go 16 inches or wider.
Material matters too, mostly for how fast pots dry out. Terracotta breathes and dries out quickly, which is great for plants that like it a little drier but means you'll water more often in summer. Plastic and glazed ceramic hold moisture longer. For hot climates or very sunny spots, lighter-colored pots help keep roots cooler. My personal preference for beginners is a good quality plastic pot: it's lightweight, affordable, and forgiving.
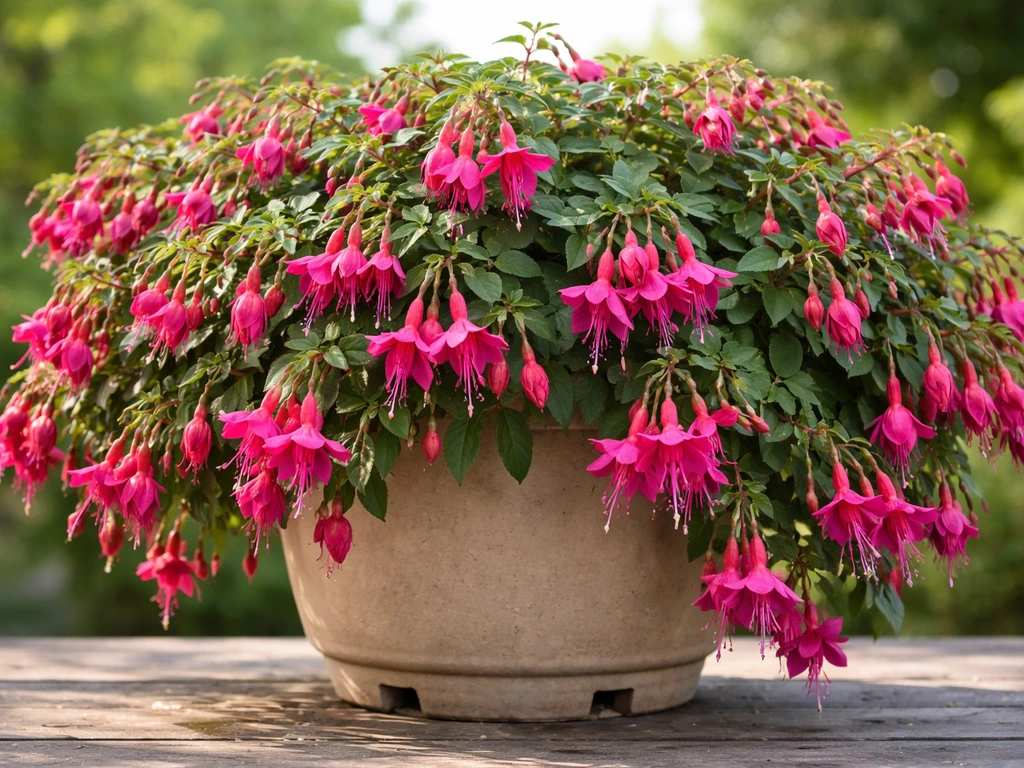
Location is just as important as the container itself. Most flowering plants need at least 6 hours of direct sun per day. Check your space honestly before buying anything. A north-facing balcony with shade all afternoon is a very different environment than a south-facing ledge that bakes all day. Good airflow helps prevent fungal issues, so avoid cramming pots into still, damp corners. If you're working with limited sun, choose shade-tolerant flowers like impatiens, begonias, or fuchsias rather than fighting the conditions.
Flowers that actually thrive in containers
Not every flower is a great container candidate. You want types that have a compact growth habit, a long blooming season, and some tolerance for the temperature swings and irregular watering that come with pot life. Here are the ones I keep coming back to:
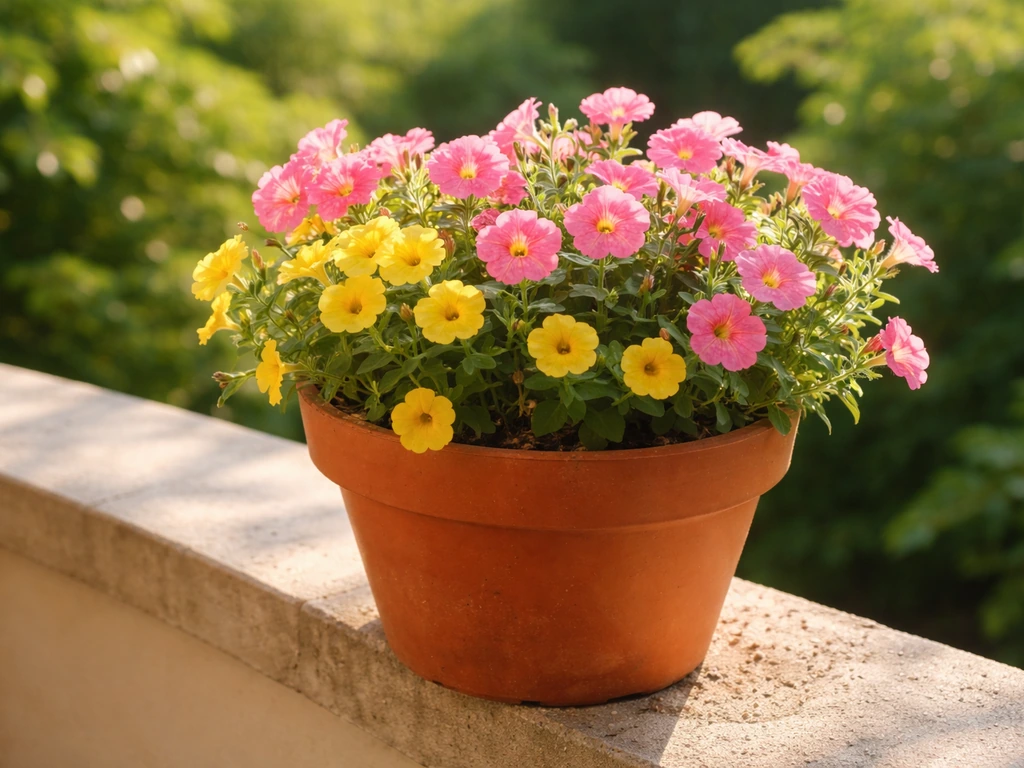
- Petunias: vigorous, bloom all season, come in trailing and mounding forms, great for mixed pots or hanging baskets
- Marigolds: tough, pest-repelling, happy in full sun, and they don't ask for much
- Zinnias: fast-growing, bold colors, handle heat well, excellent for cutting
- Geraniums (Pelargoniums): long-blooming, drought-tolerant once established, fantastic in terracotta
- Begonias: ideal for shadier spots, consistent bloomers, easy to maintain
- Calibrachoa (Million Bells): trailing habit, hundreds of tiny flowers, practically self-cleaning
- Lavender: loves heat and sun, fragrant, works well in terracotta or stone pots
- Carnations: compact varieties do surprisingly well in containers with the right care
If you want to explore a specific plant, it's worth reading up in detail. For example, growing carnations in a pot has some particular tips around soil pH and deadheading that are really worth knowing before you start. Getting into the specifics of individual plants always pays off.
If you're working from seeds rather than buying nursery transplants, your variety choices open up a lot. Some flowers that are genuinely easy to grow from seed in pots include zinnias, cosmos, marigolds, and nasturtiums. Check out a dedicated guide on the best flowers to grow from seed in pots if you want a more complete list sorted by difficulty and sun needs.
Getting the soil right
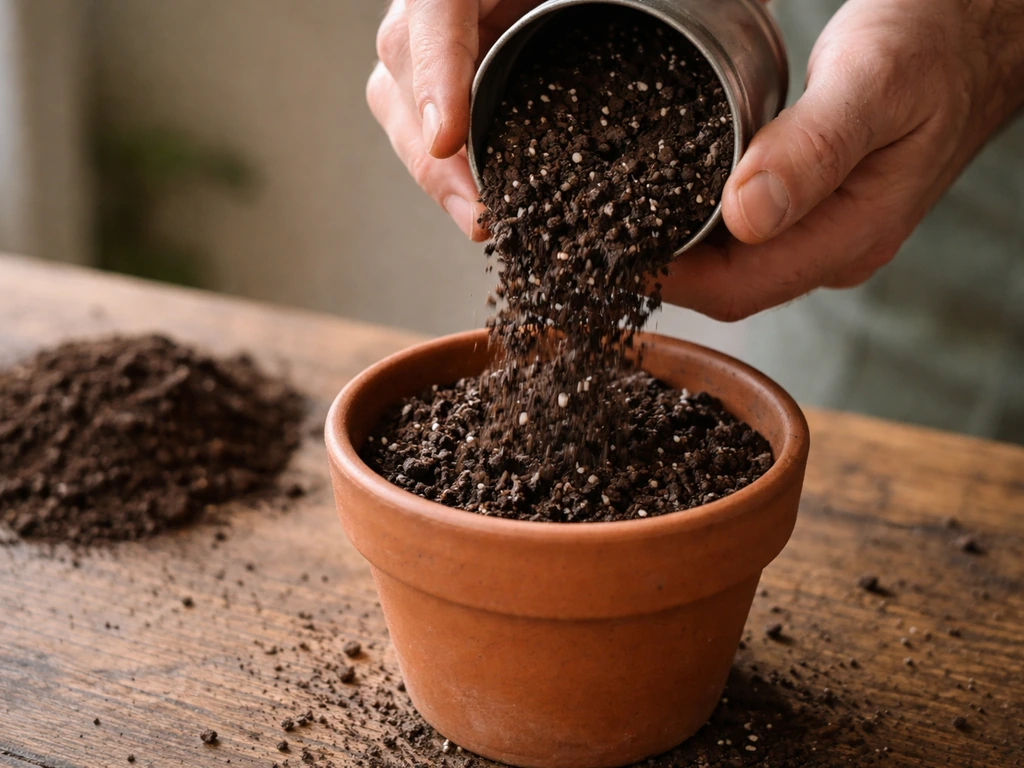
Here's the mistake I made when I first started: I grabbed a bag of cheap garden soil from the hardware store and used it in my pots. The plants sulked, then rotted. Garden soil is too dense for containers. It compacts, drains poorly, and suffocates roots. Always use a potting mix labeled specifically for containers. A good potting mix is lightweight, contains perlite or vermiculite for drainage and aeration, and often includes slow-release fertilizer to give plants a head start.
Most flowering plants want a slightly acidic to neutral pH, roughly 6.0 to 7.0. Quality potting mixes are usually in this range already, so unless you're seeing persistent problems, you don't need to obsess over testing. If you're mixing your own, a reliable base is: 60% quality potting mix, 30% perlite or coarse sand for drainage, and 10% compost for slow-release nutrients. For plants that like it drier (lavender, carnations), increase the perlite. For water-loving plants, reduce it slightly.
One optional but genuinely useful addition is a layer of coarse gravel or broken pot shards at the bottom of the container before you add soil. It helps prevent soil from washing out through drainage holes. Some people skip it and do just fine, but it's a nice touch, especially in terracotta pots.
How to plant: seeds, seedlings, and bulbs
The method you use depends on what you're starting with, and each has its own timing and technique.
Starting from seeds
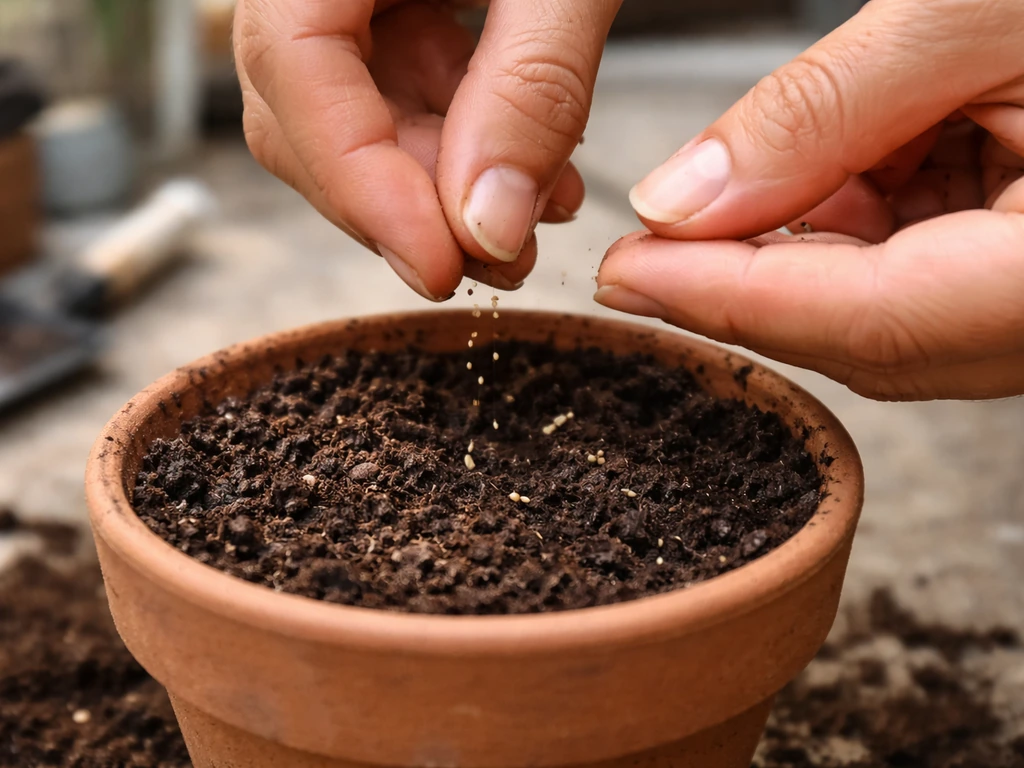
Sowing directly into a pot works well for many flowers. WVU Extension gives a practical rule of thumb: sow seeds to a depth of about two to three times the seed's width. A tiny poppy seed barely gets covered; a larger zinnia or nasturtium seed goes in about half an inch deep. Press the soil gently after sowing to ensure contact between seed and soil. Keep the surface consistently moist but not soaking wet until germination. Once seedlings emerge and have their first true set of leaves (not just the initial sprout leaves), thin them so they aren't crowded. For a more detailed walkthrough of this process, the guide on how to grow seeds in a pot covers germination conditions and thinning really well.
Starting seeds indoors first gives you a head start in spring. Sow in small cells or trays, then transplant into your final container once seedlings are a few inches tall and frost risk has passed. For flowers specifically, there's a good deep-dive available on how to grow flower seeds in pots that walks through indoor starting, hardening off, and when to transplant outdoors.
Planting nursery seedlings
This is the fastest route to flowers, especially mid-season. Fill your pot about two-thirds with potting mix, then gently loosen the rootball of the seedling and set it in the pot so the top of the rootball sits about an inch below the pot's rim. Fill in around it with more mix, firm gently, and water thoroughly. Spacing matters: most annual flowers do well with 6 to 10 inches between plants in a container. Crowding them leads to poor airflow and disease. I've made this mistake with petunias more than once and paid for it with powdery mildew.
Planting bulbs and corms
Spring bulbs like tulips and daffodils, or summer bulbs like dahlias and gladiolus, can all be grown in containers. The general rule is to plant bulbs at a depth of about two to three times their diameter. So a 2-inch tulip bulb goes about 4 to 6 inches deep, pointed end up. Use a pot at least 12 inches deep for bulbs so there's enough root room. Make sure drainage is excellent, as bulbs rot quickly in wet conditions. For dahlias, you may need to add a stake at planting time before the roots develop, so you don't damage them later.
Watering and feeding your container flowers
Containers dry out much faster than garden beds, especially in summer, and they also flush nutrients out every time you water. These two facts shape everything about how you care for potted flowers.
Watering
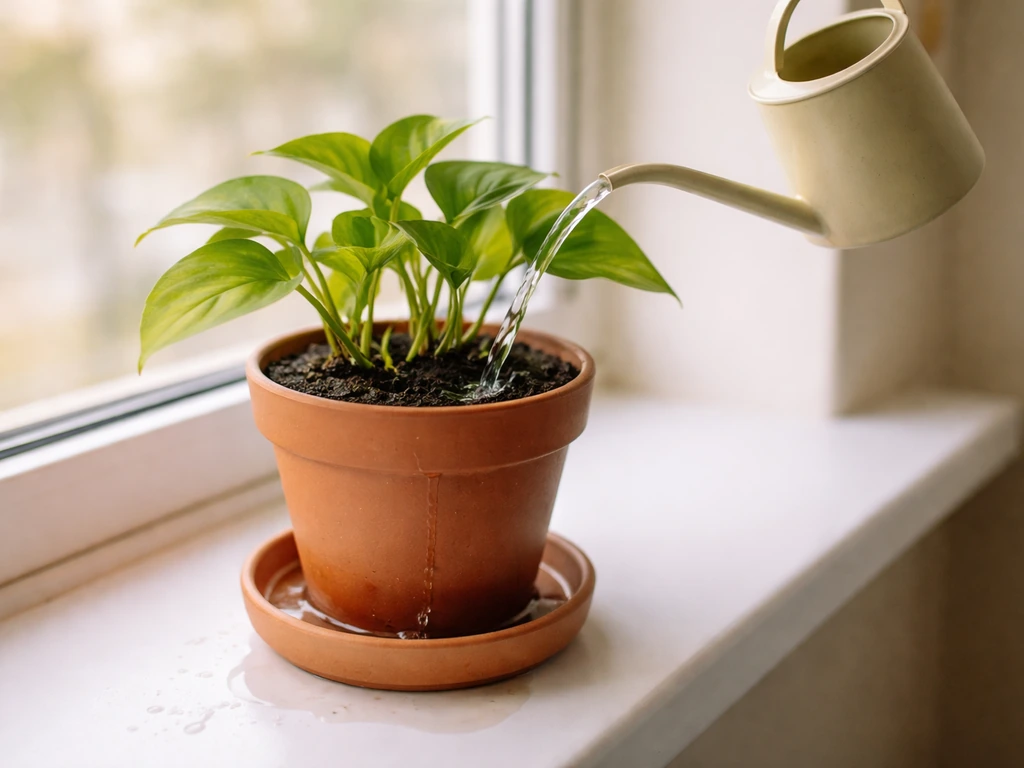
The right approach is to water deeply and consistently, not a little bit every day. When you water, go until water runs freely out the drainage holes. WVU Extension recommends this specifically because a quick splash only wets the top layer, leaving lower roots dry. Let the top inch or two of soil dry out between waterings for most flowers. Stick your finger in the soil: if it feels moist an inch down, wait. If it's dry, water. In hot summers, you may be watering daily. In cool, cloudy weather, every three to four days might be fine.
Watch for these signs and adjust accordingly: wilting in the heat of the day is normal, but wilting in the morning means the plant is genuinely thirsty. Yellow leaves combined with soggy soil usually means overwatering and possible root rot. Yellow leaves with dry soil usually means underwatering or nutrient deficiency. Crispy brown leaf edges often mean the plant dried out completely at some point.
Fertilizing
Because nutrients leach out of pots with every watering, container flowers need regular feeding. A balanced liquid fertilizer (something like 10-10-10 or a bloom-booster formula with higher middle and last numbers for phosphorus and potassium) applied every 7 to 14 days during the growing season is the standard approach. Slow-release granules mixed into your potting soil at the start of the season can also provide a steady background feed. Signs your plants need more fertilizer: pale or yellowing foliage when the soil moisture is fine, small leaves, stunted growth, or far fewer flowers than expected.
Keeping plants healthy all season long
Growing potted flowers successfully over the whole season comes down to a few regular habits that don't take much time once you build them in.
Deadheading and pruning
Deadheading means removing spent flowers before they go to seed. This is probably the single most effective thing you can do to keep container flowers blooming. When a plant sets seed, it signals to itself that the job is done and flowering slows. Pinch or snip off faded blooms every few days. For bushy annuals like petunias or calibrachoa that get leggy mid-season, cut them back by about a third. It feels brutal but they bounce back within two weeks and bloom even better. Lavender benefits from a gentle trim after its first flush to encourage a second round.
Staking and support
Taller flowers like dahlias, tall zinnias, and larkspurs will need support as they grow. Bamboo stakes and soft plant ties work perfectly in containers. Insert stakes early, before the plant is tall enough to need them, to avoid damaging roots. A single stake per plant is usually enough for container varieties, which tend to be more compact than garden varieties.
Dealing with pests and disease
Container plants aren't immune to pests, but good pot placement and care habits reduce the risk significantly. Common culprits are aphids (tiny clusters of soft-bodied insects on new growth), spider mites (fine webbing on leaves, especially in hot dry conditions), and fungal issues like powdery mildew (white powdery coating on leaves). For aphids and spider mites, a strong blast of water or a spray of diluted neem oil works well. Powdery mildew responds to improved airflow and a neem or baking soda spray. Remove heavily infected leaves and dispose of them away from other plants. The best prevention is not overcrowding pots, watering at the base rather than overhead, and keeping dead leaves picked up.
Seasonal care and what to do when things go wrong
Container gardening has a big advantage over in-ground planting: you can move your pots. Use this. In a heatwave, shift pots to a shadier afternoon spot. Before a frost, bring tender plants indoors or into a sheltered space. This flexibility makes containers genuinely more resilient if you stay engaged.
Spring and summer
Spring is the time to plant and set up your containers. Start feeding with liquid fertilizer once plants are actively growing, usually a few weeks after planting. In peak summer heat, water needs spike and you may need to add a layer of mulch on top of the soil surface to slow evaporation. Keep deadheading consistently. If you're considering growing flowers outdoors from seed during warmer months, the approach for growing autoflower seeds outside in pots touches on timing and outdoor temperature management that applies broadly to seed-starting in containers.
Autumn and winter
As temperatures drop, taper off watering and fertilizing for plants going into dormancy. Annual flowers are done for the season once frost hits; clear out the spent plants and refresh the potting mix before replanting in spring (old compacted mix doesn't drain or feed as well). Perennials and hardy bulbs in pots may survive mild winters outside if moved against a sheltered wall; in harsher climates, bring them into an unheated garage or shed. Terracotta pots can crack in freezing temperatures when the soil inside expands, so consider moving them in or wrapping them.
Common failures and how to fix them
| Problem | Likely Cause | Fix |
|---|---|---|
| Plant wilts even after watering | Root rot from overwatering or blocked drainage | Check drainage holes; reduce watering; repot into fresh mix if roots are brown and mushy |
| Few or no flowers | Too little sun, too much nitrogen, or needs deadheading | Move to sunnier spot; switch to bloom fertilizer; deadhead spent flowers |
| Yellow leaves with wet soil | Overwatering or root rot | Let soil dry out; improve drainage; consider repotting |
| Yellow leaves with dry soil | Underwatering or nutrient deficiency | Water deeply; resume regular feeding schedule |
| Leggy, stretched growth | Insufficient light or not enough pinching back | Move to more sun; prune stems back by a third |
| Plant stops growing, roots circling pot | Root-bound; needs repotting | Move up one pot size (2 inches wider) with fresh potting mix |
When and how to repot
If a plant has roots circling the bottom of the pot, poking out of drainage holes, or the soil dries out within a day of watering, it's time to repot. Go up one size, not two: a 10-inch pot moves to a 12-inch, not a 16-inch. Too large a jump and you're back to the wet-soil root rot risk. Gently tease apart any circling roots before placing in the new pot, fill in fresh potting mix around the rootball, water well, and keep the plant in shade for a day or two to recover.
Your practical next steps
If this is your first time growing flowers in containers, keep it simple: one or two pot types, two or three flower varieties you actually like the look of, and a consistent watering and feeding routine. That's genuinely enough to get a great result. For a broader overview of the whole process in one place, the guide on how to grow a flower in a pot is a great starting reference to bookmark. Once you've got one season under your belt, you'll have an intuitive sense of your specific conditions, which pots work best in your space, and which flowers you actually enjoy tending. That experience is worth more than any guide, including this one.
One last thought: don't worry about the failures. Every gardener has killed plants. The goal isn't a perfect pot, it's learning what your space and your plants need. A pot that doesn't work out is information, not defeat. Start small, pay attention, and adjust. You'll have flowers.
If you're starting from scratch and wondering about scale, the process of getting a large pot ready for planting involves some specific preparation steps around drainage layers and soil volume that are worth reading before you commit to a big container.
FAQ
How do I know whether my pot size is too big or too small for my flowers?
A clear signal is how long the soil stays damp. After you water thoroughly, check the next day and again 2 days later. If the top inch is still wet after 48 hours in warm weather, the pot may be oversized or the mix is too heavy. If it’s dry within a day, go smaller, or consider terracotta (faster drying) only if your plant tolerates it.
What’s the best way to tell when potted flowers need water, especially if I’m growing indoors?
For indoor or balcony plants, a good check is the weight of the pot. Lift it right after watering, then again after a couple of days. If it feels much lighter, water is due. Also, avoid saucers filled with water, empty drips after watering, and keep airflow around the foliage to reduce fungal problems.
My flowers wilt, but the soil looks moist sometimes. How can I tell if it’s overwatering or underwatering?
If it wilts in the morning, water shortage is the usual cause, but check the drainage first. Squeeze the soil lightly in your hand, if it forms a soggy clump and feels heavy, root stress can be from poor drainage or overwatering rather than underwatering. Repot promptly if the pot drains slowly or roots are circling.
How should I adjust fertilizer through the season, and what if I get leaves but no flowers?
Use a balanced approach: feed once every 7 to 14 days during active growth, then reduce frequency as days shorten or growth slows. If you see lots of leafy growth with fewer blooms, cut back slightly. If foliage turns pale while moisture is correct, increase dose at half-strength first to avoid burning.
Can I mix my own potting mix with compost, or will it cause problems in containers?
Yes, but do it carefully. Avoid mixing compost into the potting mix if you don’t know the quality, it can stay dense and retain water unevenly. If you amend, keep it modest (the guide’s 60 percent potting mix, 30 percent aeration material, 10 percent compost type ratio is a safe starting point) and use the same mix across your pots for consistent watering.
Does adding mulch on top actually help potted flowers, and how thick should the layer be?
In hot weather, mulch can help, but it should not cover the crown of the plant or stay soggy. A thin layer, about 1/2 inch, works best. Use it on top of potting mix only, not packed garden soil, and refresh it if it molds or clumps.
My pot drains poorly. What should I check first before assuming my flowers are the problem?
If drainage holes are clogged, water will pool or drain extremely slowly, even with good soil. Before repotting, test drainage with a slow pour, if it takes more than a few minutes to drain, clean or drill holes and consider a quick repot into fresh mix. Also check that you are not placing a deep layer of decorative gravel that reduces effective soil depth.
How do I decide how many plants to fit into one pot without encouraging disease?
For most compact annuals, space is about airflow, not just plant size. A practical way is to follow the label spacing and then err slightly wider for crowded balconies where airflow is limited. If you notice dense leaf cover, leggy growth, or recurring mildew, thin by removing one plant per gap and keep pots separate when possible.
My balcony gets little direct sun. What should I do, and how can I choose flowers that still bloom?
Start with shade-tolerant species only if your light is truly limited, many “shade” flowers still want morning sun. If you’re in mostly indirect light, choose plants for foliage or lighter bloom expectations. If you can give even 2 to 4 hours of direct sun, supplement with sun-lovers in rotation by moving pots during brighter parts of the day.
What’s a good strategy for feeding potted flowers when I don’t want to fertilize every week?
If you want to save money long-term, use slow-release fertilizer at planting for background feeding, then switch to liquid feeding only when blooms start and plants show pale growth. This reduces how often you measure and apply nutrients. Make sure you still water correctly, overwatering will leach nutrients regardless of slow-release products.
When should I stake container flowers, and how do I avoid damaging the roots?
Stake early for tall or top-heavy plants, but avoid pushing stakes deep into the root ball once roots are established. Tie loosely with soft ties so the stem can move slightly in wind. If stems bend despite staking, trim back to reduce leverage and improve new growth.
How do I know it’s time to repot, and what’s the safest step size to move up?
If roots are circling or drainage dries too fast, repot sooner rather than later. Go up one pot size only, as the guide notes, because a jump that’s too large keeps extra soil wet and increases root rot risk. After repotting, keep the plant in bright shade for a day or two, then resume normal light gradually.