Yes, you can grow tapioca (cassava) in a pot, and it's more doable than most people think. If you're also wondering about other tropical trees in containers, you can research whether you can grow tamarind in a pot and match the potting and light needs to that species grow tapioca (cassava) in a pot. You'll need a deep container of at least 15–20 gallons, a sandy well-draining soil mix, a stem cutting with several nodes, full sun, and about 8–12 months of patience before you dig up roots. It won't match an in-ground harvest in volume, but you'll get real, edible cassava roots from a container, even on a balcony or patio, if you follow a few non-negotiable rules around drainage, light, and warmth.
How to Grow Tapioca in Pots: Container Cassava Guide

Marcus Whitley
9 Jun 2026
Tapioca vs cassava: what you're actually growing in a pot
When people say they want to grow tapioca, they almost always mean they want to grow cassava (Manihot esculenta), the tropical woody shrub whose starchy tuberous roots are the source of tapioca starch. Tapioca itself is not a plant. It's a processed product: the dried or pearled starch extracted from cassava roots, which is then cooked into the chewy pearls you find in bubble tea or used as a thickener. So what you're actually planting, growing, and harvesting in your pot is cassava. The tapioca comes later, after processing.
Cassava is a tall, fast-growing woody shrub native to South America and now cultivated across tropical and subtropical regions worldwide. It grows for its large underground storage roots, long, tapered, starchy tubers with a brown waxy skin. It's also known as yuca (not yucca, the ornamental plant), manioc, or simply cassava depending on where you are. Understanding this matters for container growing because you're essentially asking a big tropical root crop to live in a pot. That's achievable, but it shapes every decision you make from container size to harvest timing.
Best pot size, drainage, and container setup
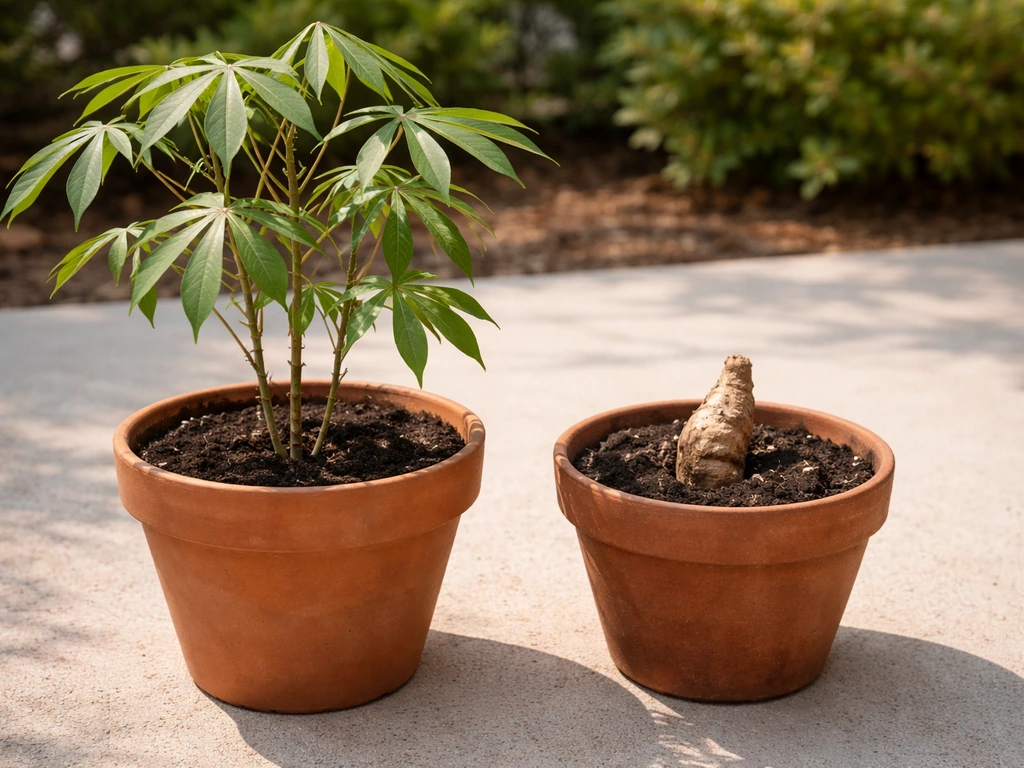
Container size is the single biggest factor determining how much root you'll grow. Cassava roots are long and tapered, they need vertical space to develop. A container that's too shallow will stunt root growth and give you disappointing results at harvest. Go with a minimum of 15 gallons, and honestly a 20–25 gallon pot is better. Depth matters more than width here: aim for at least 18–24 inches deep. Fabric grow bags in the 20-gallon range are a practical option for urban gardeners because they're lightweight, promote good air circulation to roots, and fold away between seasons.
Drainage holes are non-negotiable. Cassava is highly susceptible to root rot in waterlogged conditions, and a pot without adequate drainage will kill your roots, often before you even realize it's happening. Make sure your container has multiple drainage holes at the base, not just one. One important thing: don't add a layer of rocks or gravel to the bottom of your pot thinking it will improve drainage, it doesn't. It actually raises the water table inside the container. Just use good soil (more on that below) and let the holes do their job.
For container material, terracotta and fabric pots both breathe well and reduce overwatering risk, which suits cassava perfectly. Plastic containers retain more moisture, which can be a problem in humid climates or if you tend to water heavily. If plastic is what you have, that's fine, just be more careful with watering frequency and make sure the drainage holes are generous.
Soil mix and fertilizer plan for container tapioca
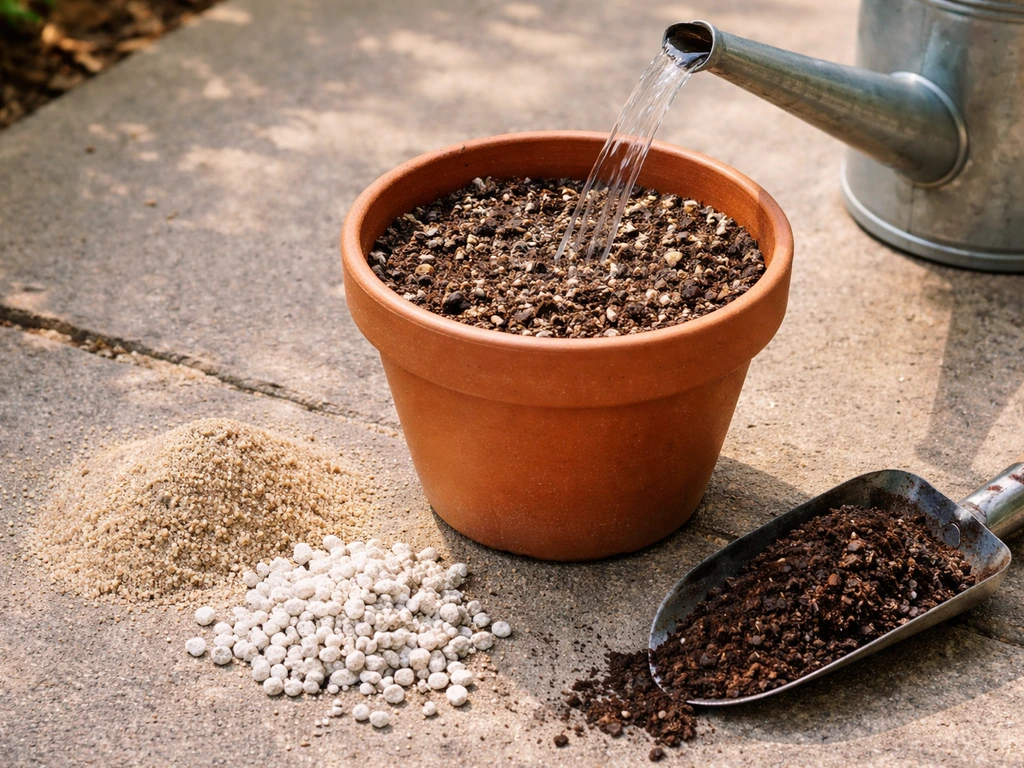
Cassava grows naturally in poor, sandy, well-draining tropical soils, and it actually prefers it that way. Don't reach for a rich moisture-retaining potting mix designed for vegetables. Instead, build a mix that drains fast and doesn't hold excess moisture. A good starting formula is about 60% quality potting mix, 30% coarse sand or perlite, and 10% compost. That gives you enough structure and nutrients while keeping drainage sharp.
For soil pH, cassava is surprisingly acid-tolerant, it can handle soil as low as pH 4.2–4.5, but it does best in the 5.5–6.5 range for a container setup. Avoid alkaline soil above pH 8, which will lock out nutrients and stunt growth. If you're working with a standard potting mix, pH is usually already in a reasonable range, but it's worth checking with a cheap soil pH meter if your plant looks unhappy.
For feeding, cassava is not a heavy feeder but it does need a consistent supply of nutrients over its long growing period. Start with a balanced slow-release granular fertilizer (something like a 10-10-10 NPK) worked into the soil at planting. After about 2 months, switch to a lower-nitrogen, higher-potassium feed every 4–6 weeks to support root development rather than leaf growth. Cassava also benefits from micronutrients including zinc, boron, iron, and manganese, a general-purpose micronutrient supplement or a liquid seaweed feed every month or so will cover most of those bases without overcomplicating things.
Starting from cuttings and planting depth/placement
Cassava is always grown from stem cuttings, not seeds. You'll need a healthy, mature stem cutting, often called a stake, that's roughly 8–12 inches (20–30 cm) long and has at least 3–5 nodes on it. Nodes are the slightly swollen points along the stem where leaves emerge. Source your cuttings from a healthy parent plant, a local tropical nursery, or an online supplier who ships live cuttings. Make sure the cutting comes from a woody (not green/soft) section of stem, as soft cuttings root poorly.
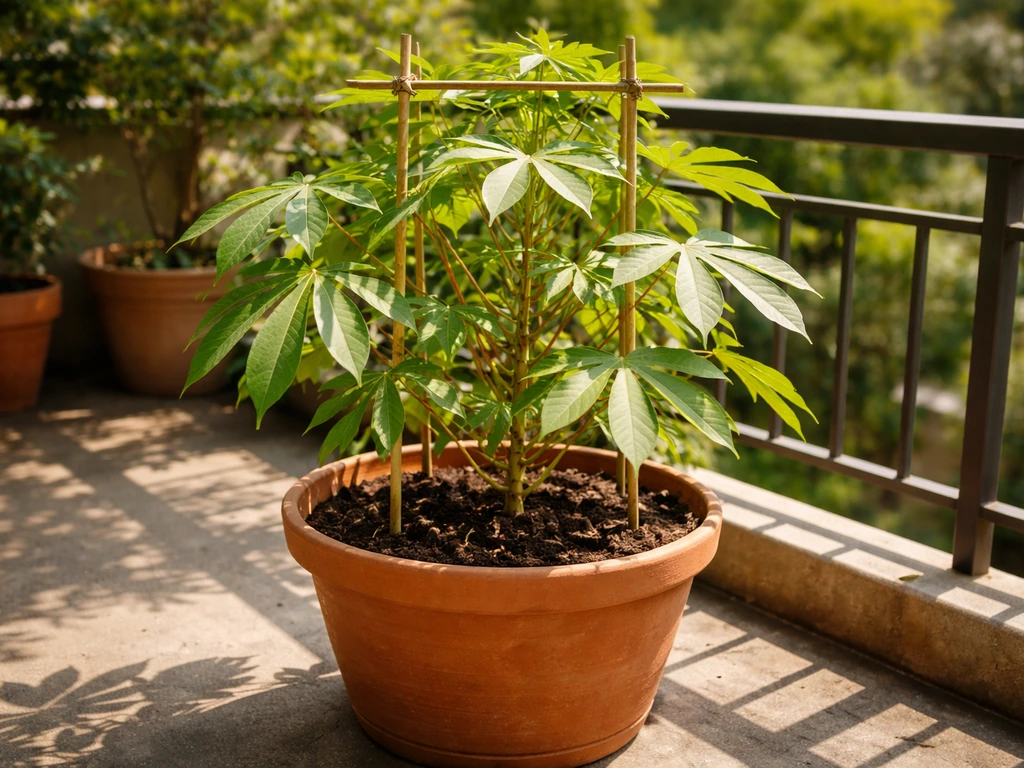
Let the cut ends air-dry for a day or two before planting, this callouses the wound and reduces rot risk. Then plant the cutting either horizontally (laid flat about 3–4 inches below the soil surface) or at a 45-degree angle with roughly two-thirds of the cutting buried. Both methods work well in containers. The horizontal method tends to produce more shoots along the length of the cutting, while the angled method is tidier in a pot and easier to manage. Vertical planting (stake pushed straight down) is also common and works fine, just make sure at least 2–3 nodes are underground.
After planting, water the pot lightly and place it somewhere warm. You should see the first shoots emerging within 1–3 weeks depending on temperature. Don't panic if nothing happens in the first 10 days, cassava cuttings take their time before they show signs of life above the soil.
Watering and light/temperature requirements
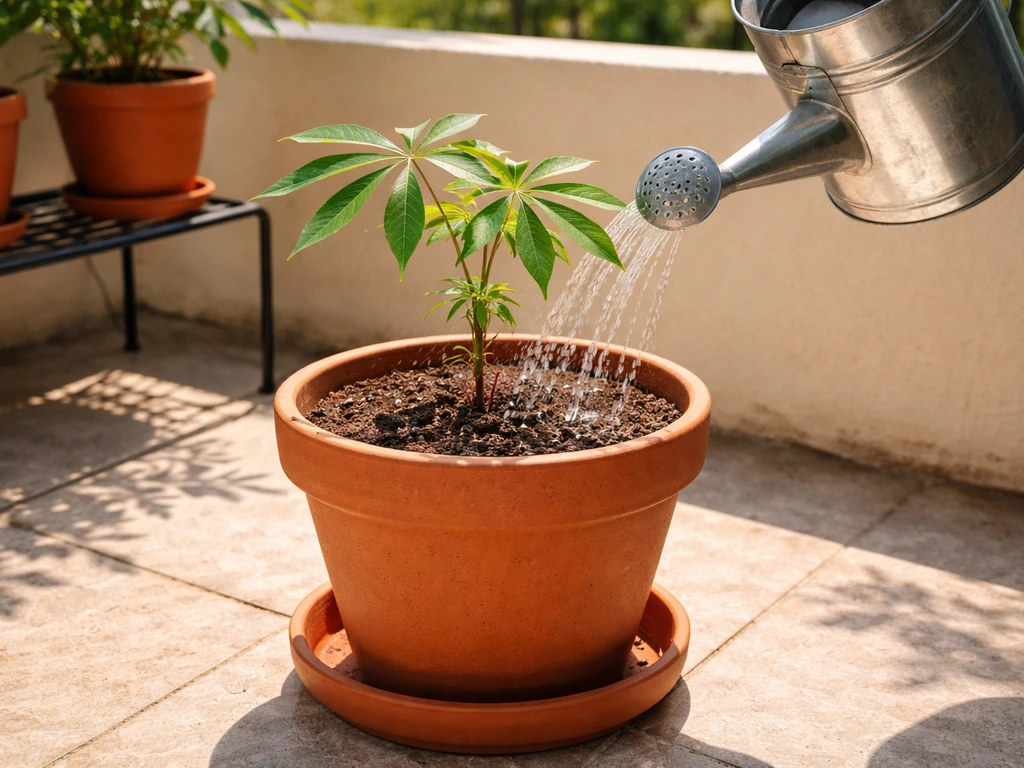
Cassava is a full-sun plant. Give it at least 6–8 hours of direct sunlight per day, and more is better. In a container, this means placing it in the sunniest spot you have, a south-facing balcony, rooftop, or patio works great. Insufficient light leads to leggy, weak growth and poor root development. If you're growing indoors or in a low-light space, cassava is genuinely not the right plant unless you're running high-output grow lights.
For temperature, cassava's sweet spot is 77–95°F (25–35°C). It's a committed tropical plant and has zero frost tolerance. Even a light frost will damage or kill the top growth. Below about 50°F (10°C), growth slows dramatically. Keep this in mind if you're in a temperate climate, your outdoor growing window is essentially your frost-free season, which in most of the US outside zones 10–12 means late spring through early fall.
Watering is where most beginners go wrong. Cassava wants consistent moisture during establishment and active growth, but it absolutely cannot sit in soggy soil. Water deeply when the top 1–2 inches of soil feel dry, then let the container drain fully. In hot summer weather this might mean watering every 2–3 days; in cooler or overcast weather, once a week might be enough. Always check before you water rather than following a rigid schedule. The biggest mistake I see is overwatering in cloudy weather, the soil stays wet, the roots sit in moisture, and rot sets in before you know it.
Care as it grows: pruning, support, and troubleshooting
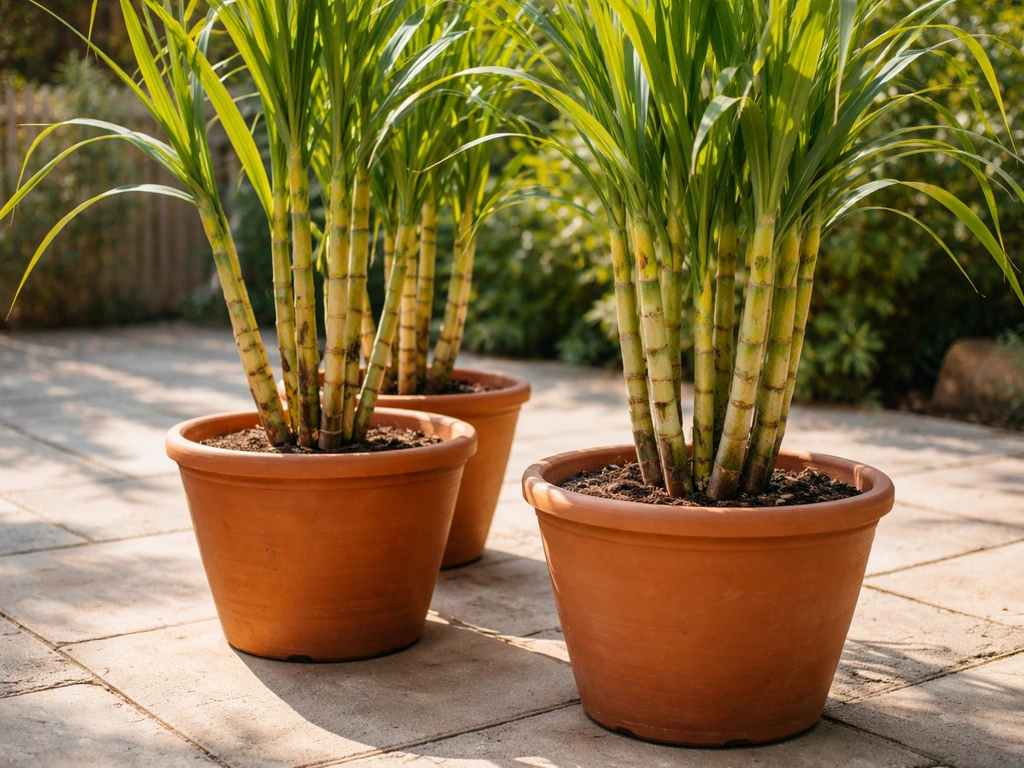
Cassava can get tall, potentially 6–10 feet in the ground, but container growing naturally limits its size somewhat, and you can prune it to keep it manageable. Pinching back the main growing tips when the plant reaches 3–4 feet encourages branching and keeps the plant bushy rather than a single tall spire. This also redirects energy toward root development. In a container, I'd aim to keep the plant under 4–5 feet through regular tip pruning. You don't need staking or a trellis, cassava stems are woody and self-supporting, unlike vines. (If you're interested in other vining or tall tropical plants, sugar cane in pots faces similar height-management decisions.)
Common problems and how to fix them fast
| Problem | Likely cause | Fix |
|---|---|---|
| Yellowing lower leaves | Nitrogen deficiency or natural aging | Apply a balanced liquid fertilizer; some lower leaf drop is normal |
| Yellowing all over / wilting | Overwatering / root rot | Check drainage, reduce watering, inspect roots for soft/brown spots |
| Slow or no growth after planting | Cold temps or poor light | Move to a warmer, sunnier spot; wait — cassava is slow to establish |
| White cottony clusters on stems/leaves | Cassava mealybug | Spray with insecticidal soap or neem oil; repeat weekly for 3–4 weeks |
| Fine webbing on leaves, stippled appearance | Cassava green mite | Increase humidity, apply neem oil or insecticidal soap |
| Brown or black leaf spots | Cassava leaf spot (fungal) | Improve airflow, avoid wetting leaves, remove affected leaves |
| Roots are small at harvest | Container too shallow, or harvested too early | Use a deeper pot next time; wait at least 8–10 months before harvesting |
Mealybugs are the most common pest you'll encounter on container cassava. They look like small white cottony blobs in the leaf axils and along stems. Catch them early and they're manageable, insecticidal soap or neem oil applied weekly for a few weeks handles most infestations. For heavier infestations, products containing acetamiprid are more fast-acting (always follow label directions). Scale insects can also appear and look like small waxy bumps on stems. Treat them the same way.
Harvesting roots in containers and what to expect
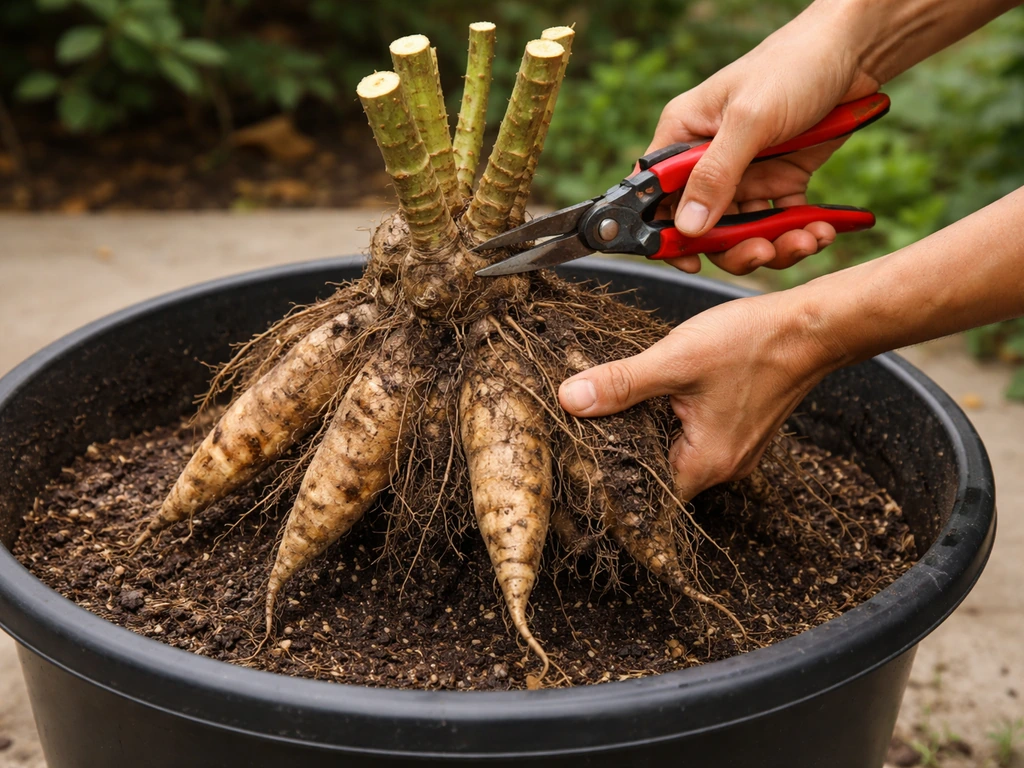
Cassava needs at least 8 months of frost-free growing time to produce harvestable roots. Most varieties are best harvested at 8–12 months. Harvesting earlier than 8 months usually gives you thin, underdeveloped roots that aren't worth the effort. A natural sign that roots are approaching maturity is when lower leaves start yellowing and dropping, the plant is redirecting energy downward. You can also carefully scrape away a little soil near the base and feel for the swollen roots.
To harvest from a container, cut the above-ground stems back to about 12 inches (save the woody portions as cuttings for replanting). Then tip the pot on its side and slide the entire root ball out. Work through the soil gently with your hands to free the roots without snapping them. Container-grown cassava will yield smaller roots than in-ground plants, expect a few roots per plant rather than a large haul, but the quality and flavor are just as good.
One thing you must know before harvest: cassava roots deteriorate extremely fast after they're pulled. Deterioration can begin within 24 hours and most roots become unpalatable within 3–4 days of harvest. So don't harvest until you're ready to use them. If you can't cook them immediately, wrap the intact (unpeeled) roots tightly in plastic and refrigerate for up to a week, or peel, cube, and freeze them for longer storage. Don't let them sit unwrapped on the counter thinking you'll get to them eventually, you won't get to them in time.
Note: all cassava varieties contain cyanogenic compounds and must be cooked before eating. Peeling and thorough cooking (boiling, frying, or baking) neutralizes these compounds and makes the root completely safe for consumption. Don't eat cassava raw.
Overwintering, replanting, and next-season tips
If you're in USDA zones 10–12, congratulations, cassava can stay outside year-round and you don't have much to worry about between seasons. For everyone else in frost-prone areas, you have a decision to make before the first frost: harvest now, or overwinter the plant indoors.
If you want to carry the plant over to next season, bring the entire container indoors before temperatures drop below 50°F. Place it in your brightest spot, ideally near a large south-facing window, and supplement with a grow light if needed. Reduce watering significantly during the indoor period since the plant's growth slows in lower light and cooler indoor temperatures. It may drop some leaves, which is normal. The goal is just to keep the root system alive, not to push active growth. Come spring when temperatures are reliably above 60°F outdoors, move it back outside and resume normal care.
Alternatively, treat cassava as an annual: harvest at the end of the warm season, use the roots, and start fresh from cuttings next year. Save your best woody stem sections as planting material for next season. Cut them into 8–12 inch pieces, making sure each piece has several nodes, and store them somewhere cool and dry (not cold, above 50°F). Wrap loosely in newspaper or keep them in a breathable bag, and check on them every couple of weeks to make sure they haven't started sprouting too early or rotting. Store them for no more than a few weeks before conditions become unreliable. CGIAR’s crop genebank regeneration guidance also recommends checking cassava stakes or cuttings carefully to avoid mixtures and to maintain correct stake identity during storage check cassava stakes or cuttings carefully.
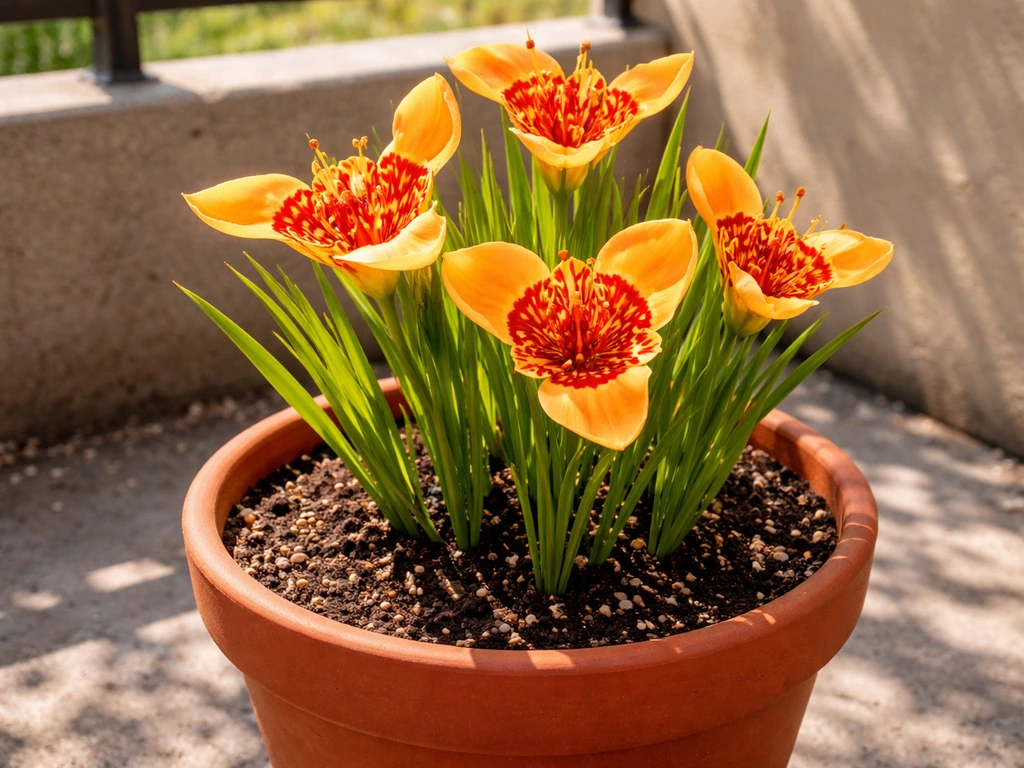
One honest note for gardeners in truly cold climates (zones 6 and below): growing cassava to full harvest is a real challenge because you simply may not have 8 consecutive frost-free months outdoors. You'd need to start cuttings indoors in late winter (February or March), grow them inside under lights for 2–3 months, move them outdoors after last frost, then harvest in early fall before the first frost. It's doable, but it's a commitment. If you're up for that project, great. If you want something easier, check out other root crops or container tropicals that have shorter growing windows. Growing cassava in pots is realistic and rewarding, it just needs warmth, time, and a container deep enough to let those roots do their thing. Sweetgrass has different needs than cassava, so once you decide on the plant, follow the specific container guidance for how to grow sweetgrass in pots Growing cassava in pots. If you're also curious about other pot-friendly tropical blooms, learn how to grow tigridia in pots for a different kind of container harvest. Tinda (ivy gourd) is a different vegetable, but the pot-based setup and consistent care approach can still guide you when you want to grow tinda in pots. If you specifically want tuberose in pots, the basics are different from cassava, so it helps to follow a dedicated tuberose container guide how to grow tuberose in pots.
FAQ
Why does my cassava look healthy but I’m not getting big roots in the pot?
In most pots, the biggest hidden issue is insufficient depth. If your plant stays leafy but the tuberous roots never really size up, check that you used at least an 18 to 24 inch depth and that the container has real drainage, not a single hole. Also avoid rich, water-retentive mixes, they can trigger early root stress that looks like slow top growth.
Can I grow tapioca in pots from grocery-store cassava or tapioca products?
Yes, you can start from store-bought cassava, but success is inconsistent because many roots are peeled, treated, or not viable as planting material. Cassava is grown from woody stem cuttings, so look for intact, woody stems or request live cuttings from a nursery, then air-dry the cut ends before potting.
What happens if I over-fertilize cassava in a container?
With cassava, resist the urge to fertilize heavily. If you overdo nitrogen, you’ll get lots of leaves with smaller, slower-forming roots. A practical approach is to use a balanced slow-release starter at planting, then switch to higher potassium and low nitrogen after about 2 months, and stop adding more until you see active growth again.
How can I tell if winter leaf drop is normal or a sign of root rot?
Leaf yellowing is often normal during cooler, lower-light indoor overwintering, especially if temperatures drop and growth slows. The difference is root-cause yellowing, which usually comes with a wet pot and a sour smell. If the soil is staying damp longer than 5 to 7 days in winter, cut watering back further and confirm the pot drains well.
Can I grow cassava in a pot in partial shade to reduce heat stress?
Yes, and it can be a lifesaver in humid climates. If you move a container indoors or into shade during the hottest part of the day, expect slower growth, so compensate by placing it back in full sun as soon as possible. Don’t keep it in low light for weeks, because cassava is very light-hungry and that affects root development.
How do I avoid overwatering when growing tapioca in pots in rainy weather?
Watering frequency changes with temperature and cloud cover, but the rule is to water only after the top 1 to 2 inches dry out, then let the excess drain completely. A useful check is to lift the pot, if it stays heavy for days, you’re likely overwatering. For pots that never dry, switch to a faster mix or consider a fabric container next season.
What’s the best way to prevent mealybugs from coming back on container cassava?
Mealybugs and scale can rebound if you stop too soon. Treat on a schedule for several weeks, because eggs and hidden colonies can survive. Also wipe leaves and check leaf axils and stem joints, then improve airflow around the pot so the plant dries between treatments.
Should I prune my potted cassava before harvest, and how much?
Tip pruning helps keep the plant manageable, and it can also redirect energy toward roots, but don’t prune aggressively right before the harvest window. If you’re planning to dig within a few weeks, do light pruning only, otherwise you may delay maturity signals like leaf drop from the lower canopy.
How do I know when it’s the right time to harvest cassava from my pot?
Harvest timing is flexible, but under 8 months often means thin roots. If you’re unsure, combine two cues: look for lower leaf yellowing and do a careful feel test by scraping a small patch of soil near one side of the base. If the roots are still firm and narrow, wait a bit longer.
What’s the safest way to store cassava roots from a container harvest?
After pulling, texture quality declines quickly, so plan your kitchen workflow before harvest. If you need to delay cooking, the best option is to keep unpeeled roots sealed and refrigerated, then cook within about a week. If you peel and cube, freezing can extend storage, but expect some change in texture compared with fresh-cooked roots.