Bay trees are genuinely one of the best herbs you can grow in a pot. They're slow, steady, and forgiving enough for beginners, but they do have a few specific needs that trip people up: the wrong pot, the wrong watering habit, or leaving them out in a frost. Get those three things right and you'll have a healthy, good-looking bay laurel that gives you leaves for cooking for years.
How to Grow a Bay Tree in Pots: Step by Step Care

Marcus Whitley
14 Jun 2026
Choosing the right bay variety and pot size
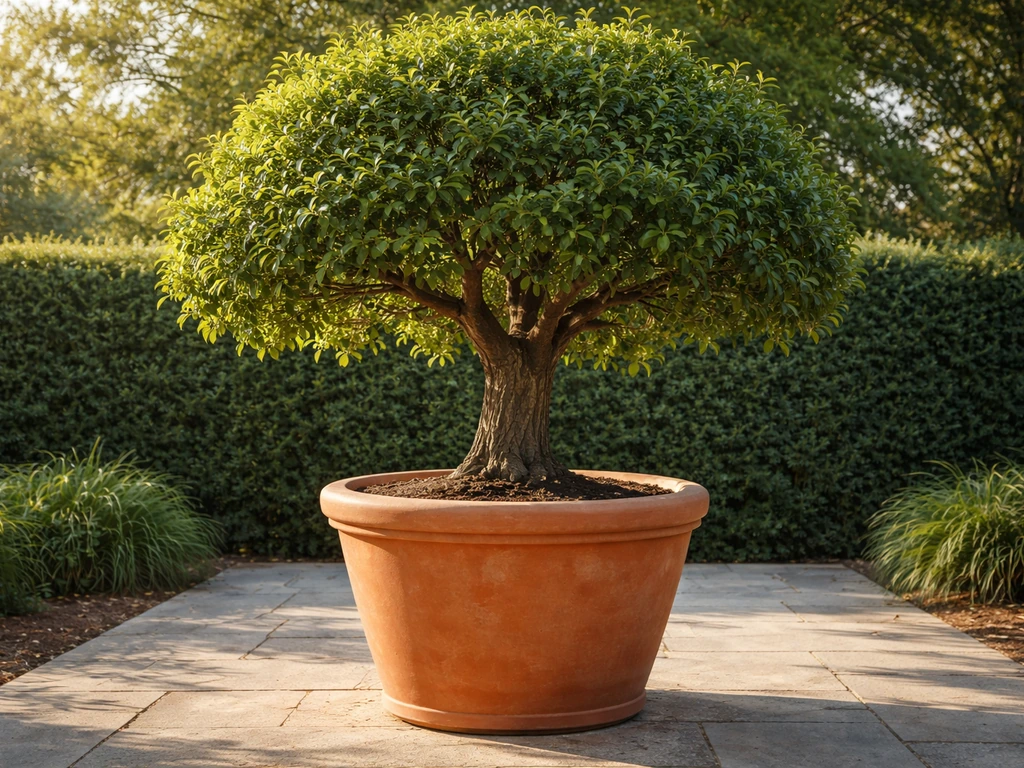
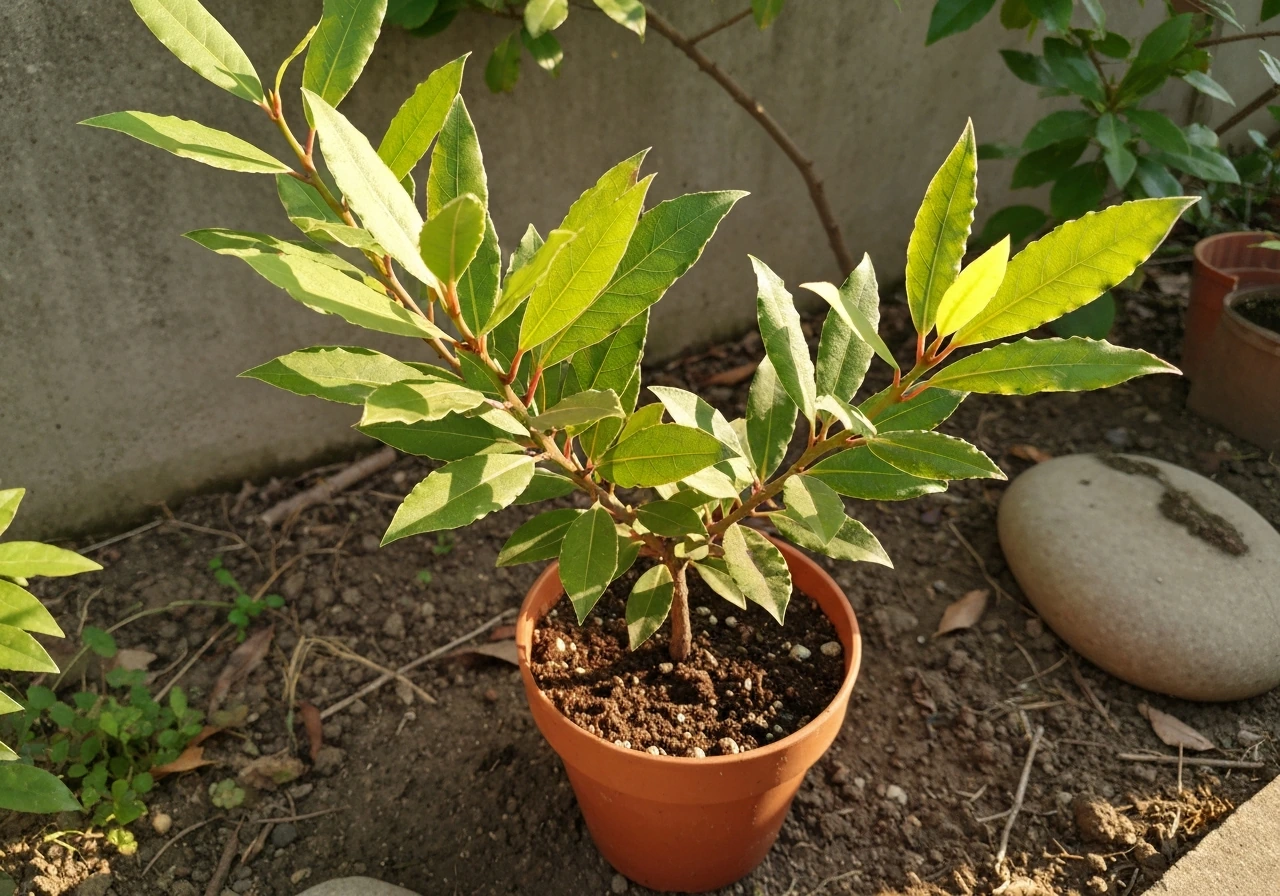
The standard species you want is Laurus nobilis, the true bay laurel. That's the one with the culinary leaves you'd use in a stew or a bouquet garni. Left to its own devices in the ground, it can reach 20 to 40 feet, which is why growing it in a pot is such a smart move: the container naturally limits its size, and regular pruning keeps it exactly as compact as you want.
If you want something a little more open and slightly smaller in stature, look for Laurus 'Saratoga', which is a horticultural hybrid of Laurus nobilis. It has larger, more rounded, lighter-coloured leaves and a somewhat looser growth habit. It's perfectly usable in the kitchen too. In containers it tends to stay in the 4 to 6 foot range in height and about 3 to 4 feet wide, which is very manageable.
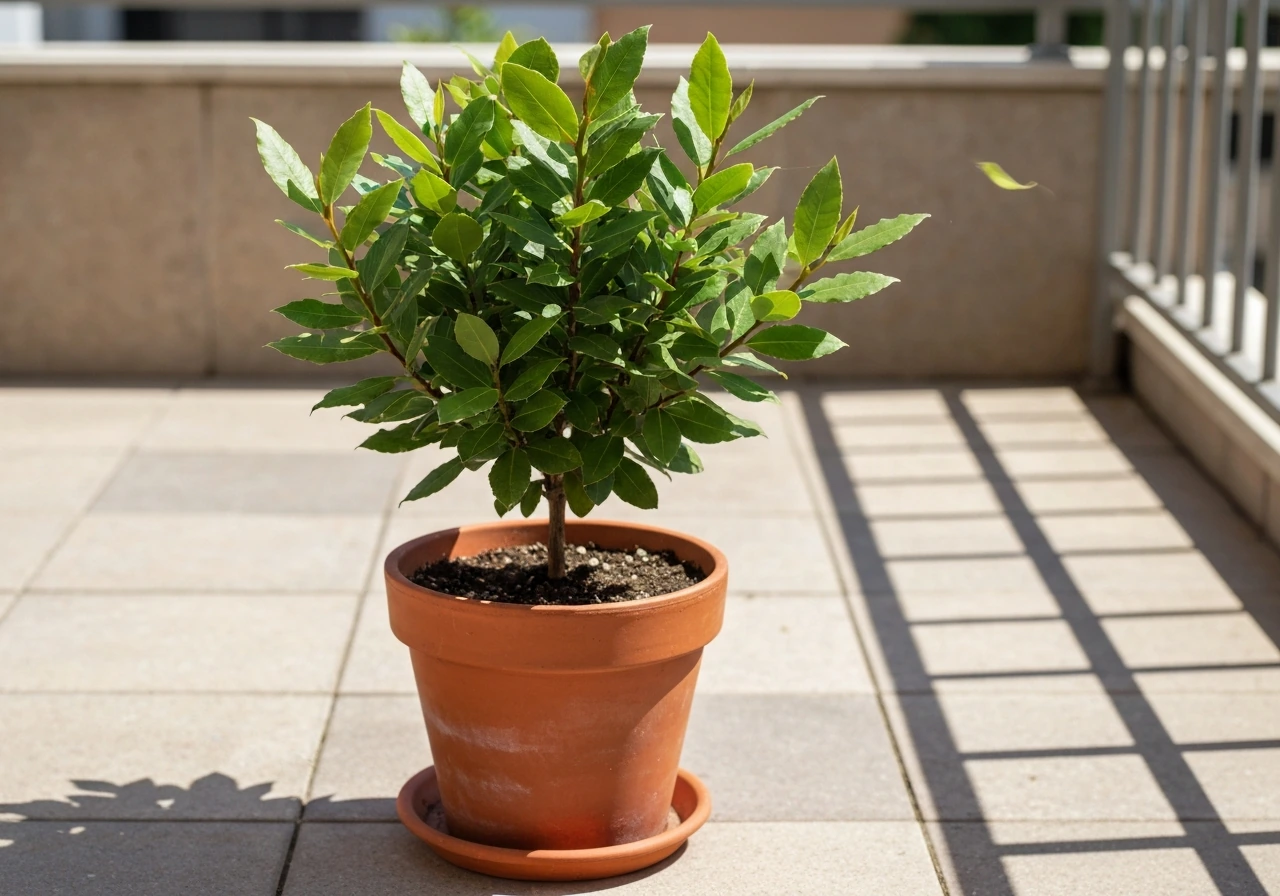
For pot size, start with at least a 5-gallon container, but honestly I'd go bigger from the start if you can. A 10 to 15 gallon pot gives the roots enough room to establish without you needing to repot constantly, and a heavier pot will be more stable when the tree gets taller and bushier. The single non-negotiable is drainage holes. Bay laurel hates sitting in wet soil, and without drainage you'll kill it slowly from the roots up.
Terracotta pots are brilliant for bay because they're porous and let the soil dry out more evenly, reducing your risk of overwatering. The downside is they're heavy, which matters if you plan to move the plant indoors for winter (and you will, if you're in a cooler climate). A large plastic or fibreglass container with good drainage holes is a reasonable compromise if you need to move it around regularly.
Soil mix and planting setup for a container bay
Bay laurel likes well-drained, slightly acidic to neutral soil, somewhere in the pH range of 6. Garden Site notes that bay laurel should be grown in well-drained soil to avoid waterlogging well-drained, slightly acidic to neutral soil. 0 to 7.0. Standard multipurpose compost on its own tends to hold too much moisture and compact over time in a pot, which is exactly the wrong environment. You need to improve drainage from the start.
A mix that works really well is two parts quality potting compost to one part perlite or horticultural grit. That grit or perlite opens up the structure so water drains freely and air gets to the roots. You can also add a small amount of pumice or calcined clay if you can get it, but perlite is cheap and widely available and does the job perfectly well.
When you're planting, put a layer of crocks (broken terracotta bits) or coarse gravel over the drainage holes before you add soil. This stops the holes from getting blocked without preventing drainage. Plant the bay at the same depth it was sitting in its nursery pot, firm the compost around it gently, and water it in well. Then step back and let it settle for a couple of weeks before you start any feeding routine.
Light, temperature, and watering
Getting the light right
Bay laurel does best in full sun to partial shade, and you want to give it a minimum of five to six hours of direct sunlight a day for good leaf flavour and healthy growth. In very hot climates, a little afternoon shade is actually beneficial, the kind of dappled protection you'd get on a slightly sheltered south-facing patio. If you're growing it on a north-facing balcony or in a spot that gets less than four hours of sun, it will survive but it'll be slow and the leaves won't have the same intensity.
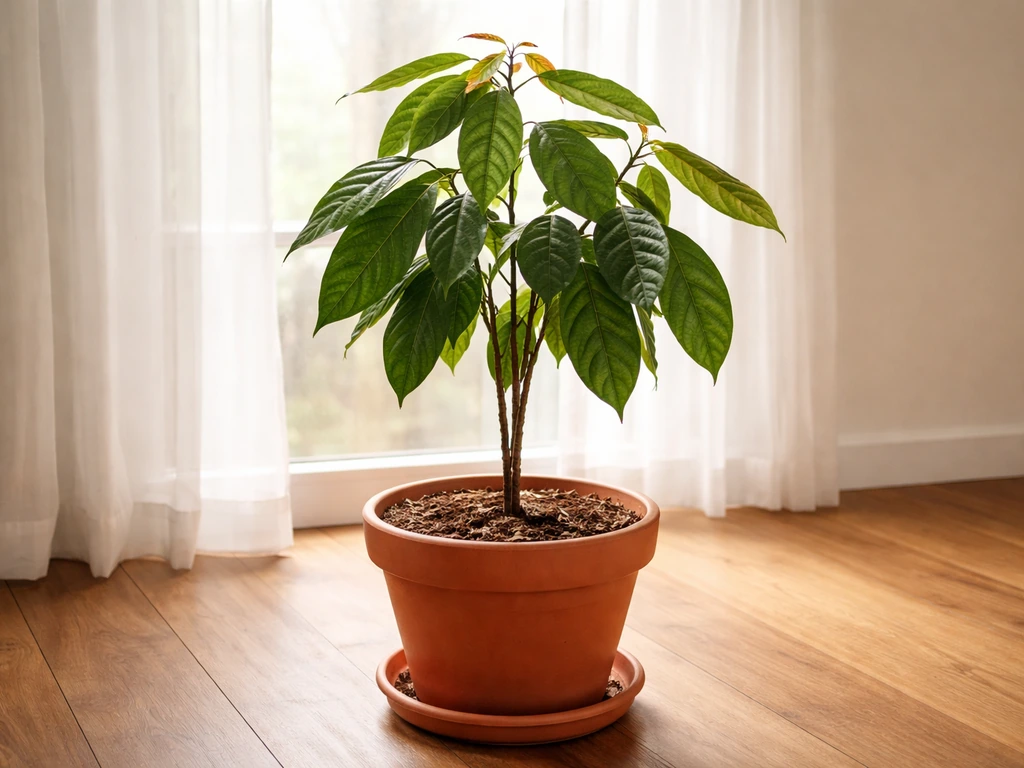
If you bring it indoors for winter (more on that below), put it in your brightest window. A south or west-facing window that gets real direct sun is ideal. Avoid sticking it in a dim corner and expecting it to thrive.
Temperature: the point where things go wrong
Bay laurel can handle mild frost but it really struggles once temperatures consistently drop below about 2°C (36°F). Young plants and ones in pots are more vulnerable than established garden trees because the roots aren't insulated by ground soil. If you live somewhere with proper cold winters, plan to move your potted bay somewhere frost-free before temperatures get that low.
Watering: less is more
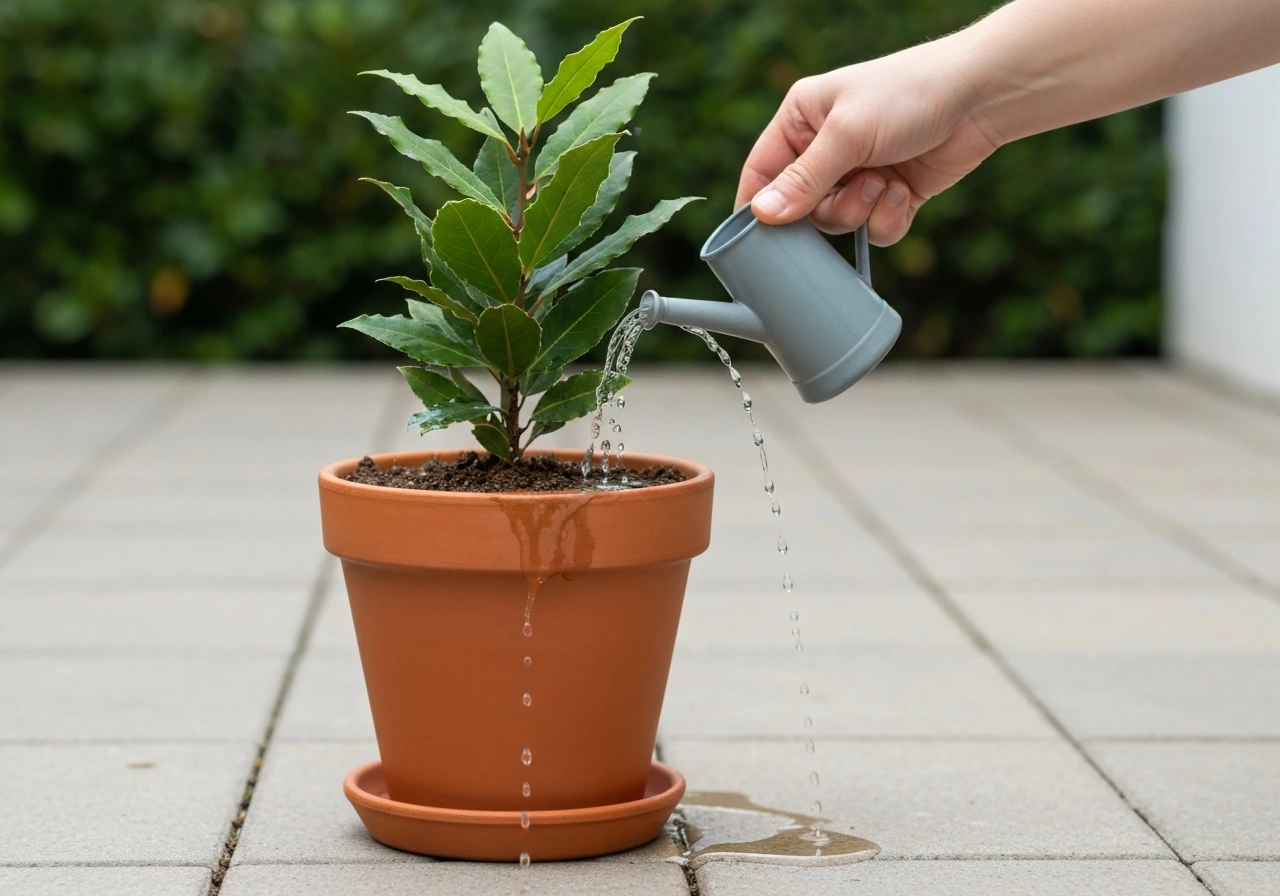
This is the area where most beginners go wrong. Bay laurel is low water use and it absolutely does not want to sit in wet soil. The approach that works consistently is to let the top one to two inches of compost dry out before you water again. You can check this simply by pressing your finger into the soil: if it feels moist at that depth, wait. If it feels dry, water thoroughly until it drains from the bottom of the pot.
In summer, depending on your climate and pot size, that might mean watering every five to ten days. In a very hot spell with a smaller pot, you might water more frequently. In cool weather or during winter, you might water once every two to three weeks. The rule is always: check the soil, not the calendar. Overwatering is far more likely to kill your bay than underwatering.
Feeding and pruning: keeping it healthy and compact
What and when to feed
Because your bay is in a pot, its nutrients get depleted faster than if it were in the ground. You need to feed it regularly from mid-spring through to late summer. There are two approaches that both work well: a slow-release granular fertiliser applied once in spring (just scatter it on the surface of the compost and water in), or a balanced liquid feed applied every two weeks from mid-spring through to late summer. I personally prefer the liquid feed route because you can adjust the strength easily and you see results faster, but if you're prone to forgetting, a slow-release granule in April and one in June is a solid backup plan.
Stop feeding entirely in early autumn. Feeding late in the season encourages soft new growth that's vulnerable to cold damage, which is the last thing you want going into winter.
Pruning to keep it compact and shapely
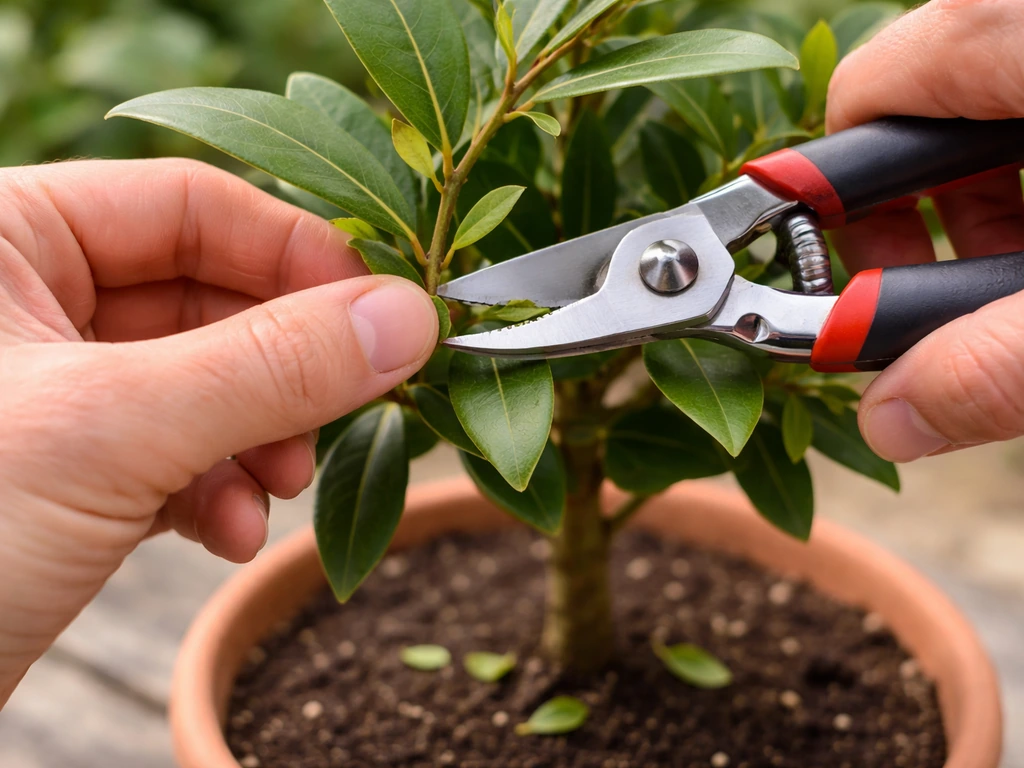
Bay responds really well to pruning, and in a pot you'll want to do it regularly to keep the size manageable. The main pruning window is late spring, once new growth has emerged. You can cut it back quite confidently at this point: it won't hold a grudge. If you're going for a topiary ball or lollipop shape (classic for bay), a second tidy-up in summer helps refine the profile.
Use clean, sharp secateurs and make cuts just above a leaf node (the point where a leaf joins the stem). Don't leave long bare stubs. If you're not going for a formal shape, just remove any crossing, dead, or overly vigorous branches to keep airflow through the canopy. Good airflow also helps prevent some of the fungal problems covered in the next section.
Pests, diseases, and what to do about them
Bay laurel in a pot is fairly robust, but it does have a few specific issues to watch for. Catching them early makes all the difference.
Scale insects
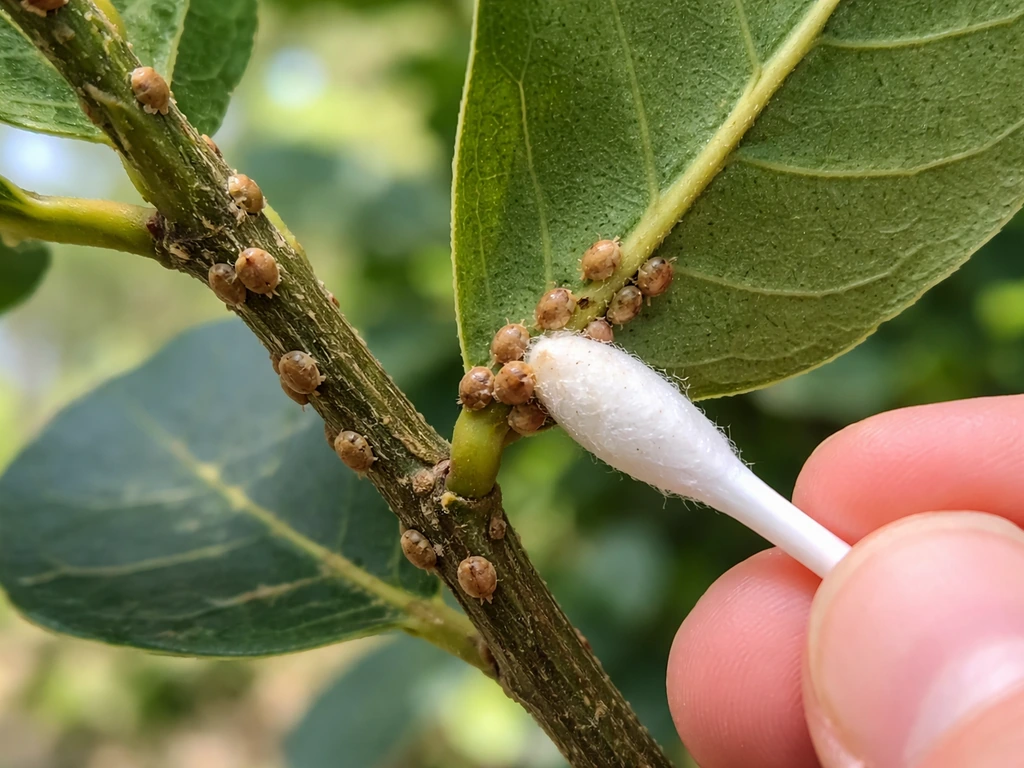
Scale insects are probably the most common pest on bay. They look like small brown or tan bumps stuck to the stems and the underside of leaves. They're easy to miss at first because they don't move. Signs include sticky residue on leaves (called honeydew) and sometimes a black sooty mould that grows on top of that honeydew. If you catch them early, you can wipe them off manually with a damp cloth or cotton swab dipped in rubbing alcohol. For heavier infestations, a horticultural oil spray in late spring when the crawlers (young scale) are active is effective.
Mealybugs
Mealybugs look like tiny white fluffy blobs, usually found in the joints where leaves meet stems. Like scale, they produce honeydew and can encourage sooty mould. The same approach works: manual removal for small numbers, horticultural oil or insecticidal soap for larger infestations. Mealybugs often hitchhike in on other plants, so quarantine any new additions to your collection for a couple of weeks before placing them near your bay.
Spider mites
Spider mites tend to show up in hot, dry conditions, especially if your bay is sitting against a wall in summer heat. Look for fine webbing on the undersides of leaves and a slightly stippled or bronzed look to the foliage. Increasing humidity around the plant (misting the leaves or standing the pot on a tray of damp gravel) helps deter them. A strong spray of water knocks them off, and horticultural soap sprays deal with established infestations.
Root rot (the silent killer)
Phytophthora root rot is what happens when bay laurel sits in waterlogged soil for too long. The symptoms above ground look like general decline: yellowing leaves, wilting despite the soil being wet, and eventually the plant dying back from the tips. Unfortunately by the time you see those signs, significant root damage has already happened. Prevention is everything here: use a free-draining soil mix, never let the pot sit in a saucer full of water, and follow the 'check before you water' approach every time. If you suspect root rot, unpot the plant, cut away any dark, mushy roots, dust the healthy root ends with a fungicide powder, and repot into fresh, dry mix.
Leaf spot and other fungal issues
Dark spots or blotches on leaves can indicate a fungal leaf spot. This is more common in conditions with poor air circulation. Prune to open up the canopy, avoid wetting the leaves when you water (water at the base), and remove affected leaves promptly. A copper-based fungicide can help if the problem is persistent.
Seasonal care: repotting, overwintering, and moving locations
Summer placement
During summer, get your bay outside if you can. A sunny patio, balcony, or doorstep with at least five to six hours of sun is ideal. If you're in a very hot climate, a little afternoon shade in the peak of summer will prevent the leaves from scorching. Make sure the pot is stable: once the tree gets bushy, it can catch wind, and a toppled bay in a terracotta pot is not a fun afternoon.
Overwintering your potted bay
If you're in a climate that gets regular hard frosts, bring your potted bay into a frost-free spot before temperatures drop below around 2°C (36°F). An unheated greenhouse, garage, or shed that stays above freezing is ideal. The key word is 'unheated': you want it frost-free but cool. If you bring it into a warm living room, the combination of low light and central heating will stress it considerably. If moving indoors is unavoidable, keep it in a room no warmer than about 60°F (15°C) and give it your brightest window.
Water much less in winter: the plant is barely growing, it's in lower light, and overwatering in winter is how most indoor bay trees die. Check the soil every week or so and only water when the top couple of inches are genuinely dry.
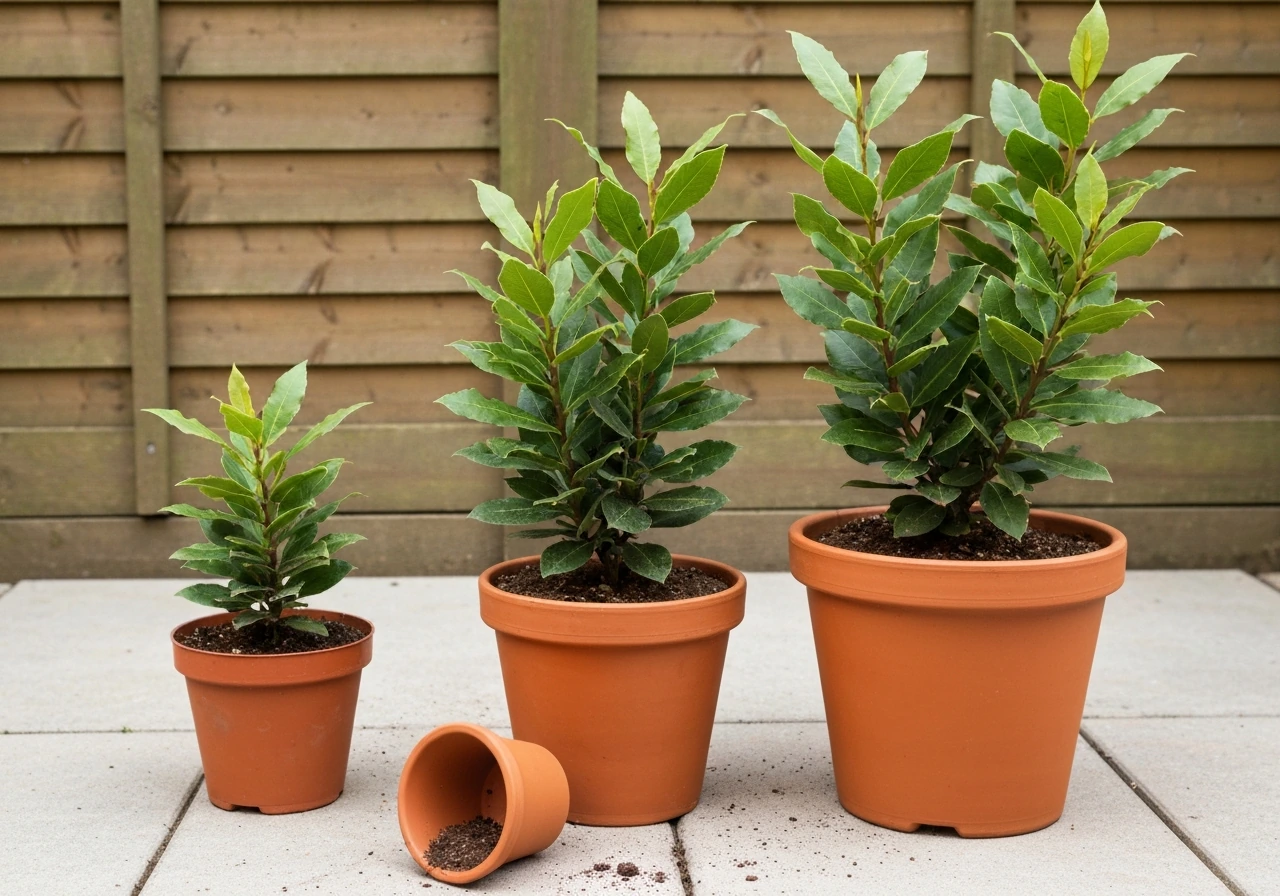
Repotting: when and how often
Bay laurel actually tolerates being slightly root-bound and doesn't need repotting constantly. The general rule is to move it up one pot size (so if it's in a 10-litre pot, go to a 15 or 20-litre pot) when you see roots poking out of the drainage holes or when growth seems to have slowed significantly despite good care. For most gardeners, that's every two to three years. Spring is the best time to repot, just as the plant is starting to put on new growth. When you repot, take the opportunity to check the roots, trim any that look circling or congested, and refresh the soil mix entirely.
If you don't want your bay to get any bigger, you can do a 'root prune' instead: carefully remove the plant, trim back the outer roots by about a quarter, and put it back in the same pot with fresh compost. This keeps the size steady and refreshes the nutrients in one go.
Propagation and what to do when growth is slow
Propagating from cuttings
The most reliable way to propagate bay laurel at home is from semi-hardwood cuttings taken in late summer. Semi-hardwood means the new growth from that year has had time to firm up a bit but isn't fully woody yet. Take a cutting about 10 to 15 cm (4 to 6 inches) long, strip the lower leaves, dip the cut end in rooting hormone powder, and pot it into a small container of cutting compost mixed with perlite.
Cover it with a clear plastic bag or propagator lid to hold humidity, and if you can provide gentle bottom heat (a heat mat set to around 20°C/68°F), even better. Expect roots in roughly two to three months. Don't give up early: bay cuttings are notoriously slow to root.
Growing from seed
You can grow bay laurel from seed, but it's slow and the germination rate can be patchy. If you want to try it, cold stratification helps: put the seeds in a damp paper towel in the fridge for four to six weeks before sowing. Sow into moist seed compost and keep them at around 65 to 70°F (18 to 21°C). Even with good conditions, germination can take several weeks and not all seeds will sprout. Cuttings are genuinely easier and faster, so I'd only go the seed route if you enjoy the experiment.
Troubleshooting slow growth and leaf drop
Bay laurel is naturally a slow grower, so a small amount of patience is always required. But if growth has completely stalled or leaves are dropping, here's how to diagnose it:
| Symptom | Likely cause | What to do |
|---|---|---|
| Yellow leaves, wet soil | Overwatering or root rot | Check drainage, reduce watering, inspect roots |
| Yellow leaves, dry soil | Underwatering or nutrient deficiency | Water thoroughly, start a feeding routine |
| Leaves dropping in autumn/winter | Normal seasonal response or cold stress | Move to frost-free spot, reduce watering |
| Brown leaf tips | Low humidity, heat, or salt build-up in soil | Flush soil thoroughly, mist leaves, move from heat sources |
| No new growth in spring | Root-bound, depleted soil, or insufficient light | Repot into fresh mix, move to brighter spot, begin feeding |
| Pale, washed-out leaves | Insufficient light | Move to a sunnier position with 5+ hours of direct sun |
One thing worth saying plainly: bay laurel does drop some leaves when it's moved or stressed, especially when brought indoors for winter. That's normal and not necessarily a sign you've done something wrong. As long as there are healthy new buds and the stems are green when you scratch them with a fingernail, the plant is alive and will recover.
If you're interested in growing other trees in containers, the principles here, especially around drainage, pot size, and seasonal moving, apply broadly. The commitment to good drainage and sensible watering habits is the foundation of success whether you're growing something compact like a bay or tackling a larger challenge.
If your real goal is how to grow big trees in pots, the main idea is giving the roots room, using a free-draining mix, and scaling up feeding and watering as the canopy grows. If you're wondering how to grow oak trees in pots, the key ideas are similar: use a large container, ensure excellent drainage, and protect young roots from cold stress.
If you want to grow cocoa trees in pots, those same basics of well-drained soil and careful watering make a huge difference good drainage and sensible watering habits. If you want to try something more challenging after mastering container basics, you can use the same pot care principles in our guide on how to grow coconut tree in pots.
For help growing drumstick in pots, choose a container with excellent drainage and give it the right sunlight and watering routine tackling a larger challenge. If you want a similar container-friendly tree, learn how to grow drumstick tree in a pot using a warm spot, fast-draining mix, and consistent light. Bay is actually a great starting point because it's forgiving enough to let you learn those habits without punishing every small mistake.
FAQ
Can I keep my potted bay tree indoors year-round?
Yes, but treat it as a temporary indoor crop. Bay laurel needs strong light, so place it right by the brightest south or west window and expect slower growth. If the room is warm and dry, spider mites are more likely, so check the leaf undersides weekly and keep the plant cool if you can (about 15°C/60°F).
My bay’s leaves are turning yellow and dropping, what should I check first?
If you notice yellowing plus leaf drop, do not keep watering “to fix it.” Use the finger test at the top 1 to 2 inches, then water thoroughly only when that layer is dry. A common cause is drainage failure, so confirm the pot actually drains well and the saucer is empty after watering.
How often should I repot a bay tree in a container?
Choose a pot that is only one size up at repot time, then refresh the soil fully. Bay can tolerate slight crowding, so if you repot too often or into an overly large pot, the extra compost can stay wet longer and increase root-rot risk. Spring is best for repotting so the roots recover as growth resumes.
What watering schedule is safest in winter?
For bay laurel, the goal is to keep it slightly on the dry side between waterings, not to keep it constantly moist. Water until you see drainage from the bottom, then wait until the top 1 to 2 inches dry out. In winter indoors, that can mean watering every few weeks, depending on light and temperature.
When should I stop fertilizing my potted bay?
Feed only during active growth, mid-spring through late summer, and stop in early autumn. If you fertilize after that window, you encourage tender new growth that can be damaged by cold snaps, even if you move the plant indoors.
Do I need to rotate or stabilize my bay pot once it gets taller?
Yes, and it’s helpful if your climate has windy exposure or very hot sun. Put the pot on a stable stand or use pot feet so air circulates under it, and rotate the pot every couple of weeks so both sides receive similar light. Better balance reduces leaning and uneven canopy growth.
When is it safe to do a hard prune for a topiary shape?
Start with pruning for shape after the main flush begins in late spring. Do a second light tidy-up in summer if you want a topiary look, but avoid heavy cutting late in the season. Also, always sterilize secateurs before and after dealing with diseased leaves to prevent spreading leaf-spot issues.
How can I tell mealybugs from scale, and how do I treat them?
White “fluffy” clusters at leaf joints are often mealybugs. A quick way to confirm is to check for honeydew or a sticky film on nearby leaves. For small numbers, remove with a cotton swab, but for established infestations, an horticultural oil or insecticidal soap works best when the pests are actively feeding and you fully wet the affected areas.
How do I know if my bay has root rot versus overwatering symptoms?
A rough guide is: if the soil stays wet longer than expected after watering, your mix may be too dense. Bay prefers a chunky mix, for example potting compost plus perlite or horticultural grit, and you should never let the pot sit in water. If you suspect root rot, unpot promptly, remove mushy roots, and repot into fresh dry mix.
Is wrapping my bay pot enough for frost protection?
Yes, and it can be a practical frost strategy. Move the pot into a frost-free, cool area before temperatures drop below about 2°C/36°F, then keep it near the brightest window you have. If you only wrap the pot outdoors, the above-ground parts may be protected but the root zone can still freeze repeatedly, especially in small containers.
What are the best conditions for propagating bay laurel from cuttings?
Use semi-hardwood cuttings late summer, and expect slow rooting. Keep the humidity high with a clear cover, use a cutting compost mix with perlite, and avoid letting the cuttings dry out. Bottom heat around 20°C/68°F can speed things up, but the key is patience, roots often take two to three months.