Yes, you can grow papaya in a pot, and yes, it can actually fruit. I know that sounds ambitious for a container plant, but dwarf varieties like Red Lady and Yellow Dwarf are genuinely built for this. I've seen Red Lady papaya hit productive size in about 7 to 9 months from seed, which is remarkably fast for a fruit tree. The key is getting the container, soil, and care routine right from day one, because papaya does not forgive neglect the way a tough herb might. Get those basics locked in and you'll have a thriving tropical statement plant that actually feeds you.
How to Grow Papaya Plants in Pots from Seeds

Marcus Whitley
22 Apr 2026
Picking the right pot and the best spot for it
Start with a pot that's at least 15 to 20 gallons for a growing papaya plant. I know that sounds big, but papaya has an aggressive root system, and cramping it in something too small stalls growth fast. For a mature dwarf variety like Red Lady, which tops out around 5 to 10 feet depending on the source, you'll eventually want a 25 to 30 gallon container. Fabric grow bags work surprisingly well here because they air-prune the roots and reduce the risk of the plant becoming rootbound and struggling.
Drainage holes are non-negotiable. Papaya is one of those plants that will rot at the roots within days if it sits in waterlogged soil. Use a pot with at least two to three large holes at the base, and raise the pot slightly on pot feet or bricks so water can actually escape freely. Terracotta pots look great but dry out very fast in summer heat, which means more watering. Plastic or resin containers hold moisture more consistently and are much lighter to move, which matters when you're dealing with a 30-gallon pot.
For location, papaya needs full sun. We're talking 6 to 8 hours of direct sunlight every single day as the absolute minimum, and 8 hours is the sweet spot. A south or west-facing spot that gets unobstructed sun for most of the day is ideal. Papaya thrives in warm temperatures, ideally between about 70 and 91 degrees Fahrenheit (21 to 33 degrees Celsius). If you're in a cooler climate, a south-facing wall that reflects heat can make a real difference. Papaya is cold-sensitive, so if temperatures drop below 50°F (10°C), move the pot indoors or into a greenhouse. This is actually one of the main advantages of growing in a container over planting in the ground.
The soil mix and drainage setup that actually works
Standard potting soil by itself is too dense and too water-retentive for papaya. You need a mix that drains freely but still holds enough moisture and nutrients to feed a fast-growing tropical plant. The recipe I keep coming back to is roughly 60% quality potting mix or coco peat, 20% perlite, and 20% coarse sand or additional perlite. Some growers go as far as 70% coco peat and 30% perlite, which is a very light, fast-draining medium that works especially well if you tend to overwater or live somewhere humid.
Coco peat (also called coco coir) is a great base for container papaya because it holds moisture without becoming waterlogged, and it's pH neutral, which suits papaya well. Perlite is the little white volcanic rock you've probably seen in bagged potting mix. It creates air pockets in the soil and stops it from compacting over time, which keeps roots healthy. Don't skip it.
Before you fill the pot, add a layer of coarse gravel or broken pot shards over the drainage holes to stop soil from washing out while keeping water flow unobstructed. Fill the pot to about 2 to 3 inches from the rim so you have room to water without it overflowing immediately. Avoid any soil mix that contains a lot of peat moss alone or heavy garden soil. Both compact badly in pots and lead to the root rot problems that are the number one killer of container papaya.
How to start papaya from seed in a pot, step by step
Starting papaya from seed is genuinely one of the more satisfying things you can do as a container gardener. Seeds from a ripe grocery-store papaya will germinate, but for reliable dwarf container varieties, buy seeds of Red Lady or Yellow Dwarf specifically. These are bred for compact growth and container culture, which matters a lot when you're working in a limited space.
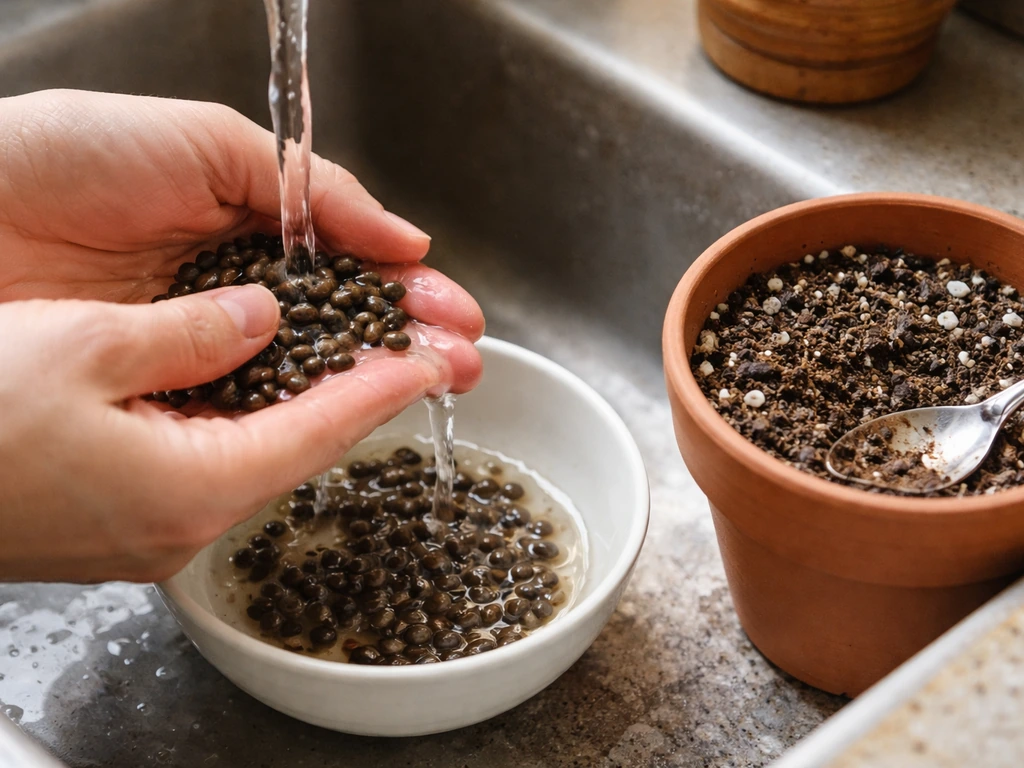
- Rinse fresh papaya seeds under water and rub off the gel-like coating (the sarcotesta) with your fingers. This coating contains germination inhibitors, so removing it speeds things up significantly.
- Let the seeds dry on a paper towel for a few hours, but don't let them dry out completely. Papaya seeds germinate best when sown fresh.
- Fill small pots or seedling trays with your coco peat and perlite mix, moistened but not soaking. Three-inch pots work well for starting seeds individually.
- Press one or two seeds about half an inch (1 cm) deep into the center of each pot. Cover lightly with the mix.
- Water gently with a spray bottle or watering can with a fine rose head. You want the mix moist, not drenched.
- Cover the pots loosely with a clear plastic bag or a humidity dome to keep warmth and moisture in. Place them somewhere warm, ideally between 75 and 85°F (24 to 29°C). A heat mat set to that range works perfectly.
- Check moisture every day or two and mist lightly if the surface starts to dry out. Don't let it pool at the bottom.
One small note on variety selection: if you're comparing container-friendly tropical fruit options, papaya moves much faster than something like citrus or kumquat. Where citrus trees can take years to fruit in a pot, dwarf papaya can get there in under a year from seed. If you want the details, check out how to grow citrus trees in pots for the right pot size, soil mix, and sun needs citrus or kumquat. That quick turnaround is a big part of what makes it worth trying even in a limited space.
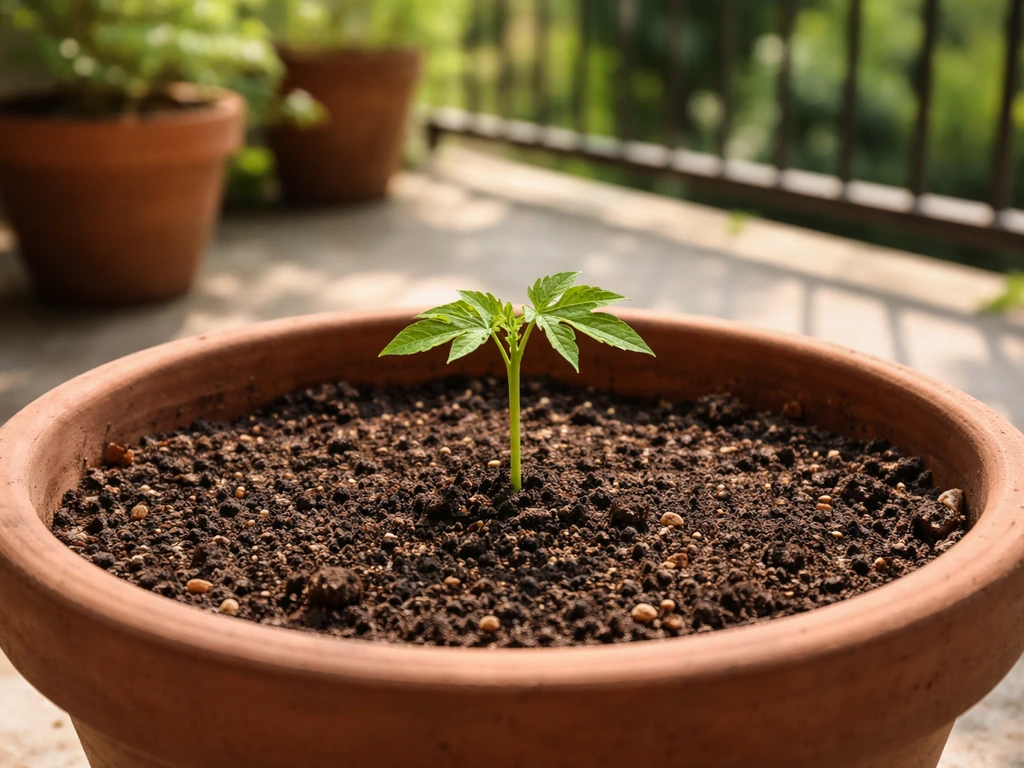
What to expect during germination and early seedling care
With fresh seeds and warm conditions, papaya typically germinates in 10 to 21 days. Don't panic if nothing happens in the first week. Keep the temperature steady and the mix consistently moist but not soggy. The moment you see the seed coat push up and the first tiny leaves emerge, remove the plastic cover and move the seedling to a bright spot. At this stage, indirect bright light is better than harsh direct sun, which can scorch brand-new seedlings.
Damping off is the main enemy at the seedling stage. This is a fungal condition caused by Pythium species that makes seedlings collapse and die at soil level practically overnight. It's caused by overly wet conditions and poor air circulation. Damping-off pathogens include water molds in the genus Pythium, and warm, wet conditions and overwatering can increase the risk overly wet conditions and poor air circulation. To prevent it, water only when the top of the mix feels dry to the touch, make sure your mix drains freely, and don't crowd seedlings together without any airflow. If you do see seedlings collapsing, remove them immediately and treat remaining seedlings with a dilute copper fungicide or just let the soil dry out more between waterings going forward.
Once seedlings have two to three true leaves (the leaves that look like real papaya leaves, not the first pair of seed leaves), they're ready to start getting a little morning sun. Introduce them to direct light gradually over a week or so rather than moving them straight into full sun. Feed with a very diluted liquid fertilizer, about a quarter of the recommended dose, once the seedling has its first true leaves. At this stage less is more. Too much fertilizer on tiny roots can burn them.
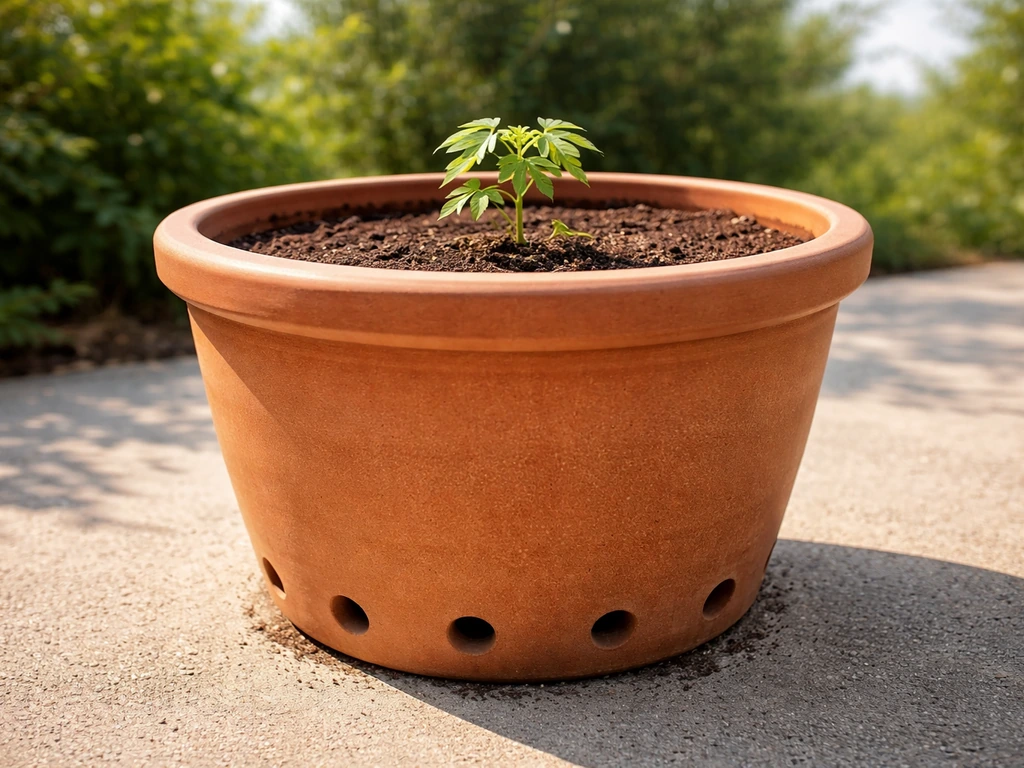
Transplanting into a larger pot without stressing the plant
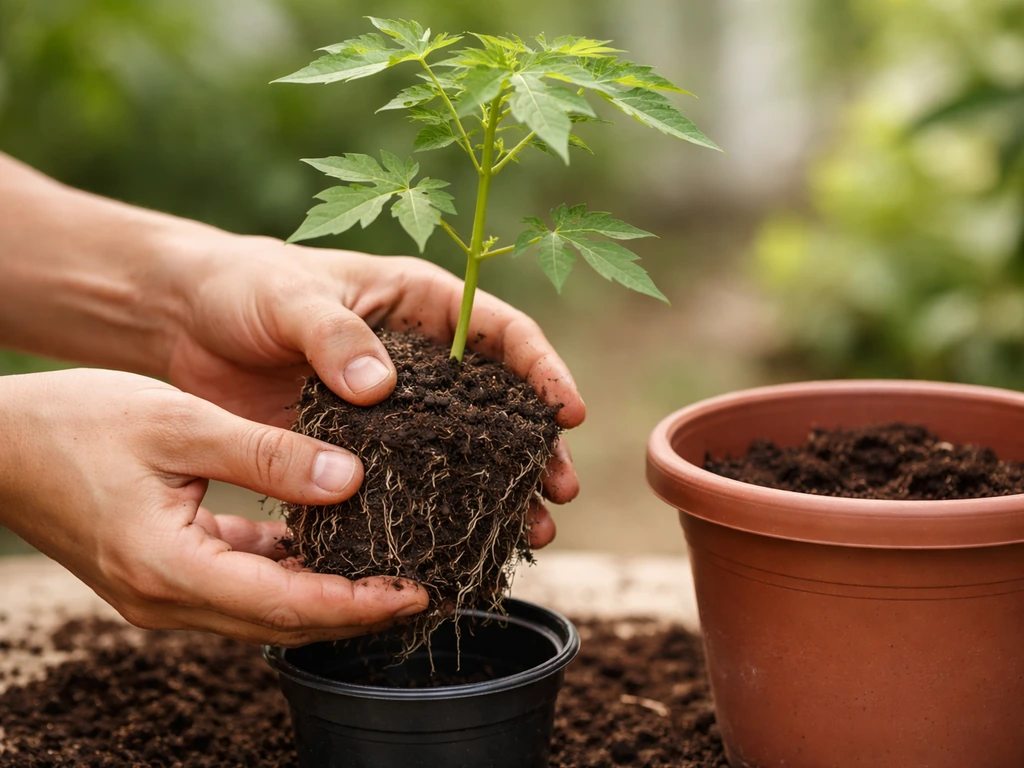
Papaya grows fast enough that you'll likely need to move it up in pot size at least once, possibly twice, before it settles into its permanent container. The signal to transplant is when you start seeing roots creeping out of the drainage holes or the plant seems to dry out unusually fast after watering. Don't wait until the plant is visibly struggling.
Move from a seedling pot to a 5 to 7 gallon container first, then up to your final 15 to 30 gallon pot when the plant is 12 to 18 inches tall and growing strongly. Always go up gradually rather than jumping straight to a massive container. Overpotting (putting a small plant in a huge pot) means the excess soil stays wet around the roots, which invites root rot.
When you transplant, water the plant well the day before so the root ball holds together. Turn the pot on its side, support the stem at the base, and slide the plant out. Don't yank it by the stem. Set it into the new pot at the same depth it was growing before, fill in with your coco peat and perlite mix, firm gently, and water thoroughly. Keep it out of direct sun for two to three days after transplanting to let it recover. If you're growing multiple plants, space containers at least 4 to 6 feet apart to account for their mature spread and to allow good airflow.
The watering, feeding, and light routine that keeps container papaya thriving
Watering
Water deeply when the top inch of soil feels dry. In warm weather, that might mean every two to three days. In cooler or cloudier conditions, once every five to seven days might be enough. The goal is to water thoroughly so it runs out the drainage holes, then let the top layer dry before watering again. Never let the pot sit in a saucer of standing water. Papaya roots sitting in water is the fastest path to root rot, which is described by plant pathologists as the single most important disease threatening papaya. That reputation is well earned.
Feeding
Papaya is a heavy feeder that grows fast, so fertilizing regularly really matters. Use a balanced NPK fertilizer (something like a 14-14-14 or similar complete fertilizer) every two weeks during active growing season, spring through summer. As the plant gets larger, increase the amount gradually. In fall and winter, when growth slows, cut back to once a month. Micronutrients matter for papaya too. Boron deficiency, which shows up as distorted new leaves and poor fruit set, can be treated by applying a small amount of borax (around 5 to 10 grams dissolved in water) to the soil every few months as a preventative measure. A liquid fertilizer with added trace elements covers this more conveniently for most home growers.
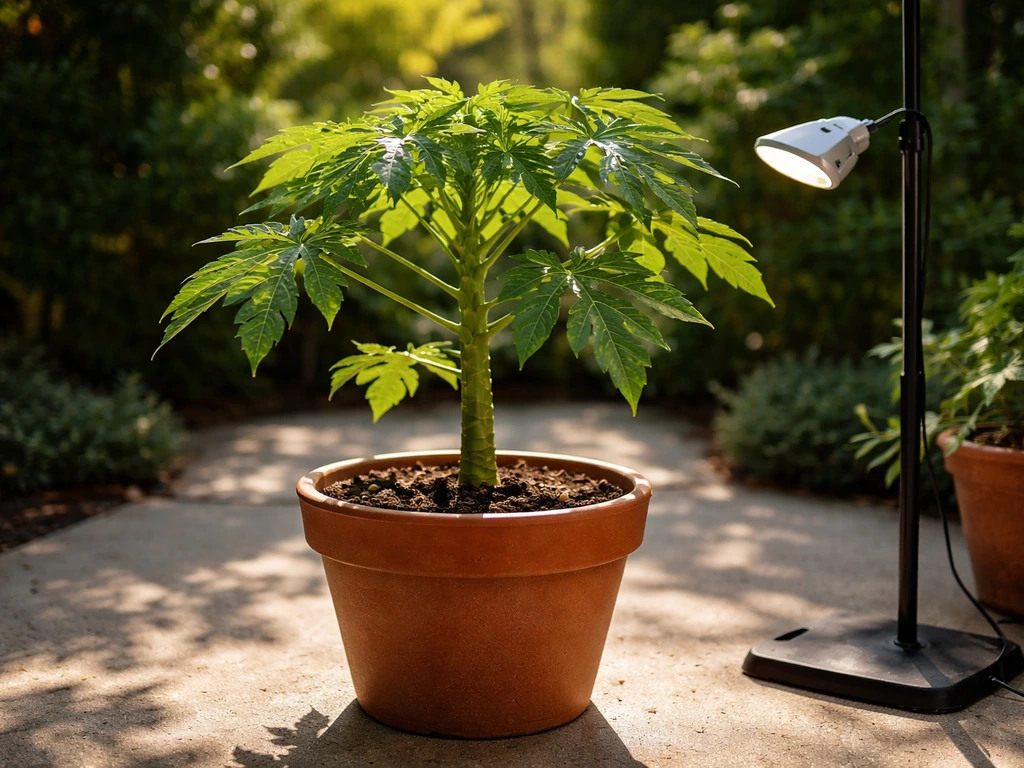
Light and temperature
Keep that 6 to 8 hour direct sun target in mind every time you position the pot. If you're growing indoors or in a greenhouse, supplemental grow lights help enormously. Papaya does not perform well in shade. Below 6 hours of direct sun, growth becomes leggy and slow and fruiting is unlikely. Above 90°F (33°C), provide some afternoon shade if possible and water more frequently since containers heat up fast. Below 50°F (10°C), bring the pot inside.
Pruning and managing size
Papaya naturally grows as a single trunk and doesn't need much pruning. If you want to keep the plant a manageable height in a container, you can cut the growing tip once it reaches a height you're comfortable with. The plant will branch and produce side shoots. This also makes it easier to manage in a limited space. Remove any yellowing lower leaves as they appear to keep things tidy and reduce hiding spots for pests.
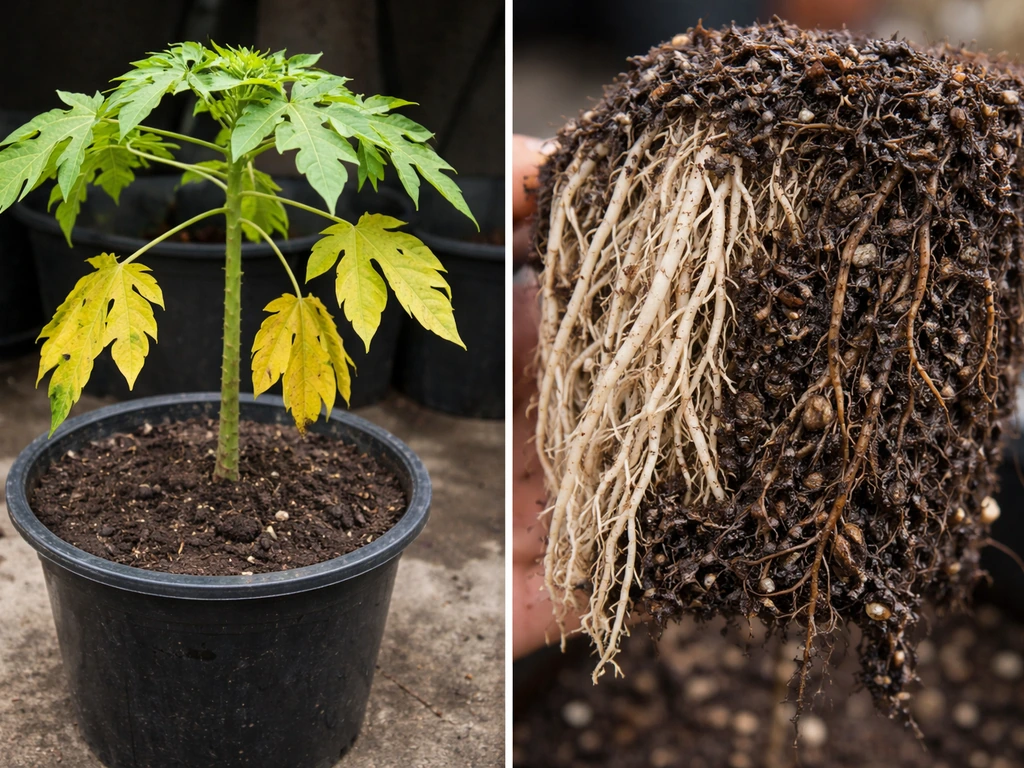
Troubleshooting the most common problems with potted papaya
| Problem | What it looks like | What to do |
|---|---|---|
| Phytophthora root rot | Yellowing leaves, wilting despite moist soil, black or brown mushy roots | Improve drainage immediately, reduce watering, repot into fresh dry mix, treat with a phosphonate-based fungicide |
| Damping off (Pythium) | Seedling collapses at soil level, stem looks pinched or water-soaked at base | Remove affected seedlings, let mix dry out more between waterings, improve airflow, treat with dilute copper fungicide |
| Powdery mildew | White powdery coating on leaves, especially in humid or low-airflow conditions | Improve air circulation around the pot, spray with dilute potassium bicarbonate or neem oil solution |
| Leaf spot (Corynespora or similar) | Brown or tan spots with yellow halos on leaves | Remove badly affected leaves, avoid wetting foliage when watering, apply copper-based fungicide if severe |
| Mealybugs | White cottony clusters on stems, leaf joints, and undersides of leaves, sticky residue on plant | Wipe off with a cotton swab dipped in rubbing alcohol, spray plant thoroughly with neem oil or insecticidal soap solution |
| Slow or stalled growth | Plant barely growing despite warmth and sun | Check if rootbound (roots circling out of drainage holes), check fertilizer schedule, check for root rot, consider repotting |
| Boron deficiency | New leaves distorted, crinkled, or small, poor fruit development | Apply borax solution (5 to 10 g borax per liter of water) to the soil, or switch to a complete micronutrient fertilizer |
Root rot from Phytophthora is the one problem that container papaya growers face most often. blank" rel="noopener noreferrer">It almost always comes down to drainage. If your pot drains freely and you let the top of the soil dry out between waterings, you're doing most of the work to prevent it. Everything else on the list above is manageable and usually shows up because of one fixable mistake.
When your papaya outgrows the pot
Even dwarf varieties like Red Lady can reach 5 to 10 feet in a container, and at some point the plant may simply be too large to keep indoors or in the spot you've chosen. At that stage, you have a few options. You can cut the top to force branching and keep height in check. You can move it to a larger container, up to 30 gallons or beyond. Or, if you're in a frost-free climate, you can plant it in the ground and start fresh with a new seedling in a pot. Papaya grows fast enough that starting a new plant from seed every year or two is a totally reasonable strategy if the first one gets unwieldy. Think of it less like managing a permanent tree and more like a very impressive annual in a container.
If you enjoy growing fruit in containers, the lessons you learn with papaya transfer well to other container fruit projects. Managing light, drainage, and feeding schedules for papaya builds a solid foundation for growing other tropical and subtropical fruits in pots. These same container basics also apply when you want to learn how to grow citronella in a pot growing fruit in containers. If you want a citrus-like fruit with a similar pot setup, follow the same container basics for how to grow kumquat trees in pots. Start with the right variety, the right mix, and a pot with good drainage, and you're already most of the way there. If you follow these pot-specific guidelines, you’ll have an easier time learning how to grow papaya in a pot. The same container basics also apply when you’re learning how to grow oranges in a pot, especially around drainage and consistent sunlight.
FAQ
Do I need a male and female papaya plant for fruit in a pot?
Most container papaya varieties can fruit without you managing two plants because many commercial dwarf types produce hermaphroditic flowers. However, seed-grown plants can vary, so if you do not see flowers by the time your plant is large enough, check whether your variety produces female or hermaphroditic flowers, and consider starting fresh from seeds labeled for that dwarf type.
What should I do if my papaya flowers but drops them before fruit sets?
Flower drop in pots is often a stress signal. Check that the plant is getting at least 6 to 8 hours of direct sun, keep watering consistent (dry-out followed by heavy watering can trigger drop), and make sure you are feeding through the active season. If the newest leaves look misshapen, you may also be dealing with micronutrient stress, especially boron-related issues.
Can I grow papaya indoors year-round, and will it fruit?
You can keep a papaya indoors, but fruiting usually requires strong light. If you cannot provide enough direct sun-equivalent light (often via grow lights), expect leafy growth but reduced or no fruit. Also plan for cold sensitivity, bring the pot in before temperatures fall below about 50°F (10°C), and keep air circulation good to reduce seedling and fungal problems.
How often should I water a potted papaya in hot weather versus cooler weather?
Instead of watering on a calendar, water deeply when the top inch of the mix feels dry. In heat, this can become every 2 to 3 days, while in cooler or overcast conditions it may stretch to once every 5 to 7 days. The key test is soil dryness, and the pot must drain fully every time, with no saucer standing water.
Why is my papaya growing tall and thin (leggy) even though I watered correctly?
Legginess almost always points to insufficient light. Papaya needs frequent, strong direct light to stay compact and productive, below about 6 hours direct sun growth slows and becomes stretched. Move the pot to a brighter spot or increase grow light intensity and duration, then acclimate the plant gradually to prevent sunscald.
What’s the best time to transplant from a small seed pot to a larger container?
Transplant when the plant is actively growing and you notice roots creeping from drainage holes or the soil dries unusually fast after watering. A good sequence is a small container for establishment, then up to a mid-size pot, and finally to your permanent 15 to 30 gallon size. Avoid jumping straight to the largest pot early to prevent excess wet soil around young roots.
Do I need to fertilize immediately after the first true leaves appear?
You should start with very diluted feeding only after true leaves appear, because tiny root systems can be burned by stronger fertilizer. Once you are regularly watering and the plant is growing strongly, then you can move to a consistent schedule during spring and summer. If growth stalls after feeding, reduce concentration and confirm you are not overwatering.
My papaya leaves are yellowing at the bottom, is that a problem?
Occasional yellowing of older lower leaves is normal, especially as the plant grows. Remove only the clearly yellowing leaves if you want cleaner airflow, and focus troubleshooting on newer growth. If yellowing spreads upward along with slowed growth, review light level, watering consistency, and whether the plant is getting micronutrients.
How can I prevent root rot beyond just using a well-draining pot?
Ensure the mix is airy (with perlite and coarse sand or similar), confirm you have multiple large drainage holes, and never let the pot sit in water after watering. Also consider using pot feet or a raised stand so air and drainage are not blocked, and water only when the top portion of the mix dries. If you suspect rot, stop frequent watering and let the mix dry more between waterings.
Can I repot a fruiting papaya without losing all the fruit?
You can repot, but it can shock the plant and may cause flower or small fruit drop. If possible, avoid disturbing during peak fruiting and choose a day when you can keep the plant warm and well-lit afterward. If repotting is necessary, keep the same depth, firm gently, water thoroughly, and protect from direct sun for a few days to recover.
Why won’t my papaya seeds germinate even after a few weeks?
Two common causes are temperature and moisture level. Papaya germinates best under consistently warm conditions, and seeds can fail if the mix stays too wet (risk of damping off) or too dry. Keep the mix moist but not soggy, maintain steady warmth, and remember germination can take up to about 3 weeks under good conditions.
What should I do if damping off starts in my seedlings?
Act quickly by removing collapsed seedlings immediately to reduce spread. Improve airflow, ensure the mix drains properly, and adjust watering to only when the top dries. If you choose treatment, use a dilute copper-based approach as a follow-up, but the strongest prevention is fixing overwatering and humidity around the seedlings.