You can grow palak (Indian spinach) in pots successfully with a container that's at least 6–8 inches deep, a well-draining potting mix, and a spot that gets 4–6 hours of sun. Manathakkali keerai grows well in pots too, but you’ll want a warm, sunny spot and a well-draining potting mix to keep it from stressing. Sow seeds half an inch deep, keep the soil consistently moist, and you'll be harvesting tender leaves in as little as 35–50 days. The biggest thing to watch out for is bolting, which happens when temperatures climb or days get long, so timing your sow and picking the right spot makes all the difference.
How to Grow Palak in Pots: Step-by-Step for Beginners

Marcus Whitley
19 Jun 2026
Best pot size and container setup for palak
Palak has relatively shallow roots, so you don't need a massive pot. A container that's at least 6–8 inches deep and 12 inches wide is enough to grow a decent harvest. If you want a simple step-by-step guide specific to container growing, see our full tips on how to grow karela in pot. That said, going bigger is almost always better with palak in pots, because a larger volume of soil holds moisture longer and stays cooler, both of which help delay bolting. A wide, shallow trough-style planter or a rectangular window box works beautifully and lets you grow several plants in a row.
Whatever container you pick, drainage holes are non-negotiable. When you are learning how to grow alugbati in pots, the basics like proper drainage holes are just as non-negotiable as they are for palak. Palak absolutely hates waterlogged roots, and a pot without drainage holes is a recipe for root rot. If you're using a decorative outer pot with a liner or inner pot inside it, check regularly that water isn't pooling at the bottom. If it is, lift the inner pot out to let it drain fully before putting it back. This is one of those small things people overlook but it genuinely kills plants.
- Minimum depth: 6–8 inches (deeper is better for moisture retention)
- Minimum width: 12 inches for a decent planting
- Material: terracotta breathes well but dries out faster; plastic retains moisture longer (useful in hot weather)
- Drainage holes: at least one large hole or several smaller ones at the base
- Avoid: saucers that let water accumulate — empty them after every watering
Soil mix, compost, and drainage essentials
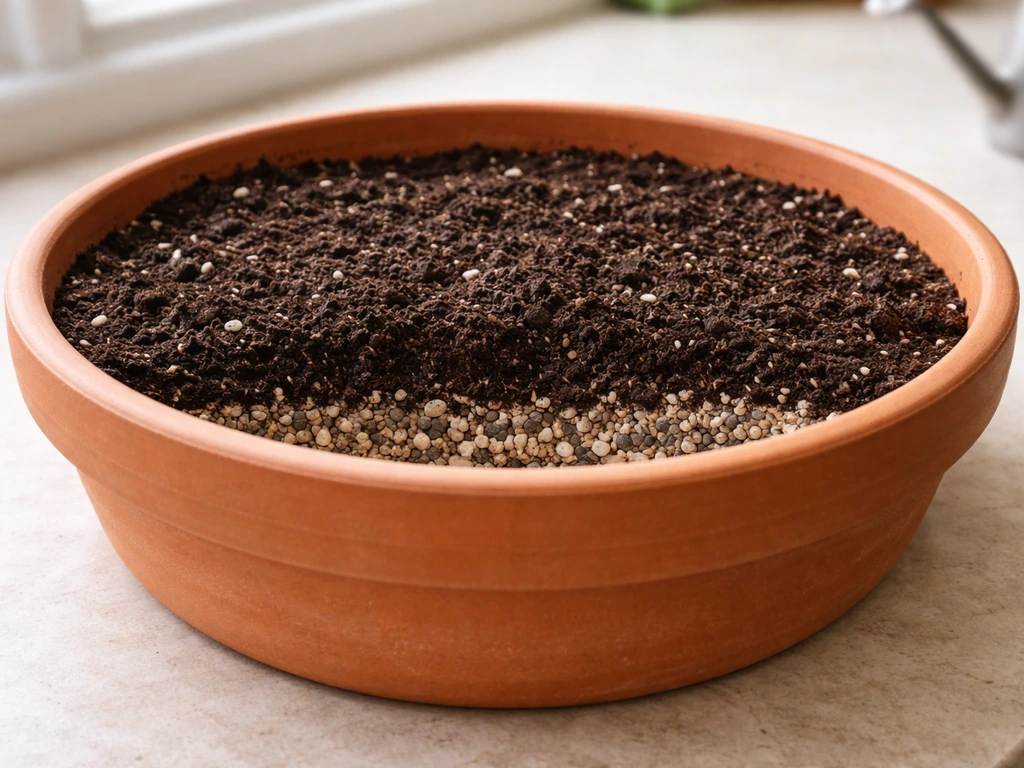
Don't just scoop garden soil into your pot. Garden soil compacts in containers and drains poorly, which suffocates roots. You want a light, airy potting mix that holds some moisture but lets excess water escape freely. A good DIY mix for palak is two parts good-quality potting compost, one part coarse sand or perlite, and one part well-rotted compost or vermicompost. Perlite (those small white particles you see in bagged mixes) improves aeration and drainage significantly.
Palak prefers a slightly acidic to neutral soil, somewhere in the pH range of 6.0 to 7.0. Most good potting mixes fall within this range naturally, so you usually don't need to fuss with pH adjustments. However, if you're mixing your own medium and using peat, be aware that peat is acidic and may need a little agricultural lime to bring the pH up. A simple rule: if you're using a bagged potting mix from a garden centre, just add a generous handful of compost per pot and you're good to go.
To further improve drainage at the base of your pot, you can add a thin layer of coarse gravel or broken terracotta pieces before filling with your mix. This prevents the drainage holes from getting clogged with soil over time.
Planting palak: seeds vs seedlings, and spacing
Growing palak from seed is cheap, easy, and honestly the most satisfying way to go. If you're specifically looking for rajnigandha, the pot choice, soil mix, and light needs are a bit different, so follow a rajnigandha-specific routine. You can transplant seedlings if you find them at a nursery, but palak doesn't love being disturbed at the roots, so direct sowing (putting seeds straight into the pot where they'll grow) works best and avoids transplant shock entirely.
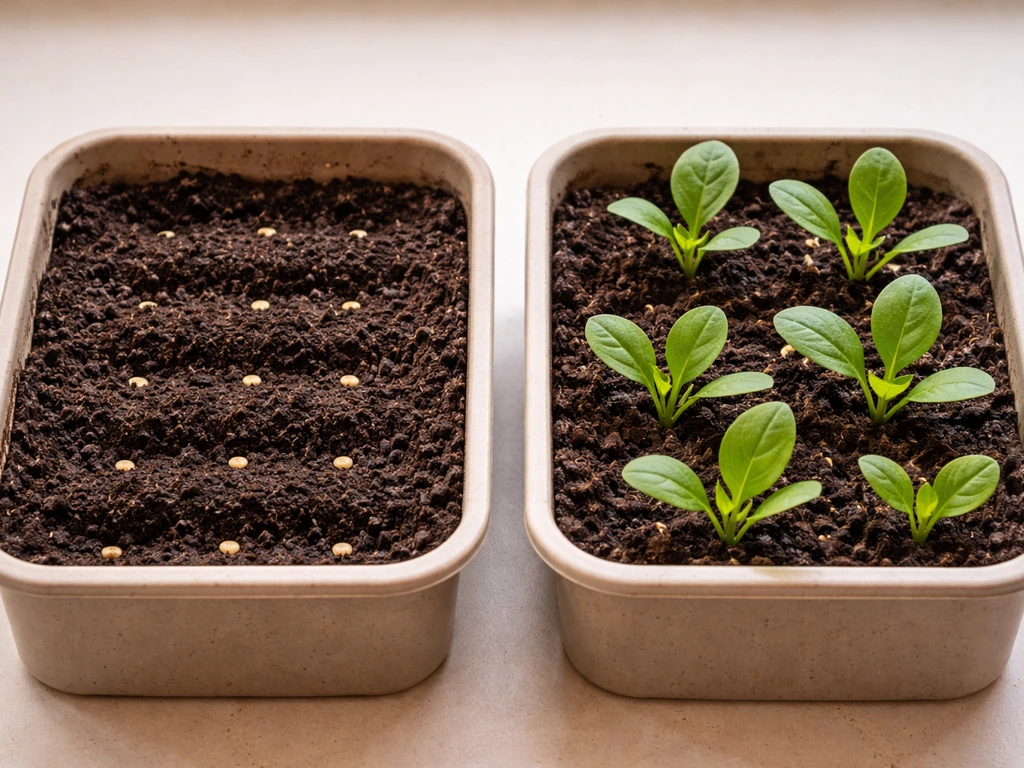
Sowing from seed
Press each seed about half an inch (roughly 1.5 cm) into the moist potting mix. Space seeds 2–3 inches apart in all directions if you're doing a broadcast sow, or sow in rows 6 inches apart. Don't panic if germination seems slow, it typically takes 7–14 days but can stretch to 3 weeks depending on temperature. The sweet spot for germination is soil temperature between 55–70°F (13–21°C). If your potting mix is cold, germination will be sluggish. Once seedlings are about 2 inches tall, thin them so each plant has about 4–6 inches of space. I know thinning feels cruel, but crowded palak grows weak and leggy.
Using seedlings
If you're transplanting seedlings, handle the roots as little as possible. Water the seedlings well before transplanting, and plant them at the same depth they were growing at in their original tray. Give each seedling 4–6 inches of space. Water immediately after planting and keep the pot in a shaded spot for a couple of days while the plants settle in.
Succession sowing for a constant supply
This is the tip that changes everything for container growers: sow a new small batch of seeds every 7 days. If you also want an herb like dhaniya, use the same pot-and-soil setup mindset and follow specific guidance on how to grow dhaniya in pots. That way, as one pot reaches harvest, the next one is just getting going. You get a steady flow of fresh palak rather than a glut followed by nothing. A simple window box or two smaller pots rotating on a 7-day sowing schedule is all you need.
Light, temperature, and keeping palak from bolting
Palak is a cool-season crop and it thrives in temperatures between 10–25°C (50–77°F). It can handle a light frost but starts to struggle when daytime temperatures push above 30°C consistently. The ideal time to grow palak in pots in most parts of India is from October through February. अगर आप इसी मौसम में चाहें, तो नीचे दिए स्टेप्स को फॉलो करके पॉट में पालक उगाने का सही तरीका और भी आसान हो जाएगा। how to grow vegetables in pots in hindi. In cooler climates, spring and autumn are the prime windows.
Give your pot a spot that gets 4–6 hours of direct sunlight a day. Full sun is great in cooler weather, but in warmer months, some afternoon shade is your best friend. Moving the pot to a shadier spot as temperatures rise is one of the genuine advantages of container growing compared to in-ground beds. Palak grown in ground is stuck where it is; yours can move.
Bolting is when the plant suddenly shoots up a flower stalk, at which point the leaves turn bitter and tough and the whole crop is basically unusable. blank" rel="noopener noreferrer">Palak is a long-day plant), meaning it's triggered to bolt when the days get longer and temperatures warm up. You can delay bolting by keeping the plant cool (position the pot where it gets morning sun and afternoon shade), harvesting leaves frequently to reduce stress on the plant, and choosing bolt-resistant varieties like All Green, Virginia Savoy, or Pusa Jyoti. But ultimately, if temperatures are high and days are long, bolting will happen. Don't fight it; just harvest what you can and start fresh.
Watering and feeding your container palak
Watering routine
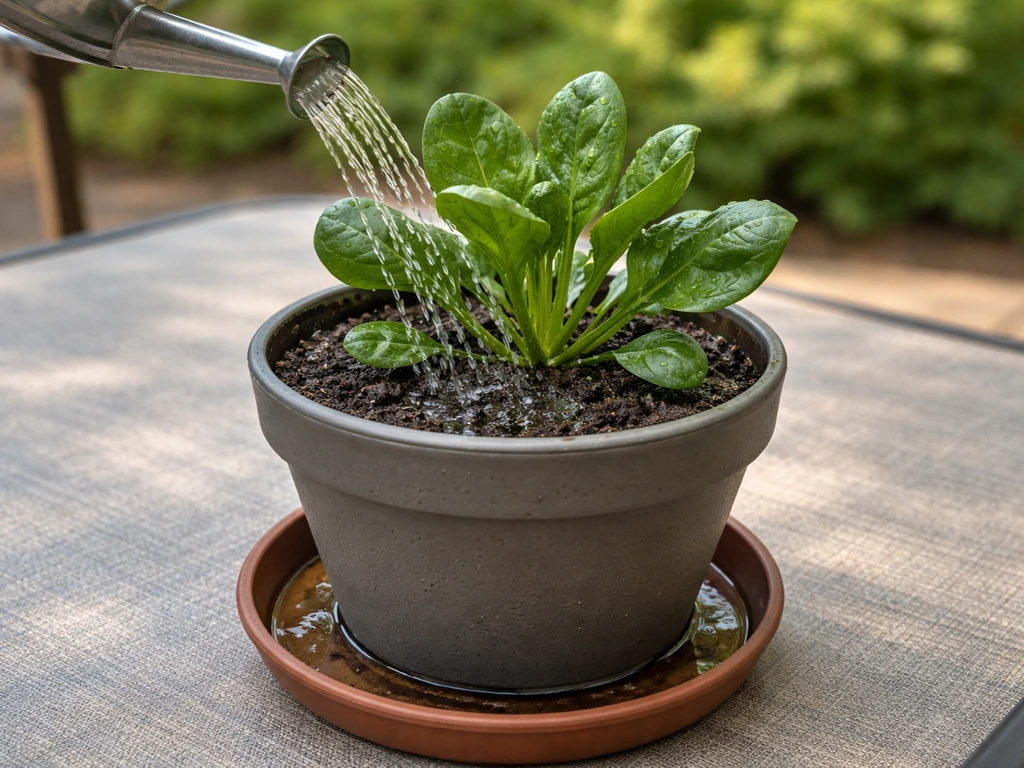
Container palak needs consistent moisture, but it also needs to drain freely. The simplest check: stick your finger about an inch into the soil. If it feels dry at that depth, water thoroughly. If it still feels moist, wait another day. In hot weather, a small pot may need watering once or even twice a day. In cooler weather with a larger container, once or twice a week may be enough. Water in the morning if you can, so plants are well hydrated going into the heat of the day and the foliage has time to dry out before evening, which reduces disease risk.
Feeding schedule
Palak is a leafy green, which means it loves nitrogen. Nitrogen is the nutrient that drives leafy, green growth. Start with a potting mix that already has compost in it, then about 3 weeks after germination (or 2 weeks after transplanting), give the plants a liquid feed of a nitrogen-rich fertilizer. A diluted fish emulsion, liquid seaweed fertilizer, or a balanced NPK fertilizer works well. Repeat every 2–3 weeks. Don't overdo it though, too much fertilizer, especially synthetic nitrogen, can burn the roots and make leaves overly lush in a way that attracts pests.
| Task | Frequency | Notes |
|---|---|---|
| Watering | Daily to twice weekly | Adjust based on temperature and pot size; check 1-inch soil depth |
| Liquid feed (nitrogen) | Every 2–3 weeks | Start 2–3 weeks after germination; compost tea, fish emulsion, or diluted NPK |
| Thinning seedlings | Once, when 2 inches tall | Leave 4–6 inches between plants |
| Succession sowing | Every 7 days | Ensures continuous harvest across pots |
| Check for pests | Weekly | Inspect undersides of leaves for aphids, leafminer trails |
Pest and disease problems to watch for in containers
Growing in pots doesn't make palak immune to pests, but it does mean the problem stays contained and is easier to spot early. Check plants weekly, especially the undersides of leaves.
Common pests
- Aphids: Tiny green or black insects clustered on stems and leaf undersides. They suck sap and weaken plants. Blast them off with a strong stream of water or spray with diluted neem oil.
- Leafminers: The larvae of small flies that tunnel inside leaves, leaving pale, winding trails. Remove and destroy affected leaves as soon as you spot them. Avoid using broad-spectrum insecticides, which kill the parasitic wasps that naturally control leafminer populations.
- Cutworms: Fat caterpillars that cut through seedling stems at soil level, seemingly overnight. If you find seedlings toppled with clean cuts at the base, cutworms are likely the culprit. A physical collar made from a cut plastic bottle around each seedling base helps a lot.
Common diseases
- Downy mildew: Shows up as pale yellow patches on the tops of leaves, with a grayish-purple fuzzy coating on the undersides. It spreads fast in wet, humid, still air. Prevention: water at the base (not overhead), ensure good airflow around the pot, and choose resistant varieties if this is a recurring issue in your area. Dry, breezy conditions naturally suppress this disease.
- Damping off: A fungal problem that kills seedlings right at soil level, sometimes before they even emerge. Affected seedlings collapse suddenly. It's caused by overwatering and poor drainage. Prevention: use fresh, sterile potting mix, avoid overwatering, and don't sow too thickly.
The best overall pest and disease strategy for container palak is prevention: use clean pots and fresh potting mix each season, avoid wetting the leaves unnecessarily, keep the area around pots free of decaying plant debris, and choose disease-resistant varieties. Downy mildew on spinach is associated with seed and infested leaf debris transmission, so good sanitation and handling of planting material matters. Most problems are far easier to prevent than to treat.
Harvesting, regrowth, and what comes next
When and how to harvest
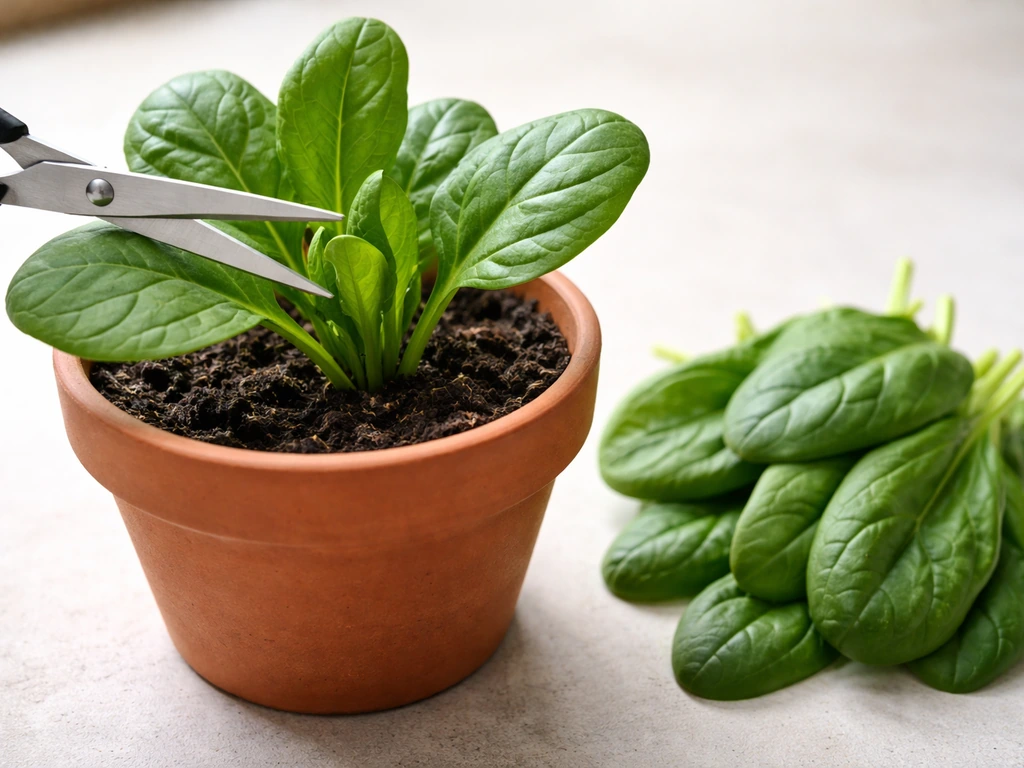
Under good conditions, palak is ready to harvest in 35–50 days from sowing. If you also want to try a warmer-weather crop, follow the same pot basics and learn how to grow bhindi in pots for a steady harvest. The leaves are ready when they're 3–5 inches long, tender, and deep green. Don't wait too long; older leaves get tougher and more bitter. You have two options for harvesting: cut-and-come-again, or a full clear cut.
- Cut-and-come-again: Snip individual outer leaves with clean scissors or pinch them off about an inch above the soil, leaving the younger central leaves intact. The plant keeps growing and produces more leaves. This is ideal for small pots and extends your harvest window significantly.
- Full clear cut: Cut all leaves just above the growing point (the base of the plant near the soil). This gives you a bigger harvest at once and the plant may regrow once or twice afterward, though regrowth quality varies.
Regrowth after harvest
After a cut-and-come-again harvest, water and feed the plants within a day or two and they'll push out new leaves within a week or so. You can typically get 2–4 rounds of harvests from a single planting before the plant either bolts or quality starts declining. Once plants start bolting (you'll see a tall central stem emerging), the leaves turn bitter fast. Pull those plants, refresh the potting mix with a handful of fresh compost, and start a new sow.
Your quick-start checklist for growing palak in pots right now
- Pick a pot that's at least 6–8 inches deep with drainage holes at the bottom
- Fill with a light potting mix: 2 parts potting compost + 1 part perlite + 1 part well-rotted compost
- Moisten the mix before sowing so it's damp but not soggy
- Sow seeds half an inch deep, spaced 2–3 inches apart
- Place the pot in a spot with 4–6 hours of sunlight; afternoon shade in warm weather
- Water when the top inch of soil feels dry; water in the morning
- Thin seedlings to 4–6 inches apart when they're about 2 inches tall
- Start liquid feeding with a nitrogen fertilizer 2–3 weeks after germination
- Inspect leaves weekly for aphids, leafminer trails, or mildew
- Begin harvesting outer leaves from 35–50 days; use cut-and-come-again to extend the crop
- Sow a fresh batch of seeds every 7 days in a second pot for continuous supply
Palak is honestly one of the most rewarding things you can grow in a pot, especially if you're new to container gardening. It's fast, it's forgiving enough for beginners, and having fresh palak leaves for dal, sabzi, or a quick saag within weeks of planting feels genuinely satisfying. If you're already growing other leafy greens and herbs in containers, palak slots right into the same routine. And once you've nailed palak, branching out to other greens like dhaniya or manathakkali keerai in pots follows naturally with the same basic principles. If you want to try something different, you can apply these same container principles to learn how to grow kaddu in pots too other greens like dhaniya or manathakkali keerai in pots.
FAQ
Why is my palak bolting in the pot, and what can I do right away?
If your pot is small (under 12 inches wide) or you see the center stem rising, start harvesting immediately and keep leaves coming often (every few days). Also shift the pot to morning sun with stronger afternoon shade, bolting is slowed but not completely stopped in consistent heat.
Can I grow multiple palak plants in one pot without affecting quality?
Yes, but space is the limiting factor. Aim for 4–6 inches between seedlings, and prefer a wider planter (window box or trough). If you want multiple plants, use one row, or thin early, because overcrowding causes leggy growth and faster bolting.
What should I do if my potting mix stays wet for days or the soil looks compacted?
Use a light, breathable mix and avoid topping up with plain garden soil later. If you notice a crust on top or the pot stays wet for days, it usually means compaction or too much fine soil, and you should refresh the mix rather than keep watering to compensate.
Do I need to test or adjust soil pH for container palak?
Palak prefers slightly acidic to neutral, but the practical move is to use a pH-appropriate potting mix and compost. If you are mixing your own and suspect peat-based acidity, test pH and adjust with agricultural lime well before sowing, not after germination.
How do I prevent root rot or leaf yellowing in potted palak?
Overwatering and low airflow are the usual causes. Let the top inch dry slightly between waterings, keep the plant under good light, and avoid wetting the leaves late in the day. If you smell sour soil or see black roots, dump the mix and restart with fresh potting medium.
Can I sow a new batch into the same pot while older palak is still being harvested?
For continuous harvest, you can do staggered sowing in the same season, but avoid mixing seed lots that are at very different stages. Label pots by sow date, and keep watering and feeding consistent so younger plants do not get shaded out by older, larger ones.
My palak seeds are slow to sprout. What troubleshooting steps should I try first?
If germination is slow, the most common reasons are cold soil, overly dry seed-starting mix, or burying too deep. Recheck temperature (55–70°F or 13–21°C is ideal), keep the mix evenly moist but not soggy, and sow again at the correct depth if most seeds fail after about three weeks.
How often should I water potted palak during hot summer days versus cooler weather?
In hot weather, switch from frequent light watering to less frequent deep watering. Check the soil at about 1 inch depth, water thoroughly until it drains out, then wait until that depth starts drying again. Very hot days often require morning watering, and sometimes a second watering late afternoon for small pots.
Is it really necessary to thin palak seedlings in a pot?
Thinning is about survival and quality. If you leave seedlings crowded, they compete for light and nutrients, become weak, and are more likely to bolt early. Thin when seedlings are about 2 inches tall so each has 4–6 inches of space.
What’s the best fertilizer schedule for palak in pots, and how do I avoid overfeeding?
Start feeding after you see strong new leaf growth, typically around 2 to 3 weeks after germination or about 2 weeks after transplanting. Use a nitrogen-forward liquid fertilizer at reduced strength first, then increase only if growth is pale, and stop feeding if leaves become overly lush or pests spike.
When is the right time to harvest palak leaves from a pot, and how should I cut them?
Yes, start cutting when leaves reach about 3–5 inches and are tender. If you wait until leaves are large and older, they turn tougher and more bitter, and you also remove fewer growing tips. Use clean scissors and take outer leaves first for faster regrowth.
What are the best early steps if I spot pests on my potted palak?
For pests, early action matters more than stronger sprays. Inspect the undersides weekly, rinse lightly with water if the infestation is small, and remove heavily damaged leaves. In small pots, physical removal and improved airflow usually works before using chemicals.